How to Remove Audio from WebM Files- FAQs & Tips
Removing audio from WebM files can be essential for various reasons, whether you're looking to create a silent video or need to eliminate unwanted sounds. This guide will walk you through the process of removing audio from WebM files using different methods, including VLC Media Player and HitPaw Univd (HitPaw Video Converter).
We'll provide step-by-step instructions and tips to ensure you can achieve high-quality results with ease. Whether you're a beginner or an experienced video editor, this article will help you find the best solution to remove audio from webm and enhance their audio quality by removing noise.
Part 1. How to Remove Audio from WebM?
If you're using Windows, VLC Media Player is a great tool to remove audio webm . As one of the most popular free media players, VLC also doubles as a basic video editing tool, making it perfect for beginners looking for a free solution to mute their videos.
The software is incredibly versatile and supports a wide range of video formats, including WebM, which makes it a convenient option for various editing needs. VLC Media Player is user-friendly, offering an intuitive interface that allows even those with minimal technical expertise to perform complex tasks such as audio removal with ease.
Additionally, since VLC is open-source and regularly updated by a large community of developers, you can expect reliable performance and continuous improvements.
This makes VLC not only a practical choice for audio removal but also a dependable media player for everyday use. Whether you are a hobbyist looking to clean up your home videos or a professional needing a quick edit, VLC Media Player provides a comprehensive, no-cost solution.
Steps to remove audio from webm for Free Using VLC Media Player:
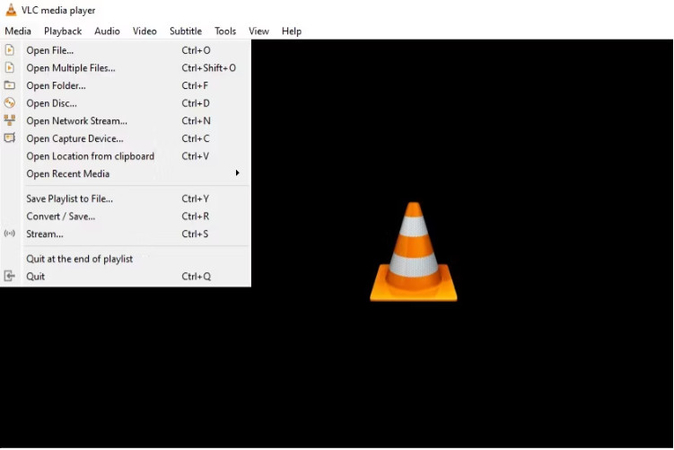
Step 1: Select Media > Convert / Save after launching VLC Media Player.
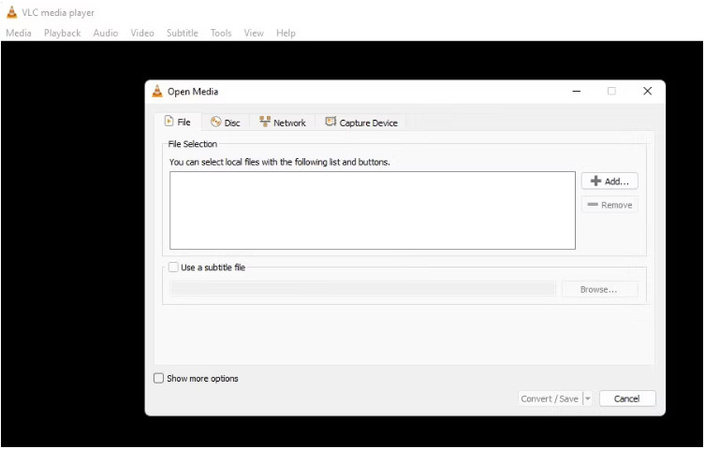
Step 2: Select the video you wish to mute by clicking the "Add" button in the Open Media window. Next, select the "Convert / Save" option located at the lower right corner of the window.
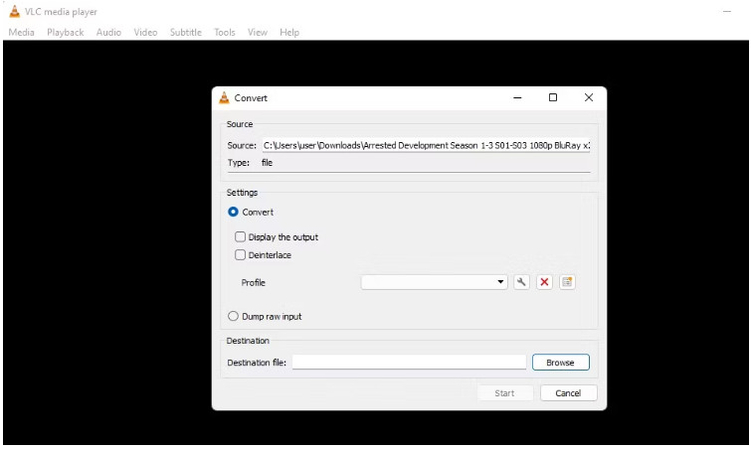
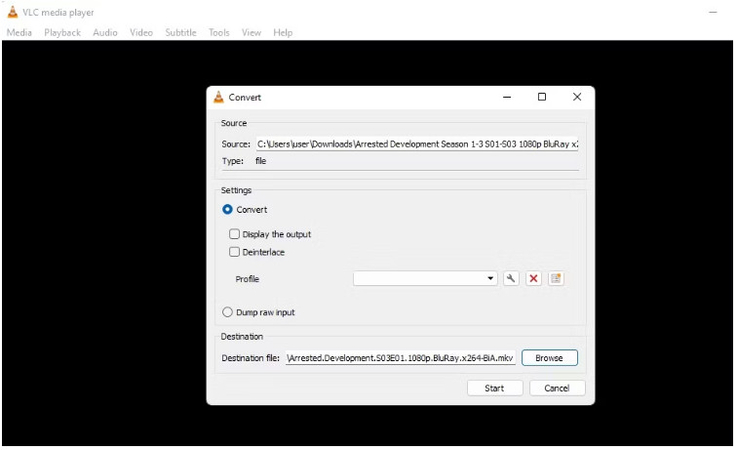
Step 3: Select the wrench-shaped button located in the Convert window.
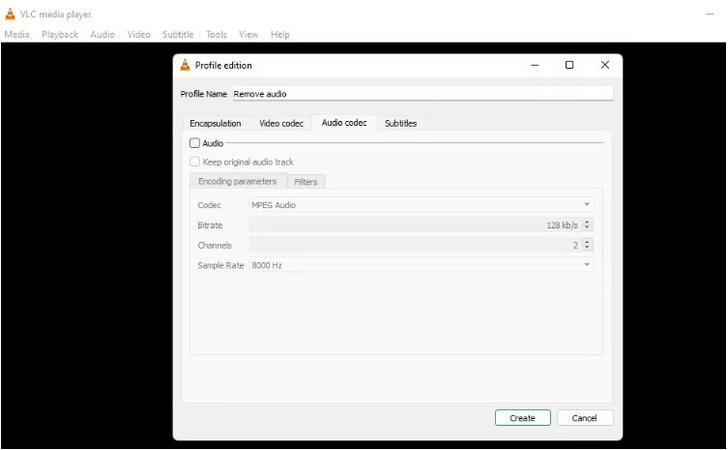
Step 4: Select the Audio codec tab and deselect the Audio checkbox in the Profile Edition window. Then, to go back to the Convert window, click the "Create" button at the bottom right.
Step 5: Select where you want to save your muted video by clicking the "Browse" option. Lastly, press the "Start" button located in the window's lower right corner.
Part 2. The Best Tool to Remove Noise with HitPaw Univd
Transitioning from removing audio, you might also want to clean up any remaining noise in your video to ensure the highest quality output. Background noise can be distracting and diminish the overall viewing experience, especially if you're aiming for a professional result. HitPaw Univd is an excellent tool for this purpose, offering robust features that make noise removal straightforward and effective. Whether you're dealing with a noisy background in a home video or subtle hums and hisses in a professional project, HitPaw Univd's advanced noise removal capabilities can significantly enhance your video's audio clarity and quality.
Features:
- Efficiently removes vocals from your videos, leaving you with a clean audio track.
- Eliminates background noise to enhance the audio quality of your videos.
- Simple to use, even for novices.
- Quickly processes videos without compromising quality.
- Allows you to process multiple videos simultaneously, saving time and effort.
- Supports a variety of video and audio formats, ensuring compatibility with all your media files.
- Maintains high video and audio quality after processing.
- Utilizes advanced AI technology for more accurate vocal and noise removal.
Steps to Use Vocal Remover
Step 1: Visit the official HitPaw website and download the software. Once installed, open the HitPaw application and go to the "Toolbox" tab in the main interface.
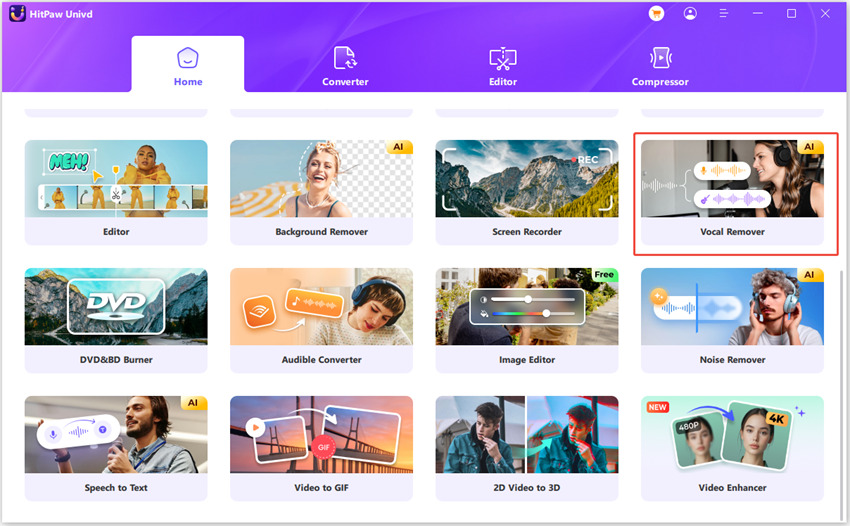
Step 2: In the "Toolbox" menu, you'll see a variety of functions and tools. Find the "Vocal Remover" feature and click on it to open the utility.
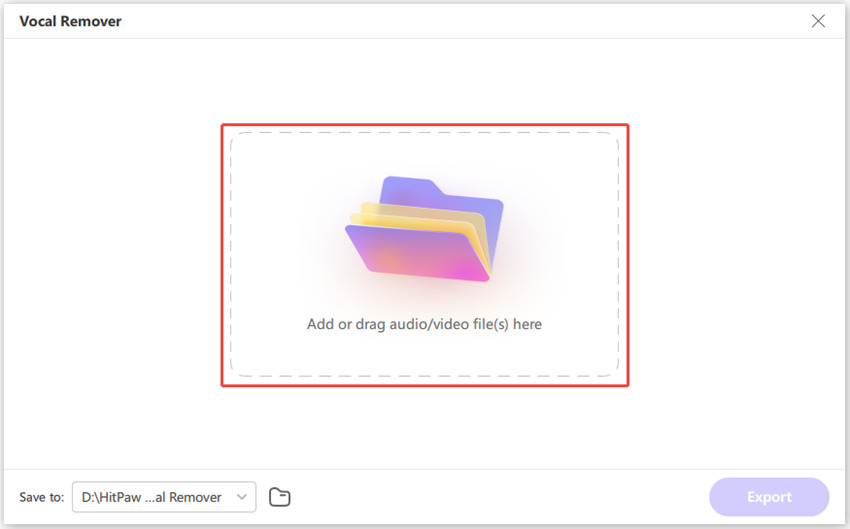
Step 3: Import your audio or video clip for vocal extraction. You can do this by clicking the "Add File" button and selecting the desired file from your computer, or by dragging and dropping the file directly into the Vocal Remover interface. HitPaw supports vocal extraction from both audio and video sources.
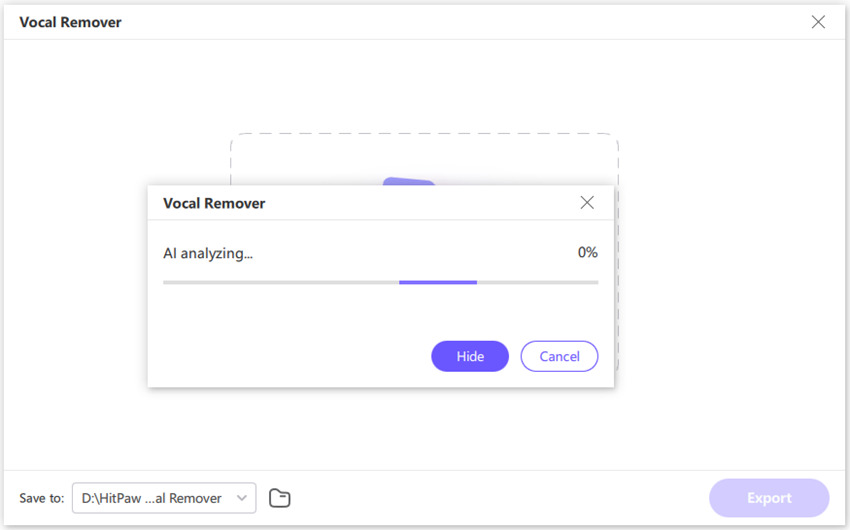
Step 4: Once your file is loaded, HitPaw's AI will analyze it to separate the vocal and instrumental components. Depending on the size and complexity of the file, this process could take some time.
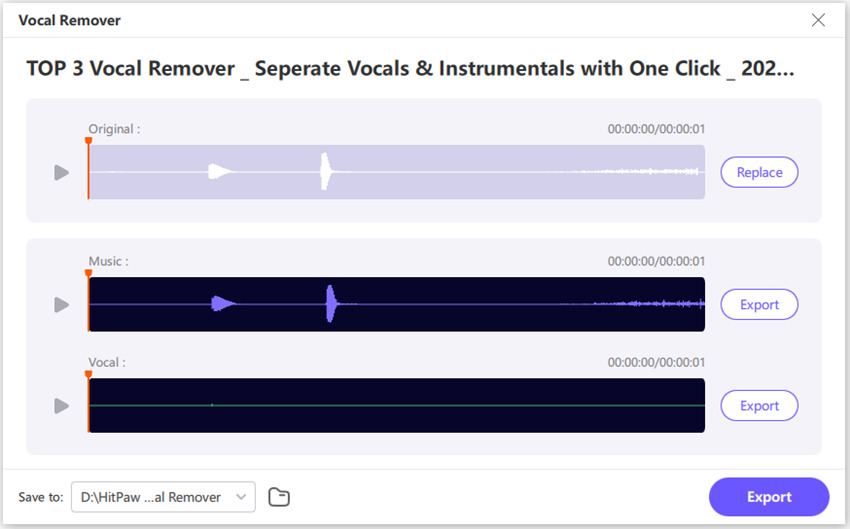
Step 5: After the analysis is complete, HitPaw will display the separated tracks in the interface. You'll usually see two tracks: the vocal track and the instrumental track. You can preview both tracks to ensure the extraction was successful. Finally, you can export either or both tracks based on your needs.
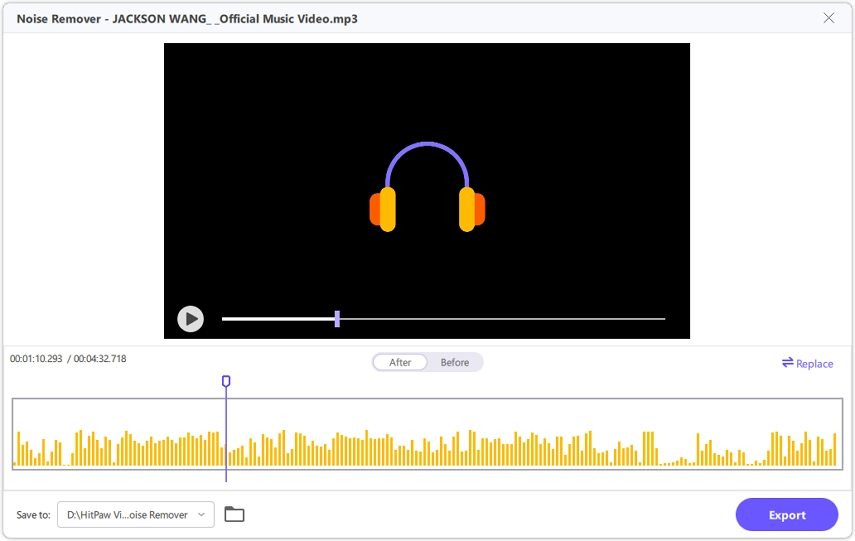
Steps to Use Noise Remover
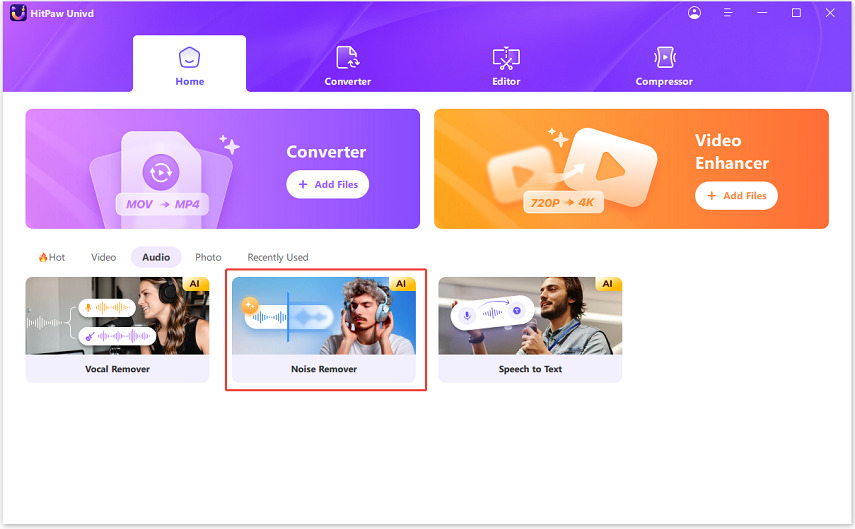
Step 1: Launch HitPaw Univd, then select the Toolbox option. Choose the function of Noise Remover.
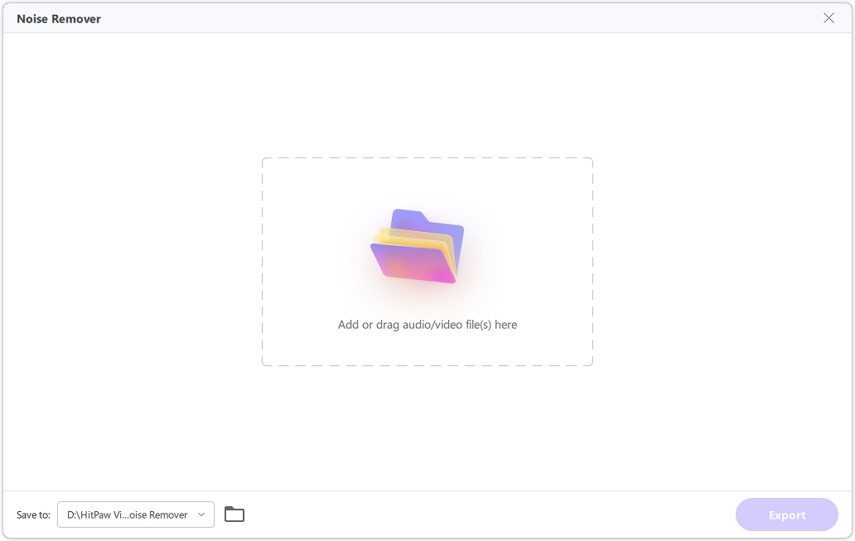
Step 2: Return to the main screen once the AI Noise Remover feature is downloaded. Add or drag an audio or video file into the software.
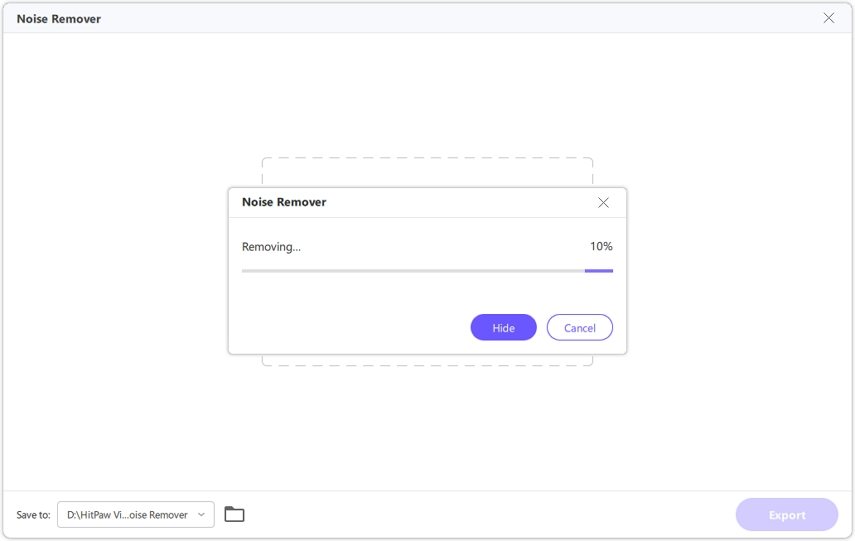
Step 3: The tool will automatically eliminate background noise from the file you've added. The AI system within the application will identify and remove the background noise seamlessly.
Step 4: After the noise removal process, you can compare the before and after effects. To save the file without background noise, click the Export option. If you want to add a new file, select the Replace option.
Part 3. FAQs of Removing Audio from WebM
Q1. Can I remove audio from a WebM file without losing video quality?
A1. You can remove audio from a WebM file without losing video quality. Tools like the HitPaw Univd are specifically designed to ensure that the video quality remains intact while the audio track is removed. This allows you to maintain the visual integrity of your content while customizing the audio to suit your needs. Whether you're looking to create silent videos or replace the audio track entirely, HitPaw Univd offers a reliable solution without compromising the original video quality.
Q2. Is the HitPaw Univd available for both Windows and Mac?
A2. Yes, HitPaw Univd is compatible with Windows and Mac operating systems. This cross-platform availability means that no matter which operating system you prefer, you can benefit from the powerful features of HitPaw Univd to edit your videos effortlessly. The software's versatility ensures that users on either platform can enjoy the same high-quality performance and robust tools for all their video editing needs. HitPaw Univd provides the flexibility and convenience to manage your video projects seamlessly, whether at home or on the go.
Final Words
Removing audio from WebM files is a straightforward process when you have the right tools. HitPaw Univd helps you remove audio from webm and enhances your video's overall quality by effectively eliminating background noise.
This makes it an indispensable tool for anyone looking to produce high-quality videos, whether for personal or professional use. With its user-friendly interface and advanced features, HitPaw Univd simplifies the video editing process, allowing you to achieve seamless and professional results. Give it a try today and experience the difference in your video editing projects.


 HitPaw Edimakor
 HitPaw Watermark Remover
  HitPaw VikPea (Video Enhancer)
Share this article:
Select the product rating:
Daniel Walker
Editor-in-Chief
My passion lies in bridging the gap between cutting-edge technology and everyday creativity. With years of hands-on experience, I create content that not only informs but inspires our audience to embrace digital tools confidently.
View all ArticlesLeave a Comment
Create your review for HitPaw articles