How to Watermark Photos on Android
Do you want to protect your photos from unauthorized use or ensure your work is properly credited? Adding a watermark is one of the most effective ways to safeguard your images. It not only helps deter misuse but also establishes ownership and showcases your brand.
In this guide, we will explore how to watermark photos on Android using two proven methods. Let's dive in!

Method 1: Create a Watermark on Android using Watermark App
The Add Watermark on Photos app is a versatile tool for watermarking your images. It supports batch processing, enabling you to watermark multiple images at once, and even lets you add watermarks to videos. The app is free, with optional in-app purchases for advanced features.
Step 1: Install the App
Download the Add Watermark on Photos app from the Google Play Store and open it.
Step 2: Grant Permissions
Allow the app to access your camera and storage to proceed.
Step 3: Select Your Images
Tap Apply on Images and choose the photos you want to watermark. The app supports batch processing, so you can select multiple files.
Step 4: Choose or Design Your Watermark
Use a preset watermark provided by the app.

For a personalized touch, select Create Watermark and use tools like text, background, and effects to design your watermark. Alternatively, you can import an existing watermark from your gallery.
Step 5: Customize the Watermark
Adjust its size, position, and transparency to fit your image. Drag and place the watermark exactly where you want it.

Step 6: Save Your Work:
Preview the watermarked images by tapping the check mark.
Save them by pressing the Download button, and find them in the "Add Watermark" folder or the "Your Creation" section of the app.
With these steps, you can easily protect your photos and add a professional touch.
Method 2: Automatically Add "Shot On" Watermarks with Shot on Stamp
For users who want an automatic solution, the Shot On Stamp app is perfect. It's designed to automatically embed a "Shot On" watermark on photos you take with your camera, highlighting the device used for the capture. While the free version has ads, upgrading to the pro version removes them.
Step 1: To begin, open the Shot On Stamp app on your device. From the home screen, tap the Logo button, select the logo that matches your device, and confirm by tapping the checkmark to set it as your watermark.
Step 2: Next, choose "Shot On." On the following screen, you can enter your device name in the Device Name field. This step is optional, and if you prefer, you can toggle off the "Shot On" option to disable it.
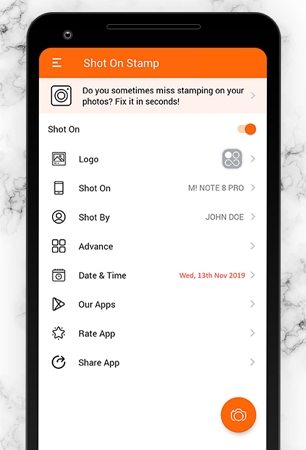
Step 3: If you'd like to personalize the watermark further, you can add your name. Simply go to the "Shot By" section and enter your name in the "Your Name" field.
Step 4: By default, Shot On Stamp also includes the date and time of capture. If you wish to modify this information, go to the "Date & Time" section. You can customize its settings or disable it if it's not needed.

Step 5: For more advanced customization, head to the "Advanced" section. Here, you can adjust various watermark properties, including position, size, font style, and color, to match your preferences.
Step 6: Once you're satisfied with your settings, tap the Preview button (the eye icon) to see how the watermark will appear on an image.

To test your watermark, return to the home screen and tap the camera button. Take a photo as you normally would, and Shot On Stamp will automatically apply the watermark.
You only need to set this up once. From now on, whenever you open the Camera app, your photos will automatically include the "Shot On" watermark.
Part 3. Pro Tip: Add Watermarks to Photos in Bulk Free
For efficient image editing on PC or Mac, HitPaw Univd (HitPaw Video Converter) offers a powerful and versatile image editor. This feature allows you to effortlessly add watermarks, crop, and rotate images in just a few clicks.
The tool's intuitive design and batch processing capabilities make it ideal for handling multiple files simultaneously, saving time while maintaining high-quality results. Whether you're a beginner or a professional, HitPaw Univd simplifies the process of managing and editing images efficiently.
Features of HitPaw Univd
HitPaw Univd - All-in-one Video Solutions for Win & Mac
Secure Verified. 254,145 people have downloaded it.
- Add watermarks to images and videos in bulk.
- Crop, rotate, and resize photos with ease.
- User-friendly interface suitable for all experience levels.
- Supports multiple file formats, including JPG, PNG, TIFF, WEBP, and more.
- High-speed processing without compromising quality.
- Compatible with both Windows and Mac systems.
Secure Verified. 254,145 people have downloaded it.
Step-by-Step Guide to Edit Images Using HitPaw Univd
HitPaw Univd simplifies the process of editing images by offering an intuitive and versatile Image Editor feature. Whether you want to crop, rotate, adjust effects, or add watermarks, the software streamlines every step. Here's how you can make the most out of it:
Step 1. Launch HitPaw Univd
Download and install HitPaw Univd from the official website. Open software and select the Image Editor Feature from the Toolbox menu.

Step 2. Crop and Rotate Images
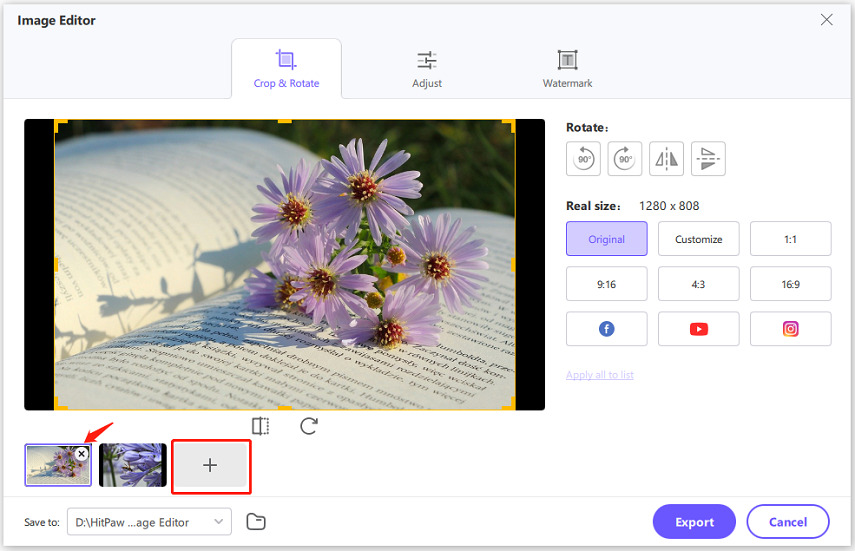
Import your images into the editor by clicking the "+" icon. You can add multiple images for batch editing or remove specific ones using the "X" icon.
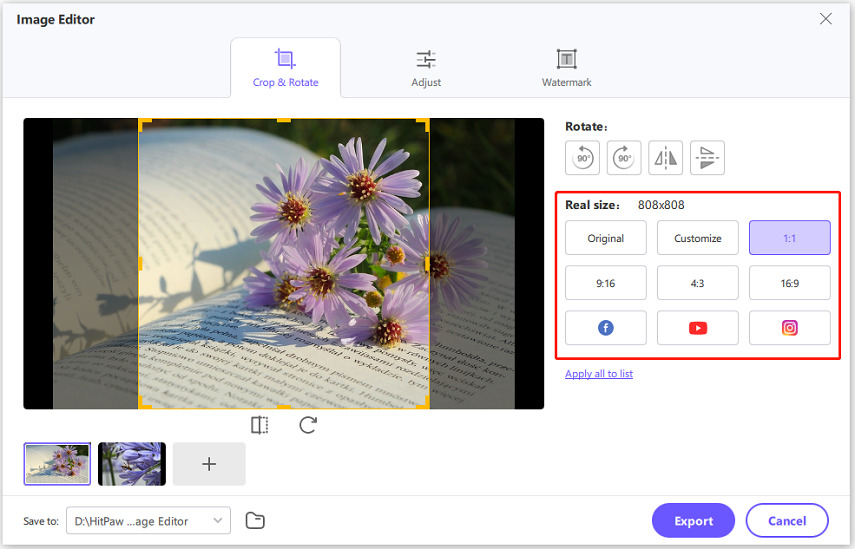
To crop, select a predefined scale or set a custom ratio. Note that original and custom ratios are applied individually, while other scales can be applied in bulk.
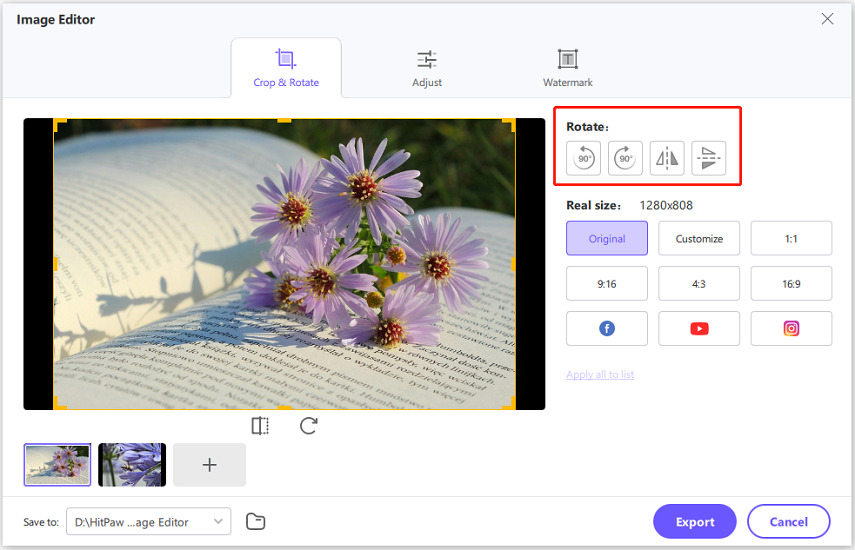
Use the rotation tools to rotate images clockwise or counterclockwise. You can also flip them horizontally or vertically.
Step 3. Adjust Image Effects
Select an image to enhance its brightness, contrast, saturation, or hue using the adjustment sliders.
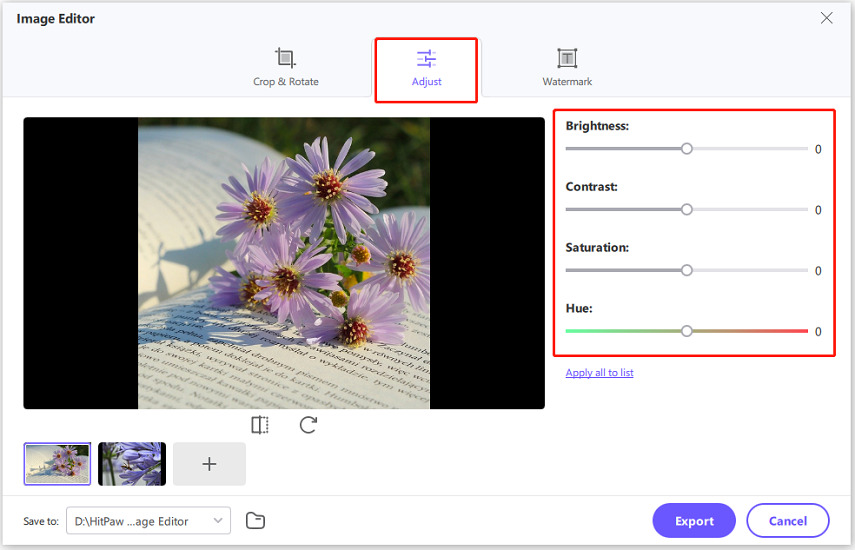
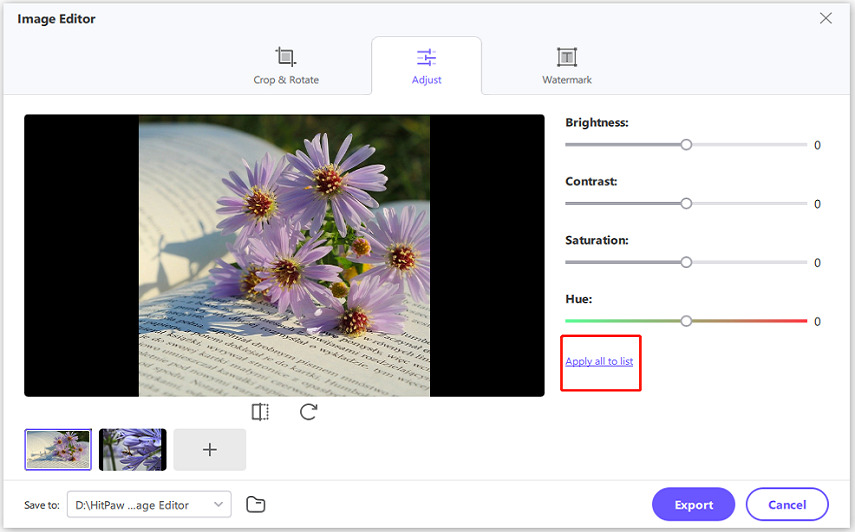
If you need to apply the same effect to all images, click the Apply All to List button for batch processing.
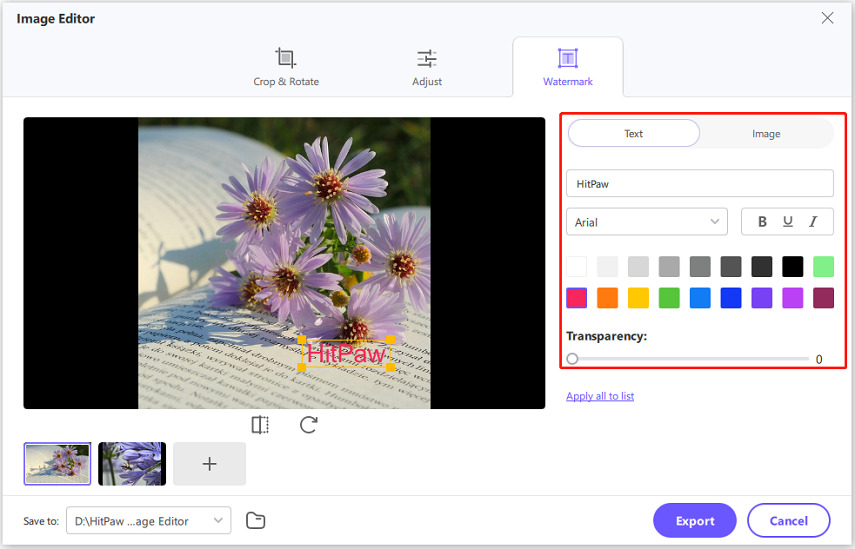
Step 4. Add Watermarks to Protect Your Photos
Input your desired text, then customize its font, size, color, and transparency. Drag the watermark on the preview screen to position it as needed. Click the Apply All to List button to add the watermark to all imported images.
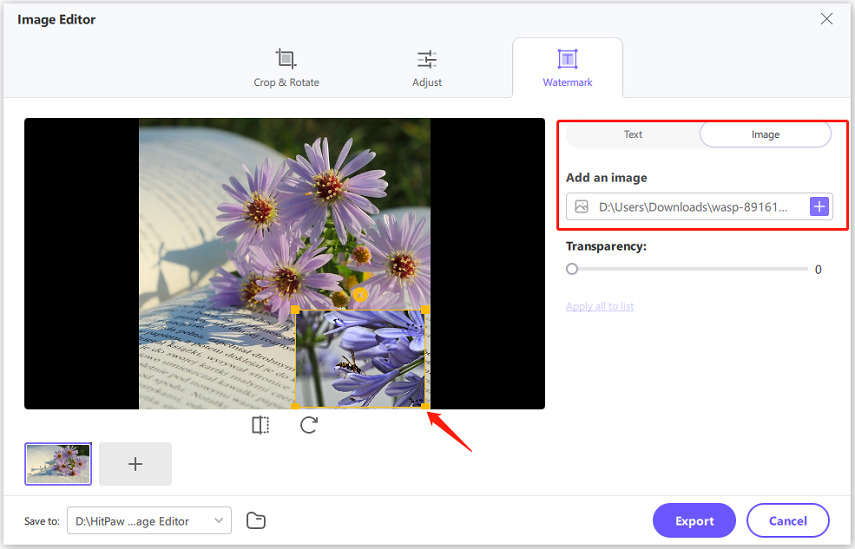
Import an image from your computer, adjust its transparency, and resize or reposition it as necessary. Use the Apply All to List button to add the watermark to all imported images at once.
Step 5. Save Your Edited Images
After finalizing your edits, click Export to save your images. Choose the desired format and quality settings to complete the process.
Conclusion
Adding watermarks to photos on Android is crucial for protecting your creative work and showcasing your brand. With free watermark app for android, Android users can easily watermark their images to suit their needs.
For those looking for advanced editing capabilities, HitPaw Univd offers a powerful tool for adding watermarks, cropping, and rotating images in bulk on PC and Mac.


 HitPaw VoicePea
  HitPaw VikPea (Video Enhancer)
 HitPaw FotorPea

Share this article:
Select the product rating:
Daniel Walker
Editor-in-Chief
My passion lies in bridging the gap between cutting-edge technology and everyday creativity. With years of hands-on experience, I create content that not only informs but inspires our audience to embrace digital tools confidently.
View all ArticlesLeave a Comment
Create your review for HitPaw articles