How to Add Watermark in Lightroom: A Complete Tutorial
Watermark your images is really very important for any photographer as well as a content creator to avoid the theft of your work. Thanks to Adobe Lightroom, it has made simple processes for including a watermark-in whether it's just a simple overlay text or a custom-made graphic logo. This tutorial will guide you through everything you want to know about how to add a watermark in Lightroom-from the basics to advanced techniques. We will look at some of the best alternative tools to add Watermark in Lightroom.
Part 1: How to Add Watermark in Lightroom- Text Watermark
A text watermark is the oldest and simplest way of branding your images. From a professional photographer to a part-time shooter, it is helpful to have your name or brand on your pictures because this promotes your brand as well as ownership purposes.
Steps to Add a Text Watermark:
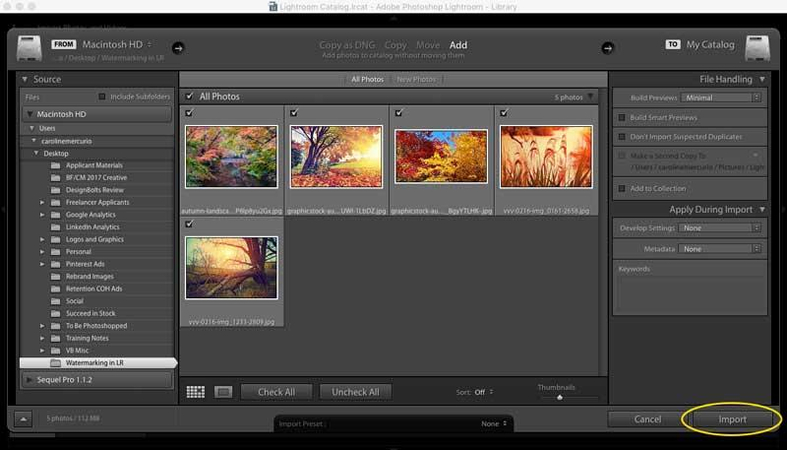
1. Launch the Lightroom Software:Click Open Lightroom and browse and select the photo or photos that need watermarks.

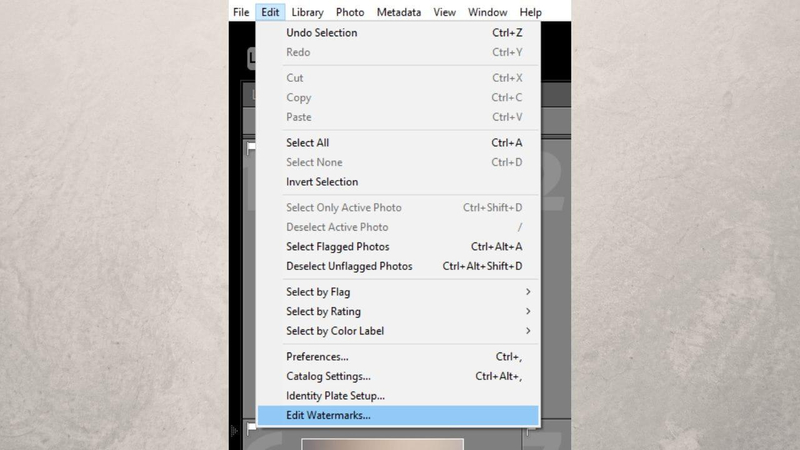
2. Adjust Watermark Preset:Click on the Edit Watermark button to edit your watermark. Select Text Watermark and insert your text in the text window. This could be your name, website, or brand tagline.

3. Customize the Appearance:Use the options provided to adjust font type, size, and style. You can also set the opacity, alignment, and position of the watermark on the photo.

4. Apply and Save:Once satisfied with your Lightroom watermark, click Save. Your text watermark will now appear on your exported photo.
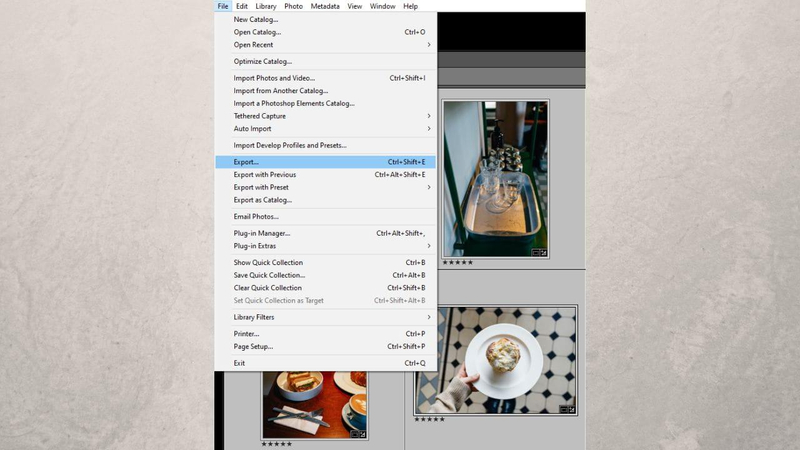
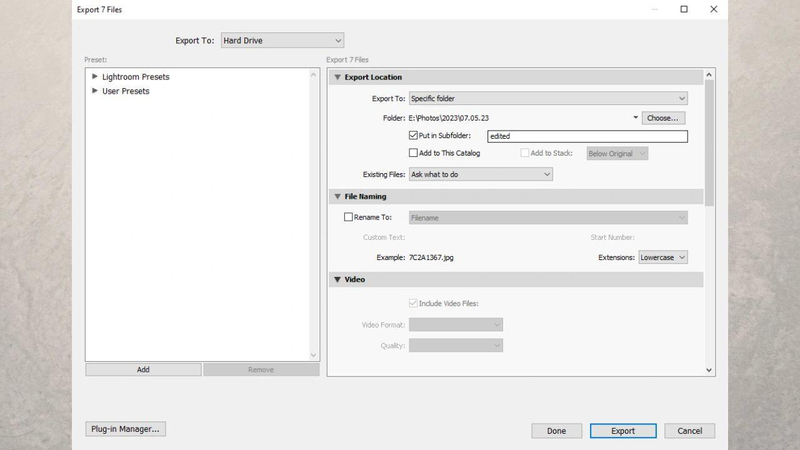
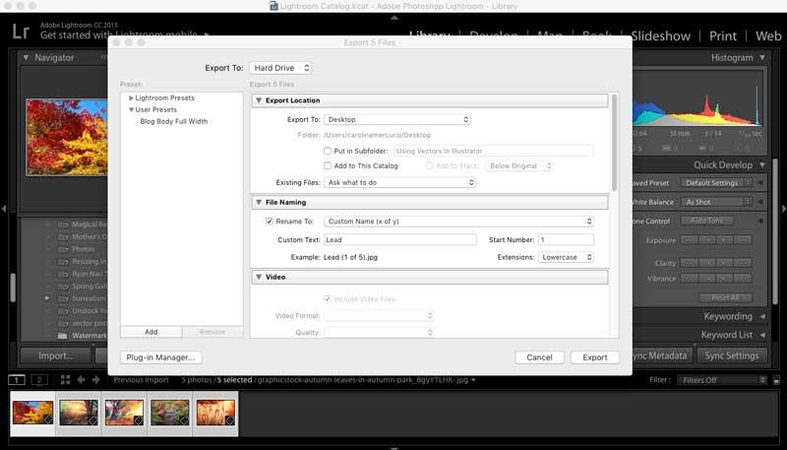
5. Export Preferences:Click on File. Tap on the Export button at the top of the Lightroom main window. The tap automatically opens the Export dialog window.

6. Export a Watermark:Tap Export Watermarking under Watermarking within the dialog window to select to export with watermarking

Part 2: How to Add Watermark in Lightroom- Graphic Watermark
Graphic watermarks such as logos are ideal for a more professional look. These are especially useful for branding and ensuring consistency across your portfolio. Learn here how to add a graphic watermark in Lightroom.
Steps to Add a Graphic Watermark:
1. Prepare Your Logo:Create or select a high-quality PNG file of your logo with a transparent background. This ensures it blends seamlessly into your photo.

2. Open the Export Dialog:As is the case with text watermarks, select the photo(s) to be exported and open up the Export dialog.

3. Turn on Watermarking:Select the Watermarking checkbox and click on the Edit Watermark button.

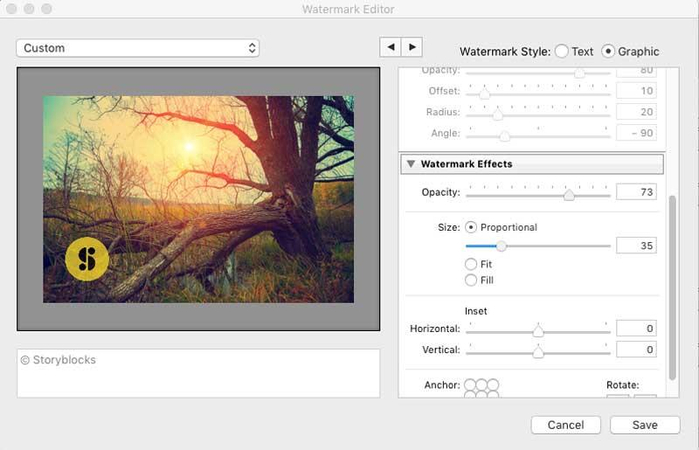
4. Select Graphic Watermark:Select Graphic Watermark and click on the Choose button to upload your logo file.

5. Adjust Placement and Size:Use the preview window to position your logo on the photo. Adjust the size to ensure it doesn't dominate the image but remains noticeable.

6. Save and Apply:Save your settings and export the photo. Your logo watermark will now appear on your image.

Part 3: Tips for Adding Watermarks in Lightroom
Creating a lightroom watermark that adds to your photo rather than taking away from it involves thought. Here are a few tips:
- 1. Subtle yet Visible:A watermark should be subtle but visible. Lower opacity can be quite professional.
- 2. Use Consistent Branding Elements:Incorporate your brand's fonts, colors, and logo to keep uniformity in your work.
- 3. Test Placement:Do not position the watermark over the important parts of the image. Try different positions and see which one works well.
Part 4: Best Alternative to Lightroom to Add Watermark: HitPaw Univd (HitPaw Video Converter)
While Adobe Lightroom watermark is very popular for its use in watermarking, it might not be ideal for all users. With powerful features and user-friendliness, HitPaw Univd will be more than an excellent alternative for one's needs. Designed keeping versatility and ease of use in mind, HitPaw Univd offers advanced watermarking options beyond the Lightroom system. This will make it ideal for photographers and creators in content production.
Key features of HitPaw Univd to Watermark an Image:
HitPaw Univd - All-in-one Video Solutions for Win & Mac
Secure Verified. 254,145 people have downloaded it.
- User-Friendly Interface: The design is intuitive and suited for novices as well as experts, with a smooth experience.
- Batch Processing: Multiple images or videos can be watermarked in a batch, which saves so much time.
- Customizable Options: This tool has all the varieties of fonts, styles, and placements of text or graphic watermarks to help maintain a look and professionalism.
- Cross-Platform Compatibility: The software is totally compatible with both Windows and Mac systems.
Secure Verified. 254,145 people have downloaded it.
How to use HitPaw Univd for watermark?
Step 1: Open Image Editor
After installing the software on your PC or Mac, launch it and navigate to the Toolbox tab. From there, select the Image Editor option.

Step 2: Import Your Images and Select Watermark
Import all the images you want to edit. On the top menu panel, you will see three options: Crop, Adjust, and Watermark. Choose Watermark to begin. You can either add a text watermark or an image watermark, depending on your preference.
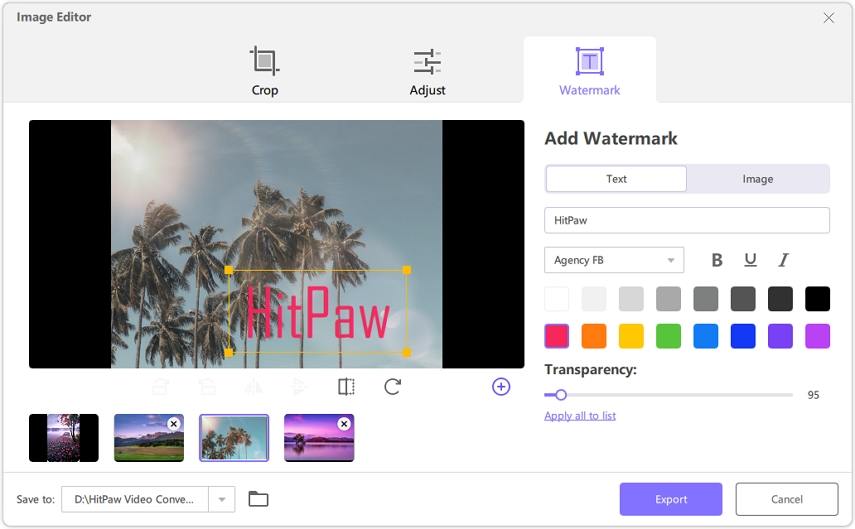
Step 3: Apply Watermarks to Multiple Photos
To apply the watermark to all your imported photos at once, check the option that says Apply all to list. This will ensure that the watermark is added to every image in your list simultaneously.
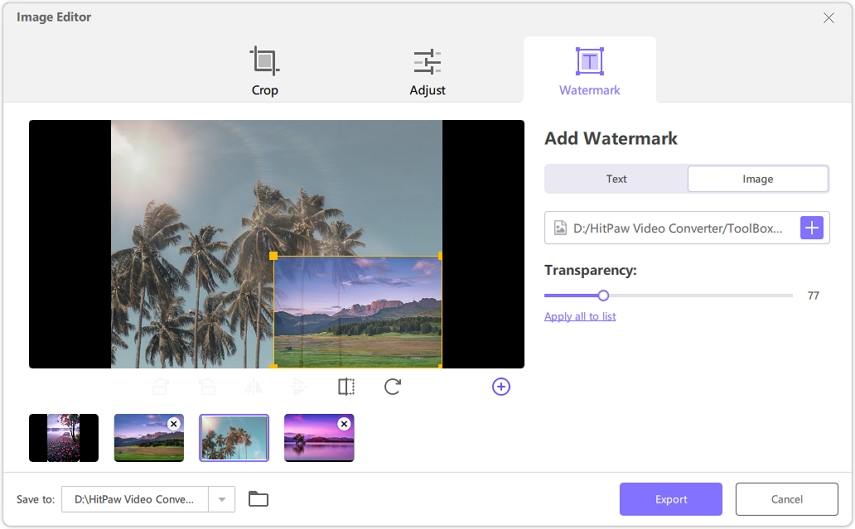
Part 5: Other Effective Tools to Add Watermark Like Lightroom
If you are exploring more options, there are several tools beyond Lightroom that can help you add lightroom watermarks effectively. These tools cater to different needs, offering various features for photographers and creators. Here are three top alternatives worth considering:
1. Canva
Canva is an all-in-one design space that designers love for its ease and rich features. You'll surely find it useful when adding watermarks to your projects or branding purposes with a hassle-free, intuitive experience.

Features:
- Easy drag-and-drop editor
- Pre-designed templates
- Extensive font and logo options
Pros
- Intuitive interface
- Ideal for beginners
Cons
- Limited advanced customization options
2. Watermarkly
Watermarkly is a fast browser-based application designed for users who need to watermark images quickly and easily. It is particularly useful for those who do not want to install extra software but still want professional output.

Features:
- Batch processing
- Cloud integration
- Customizable text or logo watermarks
Pros
- Fast processing
- Works right in your browser
Cons
- Free version has limited features
3. uMark
uMark is an effective desktop software for photographers and businesses. Its ability to process the bulk of watermarking is impressive and offers extensive customizations to make it a favorite among professionals.

Features:
- Accepts both text and graphic watermarks
- Batch watermarking
- Extensive customization
Pros
- Highly customizable
- Good for high-volume watermarking
Cons
- Paid application with no free version
Part 6. FAQs on Adding Watermark in Lightroom
Q1. Can I remove a watermark after adding it in Lightroom?
A1. Yes, it is possible to remove watermarks from images exported out of Lightroom, but you will first need the original file before the watermark was added or use tools such as HitPaw Watermark Remover.
Q2. Does Lightroom allow batch watermarking for multiple photos?
A2. Yes, Lightroom has batch watermarking capabilities, meaning you can easily add watermarks to multiple photos during the export process.
Q3. What Are the Best Practices for Designing a Watermark?
A3.
Conclusion
In this article, we have learned how to add a watermark in Lightroom. Putting watermarks in your pictures via Lightroom is simple while keeping your photos safe but branding yourself. But if you are looking for a more flexible alternative and one that will better suit a beginner, it would be HitPaw Univd. With its advanced features and ease of use, it's perfect for both individual photographers and professionals managing large projects. Start watermarking your photos today and protect your creative work!







 HitPaw VoicePea
  HitPaw VikPea (Video Enhancer)
 HitPaw FotorPea


Share this article:
Select the product rating:
Daniel Walker
Editor-in-Chief
My passion lies in bridging the gap between cutting-edge technology and everyday creativity. With years of hands-on experience, I create content that not only informs but inspires our audience to embrace digital tools confidently.
View all ArticlesLeave a Comment
Create your review for HitPaw articles