Comprehensive Guide to Start Using Voiceover Mac 2025
Apple has introduced different features for users, and one of them is Voice over MacBook. With this feature, users can perform multiple things, such as interacting with computers using gestures and shortcut keys. Also, they can use different commands to perform the daily task. But the main question is how to start or enable Voiceover Mac and what exactly Voice over MacBook does. If you are curious to know about Voiceover in Mac, continue reading this article.
Part 1: What is Voiceover Mac?

If you are using Mac, you must have heard about its built-in screen reader. Yes, we are talking about Voiceover recorder on Mac. This app is famous for providing spoken and auditory descriptions of different elements and allowing visual impairments to attract the computer and more. It can also read the on-screen content and elements, which include text, buttons, icons, and more.
With this app, you can also interact with various applications using shortcuts or gestures. This voice over Macbook works on commands, so it is important to learn the basic ones, such as Command-F5, which helps you enable Voiceover Mac app.
Many users don’t know how macOs Voiceover works. Well, once you have enabled Voiceover on Mac, it checks the display and sends the information regarding using contracted braille. Apart from that, you can use different gestures to see what is happening on the screen. You can also interact with the elements using those Voiceover Keys.
Part 2: How to Begin Using MacOs Voiceover?

To use Voiceover macOS, you have to follow different steps as it depends on the device you are using. Below have mentioned how to turn on Voiceover on macOS Ventura and macOS Monterey.
1. Start Voice Over on Mac
macOS Ventura & Later:- Open Apple Menu and choose the “System Settings” option.
- Next, click the “Accessibility” option and look for VoiceOver.
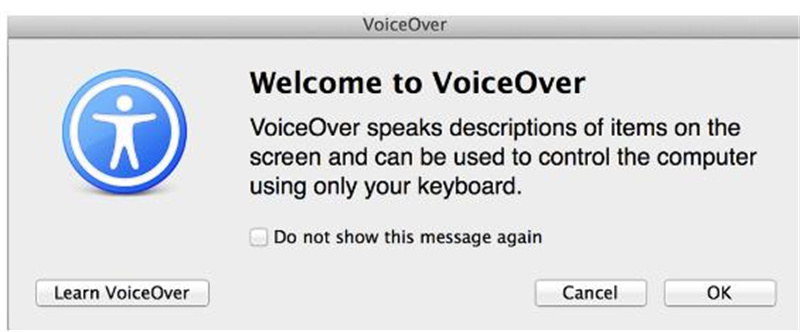
- In the next step, click “Open Voiceover Training.”
- Once you are on the VoiceTraining screen, click the Right Arrow button and follow the instructions on the screen.
- Open Apple Menu and select the “System Settings” option.
- Next, click “Accessibility” and look for VoiceOver. You can see this option on the left sidebar.
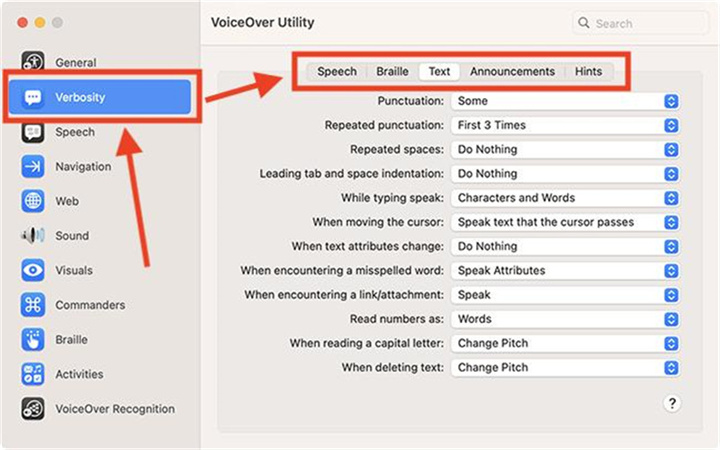
- Click the “Open VoiceOver Utility" on Mac and look for the "Verbosity Category" option and choose the Speech or Braille options.
2. Basic Navigation
Once you have started VoiceOver on Mac, the cursor will appear as a dark rectangular outline. You can use the navigation by using the modifier keys such as VO. You can use the VO using Ctrl and Alt. Below are the things which you can do with the basic navigation.
- Move items: If you want to move the items in your window, press VO+Left or Right keys.
- Grouped items: If your items are grouped, you can hold VO + Shift + Down arrow.
- Select iTem: You can hit SpaceBar if you want to choose the item.
- Switch Apps: To switch the apps, you can press the cmd keys and click the Tab key. If you want to move the apps, press the Cmd Key and then press Tab. To release the app, you can now release the CMD key.
- Menu Bar: To jump to the menu, press VO + M.
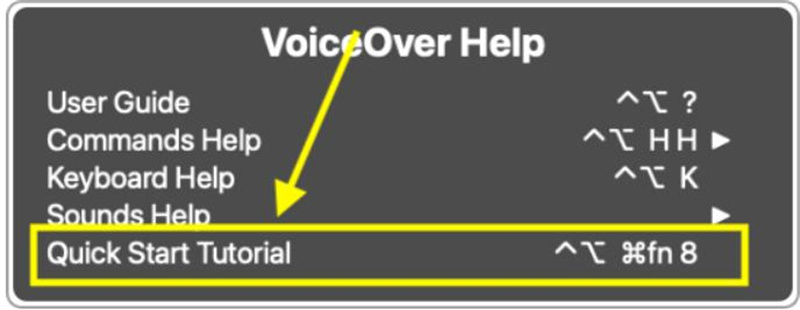
These are some common commands that you can use to access Voiceover for Mac. To get command help, you have to press VO + H H
3. VoiceOver Quick Start

There is a quick start guide from where you can get more information about VoiceOver. To get it, press VO + H, and it will open the menu for you. From the menu, choose the Quick Start option.
4. Open Settings
If you are not satisfied with Voiceover Utility Mac settings, you can press the command VO + F8 to open it. From there, you can adjust the Settings according to your requirements.
5. Change Spoken Words Settings

With VoiceOver, you can get the details about different elements as you navigate. However, some people are not satisfied with getting too much information on the screen, so it is a good idea to change it. VoiceOver has a Verbosity option from where you can change the settings easily: If you are a beginner and don't know how it is done, check out the details below.
- Speech: With this option, you can control the spoken words and their feedback. If you want less amount of spoken words, set the Default Speech Verbosity to medium. If you want to control item-by-item settings, choose the Additional Speech Verbosity option.
- Braille: This option can be set for blind or low-vision people. By clicking this tab, users can adjust the Braille displays and set it to low or high.
- VoiceOver Text: With this option, you can select how VoiceOver calls the text, such as the text type.
- Announcement: This is an important option and allows you to select the announcements VoiceOver can read out for you.
- Hints: With this option, you can choose how to read the Hints.
6. Adjust Voice Settings
With this option, you can adjust VoiceOver's voice Setting. To do that, go to System Preferences and look for Spoken Content, and from there, adjust the speed of VoiceOver.
These were some basic steps of using the VoiceOver app. You can follow this guide and adjust your VoiceOver on Macbook Pro and Macbook Air as well. However, if you want to know more about it, you can check this guide from Apple and get all the necessary information. Here you will find how to turn off VoiceOver on Mac.
Bonus Tips: HitPaw VoicePea - Best Voice Changer for PC & Mac

When it comes to creating Voiceovers, people hire professional artists and spend a lot of money to change their voices. However, if you don't want to do that and are looking for a professional Voice changer for PC and Mac, you can use the HitPaw VoicePea app. It is an AI voice changer app that comes with multiple features and a straightforward interface for non-tech users. It also offers real-time voice-changing features for gamers, streamers, and more. Want to know more about HitPaw VoicePea app? Let's discuss its key features.
- By Following three steps, you can change your voice into any character
- Use it with all the popular apps, games, and platforms
- Try the noise reduction feature to remove echo and noise
- A live voice changer option is also available
- You can seamlessly change voice on different famous platforms, including Discord, Zoom, WhatsApp etc
- The interface is simple and easy to use
Part 3: FAQs of Voiceover Mac
Q1. How to turn off VoiceOver on Mac?
A1. To turn off the VoiceOver on Mac, select the Apple menu, click the System Settings, and choose the Accessibility option. Next, click VoiceOver on the right, and from there, turn VoiceOver on or off. You can also use the Command and F5 on your keyboard to turn it off.
Q2. How do I turn VoiceOver on Mac?
A2. You can go to Apple Menu and System Settings. Next, look for the Accessibility option and choose VoiceOver, which you can find on the right side. If it is turned off, click it again and turn it on.
Q3. What does VoiceOver do?
A3. It can do many things like read aloud the text on the screen, provide information about the location, explain the functions of the elements, and more. It can also provide details about the icons, buttons, and more. Users can also adjust VoiceOver settings, such as speaking rate, pitch, and volume. They can also set the gestures and other Settings according to their requirements.
Part 4: Conclusion
Mac VoiceOver is an amazing app and offers lots of features, such as navigation, text entry, accessibility labels, customization, Braille support, web browsing and more. It also works with different web browsers and helps make online browsing more accessible. You can also integrate it with different other Apple devices.


 HitPaw Edimakor
 HitPaw VikPea (Video Enhancer)


Share this article:
Select the product rating:
Daniel Walker
Editor-in-Chief
This post was written by Editor Daniel Walker whose passion lies in bridging the gap between cutting-edge technology and everyday creativity. The content he created inspires audience to embrace digital tools confidently.
View all ArticlesLeave a Comment
Create your review for HitPaw articles