Deinterlace Video: 3 Easy Steps for Smooth Playback
Before the advent of digital content, the interlaced video or interlaced scan technique was used to display media files. As technology advances in the digital world, new and improvised media display methods were also evolved.
In today’s era, not a single user is satisfied with blurry or flickering video quality, as it destroys the fun of watching content. Thus, deinterlacing was introduced to improve the video resolution and give viewers a clearer picture.
So, how can deinterlacing video help your business? Continue reading if you want to know the best way to deinterlace a video.
Part 1. What is Deinterlacing Meaning?
Deinterlacing refers to the process of converting interlaced video content into progressive scan format. When you see horizontal lines, flickering, or "combing" effects in your videos, you're experiencing interlacing issues - a legacy format from older TVs and broadcasting systems. Modern displays use progressive scanning, which shows the entire frame at once, resulting in smoother playback without visual artifacts.
Modern devices support high-resolution media, and deinterlacing is essential to avoid visual defects. The most effective way to solve deinterlacing is to use AI-Powered Products, which can reduce flickering and bandwidth issues, thereby significantly improving video quality.

Part 2. How to Deinterlace Video with AI-Powered Product
Undoubtedly, an interlaced video has poor quality and needs to be compatible with modern devices. HitPaw VikPea (formerly HitPaw Video Enhancer) is a powerful AI-powered tool designed to enhance video quality, featuring an advanced deinterlacing video function. It intelligently applies the most efficient deinterlacing algorithms to convert interlaced videos into smooth, high-quality progressive scans. With its user-friendly interface and cutting-edge AI technology, HitPaw VikPea ensures your videos are free from jagged edges and motion blur, perfect for modern displays.
Learn how to enhance the video to 4K with HitPaw AI Video Enhancer from this video:
Why Choose HitPaw VikPea to Deinterlace Video
- Best deinterlacing software to upscale video resolution to 4k with trained AI technology
- Provides the perfect solution for low-resolution videos with AI enhancement tool to quickly fixes blur videos
- Easily remove clutter, noise, and blurriness from a old footage
- Designed explicitly for enhancing low-quality media files
- It comes with batch processing for multiple video work
- Easy to use and contain three enhancing models
Steps of How to Deinterlace Video with HitPaw VikPea
-
Step 1.First of all, download and install the HitPaw VikPea.
-
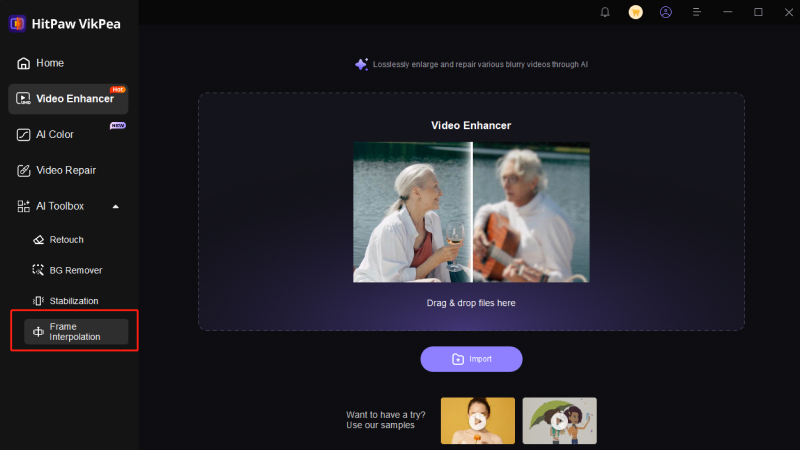
Step 2.Now, find Frame Interpolation from AI Toolbox, click to upload the video you want to deinterlace.

-
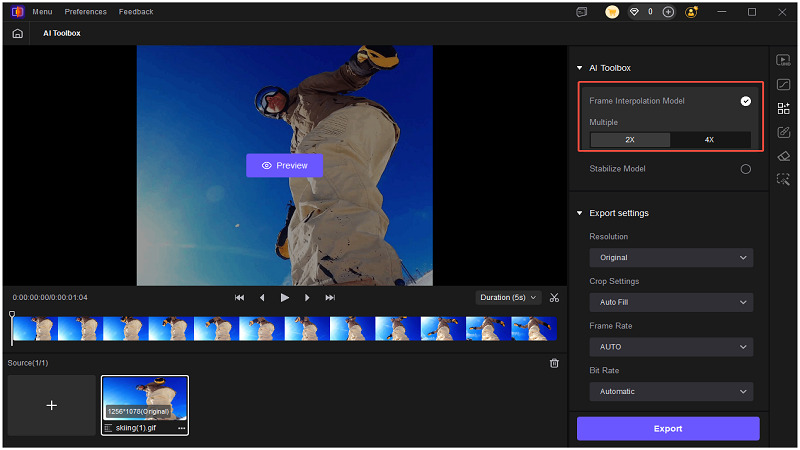
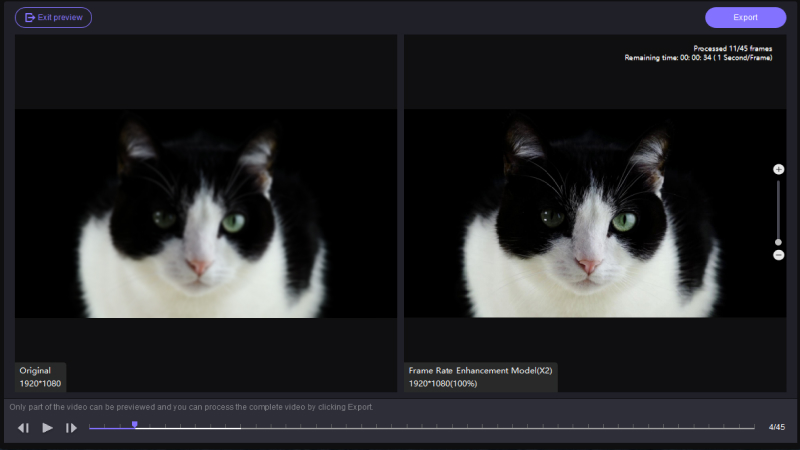
Step 3.After uploading your original video, click on the effects and choose the Frame Rate Enhancement Model from the provided list.

-
Step 4.Once you’ve selected the AI model, it will automatically deinterlacing with AI and enhance your video resolution. Finally, preview the video for final changes and export it to your local files on the computer.

Part 3. How to Deinterlace the Video for Free with Easy Steps
Interlacing is an outdated media display technique used in old televisions, cameras, and DVDs. To keep up with modern devices, you need to deinterlace your video. Let’s have a look at them one by one below:
Note: To get a high-quality video, don’t forget to upscale video with AI video enhancer - HitPaw VikPea!
Method 1 - Deinterlace Video VLC
Being one of the best professional video players, VLC has provided comfort to its users by introducing deinterlacing mode in the features. The deinterlace in VLC is easy to use, and you can operate it by just clicking on the ‘’D’’ hotkey. Besides this, VLC helps you in removing interlaced lines both automatically and manually, with a weak point that you cannot save the deinterlaced video to your local files.

Steps of How to Deinterlace Video with VLC
-
Step 1.First of all, open the VLC media player. Then, click on the video you want to deinterlace.
-
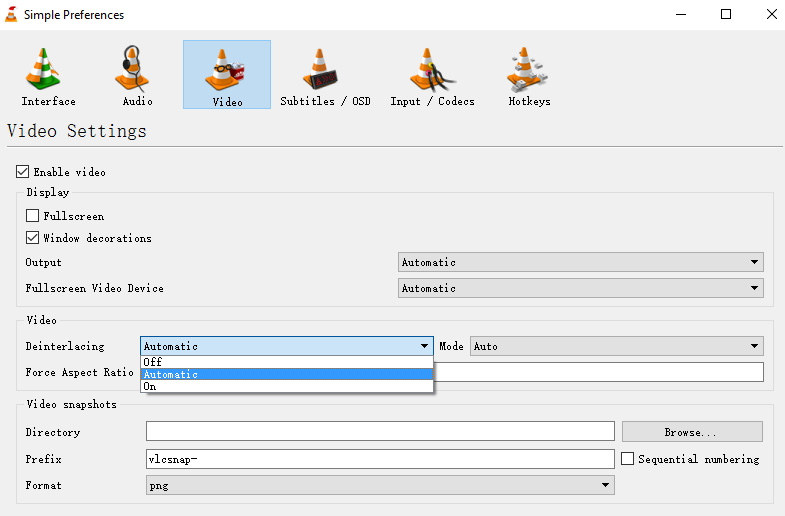
Step 2.From the video options, go to deinterlace mode and click on enable feature. You can also select automatic or manual activation here.

-
Step 3.After choosing your preferences, you can easily play and watch your favorite video through VLC deinterlace mode.
Method 2 - Deinterlace Video with HandBrake
If you are a tech-savvy user, you would love the customization settings of HandBrake. It provides different deinterlace parameters to play the video in high resolution. Unlike other video transcoders, this open-source deinterlace video software can preview and export the video to your local media files. Thus, you can conveniently try its custom features and reduce your video lines.
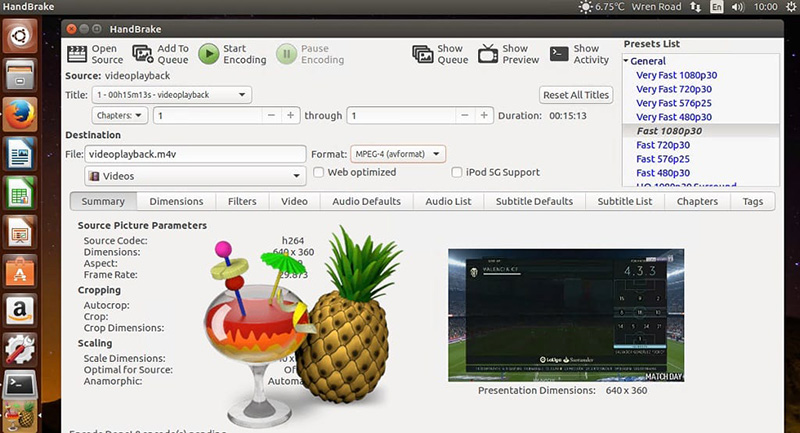
Steps of How to Deinterlace Video with HandBrake
-
Step 1.Open the HandBrake mac video software and choose the video you want to deinterlace.
-
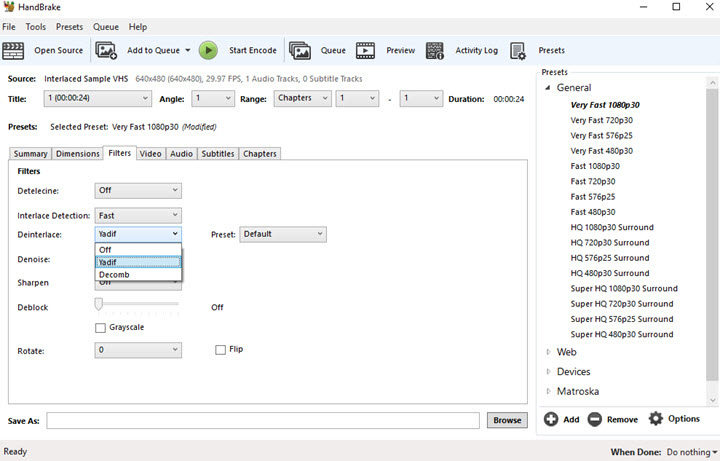
Step 2.Go to the ‘’filters’’ option and click on the how to deinterlace mode. By default, it is turned off.

-
Step 3.Finally, you’ll see three videos deinterlace modes - custom, fast, and slow. Choose any option and start converting your interlaced video.
Method 3 - Premiere Pro Deinterlace
Adobe premiere pro is one of the finest videos deinterlace options to increase your video quality. The best thing about this premier pro deinterlace is you can watch both recorded and live-streaming videos in high resolution without any interlaced lines. If you wonder how to deinterlace video in premier pro, below are some easy steps for your convenience.
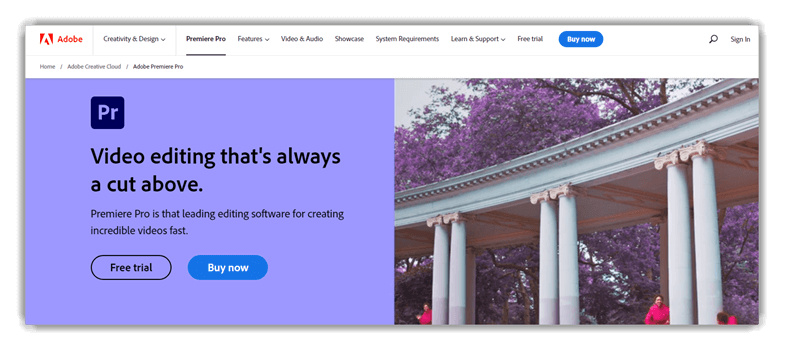
Steps of How to Deinterlace Video with Premier Pro
-
Step 1.The first step is to open the premier pro and create a new project.
-
Step 2.Once you’ve created a new project, click on the import your video option and choose the media file you want to deinterlace.
-
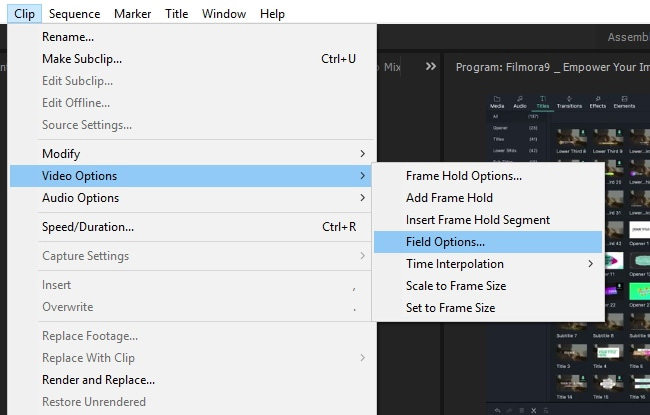
Step 3.You can also enable the deinterlace filter by going to the navigation bar and clicking on the video option. From here, you will find the ‘’field option’’ and convert your video.

Top 4 Deinterlace Software Compared - HitPaw Ranks First
| Application | Operation | Output Quality | Processing Speed | Features |
|---|---|---|---|---|
| HitPaw VikPea | Simple | Very High | Very Fast | Rich, Professional |
| VLC | Medium | Average | Fast | Basic |
| HandBrake | Medium | Average | Medium | Basic |
| Premiere Pro | Complex | Average | Medium | Rich |
From the table above, we can see that HitPaw VikPea is the best choice. Now to deinterlace video just click below for free.
Part 4. FAQs of Deinterlacing Video
1. Does Deinterlacing Improve Video Quality?
Some deinterlacing tools may only remove or duplicate odd and even lines, which might not yield significant quality improvements.
Professionals recommend advanced software like HitPaw VikPea due to its AI deinterlace technology that intelligently enhances video resolution and smoothness.
2. What is the Difference between Deinterlacing and Interlacing?
| Feature | Deinterlacing | Interlacing |
|---|---|---|
| Definition | Converts interlaced footage into a smooth, progressive scan by removing interlaced lines. | A technique that displays video by alternating odd and even lines. |
| Effect on Quality | Improves video quality by reducing flickering and jagged edges. | Can lead to blurred, flickering images due to split frame display. |
| Usage Scenario | Ideal for modern high-resolution displays where clear video quality is essential. | Common in older devices like vintage TVs and cameras, less suited for HD displays. |
Conclusion about Deinterlace Video
Now that you have understood the difference between an interlaced and deinterlaced video, it would be convenient to enhance your video quality. You can try the above-mentioned deinterlacing tools. Also, Free download HitPaw VikPea to deinterlace video with AI-powered products and enhance high-quality video freely and easily.



 HitPaw Univd (Video Converter)
  HitPaw Watermark Remover
  HitPaw VikPea (Video Enhancer)


Share this article:
Select the product rating:
Daniel Walker
Editor-in-Chief
My passion lies in bridging the gap between cutting-edge technology and everyday creativity. With years of hands-on experience, I create content that not only informs but inspires our audience to embrace digital tools confidently.
View all ArticlesLeave a Comment
Create your review for HitPaw articles