Easy Steps: How To Remove Moire Effect Video
Have you ever filmed a subject wearing striped clothing or captured architectural details, only to discover distracting rainbow-like patterns or jagged lines in your footage? These artifacts, known as moiré and aliasing, are common issues in digital videography, especially with modern cameras that often lack anti-aliasing filters.
In this guide, we'll delve into what causes moiré and aliasing in videos, how they affect your footage, and most importantly, how to remove them using tools like After Effects, DaVinci Resolve, and online solutions. We'll also share practical tips to prevent these issues in future shoots.
Whether you're a content creator, videographer, or hobbyist, this article will equip you with the knowledge and tools to enhance your video quality by addressing moiré and aliasing effectively.
Part 1. What is Video aliasing and Video Moire?

What is Video aliasing
Video aliasing is a visual distortion that occurs when a digital camera samples a scene with fine, repetitive patterns at an insufficient resolution. This can result in artifacts such as jagged edges on diagonal lines or shimmering effects on detailed textures.
What is Video Moire
Video moiré is a specific type of aliasing artifact that manifests as wavy or rippling patterns when capturing subjects with repetitive details, like fabrics or architectural elements. It arises from interference between the pattern in the scene and the camera's pixel grid.
In essence, moiré is a subset of aliasing, both resulting from the camera's inability to accurately sample high-frequency details, leading to unwanted visual artifacts in the footage.
Part 2. How to Remove Moire from Video using Software?
Use After Effects To Create Anti Aliasing Video
Remove Moire After Effects is a powerful video editing software developed by Adobe Systems to remove video aliasing, it has many tools and effects that can be used to edit video, including the ability to remove moire. After Effects tends to have a more professional look due to its ability to customize visuals, which is great for removing moire effect video.
The downside of using After Effects is that it can be complex and time-consuming to use if you don’t have experience with the software.
Remove moire After Effects costs $20.99 per month for an individual subscription or $239.88 annually as part of the Creative Cloud Suite.
To remove moiré video in After Effects, follow these steps:
-
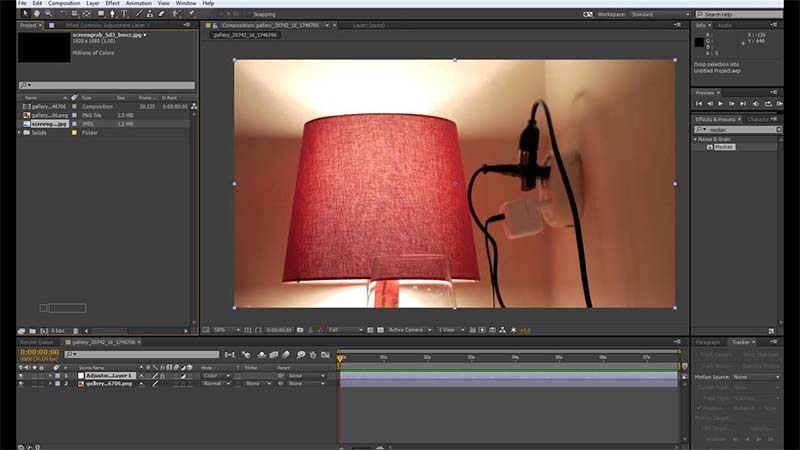
1. Open your video file in After Effects and select the clip you want to edit.

-
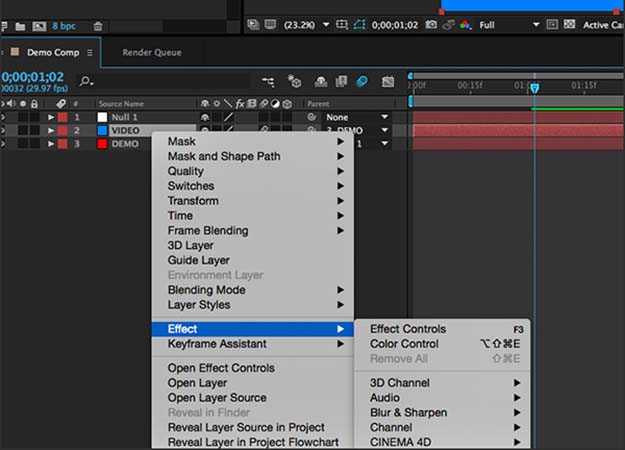
2. Select the Moiré Removal effect located under Video Effects > Remove Moiré

-
3. Adjust the settings of the effect until the unwanted patterns are reduced or removed altogether
-
4. If needed, repeat steps 2 & 3 until the desired result is achieved
-
5. Preview your edited clip, once satisfied, render out and save your edited clip.
Remove Moire Davinci Resolve
Davinci Resolve is a powerful software developed by Blackmagic Design to remove video aliasing. It offers features such as color correction and audio post-production, among other popular tools for editing video files. Davinci Resolve also offers a tool for removing moire from videos with ease - all you need to do is select your clip and apply the Moiré Removal filter located under Color > Moiré Removal.
The advantage of using Davinci Resolve when compared to After Effects is its intuitive user interface, making it easier and faster to use if you already know how to use the software's other features or want something simpler than Adobe's solution.
Davinci Resolve Studio costs $299 USD per year, with additional pricing options available depending on your needs.
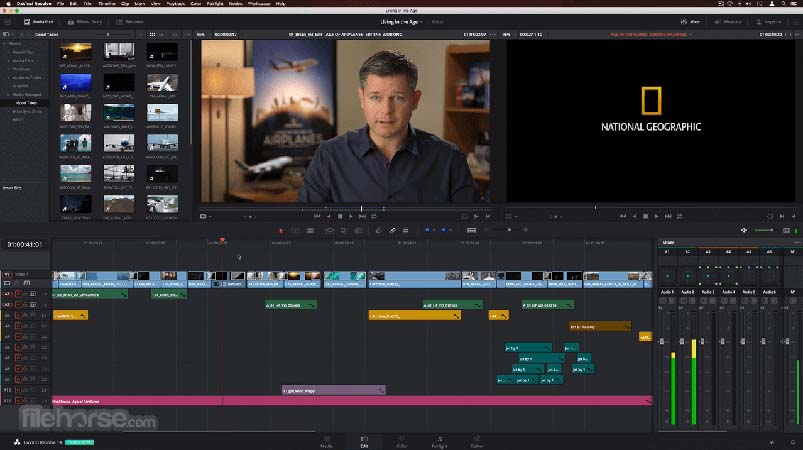
To remove moire Davinci resolve, follow these steps:
-
1. Open your video file in Davinci Resolve Studio and select the clip you want to edit
-
2. Select Color > Moiré Removal from the toolbar on top of the screen
-
3. Play around with different settings such as Blur Strength & Radius until desired results are reached
-
4. If needed, repeat step 3 until you are satisfied with the results
-
5. Preview your edited clip; once satisfied, render out and save your edited clip
Part 3. How to Remove Moire from Video using Plugins?
Plugin for Removing Moire in FINAL CUT PRO
Plugin for Removing Moire in FINAL CUT PRO enables Final Cut Pro X (FCPX) users to easily remove unwanted moiré patterning from their videos without needing external software or plugins.
This plugin works particularly well if users don’t have access to or knowledge of how to use more advanced video editing programs like Adobe After Effects or Davinci Resolve Studio - all they need is FCPX itself.
The plugin itself costs a $59 USD one-off payment, which may seem steep but compared to purchasing one of those aforementioned applications, it’s certainly cheaper!

To use Plugin for Removing Moire in FINAL CUT PRO, simply follows these steps:
-
1. Open Final Cut Pro X, then load up your footage into the program
-
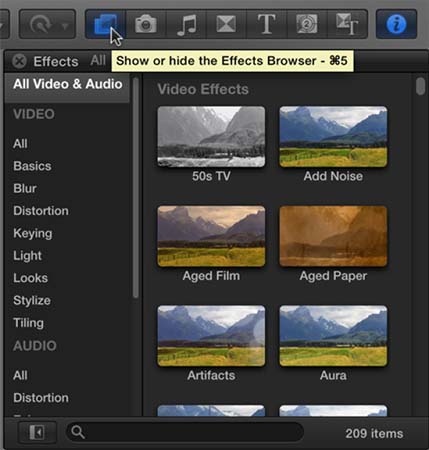
2. Go into the effects library, then locate Plugin for Removing Moire

-
3. Drag this Plug-In onto Clip/Timeline where visible moiré needs removing
-
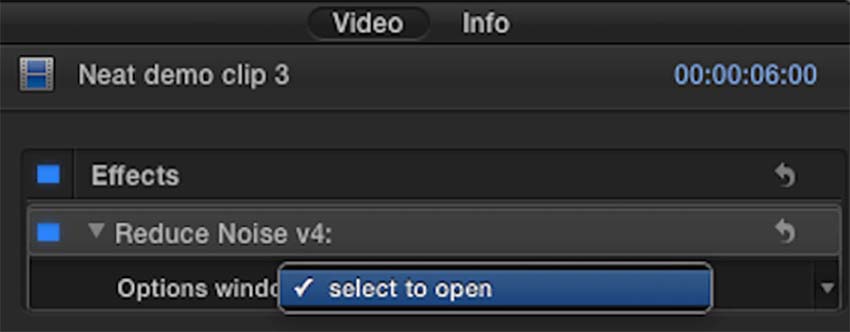
4. Play around with Options Tab settings until desired results are achieved
-
5. Preview edited Clip; once a satisfactory result is achieved, export out a new finalized version
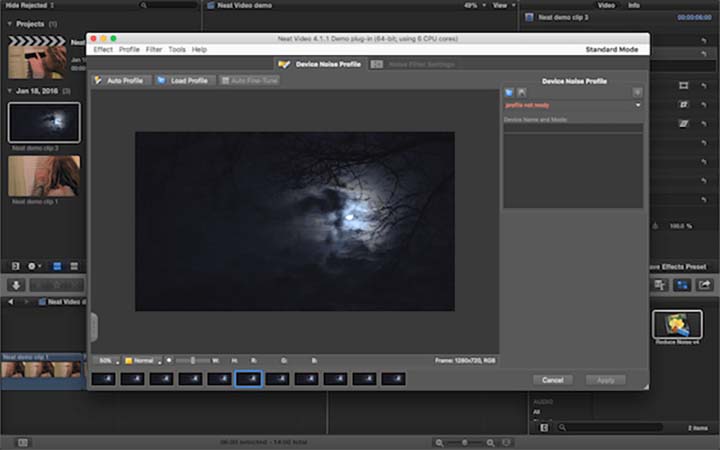
Neat Video for Moire Removal Plugin
Neat Video Moire Removal - a plug-in created by Neat Video specifically designed for eliminating digital artifacts (including moirés).
Unlike previously mentioned methods, it isn’t necessary that users understand complex terminology like “Moiré Patterns” as NeatVideo will automatically detect where unwanted artifacts are and Then reduce them accordingly - making it even easier than ever before.
The Plug-In itself costs between $79 USD - $399 USD depending on what platform you wish it runs on (e.g., Desktop/Mobile, etc.) As well as how long you wish the license lasts (monthly subscriptions are available).

To remove moire using Neat Video Moire Removal, follow these instructions:
-
1. Inside the host program, open up a project containing footage requiring artifact reduction
-
2. Select footage requiring treatment, then go to Effect Panel & find Neat Video Effect

-
3. Once selected, play around the Default Settings tab – adjust controls until the desired outcome achieved

-
4. The advanced Setting tab also allows further adjustments if required
-
5. Once finished, preview the edited clip – when happy, export the new version
Part 4. Complex? Remove Moire from Aliasing Video Simply with AI Video Enhancer - HitPaw VikPea
Many factors, such as moiré, noise, low resolution, and video aliasing, can cause poor quality or blurry videos. One solution to improve the quality of the such video is by using an AI video upscaler. One such tool is HitPaw VikPea (formerly HitPaw Video Enhancer), which focuses on using AI technology to enhance low-resolution videos and act as an anti aliasing video tool.
Hitpaw VikPea is an easy-to-use tool with a clean interface. It uses mature AI technology to enhance video quality, and it allows users to preview the results without watermarks. The tool is designed to improve the overall quality of a video, including remove blur from the video.
Features of HitPaw VikPea:
- Enhances your lower-resolution videos from 2K to 4K or 8K.
- The General Denoise Model reduces noise from older videos.
- Enhance videos with AI-powered technology.
- Batch processing enhances multiple videos simultaneously.
- Processes videos quicker than other video enhancers.
- Fast and smooth AI-powered moire removal.
Follow the steps to remove moire from video using HitPaw VikPea:
-
Step 1. HitPaw VikPea is available for download from the official website. You can download and install it on your PC or Mac.
-
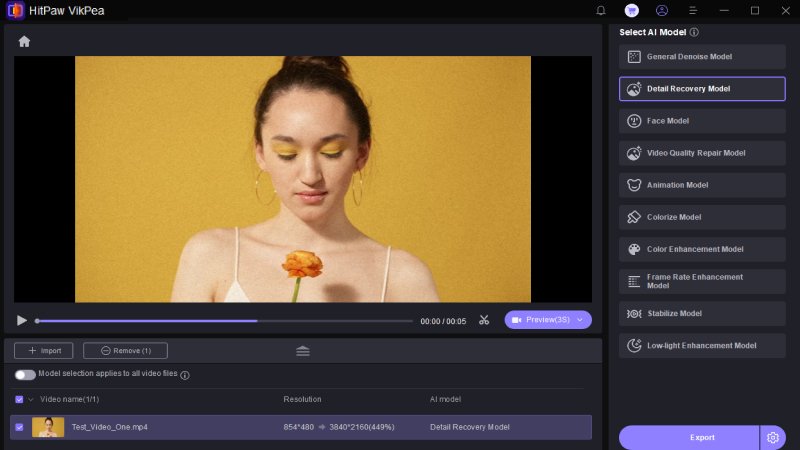
Step 2. First, upload the actual video that you want the AI to improve. You can also simply drag and drop it in the program.

-
Step 3. Choose from the multiple AI models(General Denoise Model, Animation Model, Face Model and Colorize Model) that is suitable for your video.

-
Step 4. To preview the video after applying the necessary AI models, select the desired option from these models provided. And finally export it to save your video.

FAQs of Removing Video Aliasing and Moire
Q1. Why need to remove moire from video?
A1. Moiré is an interference pattern that can occur in video footage when a repeating pattern, such as the weave of a fabric, is recorded by a camera. This can cause a series of concentric circles or a wavy distortion to appear in the footage, which can be distracting and reduce the overall quality of the video. Removing moiré from the video can improve the visual quality and make the footage more pleasing to watch.
Q2. What will make the video blurry?
A2.Video can become blurry for a number of reasons, including:
Conclusion
Poor video quality can be caused by many factors, such as noise or low resolution. One solution to improve the quality of such videos is to use an AI video upscaler.
HitPaw VikPea is an easy-to-use tool that uses mature AI technology to enhance low-resolution videos. It is designed to improve the overall quality of a video, including removing blur from the video. Download and try it to discover the magic!





 HitPaw Univd (Video Converter)
  HitPaw FotorPea
 HitPaw VoicePea


Share this article:
Select the product rating:
Daniel Walker
Editor-in-Chief
This post was written by Editor Daniel Walker whose passion lies in bridging the gap between cutting-edge technology and everyday creativity. The content he created inspires audience to embrace digital tools confidently.
View all ArticlesLeave a Comment
Create your review for HitPaw articles