5 Methods on How to Remove Background Noise in Premiere Pro
If you are big fan of video shooting and editing, then chances are high that you might have seen or observed a noise in the videos during editing. Many people use Premiere Pro remove background noise. And in this article we will see how to remove background noise in Premiere Pro as well as have a look at other features of the tool and methods that can be used to remove noise from video. Read below to know more about how to clean up audio in Premiere Pro.
Part 1. How to Remove Background Noise in Premiere Pro using the DeNoiser
Adobe Premiere has a DeNoiser Effect can reduce the background noise in a video. The below steps will help you know how to denoise audio in Premiere Pro. Even though this method is old, some users tend to like it and use if often. Have a look.
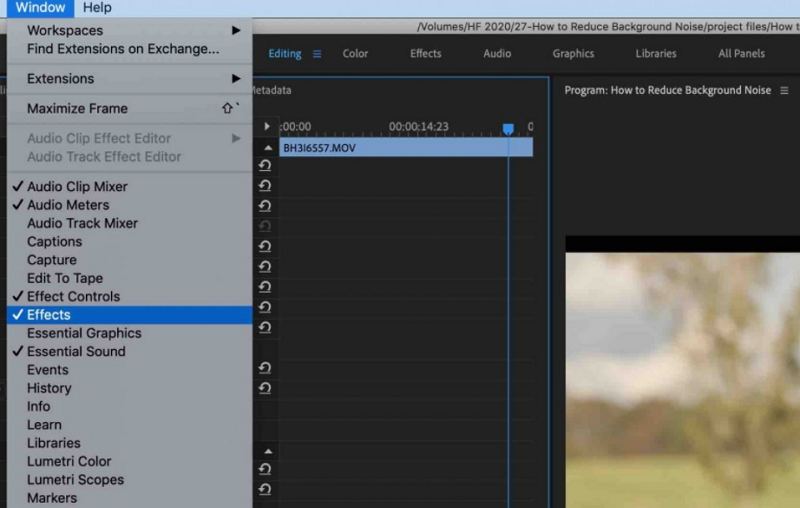
1.To begin with, select the video you wish to remove background noise in Premiere. After you have imported the video, navigate to Window and click Effects.

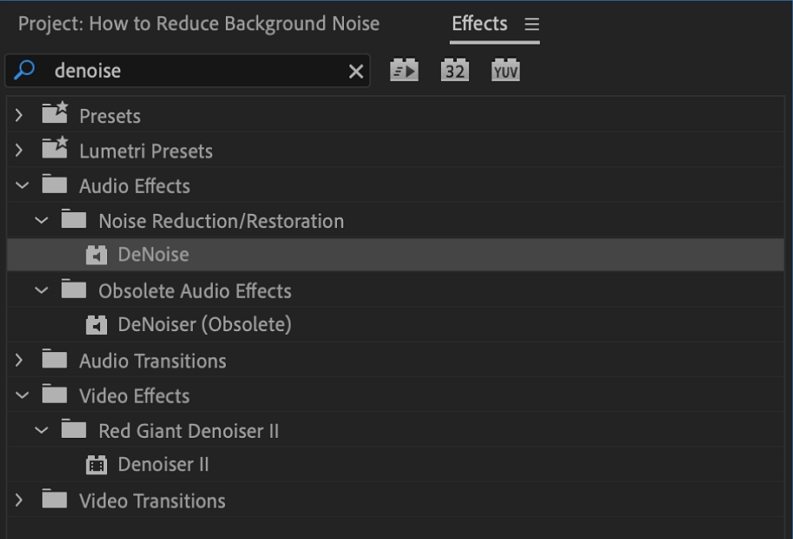
2.Now, click Obsolete Audio Effects and select DeNoiser (Obsolete). Here, the tool will ask permission from you whether or not you wish to use the latest version of the feature. Click NO and continue with the current DeNoiser (Obsolete) feature.

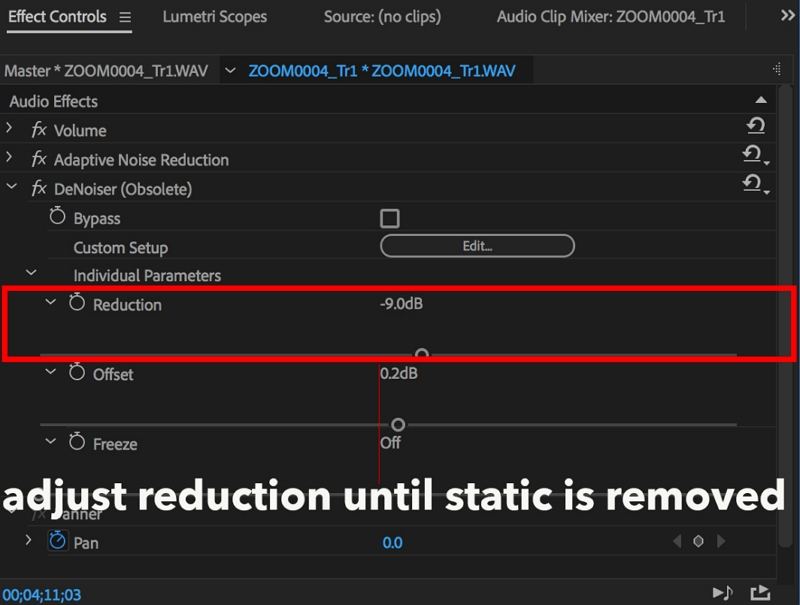
3.Choose the DeNoiser effect and then drag and drop it onto the video you wish to reduce noise Premiere Pro from. Once you have imported the DeNoiser effect onto the video, navigate to Effect Controls and click DeNoiser.
4.Click Reduce Noise By. Use the sliders on the bar to lower the noise. This will help you know how to lower background noise in Premiere. We find around -5 to -10 is usually the range you’ll be able to reduce to an unnoticeable level.

Part 2. How to Reduce Background Noise in Premiere using the Essential Sound Panel
Since using DeNoiser effect is an old Premiere Pro noise reduction method, we will now have a look at some of the modern methods that are used lately. This section will cover different features such as Reduce noise, Reduce rumble, DeHum, DeEss, and Reduce Reverb, which can be used to know how to get rid of wind noise in Premiere Pro CC 2017. Have a look.
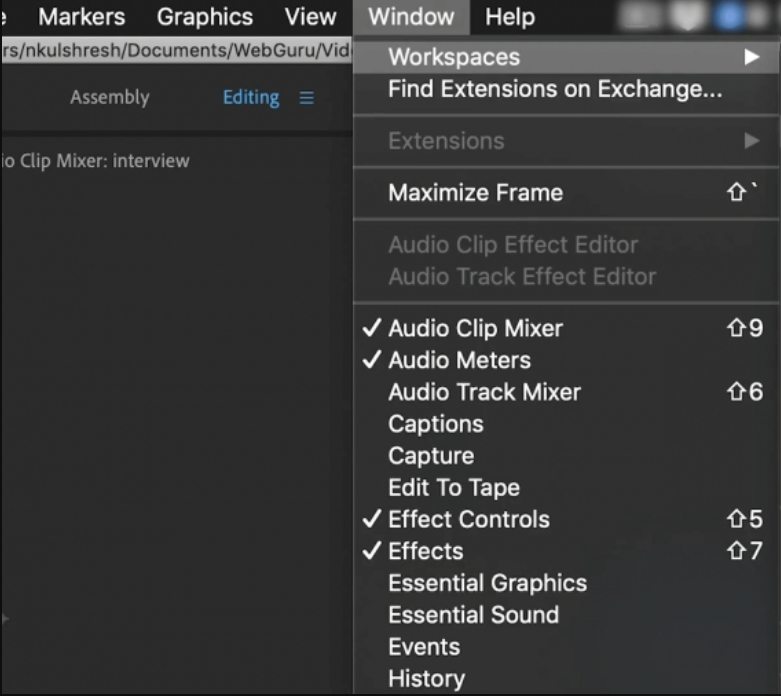
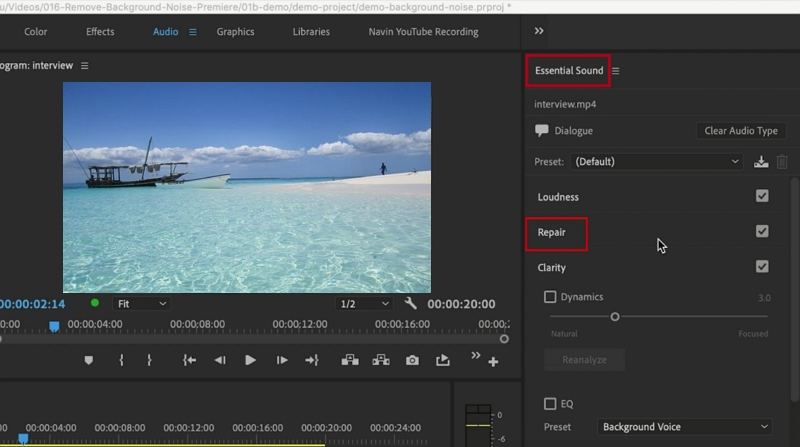
1.Before we begin to each feature, you need to navigate to the Essential Sound panel. This can be done by going to Window and clicking Essential Sound.

2.To proceed forward to know how to get rid of background noise in Premiere, import the video you wish to remove noise from and select Dialogues in the Essential Sound panel. Next, open the Repair section.

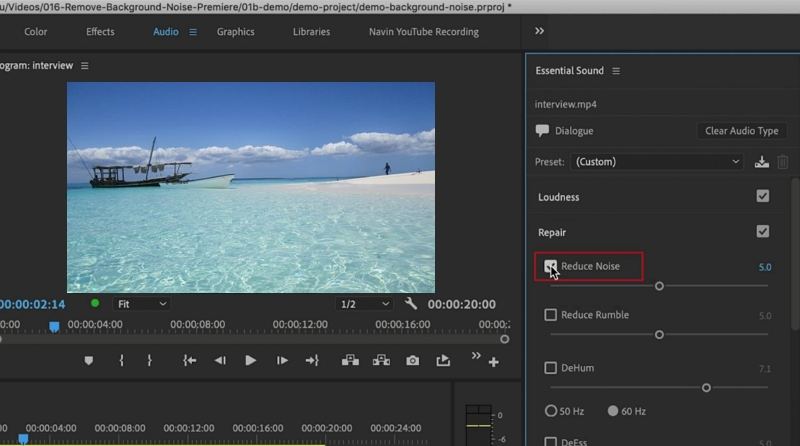
3.Use the Reduce Noise option to adjust the amount noise present in the video. Slide the bar as per your needs.

4.Users can know how to get rid of background noise in Premiere caused by wind movement. The Reduce Rumble option helps in lowering such noises.

5.Noise caused due to various frequency can be lowered by adjusting the slider for DeHum option.

6.If your video contains an irritating “S” sound, then that can be removed using the DeEss option. Adjust the slider as per your needs.

7.The Reduce Reverb option helps users know how to reduce background noise in Premiere Pro CC which is caused by an echo.

Part 3. How to Remove Hiss in Premiere Pro with CrumplePop AudioDenoise
Removing unwanted background noise like hiss can significantly enhance the quality of your audio. With CrumplePop AudioDenoise, an AI-powered audio denoiser, you can automatically detect and clean up noise in your audio clips effortlessly. Follow steps below to get to know how to get rid of background noise in Premiere Pro.
1.Visit the CrumplePop free download page to download the AudioDenoise plugin. Once downloaded, install the plugin on your computer.
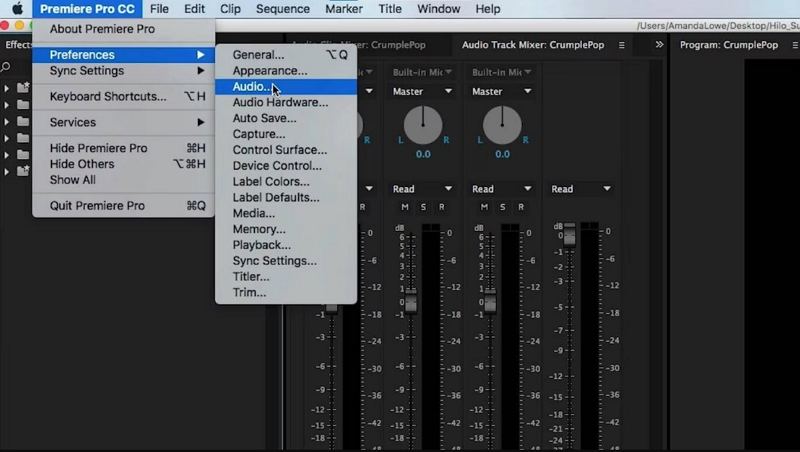
2.Open Adobe Premiere Pro and navigate to Preferences > Audio > Audio Plugin Manager.

3.Click the "Scan" button, then enable the AudioDenoise plugin. For additional help, watch CrumplePop's tutorial videos for step-by-step guidance.
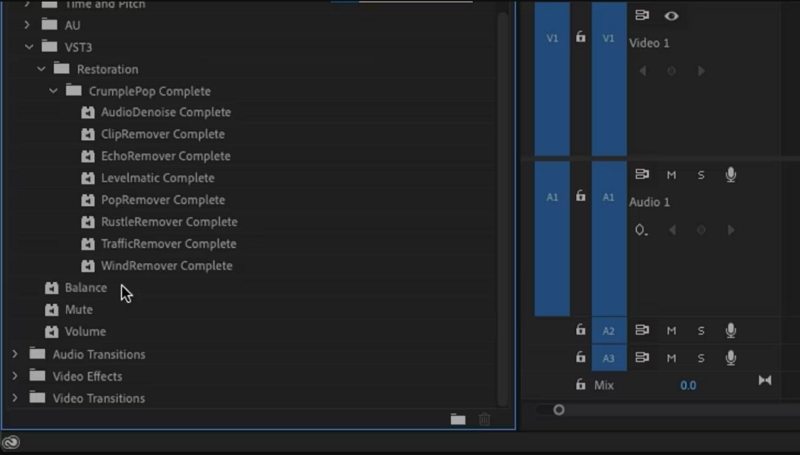
4.Import your video clip containing background noise into the Premiere Pro timeline. Go to the Effects panel, search for "AudioDenoise," and drag the effect onto your audio clip.

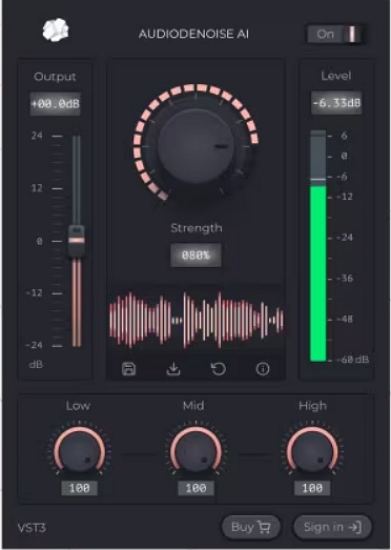
5.The AudioDenoise interface will open, providing an intuitive workspace to fine-tune the effect. Adjust the strength knob to control the intensity of the noise reduction.

6.Use the low, mid, and high frequency knobs to target specific noise ranges. Adjust the output volume slider on the left if the audio volume decreases.
7.To streamline your workflow, you can save and reuse settings by creating presets. Click the floppy disk icon within the plugin interface to save your current settings as a preset.
8.Name the preset and save it. To load a preset, click the download icon, locate your preset, and apply it to your clip.
Part 4: How to Reduce Background Noise in Premiere Pro With the Median Effect
The Median effect is a great tool for smoothing out occasional audio disruptions like clicks and pops. Unlike constant noise removal, it's best suited for infrequent, sudden sounds that disrupt an otherwise clean track.
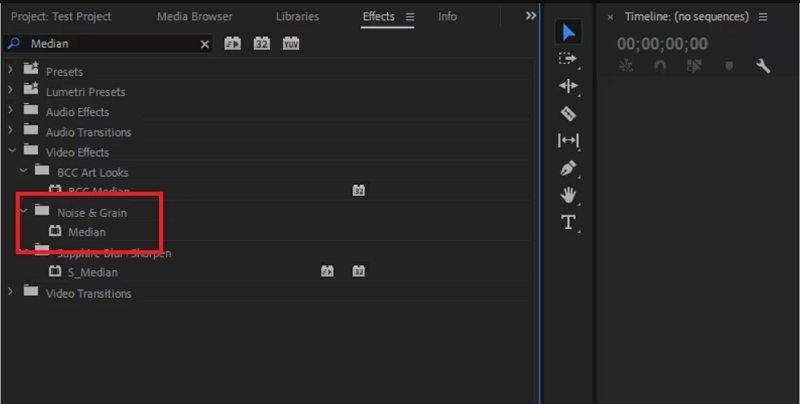
1.Open your Premiere Pro project and navigate to Effects > Video Effects. Under Noise & Grain, select Median.

2.Drag the effect onto your timeline and apply it to the relevant audio clip.
3.Adjust the Radius to fine-tune the level of smoothing applied.
4.The Median effect works by analyzing the overall audio and smoothing out outlier sounds, creating a seamless audio experience for your viewers.
Part 5. Best Alternative AI Noise Remover to Remove Background Noise from Video and Audio
For a simpler, automated solution to remove background noise from your audio and video files, HitPaw Univd (HitPaw Video Converter) is a fantastic choice. This AI-powered noise remover is perfect for those who want quick results without the complexity of professional tools like Premiere Pro. Whether you're working on dialogue, voiceovers, or narration, HitPaw ensures high-quality results with minimal effort. It's also compatible with formats and codecs that Premiere Pro doesn’t support.
- Automatically remove background noise from the audio and video
- Remove unwanted hum and hiss, fans, air conditioner, or other noises
- Compatible with MP4, MOV, MKV, FLAC, MP3, AAC, and more
- Batch clean up noise from multiple files simultaneously
- Perfect for podcasts, dialogue, narration, and voiceovers
- Simplifies the process with AI Noise Suppression
How to Get Rid of Background Noise with HitPaw Univd
Free download and install HitPaw Univd to a Windows or Mac computer and follow the steps below to get rid of background noise.
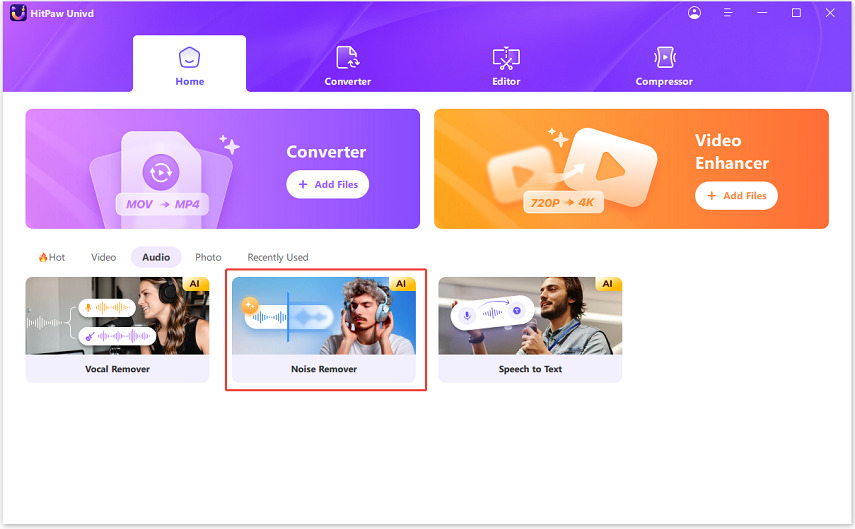
Step 1.Launch this program, and switch to the Toolbox tab where you can download the AI feature "Noise Remover".

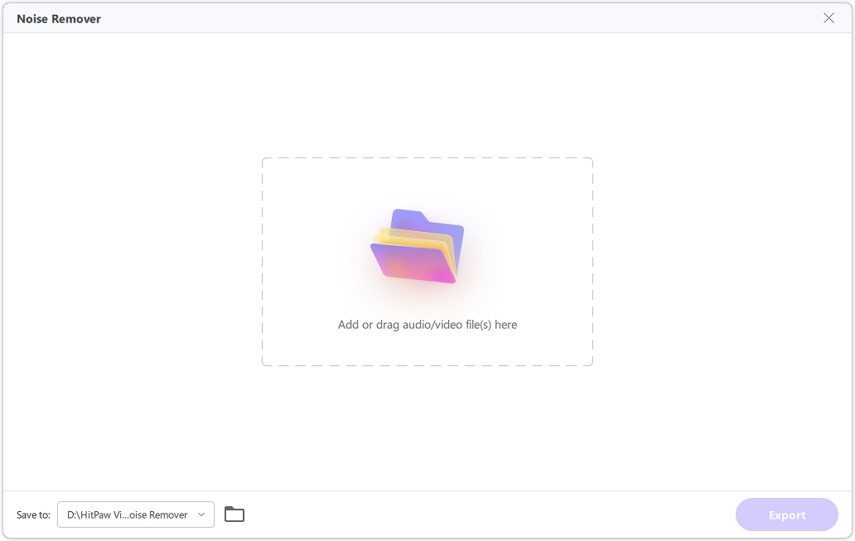
Step 2.Drag or add your file that you'd like to get rid of noise.

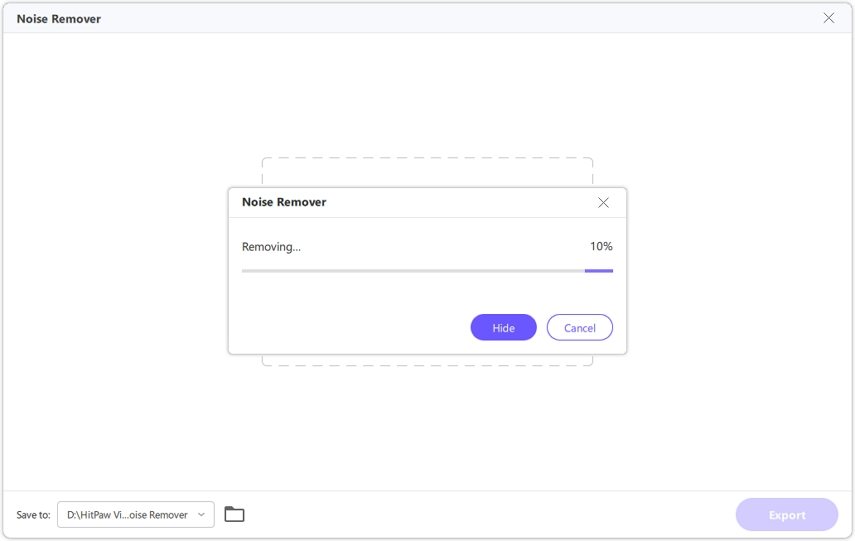
Step 3.Wait for the auto noise removing process to complete.

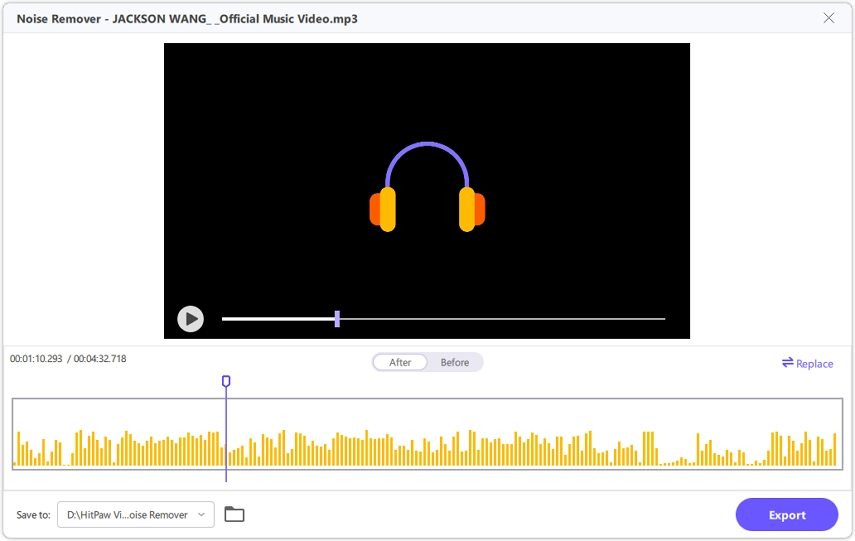
Step 4.After the process, you can export the file without noise.

Thus, we can remove background noise easily using HitPaw Univd. Free download it now to have a free trial.
Conclusion
In a nutshell, you just had a look at different methods that can be used to know how to remove background sound in Premiere Pro. We saw how to use the old DeNoiser feature to get rid of the noise. In addition to this, we also had a look at different features such as Reduce noise, Reduce rumble, DeHum, DeEss, and Reduce Reverb, which can be used to reduce the noise. Lastly, if you are not that a tech geek, you can always use HitPaw Univd to get rid of the noise from the video and audio. This AI noise remover can get rid of noise from video and audio with a simple click.






 HitPaw FotorPea
 HitPaw VoicePea
  HitPaw VikPea (Video Enhancer)


Share this article:
Select the product rating:
Daniel Walker
Editor-in-Chief
My passion lies in bridging the gap between cutting-edge technology and everyday creativity. With years of hands-on experience, I create content that not only informs but inspires our audience to embrace digital tools confidently.
View all ArticlesLeave a Comment
Create your review for HitPaw articles