[Step-by-Step] How to Use iMovie Green Screen
Shooting the video with a blue or green color backdrop allows you to replace the background with fascinating and mesmerizing backdrops. However, if you don't put the green screen backdrop while creating the video, the quality of the video might get compromised upon editing the background.
Of all the options you could look at while creating a video with a green screen, iMovie green screen remains one of the most prominent. If you don't know how to use green screen in iMovie, tune into this exciting guide to use the green screen iMovie effortlessly.
Part 1. How Do You Do iMovie Green Screen?
Before looking at the green screen in iMovie, talking about the credentials of the iMovie is important. It is a fantastic video editing tool that empowers you to customer the video wonderfully, editing almost every parameter with great effect. Although iMovie doesn't offer the smoothest and simplest user interfaces, you can quickly gather prior knowledge of this software.
Apart from allowing you to edit the various aspects of the video, it also provides you with the luxury of going for the iMovie green screen. This way, you can pretend to be creating the video in a green screen iMovie making the video relevant and sublime.
Here's the step by step guide to learn how to use green screen on iMovie.
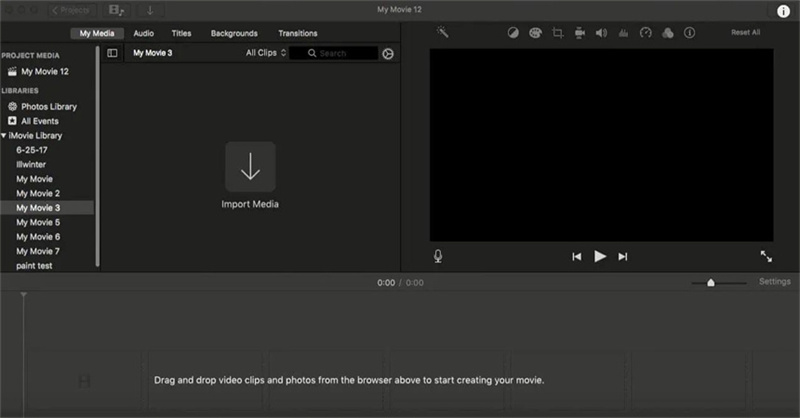
1.First, you must launch the iMovie and click the File icon. After tapping the File option, you must hit the Import button to upload the background and green screen video. You need to ensure that iMovie supports the video you will upload there. Otherwise, you won't be able to edit the videos in the iMovie. You can also drag your video to the Project Library from the ''Event Browser''.


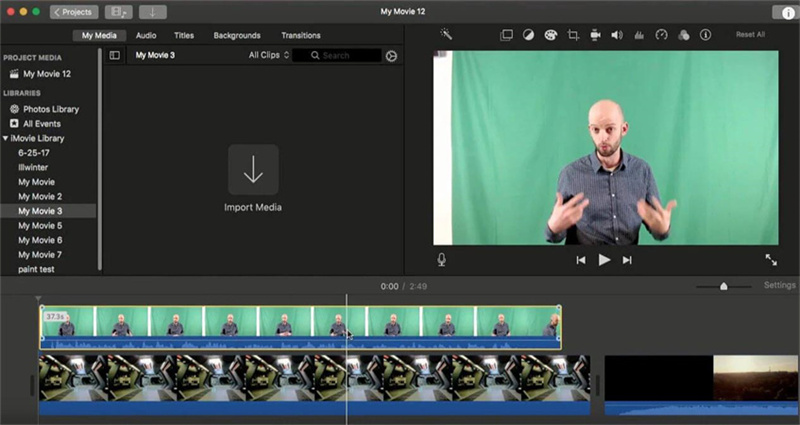
2.In this phase, you can drag the background clip into your timeline. You can also trim, crop, and adjust the background video/image per your requirements. Next, you must drag the green screen footage to the timeline after hitting the green screen icon.

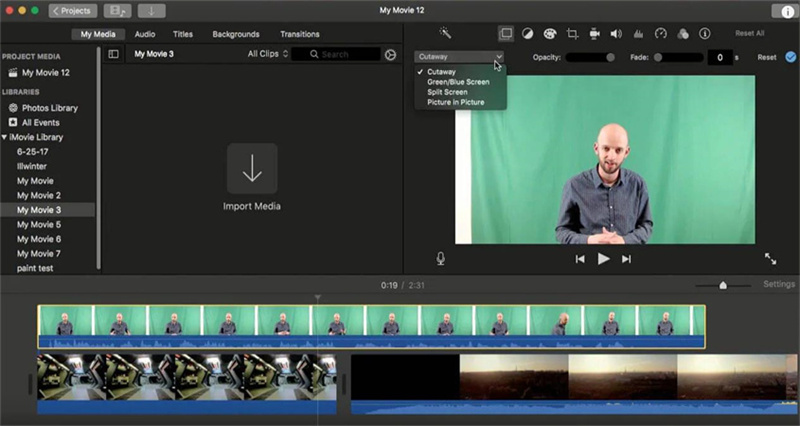
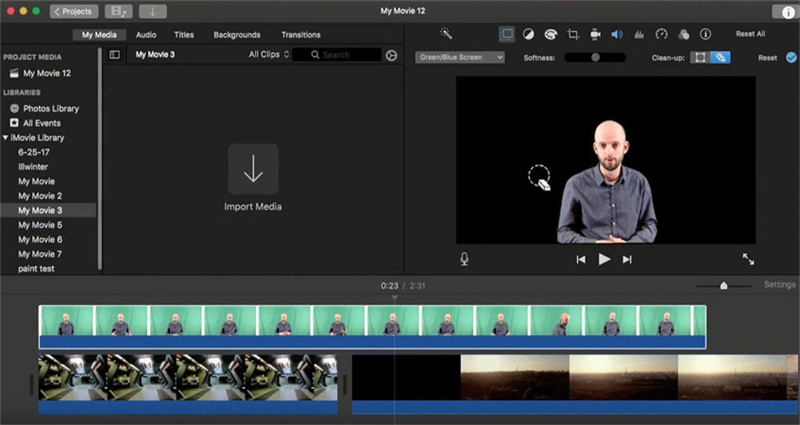
3.You'll need to ensure the two pieces of footage you're editing have the same length. Tap on the green screen footage after visiting the timeline; a yellow box will mention it. Navigate to your preview Window, tap the ''Video Overlay Settings,'' and select the Green/Blue Screen option. After doing this, you'll see the real magic. You can also customize the effort to enhance the final courtesy of the Cleanup and Softness tools.
That's it; after following all these steps, you can apply the green screen in iMovie amazingly.
Part 2. The Best alternative to Green Screen iMovie with HitPaw Video Object Remover
Going for the green screen iMovie isn't simple for people who have just started creating videos with green screens. Thus, it would help if you aimed at the HitPaw Video Object Remover, which is quite a remarkable way to apply the green screen effects to the video in no time The best thing which sets apart the HitPaw Video Object Remover from all the other tools is that despite offering automatic services, it doesn't mess up the resolution of the video.
Apart from eliminating the video background and adding the green screen background to the video, you can also eliminate unwanted objects from the videos. Importantly, HitPaw Video Object Remover takes no time before applying the green screen effects courtesy of the effortless user interface.
Features- Allows you to remove annoying and unwanted objects from the videos quickly
- Mind blowing AI powered tool that allows you to apply the screen effects to the video
- Easy to use tool that allows you to change the video background in a few seconds
- Helps you to identify and track the movements of the object via AI recognition
- Lets you customize the erased area by using the magic selection brush
- Comes up with an affordable premium package
Here's the step by step guide to applying the green screen on videos via HitPaw Video Object Remover.
Step 1:After navigating to the official webpage of the HitPaw Video Object Remover, you'll need to install and launch the software. Next, press the Choose File icon to upload the video to which you'd like to apply the green screen background.

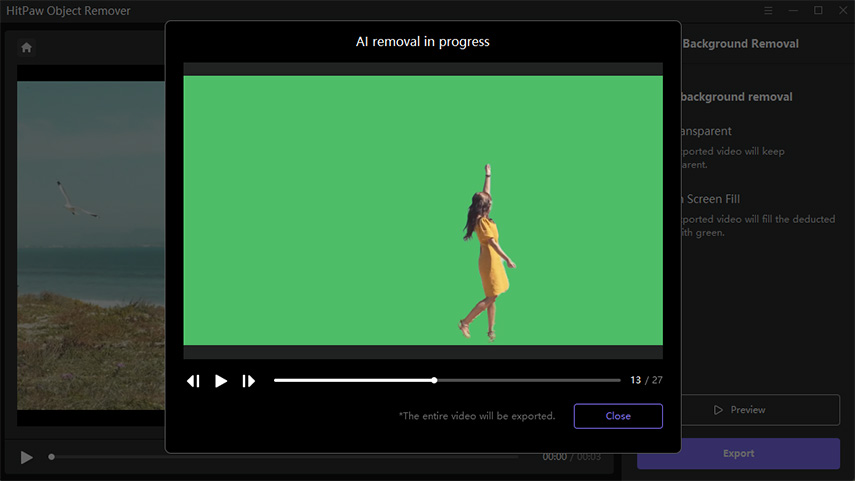
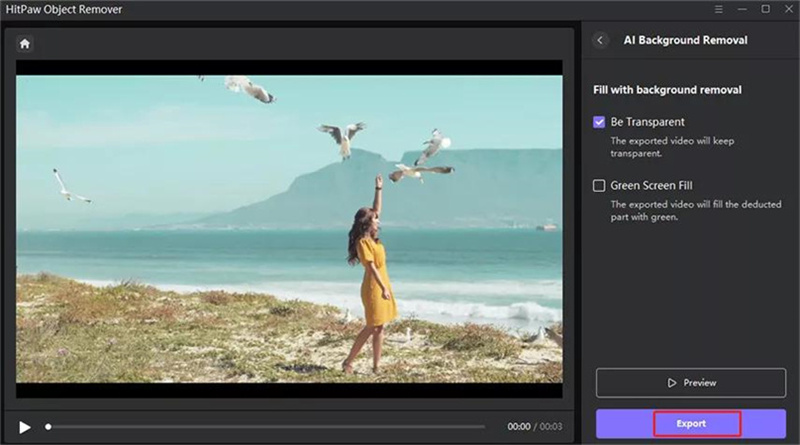
Step 2:Once the video is added to the HitPaw Video Object Remover timeline, you must select the AI Background Removal technique. Since you aspire to apply the green screen effects, you must choose the ''Green Screen Fill'' mode. Doing so assists you in making the backdrop of the video completely green.


Step 3:After adding the green screen effects, you'll need to review the video. Tap on the Preview icon and then initiate reviewing the video, which empowers you to adjust the video. If you aren't satisfied with the results, you can also undo all the changes before editing the video from the word go. Next, press the Export icon to download the video to the selected destination.

Part 3. FAQs of iMovie Green Screen
Part 4. FAQs of Green Screen Backdrop
Q1. How do I get rid of the green screen on iMovie mobile?
A1.
If you're looking to get rid of the green screen from the video on mobile iMovie, you'll need to follow the simple steps listed below
1.After launching the video project in the iMovie, you'll need to add the background to the video. Click the Add Media option and select the Green screen video from your category list.
2.Opt for the Blur/Green screen after hitting the More icon. This way, you'll see the green screen clip added as your backdrop. You can tap on the Auto button to get rid of the green screen background or from the clip. You can also move or trim the background the match green screen clip's length.
Q2. How do you add a background on iMovie?
A2. Adding the background into the iMovie is simpler than you think. You'll need to launch the video in the iMovie and click the Add Media button. Press on the Backgrounds icon and then select the various background options, including the gradient, solid color, pattern, or more. Finish adding the background to the video by hitting the ''Add to Project'' icon.
Final Words
If you aim to use the green screen with iMovie but can't find the appropriate options, take exciting notes from this guide. We have mentioned the step by step detailed guide in this post to help you learn how to use the green screen on iMovie.
Since using the green screen in iMovie could be hectic for newcomers, opting for the HitPaw Video Object Remover remains the best option. It allows you to apply the green screen effects automatically without messing up the quality of the video. Apart from adding the green screen background to the video, HitPaw Video Object Remover can also eliminate unwanted objects from the videos.




 HitPaw Photo Object Remover
 HitPaw VikPea (Video Enhancer)


Share this article:
Select the product rating:
Daniel Walker
Editor-in-Chief
My passion lies in bridging the gap between cutting-edge technology and everyday creativity. With years of hands-on experience, I create content that not only informs but inspires our audience to embrace digital tools confidently.
View all ArticlesLeave a Comment
Create your review for HitPaw articles