Full Guide on How to Reverse a Video in iMovie (Mac/iPhone/iPad)🔥 🔥
Video reversing is one of the popular techniques used by professional as well as amateur editors to add that extra comic sense or flair of suspense. Reversing a video is not at all a simple task and requires the help of professional editors to get it done effectively and quickly. For iOS users, iMovie is a stop solution for all types of video editing requirements and video reversing is no exception. So, if you want ways on how to reverse a video in iMovie on your Mac, iPhone, and iPad this article will take you through all the needed steps.
Part 1. How to Reverse a Video in iMovie on Mac
Checkout the guide below on how to reverse a clip in iMovie on Mac:
Step 1. On your Mac system, open the iMovie app and then browse and add the video that you want to reverse.
Step 2. Choose the added video drag it to the timeline and select it.
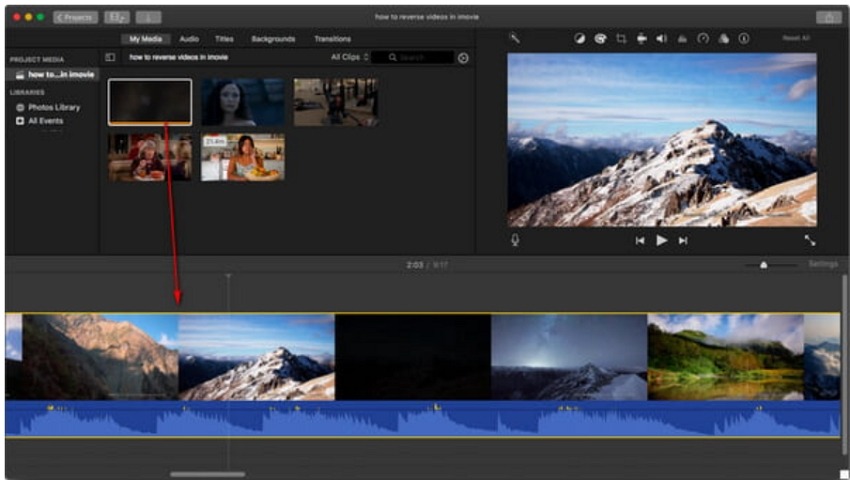
Step 3. Next, you need to click on the Clock(Speedometer) button present above the viewer and the Reverse option can be seen under the tab. Choose the checkbox of Reverse and you can now see the icon of reverse-play at the timeline on the clip.
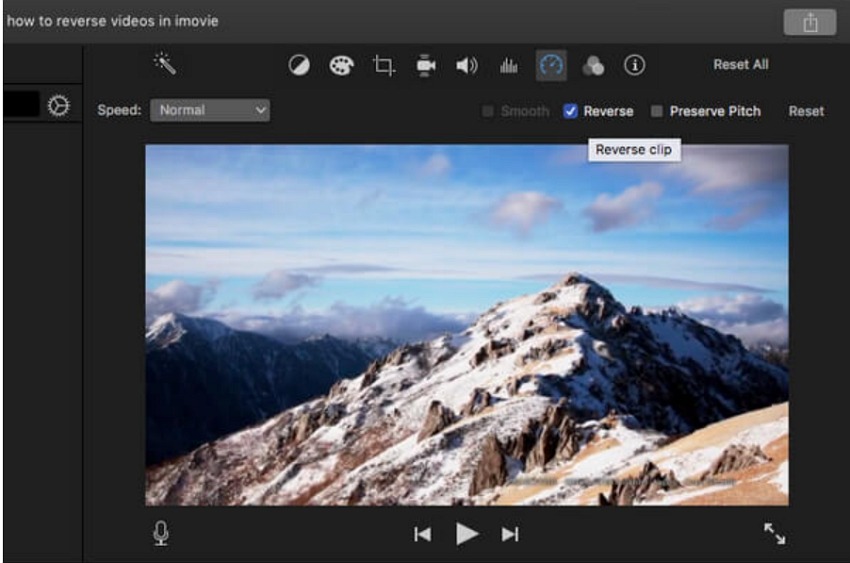
Step 4. Speed can be adjusted as required and also other editing like adding effects, cropping and more can be applied. Finally, export the video and choose to save it locally or directly to another device or YouTube.
Note: The above steps are for the iMovie 10 versions and it has to be noted that steps might differ slightly based on the iMovie version.
Part 2. How to Reverse a Video in iMovie on iPhone/iPad
For iPhone and iPad, the iMovie does not support playing video in reverse as there is no built-in feature for the same. But no need to worry as there are third-party apps available that can get the video reversing task done and one of the popular names is Reverse Cam. Find out the steps below on how to reverse video in iMovie alternative iPhone app Reverse Cam.
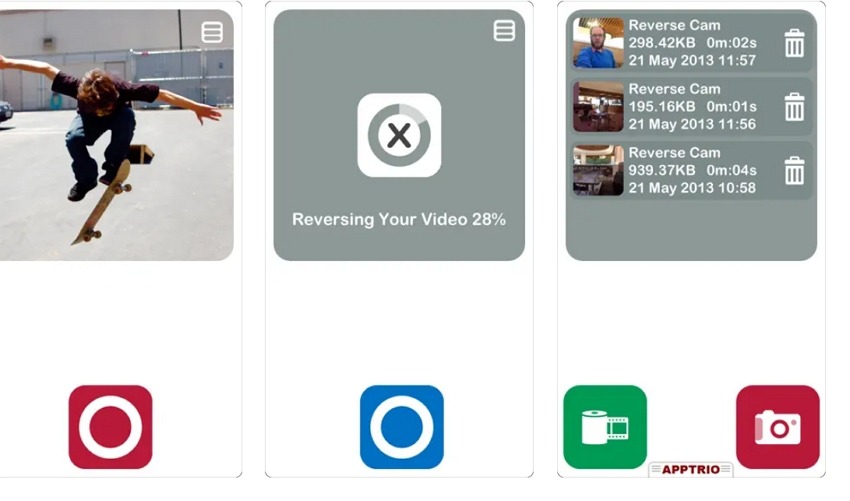
Step 1. First of all, download the Reverse Cam app on your iPhone/iPad from the Play Store.
Step 2. The app gives you the choice to either add a video from your library or record one as desired.
Step 3. Once the video is added to the app, you next need to select the playback speed.
Step 4. The app will start processing the video and reversing it.
You can now move this reversed video to iMovie for further editing.
Part 4. Bonus Tip: Best Alternative to iMovie for Creating Videos
iMovie is a good tool for reversing videos and performing other editing functions on your Mac, but if you want to create professional-looking videos using cutting-edge features, HitPaw Edimakor is for you. Using the exceptional features of this Windows and Mac-based software, high-quality videos can be created in no time. You also have access to the Android and iOS device version of the software.
The AI-enabled functions of the tool further make your video creation task simple, quick, and more creative.
Key Features
- All needed video editing tasks are supported like crop, trim, split, merge, adding texts, and more
- AI-powered tool allows dynamic texts to your videos with an option for text customization by changing font, color, size, and animations
- With support for speed ramping, the software allows adjusting video speed for highlighting moments and adding engaging effects
- Make your videos more engaging and interesting by adding a variety of transitions and effects.
- The software comes packed with more than 100 filters in 7 different themes for you to set the video mood. Also variety of stickers in different categories like Hello Kitty, decal, laptop, kawaii, and more are available.
- Support AI-powered speech-to-text and text-to-speech
- Processed videos can be exported in different formats as well as pre-set social media profiles.
Steps to create and edit videos using HitPaw Edimakor
Step 1. Download and install HitPaw Edimakor software on your system. On the main page, you need to tap on Create a project. Using the Import Files button, browse and add the video clips that need to be edited.
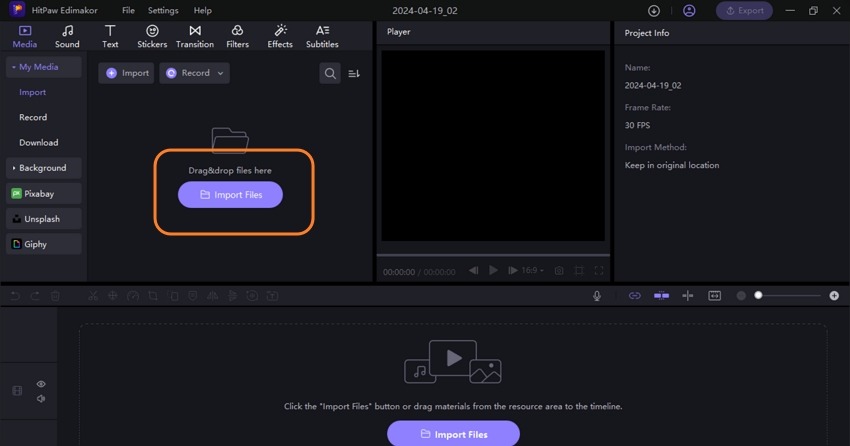
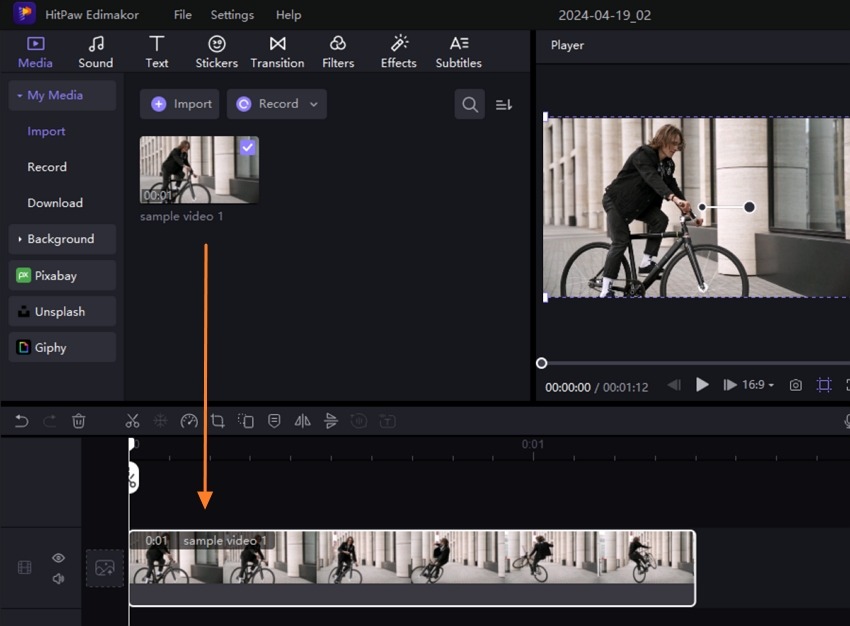
Step 2. Drag and move the added video clip(s) to the timeline below.
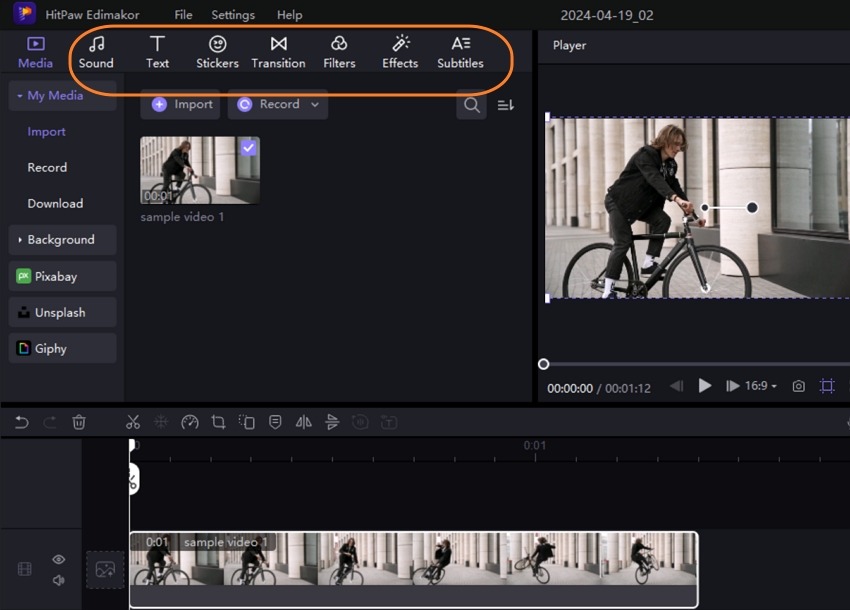
Step 3. Desired editing tasks can be chosen from the top menu bar. The selected effect, filter, text, or any other function can be applied by simply moving it to the timeline.
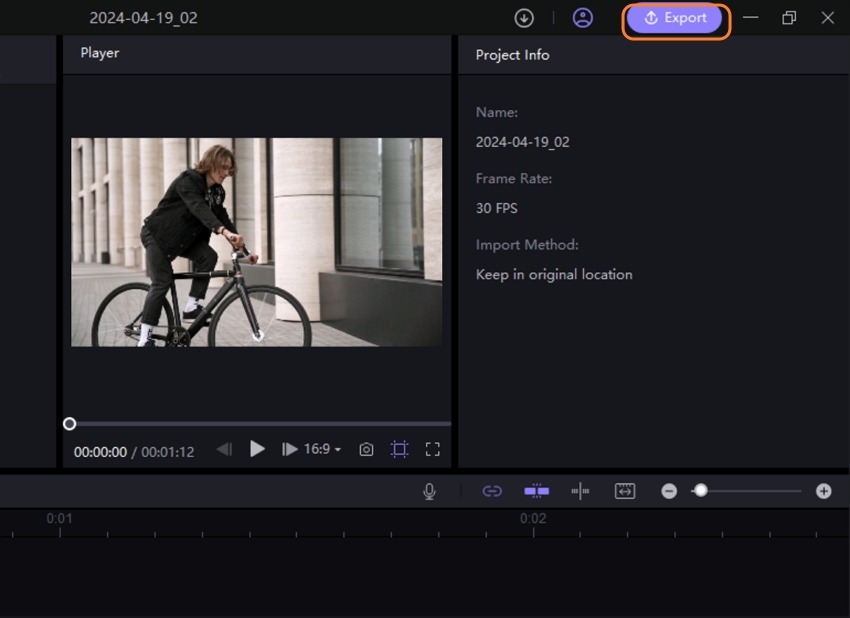
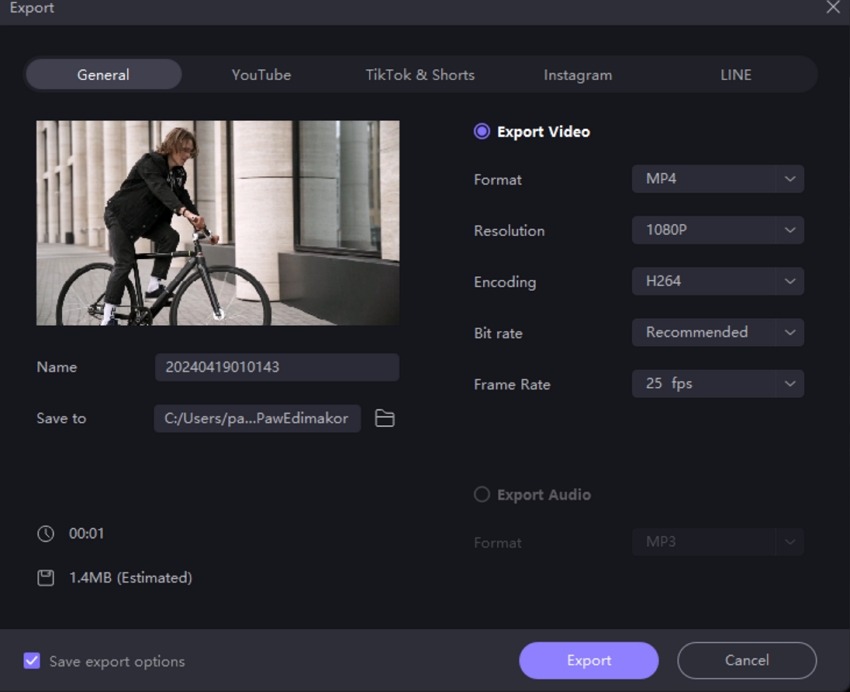
Step 4. Check the preview from the right-hand side of the interface. After all editing tasks are done, tap on the Export button on the top-right. A pop-up window will appear from where you need to choose the export settings.
Finally, tap on the Export button to save your processed file.
Conclusion
So now you know how to reverse a video in iMovie. Video reversing on your Mac can be done using iMovie, but for iPhone and iPad you would need another third-party tool. Here the best alternative that you can consider for all types of video creation and editing tasks is HitPaw Edimakor. The software works on Windows, Mac, Android as well as iOS, and once installed, it can be used to create all types of excellent quality videos quickly and easily. For professionals, the software offers all required features and at the same time, it is also apt for for amateurs and beginners, owing to its clean and simple interface and a long list of basic, advanced, and AI-based functions.


 HitPaw Univd (Video Converter)
  HitPaw Screen Recorder
 HitPaw VikPea (Video Enhancer)


Share this article:
Select the product rating:
Daniel Walker
Editor-in-Chief
My passion lies in bridging the gap between cutting-edge technology and everyday creativity. With years of hands-on experience, I create content that not only informs but inspires our audience to embrace digital tools confidently.
View all ArticlesLeave a Comment
Create your review for HitPaw articles