[Lastest!] How to Remove Green Screen in Premiere Pro 2025
Where a green screen helps you take video quality to the next level, you can't ignore that sometimes a green screen might prevent you from delivering a message through the video you've been trying to.
Thus, going for the Premiere Pro Green screen removal makes complete sense as this software is designed to edit the video brilliantly. To help you know how to remove green screen in Premiere Pro, this guide introduces the informative guide.
Part 1. Why do you need Premiere Pro to Remove Green Screen?
Before revealing how to get rid of green screen in Premiere Pro, it is equally important to talk about why someone should go for the Adobe Premiere Pro Green screen remove option.
Most tools that offer you to remove the green screen will, unfortunately, end up causing the video quality loss-making things even worse for you. However, you won't find that type of an issue with Adobe Premiere Pro, as it is one of the most professional video editing software.
Citing Adobe Premiere's ability to remove the green screen while maintaining the original quality, many experts will recommend you acquire the services of Adobe Premiere Pro. The only downside of Adobe Premiere Pro you might have to work on is that it comes up with a hectic user interface that might be tricky for newcomers.
Part 2. How to Remove Green Screen in Premiere Pro?
Knowing how to remove green in Premiere Pro is super easy. Premiere Pro is one of the most professional ways to edit videos, and managing the green screen on the video is only a matter of a few seconds.
If you intend to remove green screen Premiere Pro, all you need to do here is follow the step-by-step guide below.
Step 1. Navigate to the Effects tab on the timeline's left side and find the '' Ultra Key''To begin with, you'll need to install Adobe Premiere Pro on the PC and then launch the software to start the proceedings.
Next, import the video with the green screen and ensure you put the green screen footage on the top layer of the timeline.
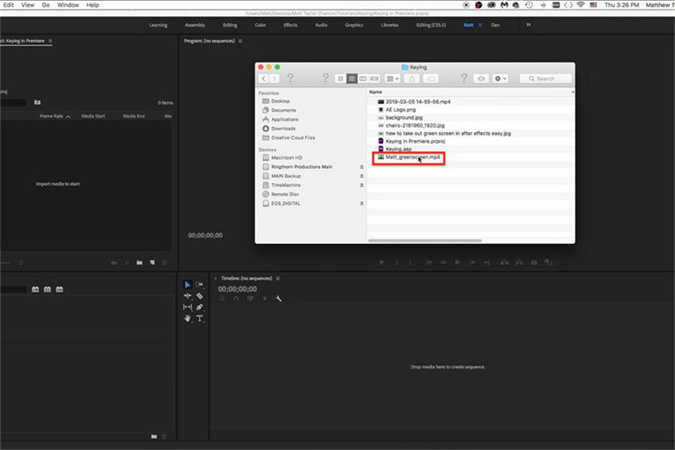
Step 2. Navigate to the Effects tab on the timeline's left side and find the 'Ultra Key'
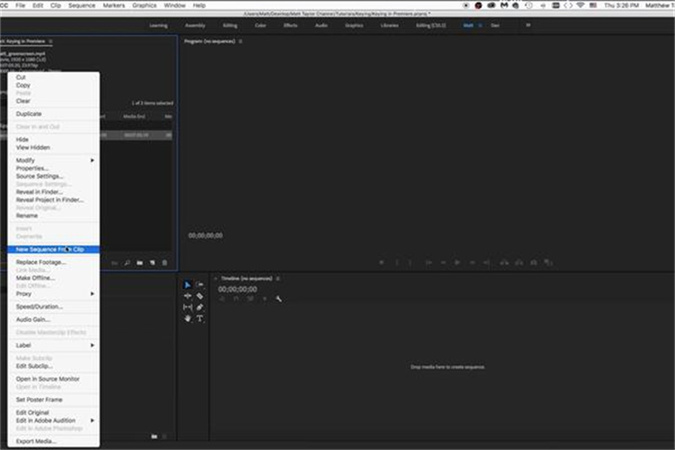
Step 3. In this phase, you only need to drag the Ultra Key effect on your timeline's green screen clip.
Next, visit the effects control tab at the top side of the Adobe Premiere Pro Window.
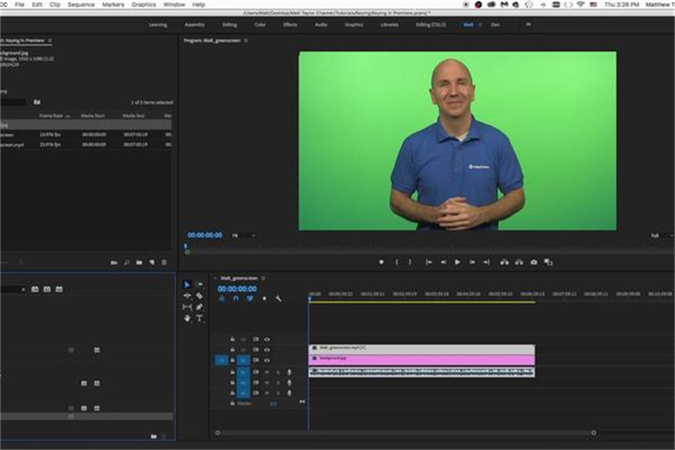
Step 4. Rely upon the eyedropper to choose the green color on the video. Now, you can select all the green screen footage.
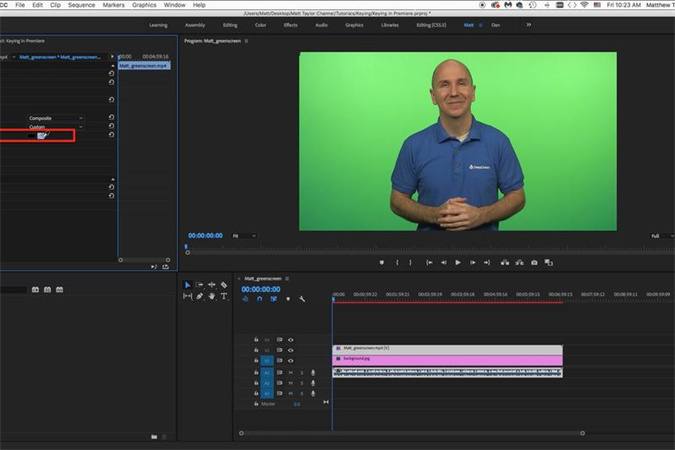
Step 5. The default settings will mostly work, but you can opt for other Settings adjustments to fine-tune your effects. Navigate to the option under the Matte Generation and adjust the numbers before removing the noise.
Since the green screen background can't be perfect, you can only make some highlights 'keyed out' if you make the necessary adjustments with your Matte Generation.
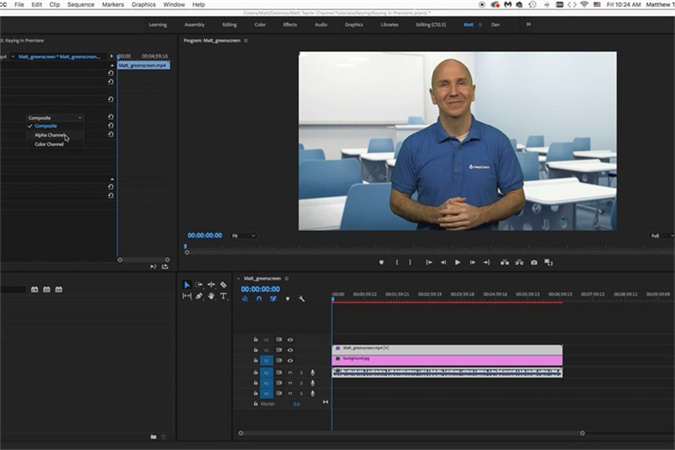
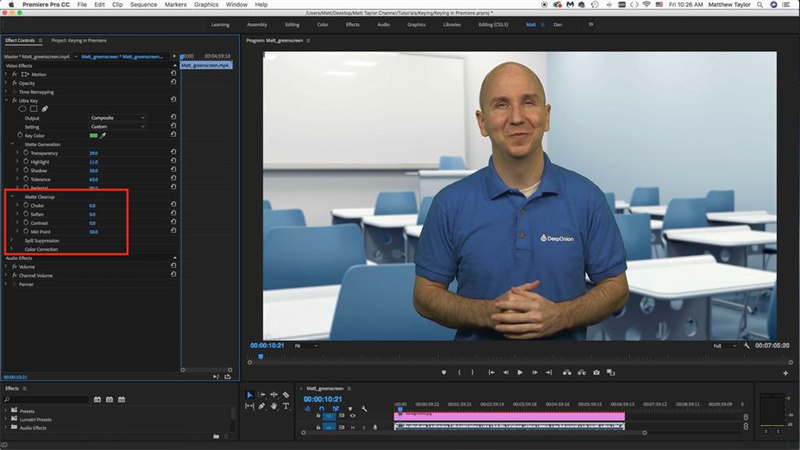
Step 6. Work on the object's edges by using the Matte Cleanup options. With Choke shrinking the edges, Soften will make your edges fuzzier.
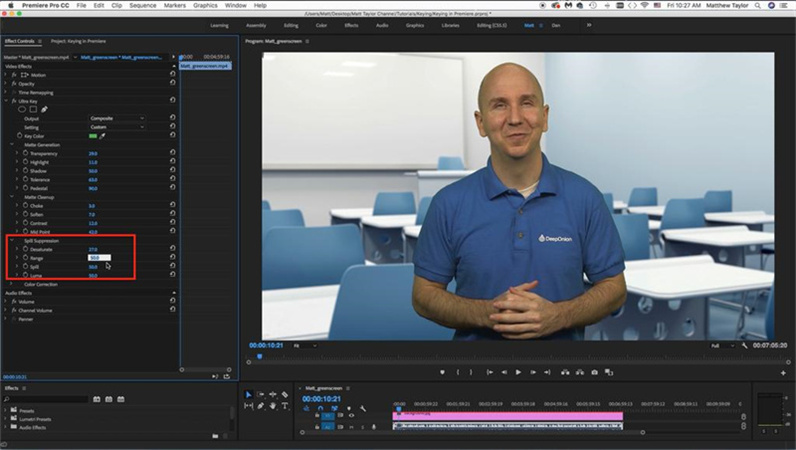
Step 7. Adjusting the edge color of the subject is possible courtesy of the Spill Suppression. That's all you've had to know how to remove green screen in Premiere Pro.
Part 3. The Best Video Background Remover than Premiere Pro
You can remove green screen in Premiere Pro, but this software also comes up with some shortcomings. Apart from coming up with a slick user interface, Premiere Pro might take longer than usual to remove green screen in Premiere Pro. Luckily, you can avoid facing all this chaos courtesy of the HitPaw Video Object Remover.
This AI-powered software blesses you with a massive opportunity to quickly eliminate the green screen background or any unwanted objects from the video. Compared to Premiere Pro, HitPaw Video Object Remover doesn't come up with a slick user interface and makes getting rid of the green screen effortless.
- Allows you to remove background in 3 seconds
- Eliminates the objects from the videos automatically
- Allows you to customize the removed area through a magical selection brush
- Offers the simple user interface
- 100% safe
Features:
- Step 1. Download and Installation
- Step 2. Import Video
- Step 3. Choose the Background Fill Mode
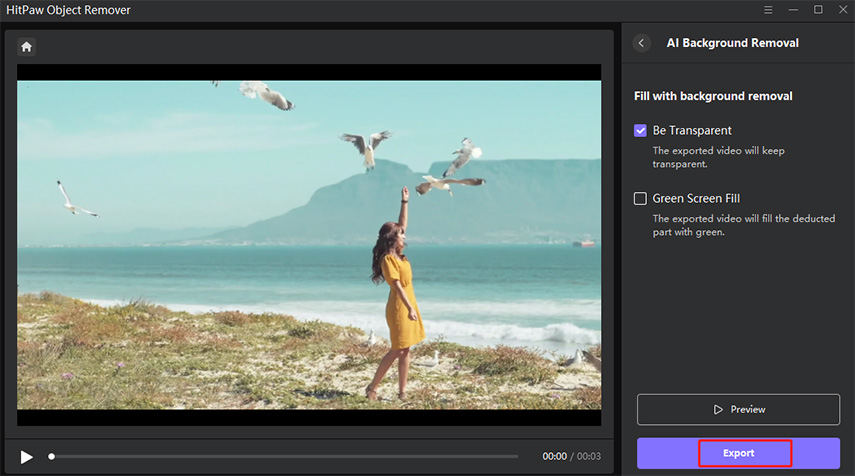
- Step 4. Preview and Export the Green Screen Video
Download HitPaw Video Object Remover on your Computer.
To upload the video from which you want to remove background, click ‘Select file.’ Alternatively, you may just drop the video into the edit box.

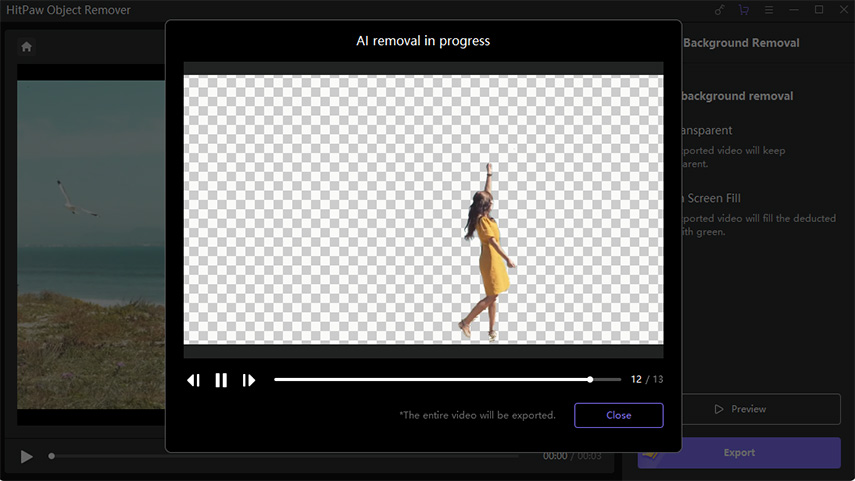
Choose the Background Fill mode you need in HitPaw Video Object Remover.
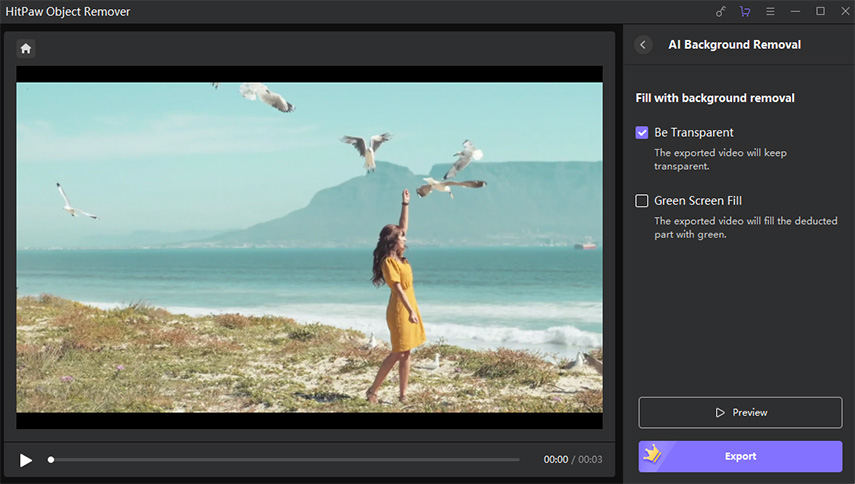
Green Screen Fill: The exported video will have the missing segments filled in with a green screen.
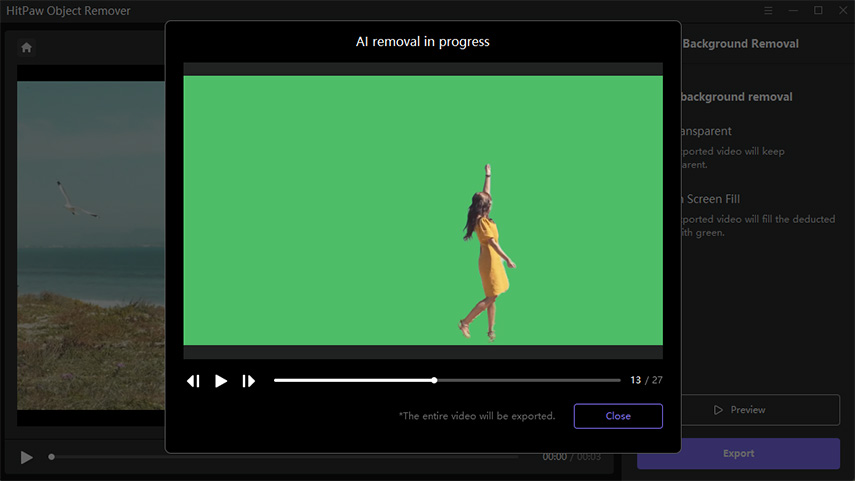
What is more, you can also try the transparent function: the background of your video will become transparent.
Preview the removing effection and export the video to your computer.
Part 4. Extra Tips for Remove Green Screen Premiere Pro
1. What is motion tracking in Premiere Pro? And how does it work in Premiere Green Screen Removal?
You can keep track of a moving object in a video courtesy of Motion tracking in Premiere Pro. Motion Tracking has always been a handy option, From helping you blur or cover a face to removing the green screen background.
I. Launch Premiere Pro and import the video before selecting the Title.
II. Select the video, click, and click on the Tools icon. Proceed ahead by tapping the Motion Tracking.
III. Tap on the Select Object icon, and doing so will help you see the resizable frame. Next, tap on the Track object, which will allow you to track the green screen footage on the video.
2. There are Color Key and Ultra Key for removing the green screen in Premiere Pro; which is more suitable for me?
You can remove green screen in Premiere Pro using the ultra key and key color. Navigate to the Effects panel to find the Ultra Key, and under Ultra Key icon, you can see the Key color options.
The Ultra Key and Key color options are similar and will help you opt for the Premiere Pro green screen removal at the same pace and speed. However, the only difference between those two terms is that ultra key offers more options to help you apply a better finishing touch to the video. Hence, using the Ultra key when going for the Adobe Premiere Green screen removal option is recommended.
Conclusion
Struggling to remove green screen from your video isn't a sight to behold. However, this post reveals how to remove green screen in Premiere Pro.
To remove green screen in Premiere Pro, you only need to follow the simple steps. We've recommended the HitPaw Video Object Remover as the best way to remove green screen. Apart from offering a user-friendly interface, it doesn't affect the resolution of the video while erasing the green screen.


 HitPaw Photo Object Remover
 HitPaw Watermark Remover
  HitPaw VikPea (Video Enhancer)

Share this article:
Select the product rating:
Daniel Walker
Editor-in-Chief
My passion lies in bridging the gap between cutting-edge technology and everyday creativity. With years of hands-on experience, I create content that not only informs but inspires our audience to embrace digital tools confidently.
View all ArticlesLeave a Comment
Create your review for HitPaw articles