Top 8 Ways to Fix Choppy Video Files for Smooth Playback
Choppy video playback can be frustrating, whether it's a gaming clip, movie, or home video. But don’t worry—before giving up on the file, there are several simple fixes you can try. In this guide, we’ll cover 8 effective ways to fix choppy video files and get them playing smoothly again, even for high-resolution formats.
Part 1. Why Do Videos Get Choppy?
Choppy videos can be incredibly frustrating, but understanding the causes is the first step toward fixing the issue. Several common factors can lead to video stuttering:
- Large File Sizes: High-resolution videos, especially 4K or 8K, require significant bandwidth and processing power to play smoothly. If your device struggles to handle the data, playback becomes choppy.
- Unsupported Formats: Certain video codecs or formats may not be compatible with your device or software, causing playback issues.
- Corrupted Downloads: Interrupted downloads or streaming issues can lead to corrupt video files, resulting in choppy playback.
- Slow Internet Connection: Poor Wi-Fi or overloaded networks can cause buffering and interruptions during streaming.
- System Overload: Running too many programs or resource-heavy applications can drain your system, making it difficult to play videos smoothly.
If you're still facing choppy video issues, HitPaw VikPea offers an easy, AI-powered solution. It quickly improves video quality, removes stuttering, and upscales resolution in just a few clicks. Let’s explore how this tool can smooth out your videos and deliver professional-quality results effortlessly.
Part 2. How to Fix A Choppy Video File with Best AI Video Enhancer?
Now that we know the causes of janky videos, let's fix them. Tweaking settings helps, but AI video repair tools are simpler for choppy files.
HitPaw VikPea (formerly HitPaw Video Enhancer) is such the best AI video repair tool. It can automatically detect the video issue and repair it with GPU acceleration in fast. There is no ads or watermark for your repairing!
Features
Here are the key features of HitPaw VikPea:
- Uses powerful AI upscaling to increase video resolution from SD to HD, 4K, and even up to 8K. Great for enhancing old, low-quality videos.
- AI colorization can add natural, realistic color to black-and-white or monochrome videos with a single click.
- Optimized AI models specially designed to repair and enhance anime videos as well as human faces.
- Intelligent AI denoising removes unwanted background noise while preserving important video details.
- AI deblurring can reduce motion blurs, out-of-focus blurs, and other fuzziness to sharpen video.
- Compatible for Windows and Mac video repair
Steps of Using
Here is how to fix a choppy video file using HitPaw VikPea:
Step 1:First up, download HitPaw from the link below and install it on your computer. The installer will guide you through the process - just keep clicking 'next'. Once installed, launch the app. Time to fix those videos!
Step 2:The Video Repair module is right on HitPaw's main interface. You'll see handy presets like fix video sound, fix video screen loss, and video correction - just click the scenario that matches your choppy video issues. Now, click the "Intelligent Detection and Repair" button at the bottom to let HitPaw analyze the footage and customize the AI enhancement.

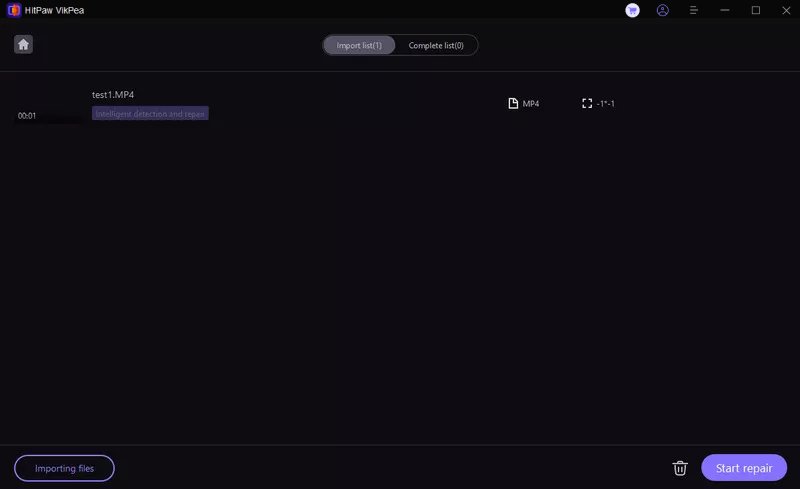
Step 3:Once your videos are imported, click the "Start Repair" button in the bottom right corner. Then sit back and relax! The AI will start detecting issues and restoring your videos.

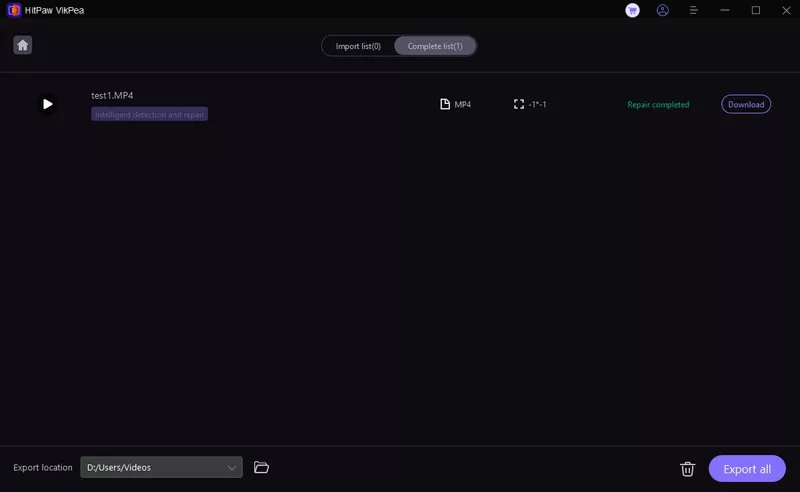
Step 4:After HitPaw finishes working its magic, your repaired videos will appear in the Completed section. Click "Download" next to each video or "Export All" to save the enhanced files to your computer.

Note: You can also find some online video repair tools with our guide!
Part 3. Other 7 Available Ways of How to Fix Choppy Video
Beyond AI repairing, you can also take some common ways to try to fix your choppy video files.
1. How to Fix Choppy Video in Final Cut Pro
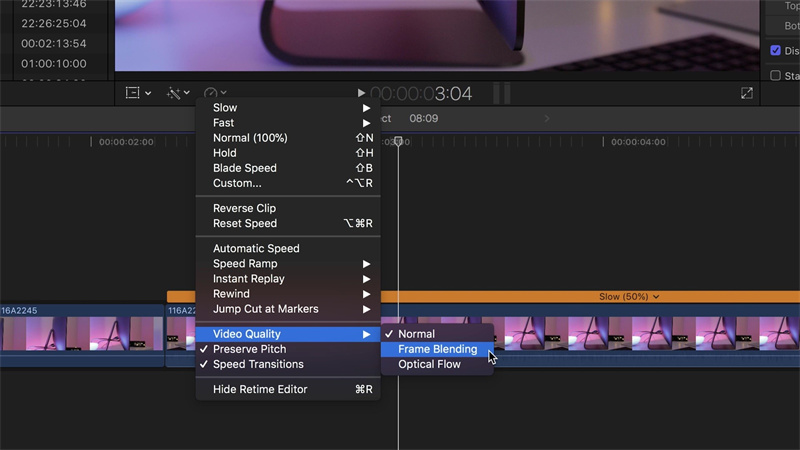
In Final Cut, choppy previews can be due to rendering needing to catch up. Try switching playback to Better Performance mode or render clips/sections before viewing.
Limiting effects, transitions, and generators can help if they're overtaxing your system. Close other programs and tabs to devote maximum resources to Final Cut for smoother editing.
Steps:
- Open Final Cut Pro and go to the Playback Settings.
- Switch to Better Performance mode to reduce resource demand.
- Render the necessary clips or sections for smoother previews.
- Limit effects, transitions, and generators, which can overtax your system.
- Close background programs to allocate more resources to Final Cut.
Pros
- Improves real-time playback.
- Reduces system load without compromising quality.
Cons
- Requires manual rendering.
- Limiting effects might affect the creative process.
After repairing, you can also use it for video resolution upscaling.
2. Update Graphics Drivers on PC
Outdated graphics card drivers can hinder video playback performance on PCs. Head to your card manufacturer's site periodically to download the latest driver updates.
This ensures maximum compatibility with new video codecs plus optimizations for smooth playback. Keeping your GPU drivers current is an easy way to nip choppiness in the bud.
Steps:
- Identify your graphics card model (NVIDIA, AMD, Intel, etc.).
- Visit the manufacturer's website.
- Download and install the latest driver updates.
- Restart your computer to apply changes.
Pros
- Ensures better compatibility with modern video codecs.
- Improves overall video and gaming performance.
Cons
- Requires periodic manual updates.
- Driver updates can occasionally introduce new issues.
3. Try a Different Video Player
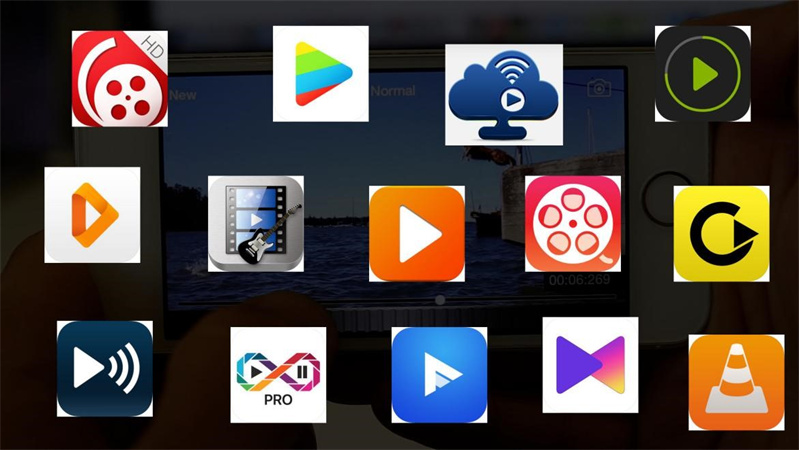
If choppiness persists across files, the issue may be your preferred media player. Experiment with alternative programs like VLC, Media Player Classic, KMPlayer, etc.
Some handle playback and render better for certain codecs and resolutions. Finding the right software fit can make a world of difference.
Steps:
- Download alternative video players (e.g., VLC, KMPlayer, Media Player Classic).
- Open the choppy video with the new player.
- Experiment with different playback options within the player.
Pros
- Alternative players often handle a wide range of codecs better.
- Customizable playback options.
Cons
- Requires trial and error to find the best player.
- Different interfaces may need getting used to.
4. Clear Your Browser's Cache
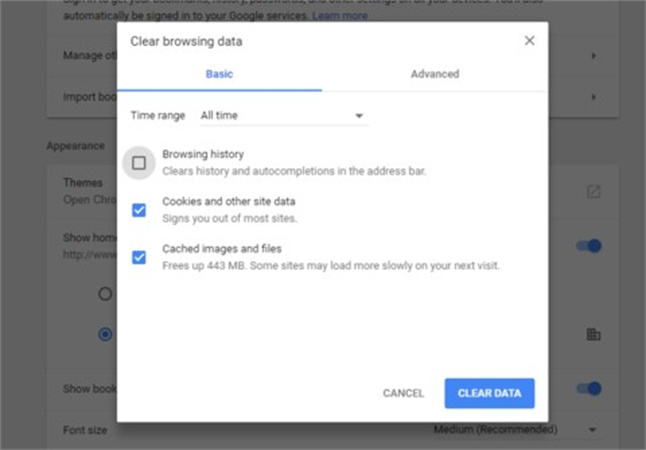
Browsing history, cookies, and cached data can bog down browsers over time. This hampers streaming playback.
Hit CTRL+SHIFT+Delete in Chrome or Firefox to open the clear cache menu. Check all history/cookie options, then click "Clear." Wiping the clutter forces cached video to re-buffer properly.
Steps:
- Open your browser and press CTRL+SHIFT+Delete (or CMD+Shift+Delete on Mac).
- Select Clear Browsing Data.
- Choose the time range and check Cached Images and Files.
- Click Clear Data.
Pros
- Boosts streaming performance.
- Fixes caching issues that may cause choppy video playback.
Cons
- May temporarily slow down browsing as cache rebuilds.
- Removes stored login information.
5. Scan for Malware
Sneaky malware running in the background can overload your resources, causing video lag.
Run a full system scan with reliable antivirus software to detect and remove any malicious processes hogging your bandwidth, memory, or GPU. Cleaning up infections restores performance.
Steps:
- Install a trusted antivirus software.
- Run a full system scan.
- Remove or quarantine any malware detected.
- Restart your system to complete the process.
Pros
- Removes background processes that slow down video playback.
- Enhances overall system performance.
Cons
- Scanning can take time depending on the system.
- May require purchase of antivirus software.
6. Re-import or Copy the Video again
A faulty import process can create issues with video files. Try re-importing the choppy video into your editing program or destination drive.
Or copy the source file again uncompressed. This may generate a better optimized, glitch-free version for smooth playback.
Steps:
- Delete the original file from the editing program.
- Re-import the video or copy it from the source location again.
- Ensure that no compression occurs during import.
Pros
- Fixes issues caused by corrupt or faulty imports.
- Generates a cleaner version of the video file.
Cons
- May not work if the original file is corrupt.
- Re-importing large files can take time.
7. Reduce the Video Size and Resolution
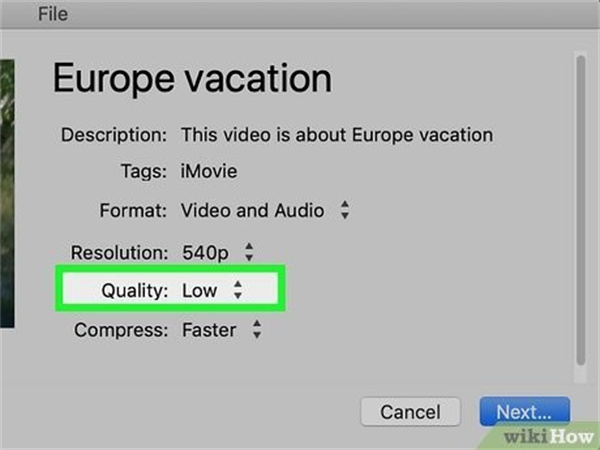
Large or high-res video strain systems. Use video converter software to scale choppy files down to lower resolutions like 720p or 1080p.
Shrinking massive videos reduces resource demand, so playback smoothing out. You can also re-encode at a lower bit rate. Moreover, shrinking video size and resolution can also make your video less stuttery as compared to when it is in very high size and resolution.
Steps:
- Open a video converter software (e.g., HandBrake, VLC).
- Import the choppy video file.
- Choose a lower resolution (e.g., 720p or 1080p).
- Convert and save the new video.
Pros
- Reduces resource demand on lower-spec devices.
- Smoothens playback of large video files.
Cons
- May result in a noticeable drop in video quality.
- Requires additional processing time.
Part 4. FAQs of How to Fix Choppy Video
Q1. Why does my video keep stuttering?
A1. If one video lags consistently, the file itself is likely the issue. Corrupted downloads, incompatible codecs, wrong resolutions, and other glitches can make a particular video clip chronically choppy. Trying repairs, conversion, or re-downloading may help.
Q2. How do you find the choppy effect on CapCut?
A2.
Set your phone on a tripod and film yourself walking through the tripod, step by step, ending with you covering the phone with your hand. Now open the clip in the CapCut app.
Scroll forward a little bit and then hit freeze here. Scroll forward again. Hit freeze again, and then delete the part in between, and just do that step by step for every sequence hitting freeze, and then deleting the part in between, and you can already see that stutter effect.
Do that for the whole video, and then just shorten all these clips to around 0.2 seconds, and that's it.
Q3. Why are video frames dropped during playback?
A3. When a video can't keep up with playback speed, frames get skipped to catch up. This causes stuttering. Insufficient network bandwidth, incompatible codecs, overloaded hardware, and other issues can all force frames to be dropped.
Bottom Line
How to fix choppy video? Troubleshooting and the right tools can help. Simple settings tweaks can work, but for damaged files, AI repair tools like HitPaw VikPea, is much powerful.
Download HitPaw now to quickly restore quality and achieve smooth playback with advanced enhancement algorithms.



 HitPaw Edimakor
 HitPaw Univd (Video Converter)
  HitPaw FotorPea


Share this article:
Select the product rating:
Daniel Walker
Editor-in-Chief
My passion lies in bridging the gap between cutting-edge technology and everyday creativity. With years of hands-on experience, I create content that not only informs but inspires our audience to embrace digital tools confidently.
View all ArticlesLeave a Comment
Create your review for HitPaw articles