Full Guide to Add Text in CapCut on PC/Mac/Android/iPhone 🐾
This guide is all about teaching how to add text in CapCut. While other tutorials focus on a single subject, i.e., captions, subtitles, or casting, the sections here cover all these and explain the processes in the most convenient way you can ever learn.
In addition, one of the following segments also suggests using an alternate solution to make your task way easier compared to what CapCut offers. Continue reading to see and understand how to add text on CapCut easily and quickly.
Part 1: How to Add Text in CapCut Online
CapCut offers multiple options when it comes to adding text to your videos. For instance, you can add a title to your clip, insert a caption into the video to make it appear throughout the playback, or auto-generate subtitles in your preferred language to make your clip understandable to people all over the world.
You can learn how to add text to CapCut online by following the instructions given below:
Step 1: Bring the Source Video to the Timeline
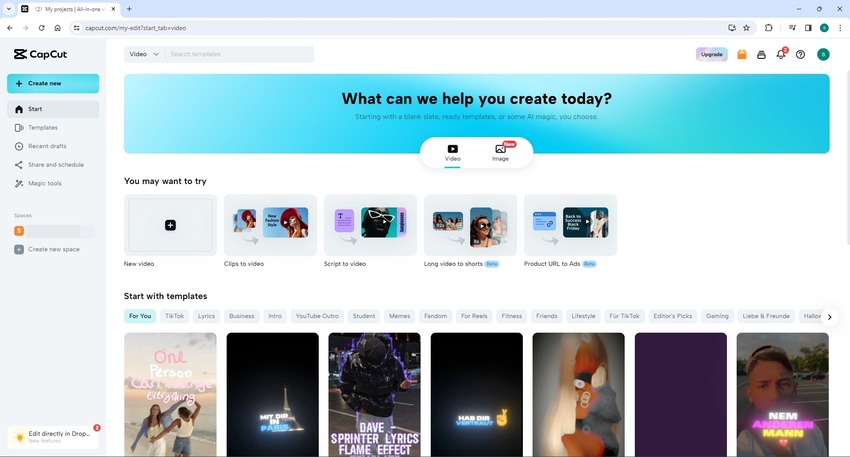
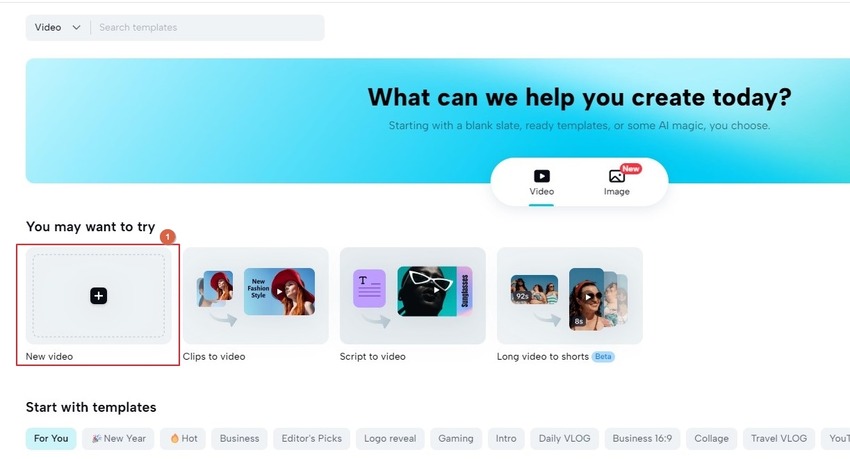
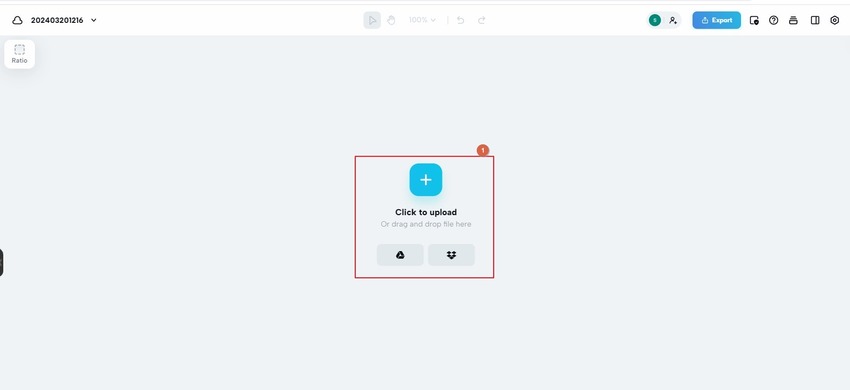
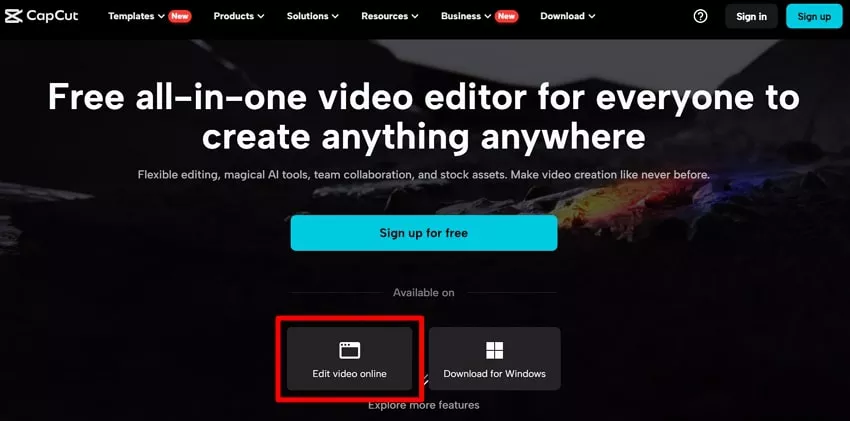
Open your favorite web browser and go to https://www.capcut.com/. Register for a free account if not already signed up, and once done, sign in to your profile. On the landing page, click New video from the upper section, click the Click to upload option on the next page, locate and upload the source video, and drag it from the center pane to the Timeline in the lower section of the interface.
Step 2: Add a Title (Big Text)
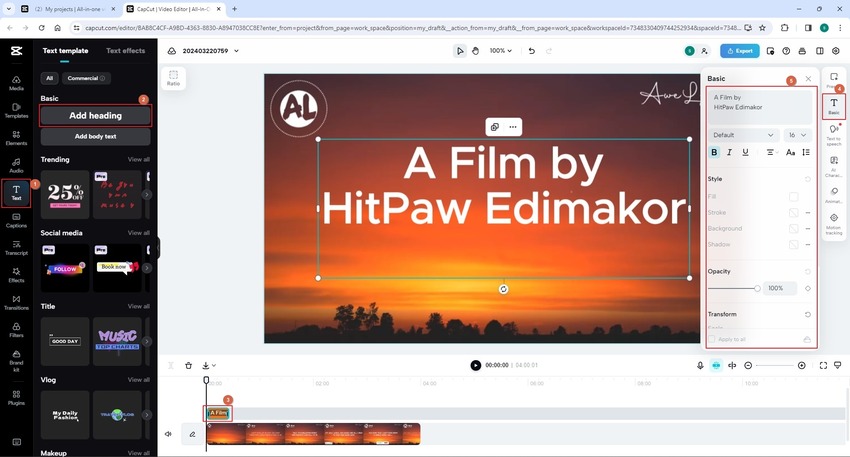
Place the Playhead (Scrubber) on the frame in the Timeline where you want to add the title in the clip. Click the Text button from the left bar, and click Add heading from the center pane to automatically insert the title preset into the Preview window and to create its track in the Timeline.
Click inside the placeholder text in the Preview window and replace it with the title of the video. Drag either the left or right handle of the text segment in the Timeline to extend the duration of its visibility.
Optionally, use the formatting options in CapCut’s Basic floating panel to adjust the look and feel of the text.
Step 3: Add Captions/Subtitles and Export
Place the Scrubber on the frame in the Timeline from where you want to add a caption or subtitles. Click the Captions button from the left bar, and choose your preferred option to generate auto-subtitles/captions, add them manually, or upload a custom file from your local computer. In the case of music videos, you can click the Auto lyrics option to make CapCut automatically generate the lyrics and sync them with the clip.
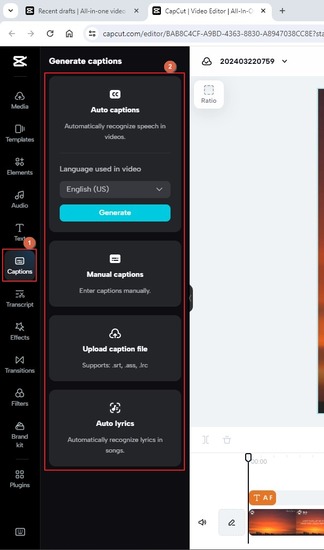
Once everything is done, click Export from the upper-right area of the page and follow the on-screen instructions to define output preferences and export the video.
Part 2: How to Add Text in CapCut Desktop Program on PC/Mac
If you want more control over your content and lift all limitations that CapCut’s online variant imposes, using a desktop program would be your best bet. Furthermore, because CapCut supports Windows and Mac platforms, you can install it on any computer you’re comfortable with.
Follow the below steps to learn how to add text in CapCut on a PC:
Step 1: Add a Video to the CapCut’s Timeline
Download CapCut from the official website and install it on your computer. Launch the program, click New project on the main screen, click Import on the video editor window, and import the source video to the program. Drag the media clip to the CapCut’s video editor Timeline at the bottom.
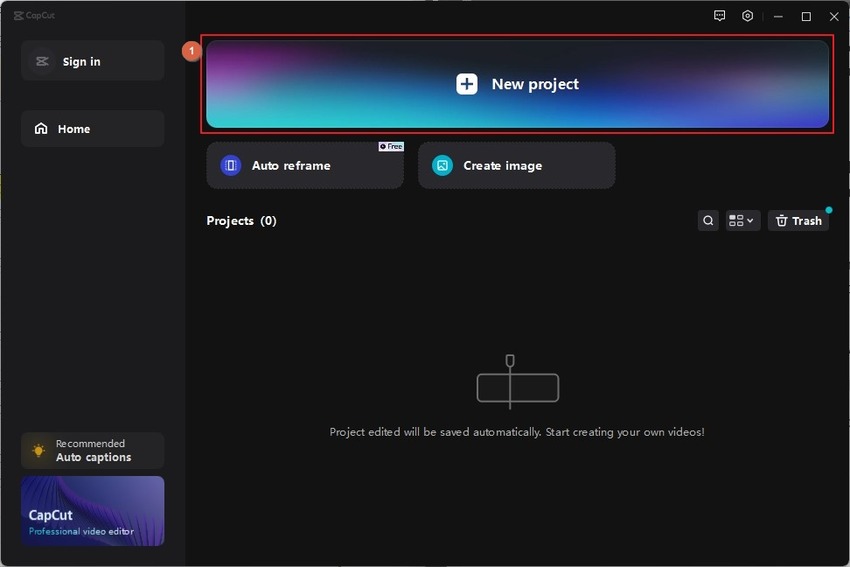
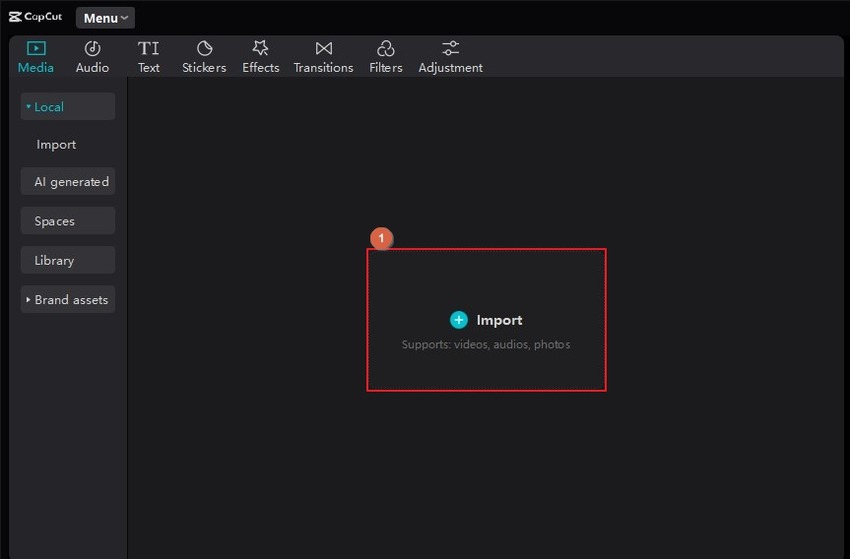
Step 2: Add Video Title (Big Text)
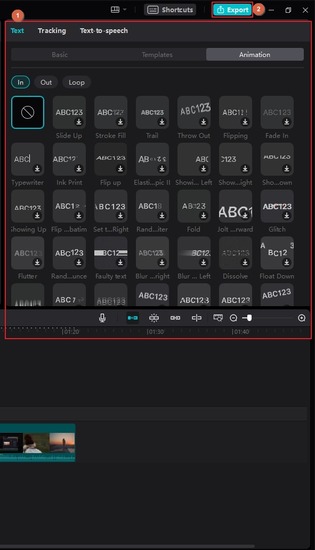
Click the Text button from the top, expand the Add text menu on the left pane, and click to choose your preferred category from the available options. Then, click your preferred preset from the central pane to place it over the video. Use the tabs and options in the right pane to edit and format the text to make the title look more appealing. Click Export from the upper-right when done.
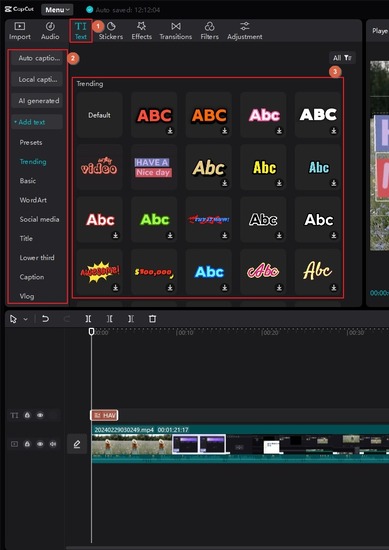
Step 3: Export the Video
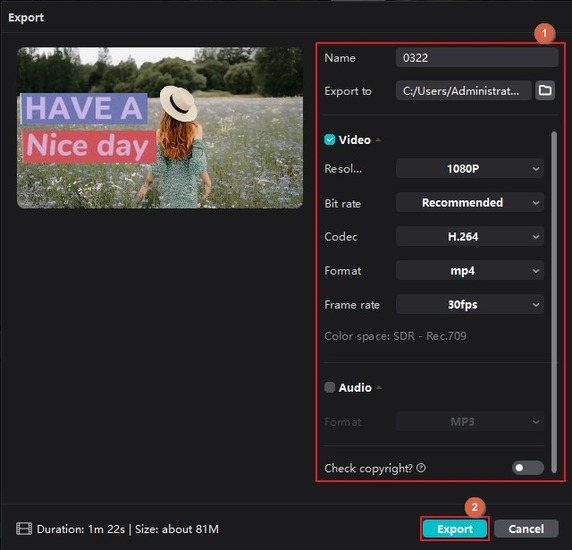
Define output preferences in the Export box and click Export from the bottom to produce the video with text/subtitles.
Part 3: How to Add Text in CapCut on Android/iPhone
CapCut supports Android and iOS platforms as well. If you don’t wish to use a computer, you would love the idea of having the app on your favorite handheld smart device. A quick search on the App Store or Google Play will lead you to the download screen to install the program. Once done, you can complete the following steps to learn how to add text in CapCut on your smartphone:
Step 1: Import Media to CapCut
Launch CapCut on your smartphone and import the video from your device.
Step 2: Add and Format the Text
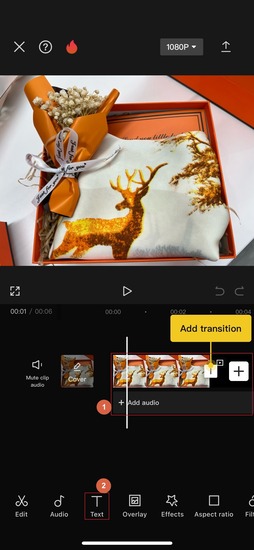
Tap to select the media in the Timeline, tap the Text (T) tool from the bottom, and type a text in the Enter text field. Use the Font tab from the lower part to choose a font face. Optionally go to other tabs and pick styles, effects, animations, etc. presets. Tap Done (the Tick Mark) once you are satisfied with the look.


Step 3: Share the Video
Tap the Share icon from the top-right, choose your preferred platform on the Ready to share screen, and tap Done to publish the video without leaving CapCut.


Part 4: Best Alternative to CapCut to Add Text in Videos
CapCut is a widely used post-production tool all right. However, you cannot use it as a production application, as it lacks AI-powered scripting features and cannot even record a computer screen, which is quite common these days.
As a result, many professionals prefer switching to a more efficient tool called HitPaw Edimakor, which bridges the gap between production and post-production features and offers them all under one roof. Furthermore, like CapCut, HitPaw Edimakor is also available for Windows and Mac computers, allowing you to produce your next viral content on the PC of your choice.
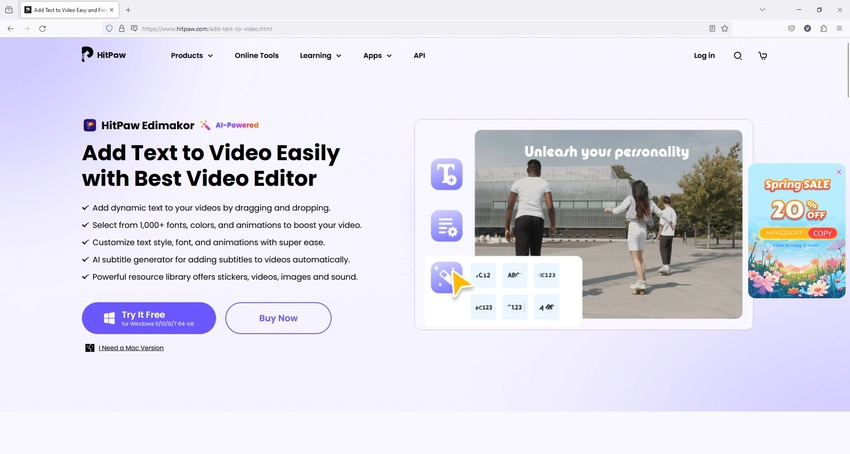
The step-by-step instructions that follow don’t explain how to add text in CapCut but the process of doing the same thing in HitPaw Edimakor:
Step 1: Prepare the Video for Editing in HitPaw Edimakor
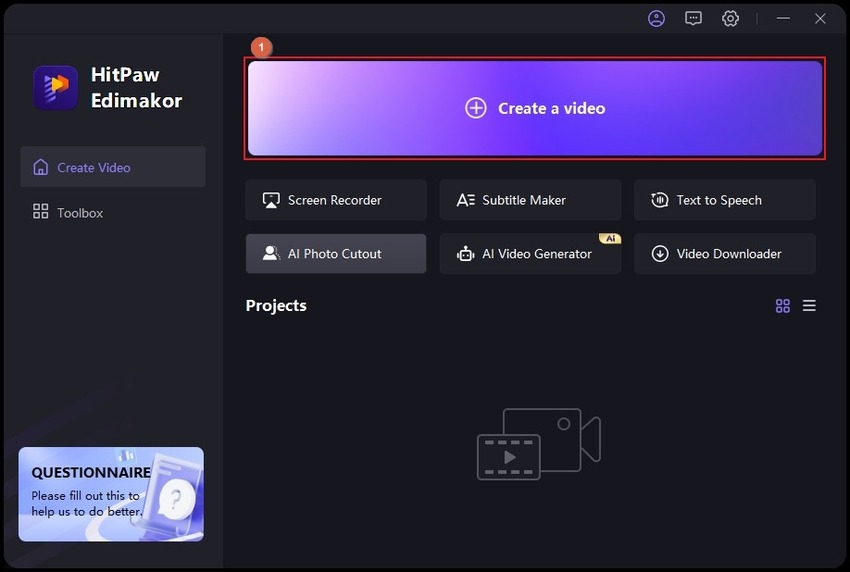
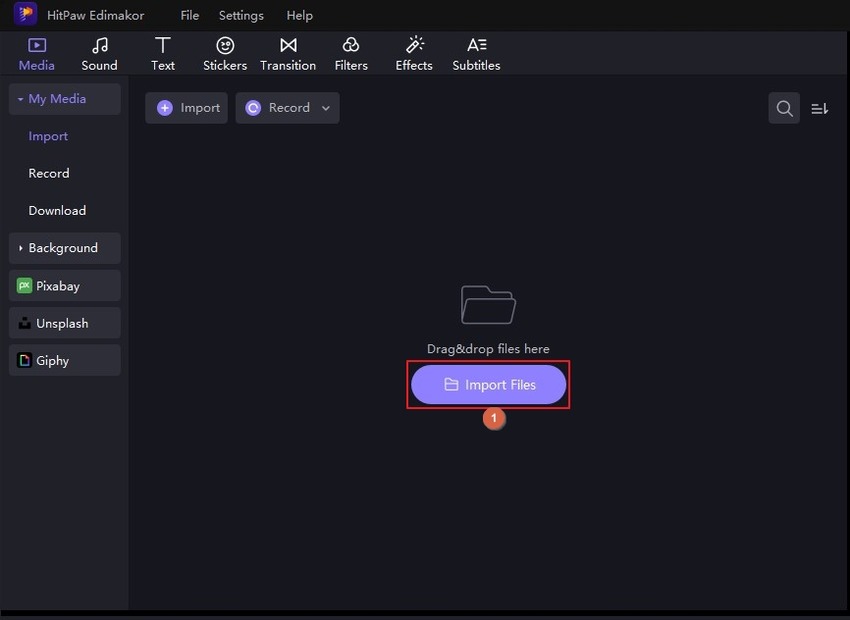
Launch HitPaw Edimakor and click Create a video from the top of the initial screen. Click Import Files on the video editor interface, import the source video to Edimakor, and drag it to the Timeline at the bottom.
Step 2: Add a Title (Big Text)
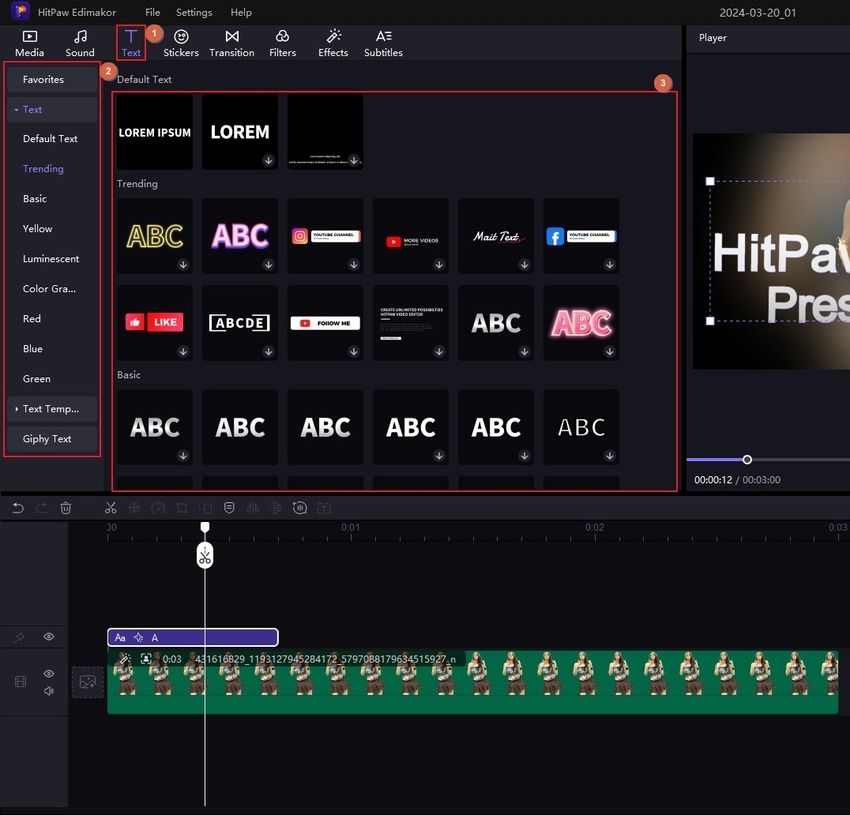
Click the Text button in the standard toolbar at the top, choose a category from the left pane, and drag your preferred text preset to the Timeline.
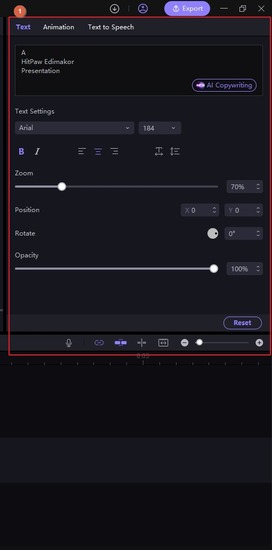
Optionally, use the tabs, sliders, and menus in the right pane to adjust the appearance and animation of the title to make it look livelier.
Step 3: Add Subtitles
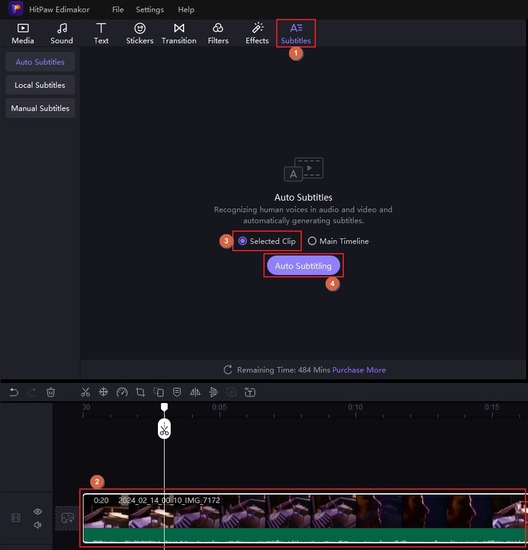
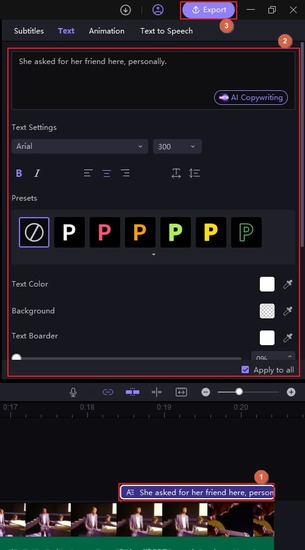
Click the Subtitles button from the top, select the media track in the Timeline, choose the Selected clip radio button in the Auto Subtitle box, and click Auto Subtitling. Wait while HitPaw Edimakor auto-generates subtitles and syncs them with the audio in the video. Follow the method from the previous step to decorate the text. Click Export from the upper-right.
Use the tabs and options on the Export box to set output preferences and click Export from the lower part.
Part 5: Comparison Table between CapCut and Edimakor on Adding Text in Videos
| Product | CapCut | HitPaw Edimakor |
|---|---|---|
| Add Text through Web Version | Yes | Yes (through HitPaw Video Editor Online) |
| Add Text through the Desktop App | Yes | Yes |
| AI Subtitle Generator | Yes | Yes |
| Manual Titling and Subtitling | Yes (fails if not updated) | Yes |
| Text Formatting and Animations | Yes | Yes |
| Text-to-Speech | Yes | Yes |
Part 6: FAQs on How to Add Text on CapCut
Q1. How to do an overlay text in CapCut?
A1. In the case of objects, CapCut’s web version has Overlay as one of the blending modes. However, the portal treats text differently, and therefore, you must adjust its opacity to get the Overlay effect. To make it look more realistic, you can move the text track in the Timeline above or below the one with the object and then adjust the transparency of both elements accordingly.
Q2. How to add text behind an object in CapCut?
A2. To add the text behind or in front of an object in CapCut, you can place its track below or above the one holding the object in the Timeline, respectively.
Q3. How to put text freely in CapCut?
A3. Regardless of the method to add text in CapCut, you can move its frame in the Preview window for repositioning.
Conclusion
You may want to learn how to put text in CapCut until you aren’t aware that another, more robust tool is present in the market that works more efficiently and offers more features compared to CapCut.


 HitPaw Video Converter
  HitPaw Screen Recorder
 HitPaw VikPea


Share this article:
Select the product rating:
Joshua Hill
Editor-in-Chief
I have been working as a freelancer for more than five years. It always impresses me when I find new things and the latest knowledge. I think life is boundless but I know no bounds.
View all ArticlesLeave a Comment
Create your review for HitPaw articles