Best Method to Add Captions/Subtitles to Instagram Reels in 2024
It is easy to learn how to add captions to reels when you have some experience in posting videos on the platform. Even if you don’t, here you will learn everything from scratch. By the time you’re done reading this guide, you will have a couple of methods under your sleeves and an in-depth understanding of the concepts and procedures on how to get subtitles on Instagram reels.
Part 1: What are Instagram Reels?
Instagram reels are short videos the portal allows you to publish on its platform. The maximum duration of a real may vary from 30 to 90 seconds depending on your account type and reputation. An Instagram reel may contain camera footage, short video clips you may have obtained from different sources, or still images with background music or dialogues or otherwise.
Part 2: What Is the Difference Between Captions and Subtitles?
Although most people use the terms ‘Captions’ and ‘Subtitles’ interchangeably, there is a difference between the two. While captions are the transcriptions of the narrations or dialogues a video clip has, subtitles are the translations of audio in a different language, making the clip understandable to people from various parts of the world.
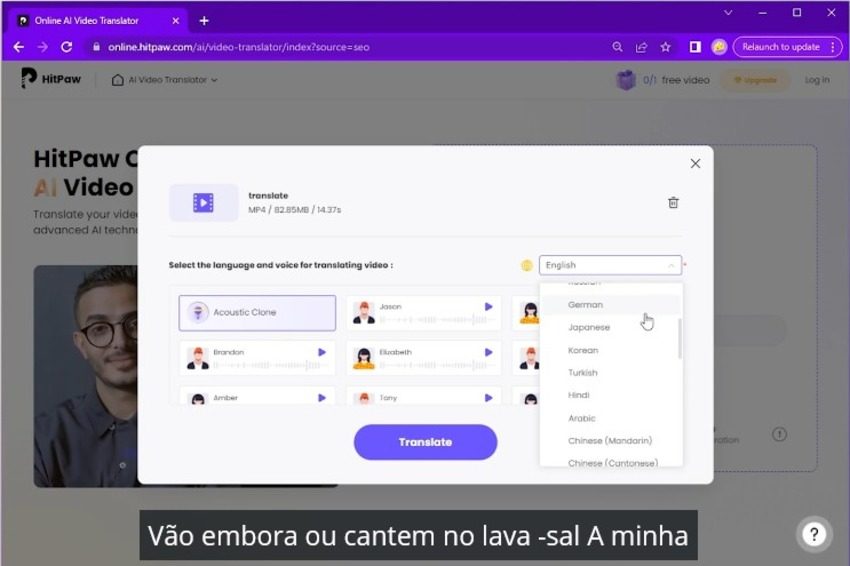
Part 3: Full Guide on How to Add Captions/Subtitles to Reels Using Instagram’s Built-in Feature
Many Instagram users aren’t aware that the portal has a built-in auto caption feature that automatically generates captions and adds them to the reels at the time of publishing. With that said, in this section, you will learn how to add auto-captions on Instagram reels using the platform’s built-in option. The step-by-step procedure for using Instagram to generate automatic captions is given below:
-
Step 1: Upload a Video as a Reel
Launch Instagram on your smartphone and tap the + (New) icon from the bottom of the interface. On the next screen that appears, tap to choose the REEL option from the bottom. Next, choose a video with audio from your device storage and tap Next from the bottom-right. Once added, tap Next from the top-right to go to the next screen.
Note:Alternatively, you can use Instagram’s Camera tool to record footage to use it as a reel.
-
Step 2: Generate Auto Captions
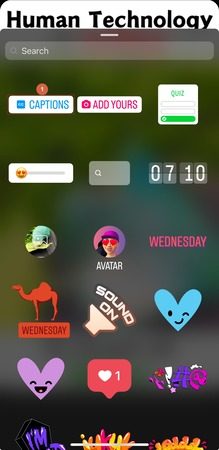
Tap the Stickers icon from the top-right area and tap the CAPTIONS sticker on the next window. Wait while Instagram automatically generates captions for the audio your video has. Once Instagram starts displaying the captions, tap a preset from the lower-right area to set the font size. You can also drag the captions frame to reposition it on your screen. Tap Done from the top-right once you are satisfied with the layout.


-
Step 3: Publish the Reel on Instagram
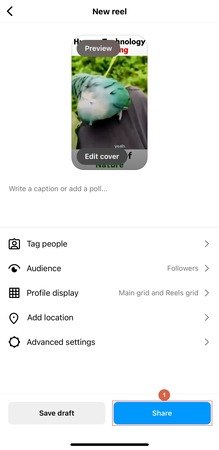
Back on the previous screen, tap Next from the bottom-right. On the next window, type a description if required, use the other options to define the privacy and other details, and tap Share from the bottom-right to post the reel on Instagram.


Part 4: How to Add Subtitles to Instagram Reels with an AI Auto Subtitle Generator
If you tried the above method, you might have noticed that Instagram doesn’t offer many editing features for the subtitles it generates. Furthermore, you don’t have the flexibility to define the font size at your will, and you are restricted to the presets the platform has. Because of these limitations, many users prefer a dedicated third-party application for captioning and subtitling. If you are one of them, this section would be of great help to you.
When discussing a third-party tool to add subtitles and captions, picking an AI-powered program would be a wise approach. Although many vendors claim that their app does the job pretty well, most of them offer online solutions, which may make your videos vulnerable to unwanted exposure. This is where HitPaw Edimakor comes into play.
HitPaw Edimakor is a desktop application that you can install on a Windows or Mac computer and use the program right on your PC. Although the app requires a stable Internet connection as it uses artificial intelligence to do most of the tasks, it does all the processing on your computer, significantly reducing the chances of data theft or exposure. In addition, the ‘Export’ window has a dedicated tab for Instagram that automatically adjusts the resolution of your reels compatible with the platform for convenient publishing.
You can learn how to put subtitles on Instagram reels using HitPaw Edimakor by following the step-by-step instructions given below. If you also want to know how to add text to Reels, click to know more.
-
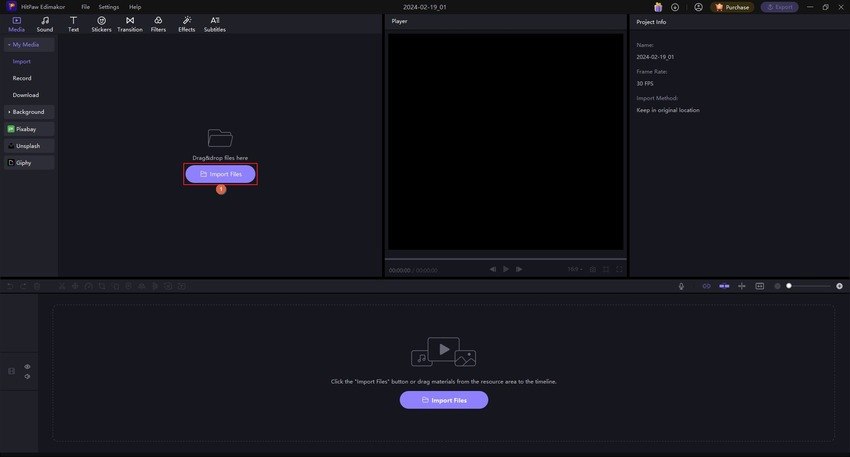
Step 1: Import the Source Video to the HitPaw Edimakor Timeline
Note: This section assumes you have already recorded or obtained the video you want to publish as an Instagram reel and saved it on your computer’s local hard disk.
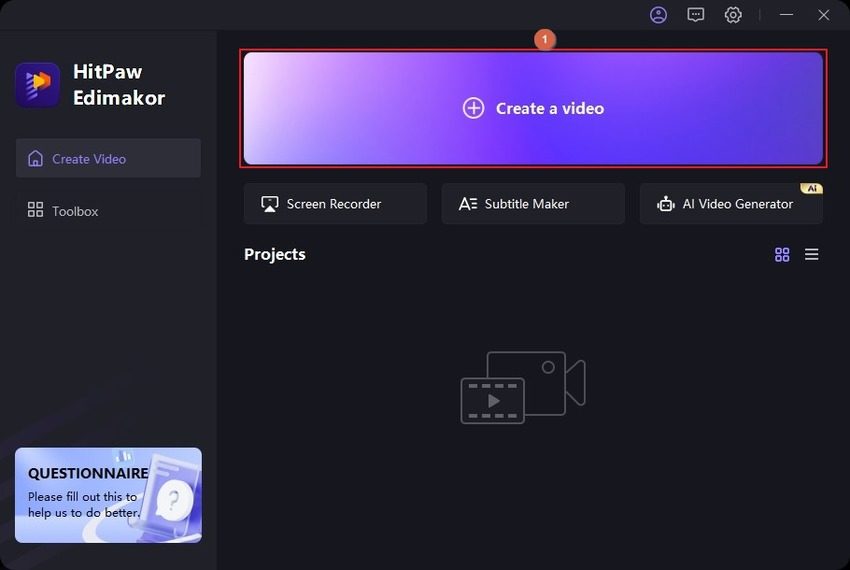
Launch HitPaw Edimakor and click Create a video from the first screen that appears. On the Video Editor window, click Import Files from the Media Bin and import the source clip to the application. Next, drag the media to the HitPaw Edimakor’s Timeline at the lower part of the interface.


-
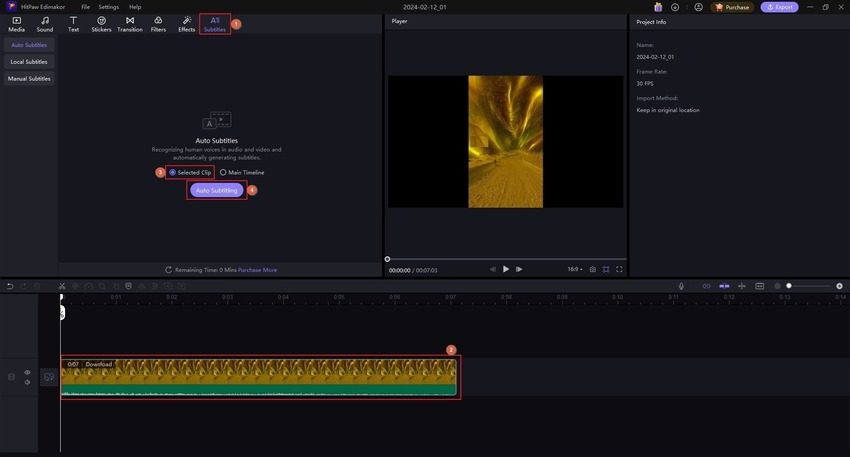
Step 2: Use HitPaw Edimakor’s AI Technology to Generate Subtitles
Click Subtitles in the standard toolbar at the top and click to select the media track in the Timeline. Ensure that the Selected Clip radio button is selected in the Auto Subtitle box at the upper-left area of the window. Click Auto Subtitling and wait while HitPaw Edimakor automatically generates subtitles for the video and adds them as a new track in the Timeline.

-
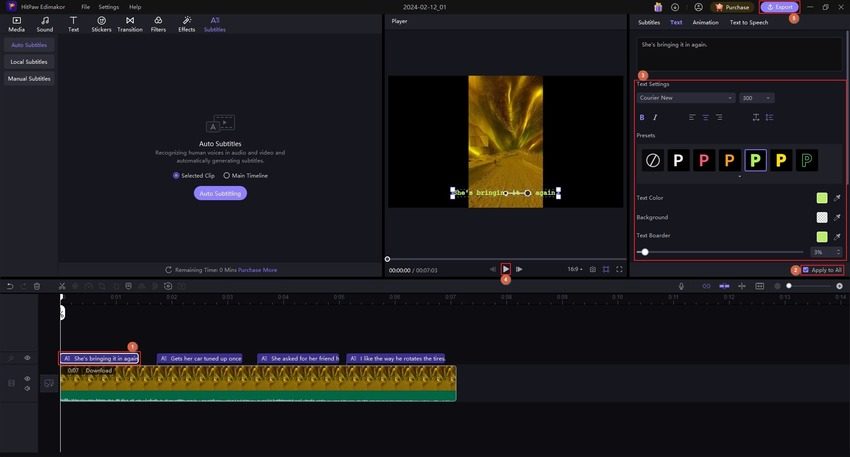
Step 3: Edit and Format the Text and Export the Video
Use the Text field in the right pane to edit the subtitles wherever needed. Optionally, use the formatting options to customize the appearance of the captions. Once done, click the Play button under the Preview window of the HitPaw Edimakor’s interface and review the clip for acceptability. Click Export from the top-right, define output preferences, export the video, and save it on your local hard drive. From here, you can use your preferred method to transfer the clip to your smartphone and publish it as an Instagram reel.

Part 5: How to Add Captions to Instagram Reels with an Online Video Editor
Once you have learned how to add subtitles in Instagram reels using HitPaw Edimakor and tried it, the chances are that you will stick to the program for the next couple of years. However, if the case is otherwise and you don’t wish to have an application inside your PC, HitPaw offers a web solution as well.
You can use HitPaw Online Video Editor to add subtitles to your videos before posting them as Instagram reels. HitPaw Online Video Editor is a web sibling of HitPaw Edimakor that lets you do most post-production tasks without installing Edimakor on your computer. However, while the desktop application offers more flexibility and supports unlimited sessions for video editing without any file size restrictions, the online portal requires a subscription, without which the upload limit remains restricted to 20 MB file size.
Nevertheless, even with the online video editor, you can crop and rotate your clips, play them in reverse, remove watermarks, add custom watermarks, increase the playback speed, etc.
The step-by-step instructions on how to add captions in reels with HitPaw Online Video Editor are explained below:
-
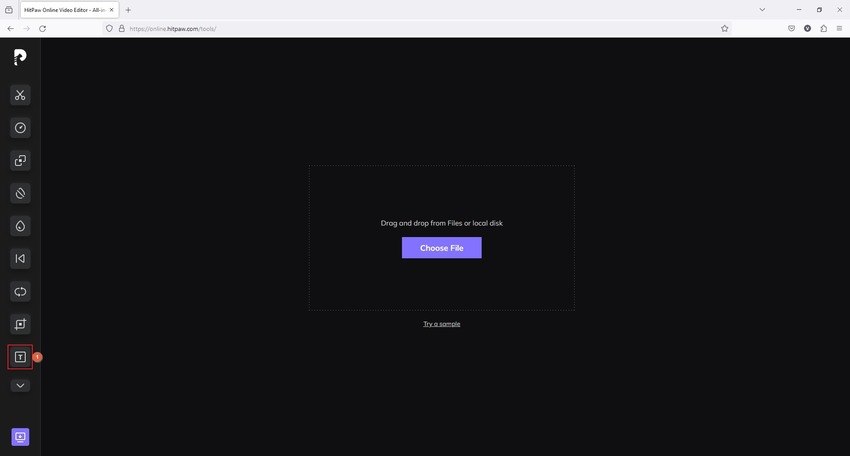
Step 1: Upload the Source Video to the Online Solution
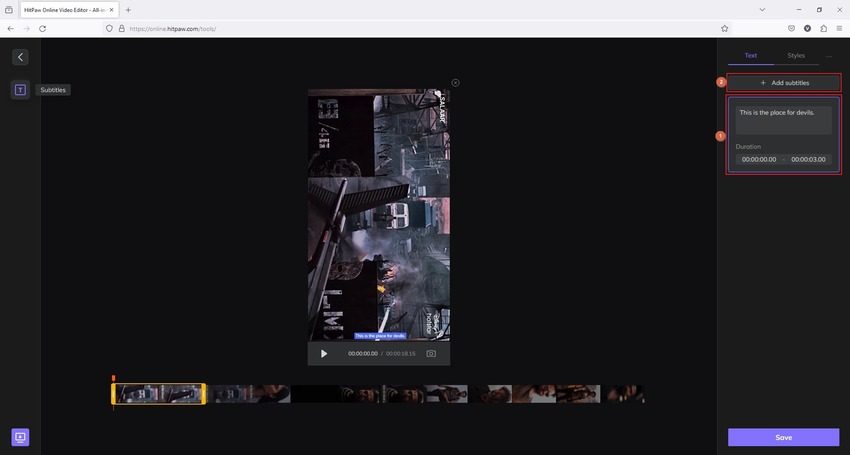
Use your favorite web browser to go to the https://online.hitpaw.com/tools/ URL and click the Subtitles tool from the toolbar on the left. On the next page, click Choose File and upload the source video to the HitPaw Online Video Editor.

-
Step 2: Add Subtitles to the Video
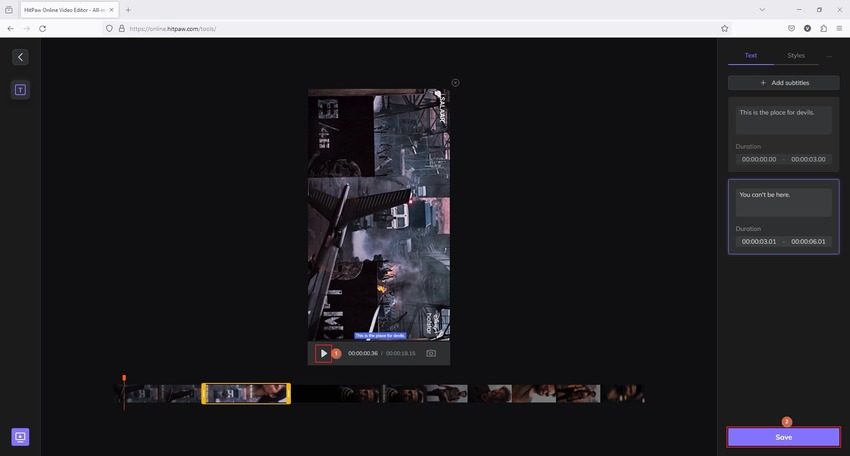
Click inside the Text here field in the right pane and enter the caption according to the dialogue in the clip. Use the Timers under the Duration section to adjust the start and end time of the text appearance. Click Add subtitles from the top of the right pane to add another text box, enter subtitles, and adjust its duration as before. Repeat this process till the end of the media.

-
Step 3: Preview and Export the Video
After you have added subtitles to the entire video, click the Play button under the Preview window and review the output for correctness. Click Save from the bottom of the right pane, download the video with subtitles, and publish it as an Instagram reel.

Part 6: FAQs about Adding Captions to Instagram Reels
Q1. How to fix if my captions are not showing up on Instagram reels?
A1. You may want to try the method explained above to add captions to your videos using Instagram’s built-in feature. If you already tied that, using a third-party desktop or online tool should do the job. If the issue persists, it could be due to the language barrier, or you might be living in a region that doesn’t support the Instagram captions feature.
Q2. How to add captions to reels from saved audio?
A2. You should try using HitPaw Edimakor or HitPaw Online Video Editor to add captions to the audio and then create a reel from it to publish on Instagram.
Q3. How to fix Instagram not allowing me to add captions to eels?
A3. If your region doesn’t support automatic caption generation or the audio language is foreign to the portal, you can try using HitPaw Edimakor or HitPaw Online Video Editor to complete the task.
Conclusion
Although it is easy to learn how to put subtitles on Instagram reels, the portal has limited formatting options, which many users might not appreciate. Therefore, most people switch to a third-party program like HitPaw Edimakor, which is more accurate, easy to use, and gives full control over the subtitles, eliminating the need for learning how to add captions to reels within Instagram.





 HitPaw Univd (Video Converter)
  HitPaw Screen Recorder
 HitPaw VikPea (Video Enhancer)

Share this article:
Select the product rating:
Daniel Walker
Editor-in-Chief
My passion lies in bridging the gap between cutting-edge technology and everyday creativity. With years of hands-on experience, I create content that not only informs but inspires our audience to embrace digital tools confidently.
View all ArticlesLeave a Comment
Create your review for HitPaw articles