Full Guide on How to Add Captions in CapCut Easily on Desktop/Online🔥 🔥
Being a widely used tool, almost every video editing enthusiast and professional knows how to add captions in CapCut. Many of them also know how to add subtitles on CapCut. While both processes are simple, you must be careful about the formatting to ensure that the words remain visible throughout the movie, regardless of the background, which might frequently change during the playback.
Considering this, the following segments explain how to put captions on CapCut easily and quickly. To make things even more convenient for you, one of the sections in this guide also teaches about an alternative, comparatively better solution to get the job done.
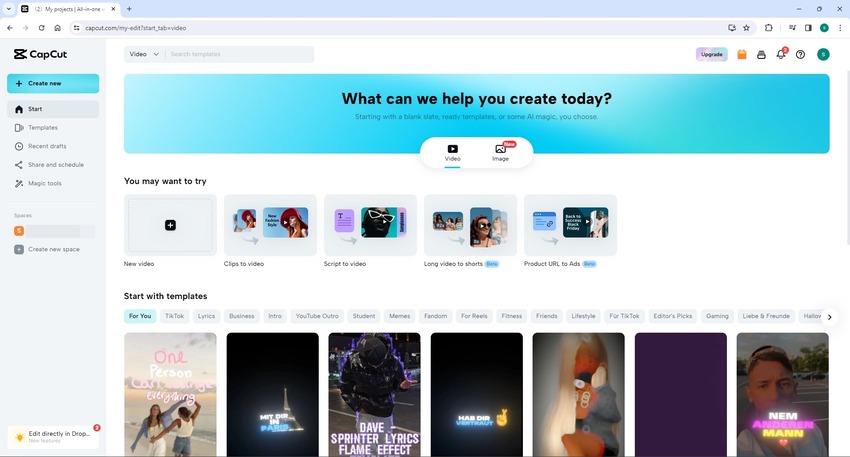
Part 1: How to Add Captions in CapCut Online Easily
Adding captions in CapCut is as simple as dragging an attractive ‘Caption’ preset to the Timeline and editing the text. In addition, the portal also allows you to change the font face, size, and position where the text should appear on the screen.
The step-by-step process on how to add captions in CapCut is given below:
Step 1: Upload the Video
Use your favorite Internet browser to go to https://www.capcut.com/ and register a new free account. Once done, sign in to your ID and click New video from the upper portion of the landing page. On the next page, click the Click to upload button and upload the video you want to add captions to using CapCut. Alternatively, you can choose to upload the source video from Google Drive or your Dropbox account.
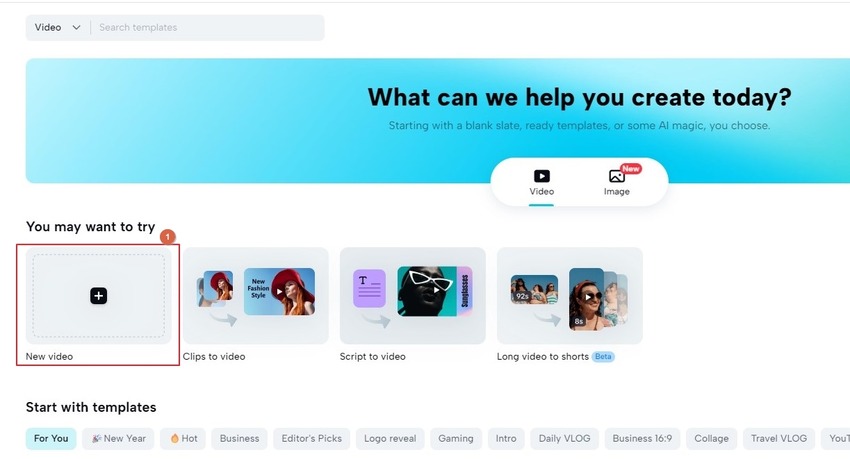

Step 2: Pick a Captions Preset
Click to select the Text tool from the left bar, scroll down the central pane to the Captions section, horizontal-scroll the Caption options, and choose and drag your preferred preset to the Timeline.
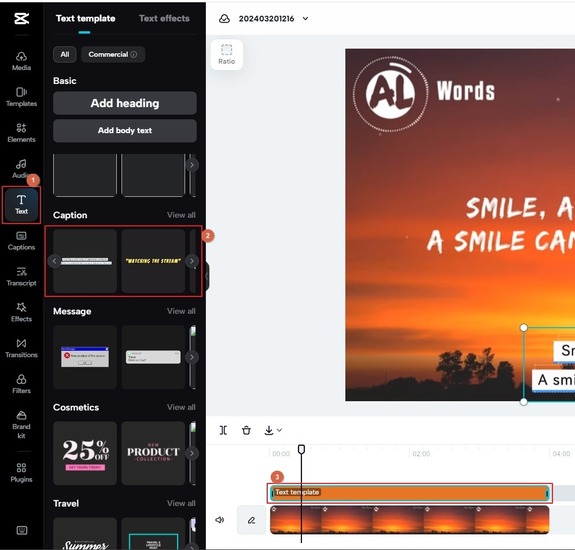
Step 3: Edit Captions and Export the Video
Grab either of the two scaling handles of the Caption track and drag it horizontally to extend the visibility duration of the text. Use the Basic floating panel to edit, decorate, and position the text as needed. Repeat this as many times as you want, especially when creating subtitles.
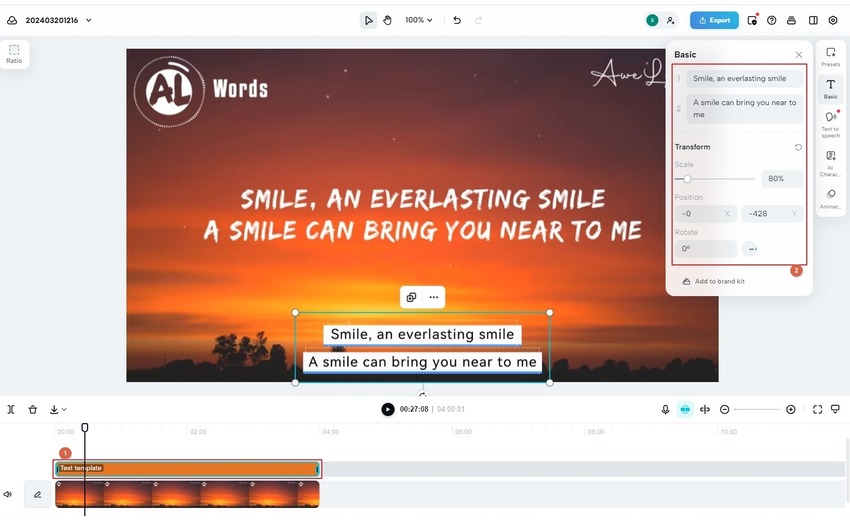
Click Export from the upper-right area to export the video with captions.

Part 2: How to Add Captions in CapCut with Auto-Caption Feature
Adding captions in the desktop version of CapCut is comparatively simple, as it can auto-generate subtitles. In addition, you can also import a custom subtitles file (in SRT or any other supported format), place captions in the Timeline, and make minor adjustments for accuracy and synchronization.The following steps explain how to add subtitles on CapCut automatically:
Step 1: Place the Media in the Timeline
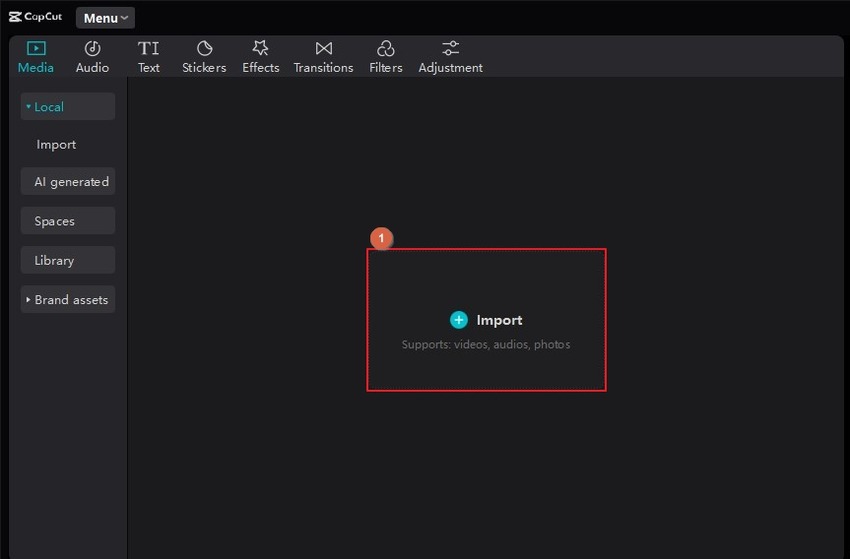
Follow the URL used earlier to download the desktop version of CapCut and install it on your computer. Launch CapCut and click New project on the main window. On the next interface, click Import in the Media box and import the video to CapCut. Next, drag the clip and place it in the Timeline.
Step 2: Auto-Generate Subtitles in CapCut
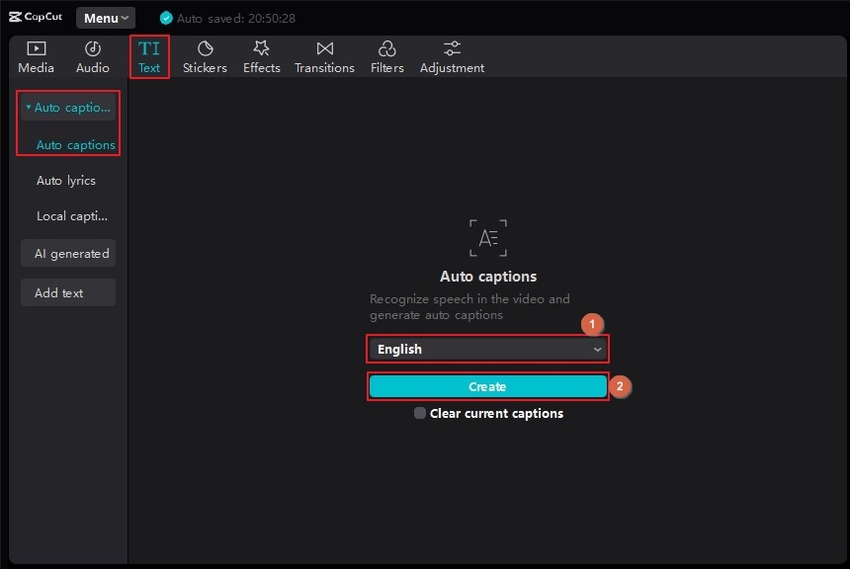
Click the Text button from the top, select the Auto captions option from the left pane (if not already selected), choose your preferred subtitle language from the drop-down list in the Auto captions box, and click Create. Wait while CapCut generates subtitles for the video, places them in the Timeline, and syncs them with the video.
Step 3: Format the Text and Export
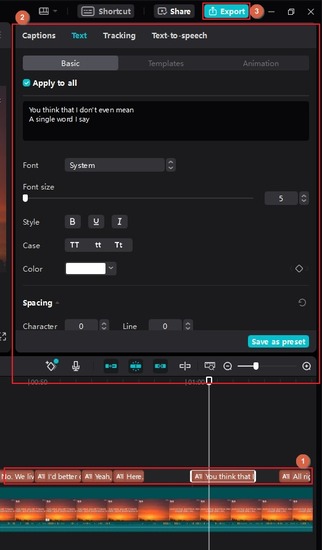
Click to select any subtitle segment in the Timeline, ensure that the Apply to all box at the top of the right pane is checked, and use the formatting options to adjust the font face, weight, background color, etc. of the text. When everything is in place, click Export from the upper-right area of the CapCut window.
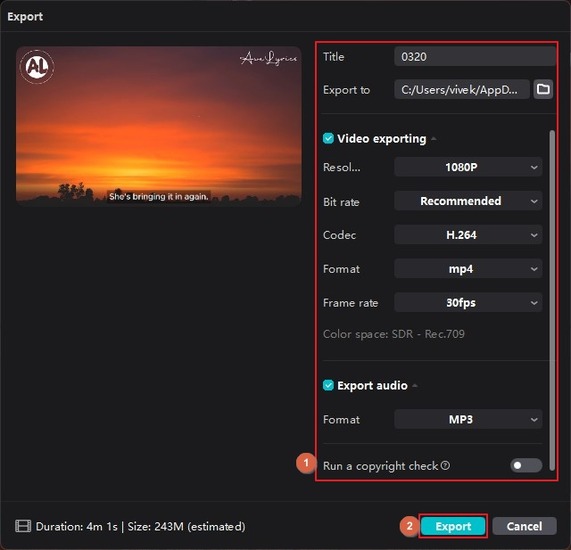
Use the options in the Export box to define output preferences and click Export from the bottom-right to export the video with captions.
Part 3: Best Alternative to CapCut to Add Caption/Subtitle in Videos
Although CapCut is pretty efficient, it lacks a couple of things, such as AI-powered script writing, screen recording, etc. These missing elements prevent the program from becoming a one-stop shop for your production needs, making you wander around for separate apps for petty stuff. If you are a professional video creator (or even an amateur), you may need a program that can do almost everything from a single interface under one roof. This is where HitPaw Edimakor comes into play, as it checks all the above boxes, leaving no vacuum that requires any foreign app. Therefore, the instructions given below don’t teach how to add captions in CapCut but the method to auto-generate subtitles using HitPaw Edimakor, which is famous for doing the job with perfection:
Step 1: Place the Media in the HitPaw Edimakor Timeline
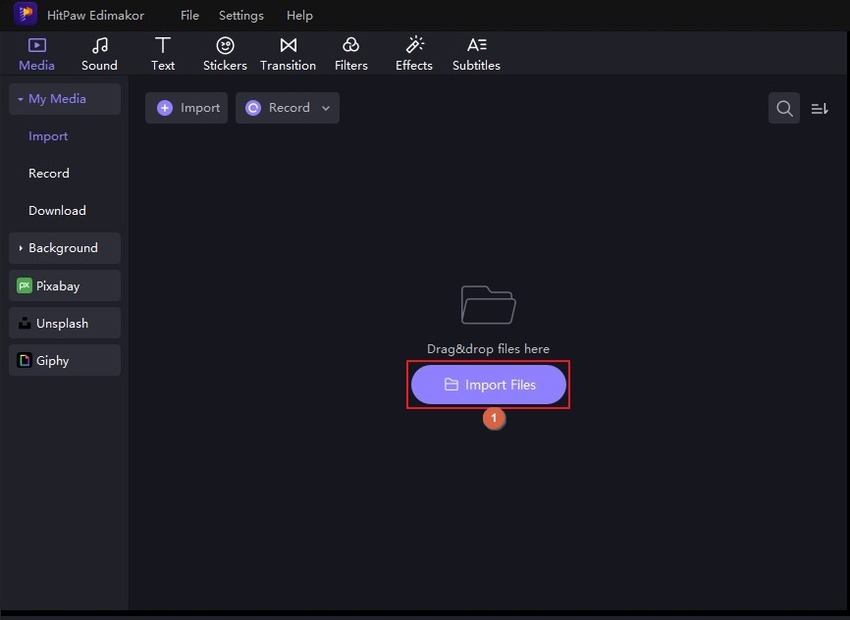
After downloading and installing HitPaw Edimakor on a compatible computer, launch the program and click Create a video from the top of the first screen. Click Import Files on the video editor’s Media Box, import the media to the app, and drag it to the Timeline at the bottom.
Step 2: Auto-Generate Subtitles
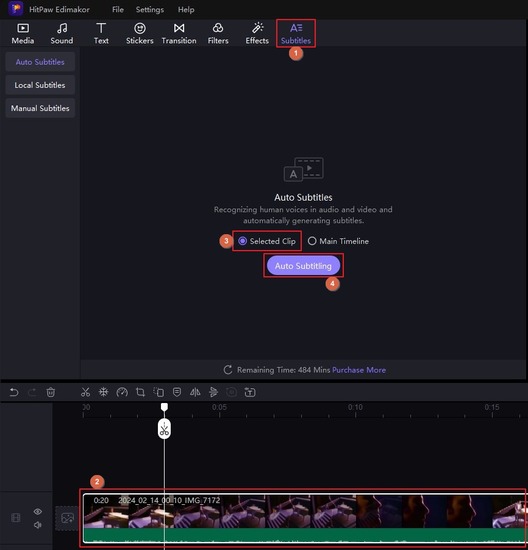
Go to the Subtitles screen by clicking the corresponding button in the standard toolbar at the top, click to select the media track in the Timeline, ensure that the Selected clip radio button is selected in the Auto Subtitles box, and click Auto Subtitling. Wait while HitPaw Edimakor generates subtitles and syncs them with the video.
Step 3: Format the Text and Export
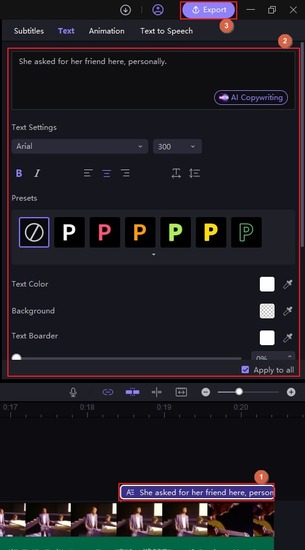
Click any of the subtitle segments in the Timeline and use the option in the right pane to format the text. Click Export from the top-right. Use the tabs and options in the Export box to define output preferences and click Export to export the video.
Part 4: Comparison Table between CapCut and Edimakor on Adding Captions/Subtitles
| Features | CapCut | HitPaw Edimakor |
|---|---|---|
| Integrated Caption/Subtitle Tool | Yes | Yes |
| Accessibility | Buried inside the video editor | From the main screen |
| Auto Subtitle Generator | Yes | Yes |
| Allows Custom Subtitles Uploading | Yes | Yes |
| Single-Touch Subtitle Generation | No (Separate buttons for lyrics and subtitle generation) | Yes (One button does it all) |
| Granular Text Formatting Options | Yes | Yes |
| Dynamic Text | Yes | Yes |
Part 5: FAQs on Adding Captions/Subtitles in CapCut
Q1. How to fix if auto-caption doesn’t work in CapCut?
A1.
A few things you may want to check to get the auto-caption feature in CapCut back up and running include:
Q2. How to add dynamic captions on CapCut?
A2. You can use the ‘Templates’ and ‘Animation’ tabs in the right pane to add dynamics to the captions/subtitles in CapCut.
Conclusion
Although CapCut is a popular video editing tool, it still uses the old-school method and lacks advanced features like an automatic script generator, screen recorder, etc. Even after that, it is easy to learn how to add subtitles on CapCut. However, it would be wise to have an alternative, better solution like HitPaw Edimakor and learn the process to use it instead of investing your time in learning how to add captions in CapCut.


 HitPaw Univd (Video Converter)
  HitPaw Screen Recorder
 HitPaw VikPea (Video Enhancer)


Share this article:
Select the product rating:
Daniel Walker
Editor-in-Chief
This post was written by Editor Daniel Walker whose passion lies in bridging the gap between cutting-edge technology and everyday creativity. The content he created inspires audience to embrace digital tools confidently.
View all ArticlesLeave a Comment
Create your review for HitPaw articles