How to Freeze Frame in Premiere Pro Effectively
Adding freeze frames to your is considered one of the most creative video editing techniques that help you make your video relevant and top-notch. You can make a single frame, video clip, or photo appear in a particular part of your, and that frame can appear multiple times in a single video. Several tools help you freeze frames of your video, but only a few are efficient. Adobe Photoshop Pro is considered reliable, and you can use this tool to freeze the frame on your video. This post will reveal how to freeze a frame in Premiere Pro.
Part 1: What Is Freeze Frame in Adobe Premiere
Before discussing how to create a freeze frame in Premiere, let us talk about the Freeze frame term in Adobe Premiere.
Frame freezing, also known as Frame Hold, in Premiere Pro is nothing but a process of taking the static image from your video and then putting it in a particular part of your video. When that picture appears, your screen will be frozen, and you'll be able to freeze images on your screen.
Various things urge you to use this feature as you might intend to narrate a story on your video and then pause the video at a particular moment; you can freeze the frame to serve your purpose.
Part 2: How to Do A Freeze Frame in Premiere Pro | 5 Ways
Premiere Pro makes it pretty simple to freeze frame. Here's how to do freeze frame in Premiere using 5 magnificent ways.
Setting Frame Hold Options
To begin with, you'll need to figure out how you intend to make the frame holds work.
Here's how to do it.
-
1.Launch the Premiere Pro and then import any video clip you'd like to freeze-frame in Premiere Pro.
-
2.Navigate to the Toolbar and choose Clip and Video options—next, press on the'' Frame Hold Options'' icon.
-
3.Check the box of Hold on and choose the option you want. Next, you can select how you'd like to use the frame.

Frame Hold Segment in Clip
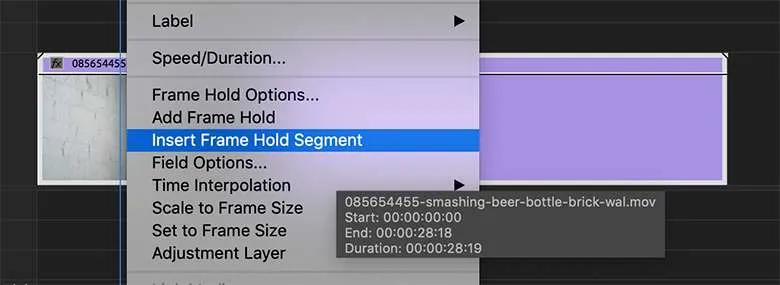
Premiere Pro comes with several methods to freeze frames in Premiere Pro but opting for the Insert Frame Hold Segment in Clip method is considered one of the best ways to get your job done.
Here's how to freeze a frame in Premiere Pro using Insert Frame Hold Segment in Clips:
-
1.Launch the Premiere Pro's latest version and tap on ''New Project". Next, click on Choose media icon to import the video you'd like to edit. Next, tap on the Open icon after selecting the media file.
-
2.Create a new sequence after dragging the uploaded video to your timeline. Next, right-click on your particular video's part to get the required frame. Once the drop-down menu appears, you'll select the Insert Frame Hold Segment option.

-
3.The method will clip the video's frame for a couple of seconds. You can also increase the time by dragging the edge of your frame.

Add Frame Hold method
Another brilliant way to freeze frames in Premiere Pro is through the Add Frame Hold method.
Follow the guide below to create freeze-frame in Premiere using the Add Frame Hold Method.
-
1.After launching the Premiere Pro on your PC, you'll need to import the video into the main interface of Premiere Pro. Next, drop and drag the imported video to the timeline.
-
2.Select the part of the video you'd like to use to freeze the frame and right-click on it. Next, tap on the ''Add Frame Hold'' option.
-
3.The process will cut the part of your video and add it as a freezing frame to the rest of your video.

Export Still Frame and Import
The method might be more suited when you intend to end the video as people don't want to see the different segments when the video ends.
Using the Exporting Frame Method, you've got the opportunity to create a still and single frame from your video clip and then put it in your desired location.
Here's how to add freeze frame in Premiere Pro using the Exporting Frame Method.
-
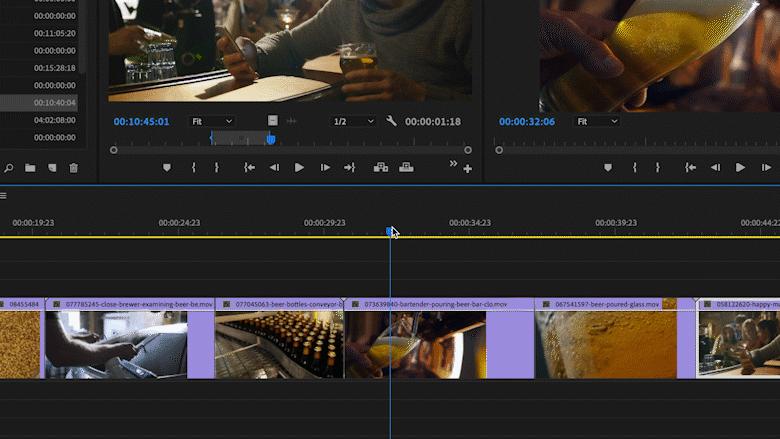
1.Start the Premiere Pro on your PC and then drag and drop the video to the main interface of Premiere Pro. Next, push the video to Premiere Pro's timeline to create the new sequence. Next, choose the time marker from the part of the video you'd like to take the still frame of the video.
-
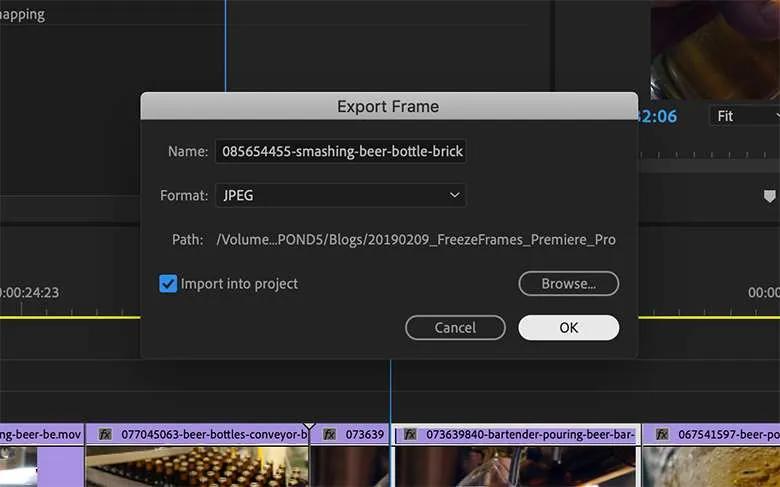
2.You'll need to tap on ''Export Frame,'' or you can access this option by clicking the Shift+E option.
-
3.Now, Export Frame will launch the dialogue box on your screen, where you've got the chance to choose the format of the image you've saved from your video. Moreover, you can choose the directory for export and upload the selected take to the corrupt project. Tapping on ''OK'' will help you add the picture to the particular video part to freeze the frame.

Time Remapping feature
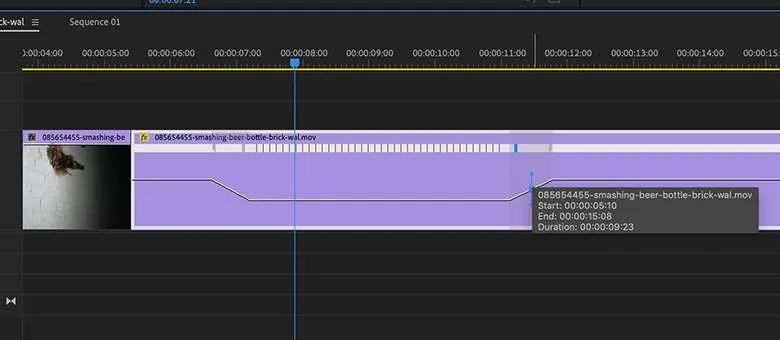
The remapping feature in Premiere Pro helps you to freeze a particular part of the changing speed of your selected clip.
Here's how to add a freeze frame in Premiere Pro:
-
1.Important the video to the main interface of Premiere and then drag the video to timeline. Next, select the part of the video you'd want to freeze.
-
2.After visiting the clip effect menu, you must choose the ''Remapping'' icon. Next, tap on the speed icon from there to proceed ahead.

-
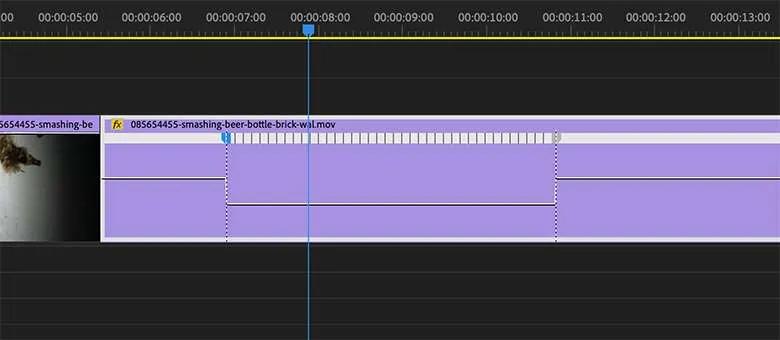
3.Generate the speed keyframe after clicking the rubber band option that appears there. Next, you'll need to hold the Option-Command and start dragging your outer keyframe to the duration of the video you'd like to frame. You can see the lower rectangular section that shows the freeze frame.

Part 3: Best Video Editor to Make A Freeze Frame Effect for Beginners
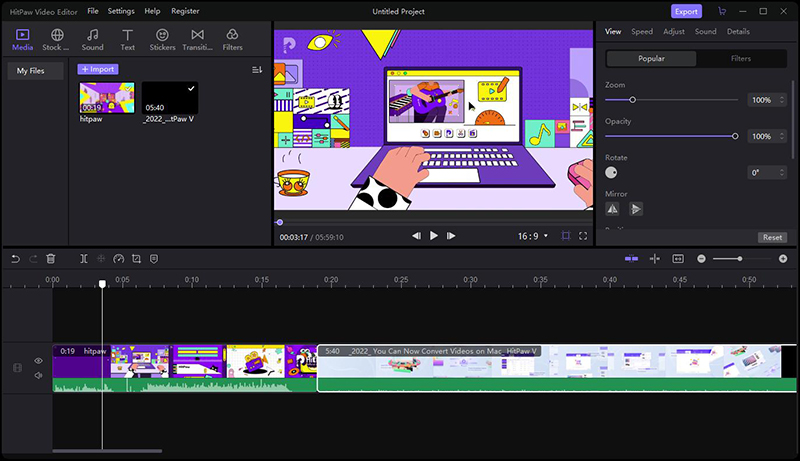
Adobe Premiere might be a high-profile software to freeze frames on your video, but HitPaw Edimakor offers more user-friendly and remarkable services than Adobe Premiere Pro.
Apart from allowing you to freeze frames, HitPaw Edimakor also enables you to perform various other editing activities on your video.
Main Feature of HitPaw Edimakor
- Allows you to freeze frames of your video.
- Offers an effortless user interface.
- Apply brilliant transitions and picture-in-picture effects to your video.
- Cut, crop, or rotate your video.
- Change the speed of your video.
- Add texts and eye-catching themes to your video.
- Provides endless materials from GIPHY, Unsplash, and Pixabay.
How to Freeze Frames using HitPaw Edimakor
Firstly, you need to have this program on your computer. You can safely download HitPaw Edimakor via the below download button.
-
1.Launch HitPaw Edimakor on your PC, and then import the video you'd like to freeze the frames.

-
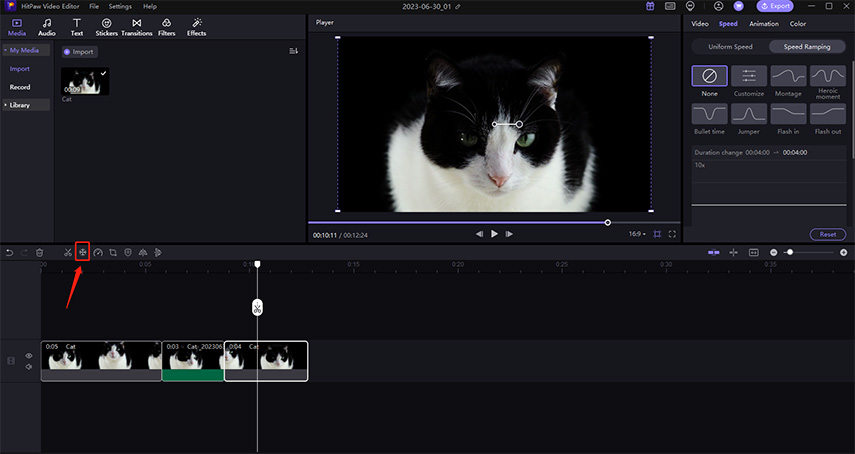
2.Drag the video to the timeline and tap on the'' Snowflake'' icon. Next, click on the ''Add freeze frame'' icon.

-
3.Once you're freezing the frames, download the video by tapping the'' Export'' icon.
Conclusion
If you don't know how to make a freeze frame in Premiere, this guide could be a game changer. Freezing frames using Premiere Pro is a go-to way, but it can be tricky if you don't have prior knowledge of this software. So, the most suitable tool for you to freeze frames is none other than HitPaw Edimakor. It is the most recommended software that stimulates video editing with top-class features.





 HitPaw Univd (Video Converter)
  HitPaw VikPea (Video Enhancer)


Share this article:
Select the product rating:
Daniel Walker
Editor-in-Chief
My passion lies in bridging the gap between cutting-edge technology and everyday creativity. With years of hands-on experience, I create content that not only informs but inspires our audience to embrace digital tools confidently.
View all ArticlesLeave a Comment
Create your review for HitPaw articles