Framerate Conversion Full Guide In 2025
In the world of video production and playback, the term "framerate conversion" holds significant importance. This article will delve into the intricacies of framerate conversion, shedding light on what it is, how it impacts video quality, and the innovative use of AI technology in achieving this conversion seamlessly.
Part 1. What is Framerate Conversion?
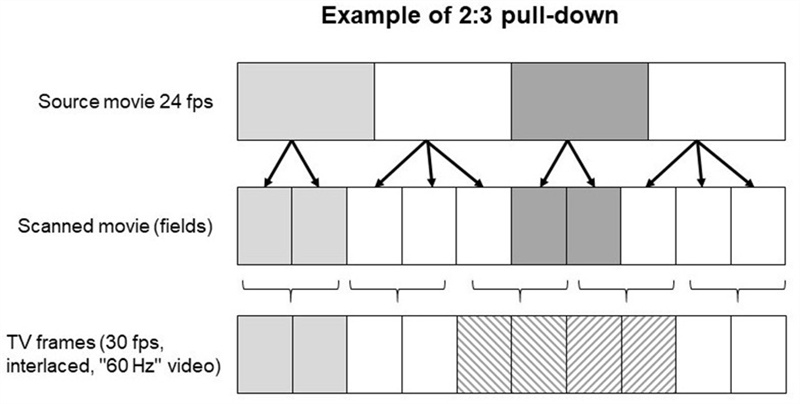
Framerate conversion, in its essence, is the process of altering the frame rate of a video. But what exactly is frame rate? In video production, frame rate refers to the number of individual frames or images displayed per second. It is typically measured in frames per second (fps). Common frame rates include 24fps, 30fps, and 60fps.
Framerate conversion comes into play when you want to change the frame rate of a video, either to match a different playback standard or to achieve a specific creative effect. This process involves adding or removing frames, which can result in a smoother or more stylized look, depending on the desired outcome.
Part 2. Does Frame Rate Improve Video Quality?

Frame rate has a very big impact on video quality. It gives a great visual experience and provides the users with the best quality videos. When you want to have lifelike experiences and smoother videos, it means you actually want to have higher fps. Usually, if we see from general perspective, we notice that 60fps and above are great frame rates and give great visual experiences. You can expect their importance if you want to have great movie-like experiences or filmic look to your videos. So frame rate plays a vital role in clarifying the videos where there are fast movements.
However, frame rate is not the only thing that decides the quality and clarity of the video. You need to seriously consider various other factors and should never try to convert videos wit very large fps differences. Otherwise, the video may look unnatural or fake and can’t seem smooth.
Part 3. How To Do Framerate Conversion Using AI Enhancer?
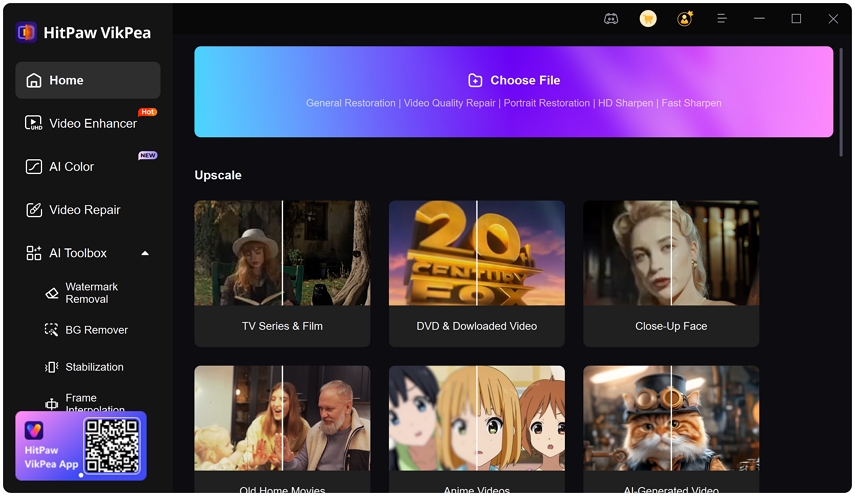
In recent years, advancements in artificial intelligence have revolutionized video enhancement techniques. One of the standout tools in this domain is the HitPaw VikPea (formerly HitPaw Video Enhancer), a program that utilizes AI algorithms to enhance the quality of videos. What sets it apart is its ability to perform framerate conversion seamlessly, among other impressive features.
HitPaw VikPea: The AI Powerhouse
HitPaw VikPea is not your run-of-the-mill video editing software. It boasts a range of features that make it a game-changer in the world of framerate conversion and video enhancement:
- Upscale Videos up to 8K Resolution: HitPaw VikPea has the capability to upscale videos, making them crisper and more detailed, even up to the stunning 8K resolution.
- Mature AI Technology: It employs sophisticated AI algorithms that have been fine-tuned to deliver outstanding results, ensuring that framerate conversion is both effective and visually pleasing.
- Simple and Clean Interface: User-friendliness is a priority, and the software's intuitive interface makes it accessible to both beginners and professionals.
- Preview Without Watermarks: HitPaw VikPea lets you preview your video with the applied enhancements before saving, ensuring you get the desired results without any unwanted surprises.
How to Use HitPaw VikPea for Framerate Conversion
Now, let's walk through the steps of using HitPaw VikPea for framerate conversion:
Step 1. Download and Install:Start by downloading and installing HitPaw VikPea on your computer. It's available for both Windows and MacOS.
Step 2. Import Your Video:Launch the software and import the video you want to convert by clicking on the "Add File" button.

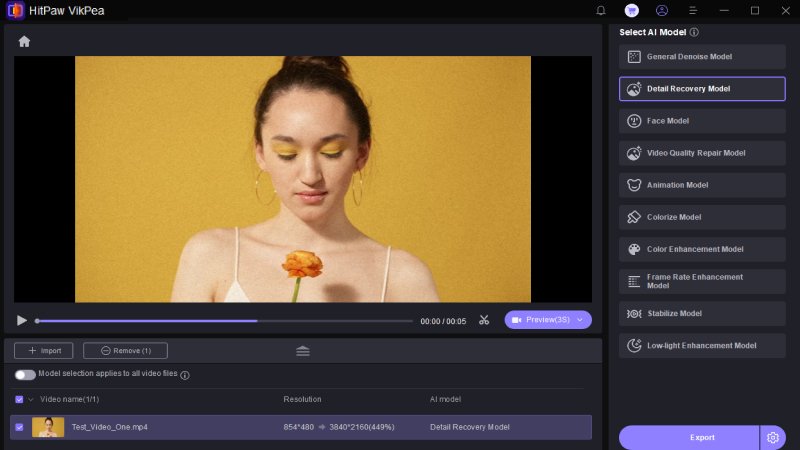
Step 3. Select Framerate Conversion & Enhance video:The video editing software's graphical user interface lets you change frame rate. Choose your favorite video frame rate. HitPaw VikPea can improve video quality and stabilize shaky footage. Any necessary changes can be made.

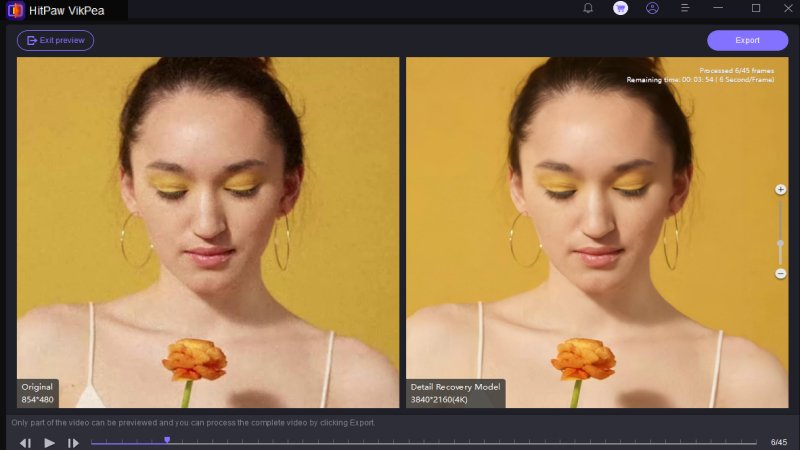
Step 4. Preview and Save:Before finalizing your changes, use the preview function to see how your video will look after conversion. Once you're satisfied, click "Apply" to save your video.

With HitPaw VikPea, framerate conversion becomes a breeze, and you can achieve your desired video quality effortlessly. Whether you're a content creator looking to enhance your videos or a filmmaker aiming to achieve a specific cinematic look, this AI-powered tool has got you covered.
Part 4. How to Change Frame Rate in Photoshop
Changing the frame rate of a video can be done using various software tools, and Photoshop is no exception. Here, we'll walk you through the steps of changing the frame rate in Photoshop.
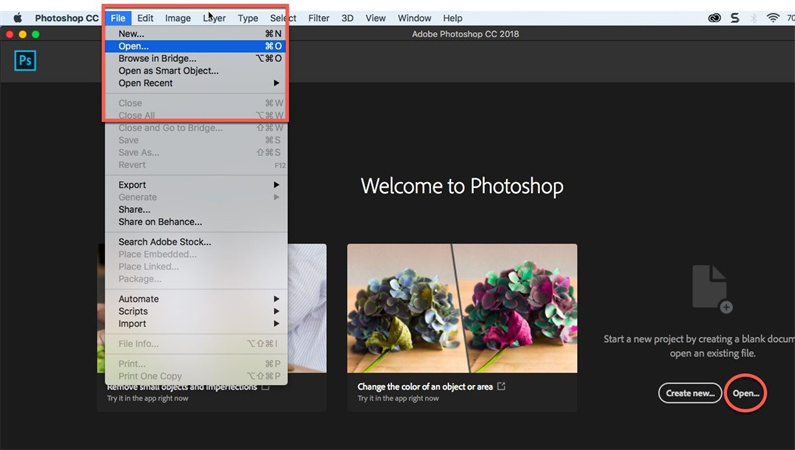
Import Your Video: Open Photoshop and go to "File" > "Open" to import your video file.

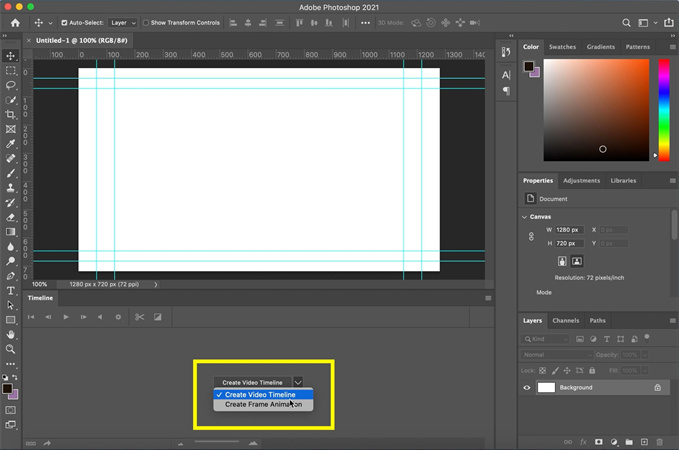
- Timeline Panel: To access the Timeline panel, navigate to "Window" > "Timeline." This panel allows you to work with video timelines.
Create Video Timeline: In the Timeline panel, click on the "Create Video Timeline" button if it's not already selected. This will convert your video into a timeline format.

- Adjust Frame Rate: In the Timeline panel, click on the arrow next to "Set Timeline Frame Rate" to choose your desired frame rate for the video. You can either select a preset frame rate or input a custom value.
- Change Frame Duration: To adjust the duration of individual frames, you can drag the edges of each frame in the timeline to make them longer or shorter. This effectively changes the frame rate without affecting the video's speed.
- Export Your Video: Once you've made the necessary changes, go to "File" > "Export" > "Render Video" to save your edited video with the new frame rate.
It's important to note that while Photoshop allows you to change the frame rate of a video, it may not offer the same level of control and sophistication as dedicated video editing software.
Part 5. How to Extend a Frame in Premiere Pro
If you're working with Adobe Premiere Pro and need to extend a frame within your video, follow these steps:
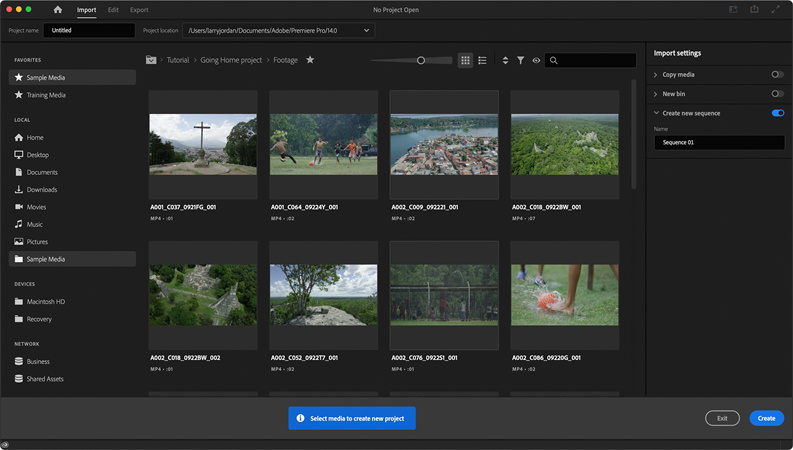
Import Your Video: Open Premiere Pro and import your video project.

- Select the Clip: In the timeline, select the clip you want to extend a frame for.
- Position the Playhead: Move the playhead to the frame you want to extend. You can do this by clicking on the timeline at the desired frame.
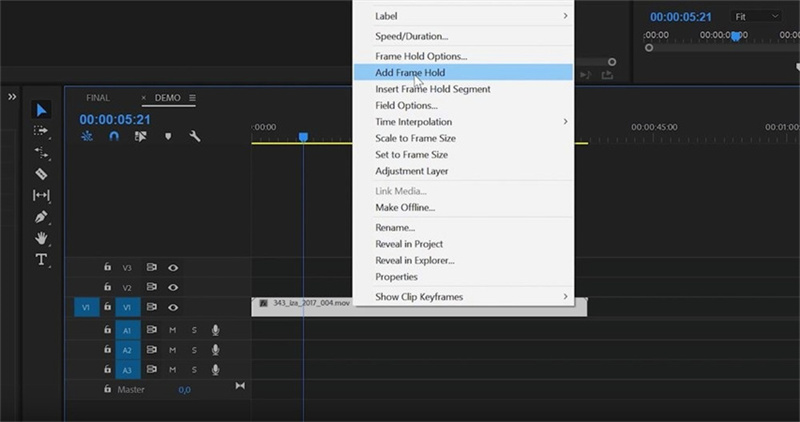
Extend Frame: Right-click on the selected clip and choose "Add Frame Hold." This will extend the frame at the playhead position.

- Adjust Duration: To change the duration of the extended frame, simply drag the edge of the frame to make it longer or shorter.
- Render and Export: Once you're satisfied with the changes, render and export your video with the extended frame.
Bottom Line
In the world of video production and editing, understanding frame rate and its manipulation is essential for achieving the desired visual effects and storytelling elements. Whether you're using Photoshop to adjust frame rates or Adobe Premiere Pro to extend frames, these tools provide valuable options for video customization.
However, for those seeking a streamlined and AI-powered solution that goes beyond simple frame rate adjustments, HitPaw VikPea stands out. With its advanced AI technology, intuitive interface, and a wide range of enhancement options, it's the go-to choice for professionals and enthusiasts alike.



 HitPaw Photo Object Remover
 HitPaw Video Object Remover
 HitPaw VikPea (Video Enhancer)


Share this article:
Select the product rating:
Daniel Walker
Editor-in-Chief
My passion lies in bridging the gap between cutting-edge technology and everyday creativity. With years of hands-on experience, I create content that not only informs but inspires our audience to embrace digital tools confidently.
View all ArticlesLeave a Comment
Create your review for HitPaw articles