How to Fix Overexposed Video: Top 4 Free Tools
Usually, equipment glitch and strong light can cause video overexposure; this phenomenon is also common among professional videographers. In addition to adjusting equipment settings, they also look for simpler ways to fix overexposed videos, such as AI tools.
This guide will introduce you to different solutions, whether you are a professional or amateur, you can find solutions in this guide.
part 1. How To Fix Overexposed Video Via AI Video Enhancer
The perfect solution to fix overexposed videos is HitPaw VikPea (formerly HitPaw Video Enhancer), which aims to enhance every aspect of a video through automatic AI detection and upscaling.
Whether you are a professional editor or an amateur user, HitPaw VikPea provides a user-friendly interface for improving your video's brightness, contrast, and color balance. Not only can you fix overexposed videos, but you can also change details such as resolution and frame rate to optimize your video.
Why Choose HitPaw VikPea?
- High-quality processing of overexposed videos, restoring perfect color balance.
- Fast output without the need for long waits.
- AI intelligent recognition, no need for complex operation skills.
- 100% immersive enhancement, no watermarks, no ads.
- User-friendly interface, online guide throughout the process.
Steps of How To Fix Overexposed Video Via HitPaw VikPea
Step 1: Download HitPaw VikPea
To fix overexposed videos with HitPaw VikPea, you must first download the software.
Step 2: Import The Overexposed Video
Click "Add Files" to upload your overexposed video. Once uploaded, the video will be visible on the software dashboard.

Step 3:Choose AI Model
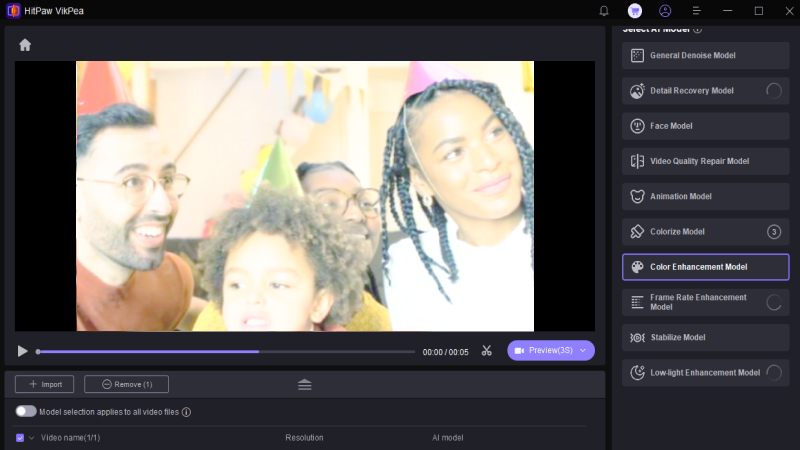
In the next step, HitPaw VikPea provides different AI models and you can select “Color Enhancement Model” to fix overexposed videos. And you can also add other Models to enhance other details of your video, such as General Denoise Model, Frame Interpolation Model, Stabilize Model and so on.
Step 4: Preview & Save The Video
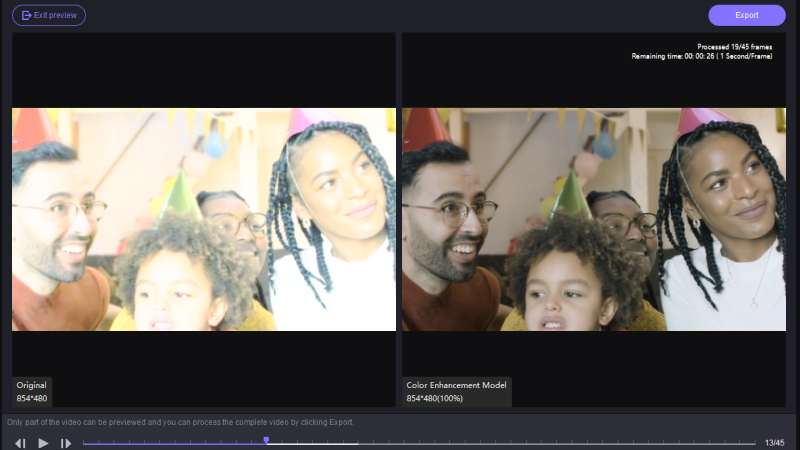
When you're satisfied with the video changes, click "Save" to save it to your preferred location on your device. HitPaw VikPea can upscale the original video to 8K resolution, ensuring it maintains its quality after enhancement.
part 2. How To Fix Overexposed Video In Premiere Pro?
To fix overexposed video Premiere Pro, follow these simple steps:
- 1. Open The Lumetri Scopes
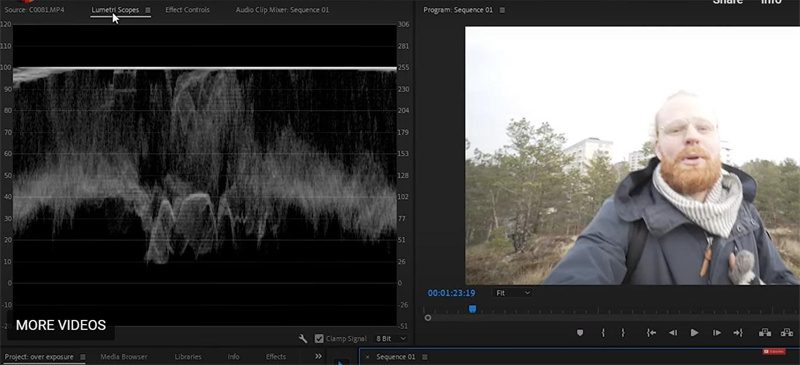
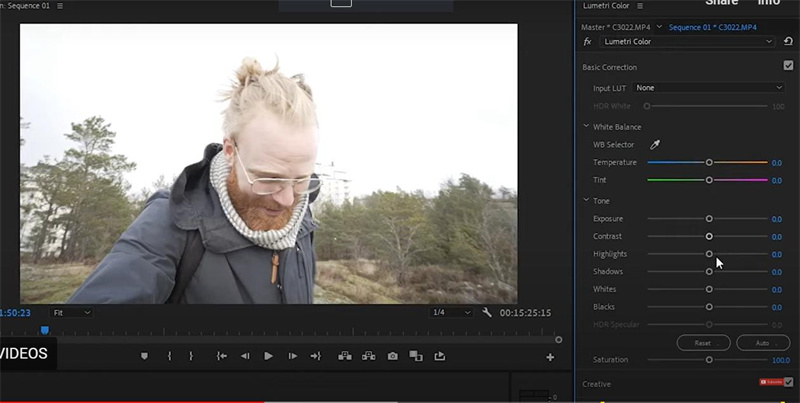
Access the Lumetri Scopes panel at the top left of your screen. Go to the Color workspace by selecting Window > Workspaces > Color. Choose the footage you want to adjust, then expand the Basic Correction section of the panel.

- 2. Adjust Brightness And Tonal Values With The Waveform Monitor
The waveform monitor helps you identify bright and dark areas in your video. Overexposed parts will appear as dot clusters, and the white line on the waveform monitor will reach around 100. Darken your clip by clicking and dragging the numeric value to the left.

- 3. Color Exposure
Explore the Creative section and choose a preset that matches your desired mood for a natural color effect. Enhance skin tones using the vectorscope. Adjust the saturation notch towards the right. Additionally, you can isolate specific colors for further skin tone improvement.
Premiere Pro Barrier:
- Lost detail in fully blown-out areas.
- Time-intensive adjustments.
- Increased noise in shadows.
- Potential for color artifacts.
- Performance impact on weaker systems.
- Steeper learning curve for beginners.
If you want to fix overexposed video quickly, just try the best AI video color enhancer!
part 3. How To Fix Overexposed Video In Final Cut Pro?
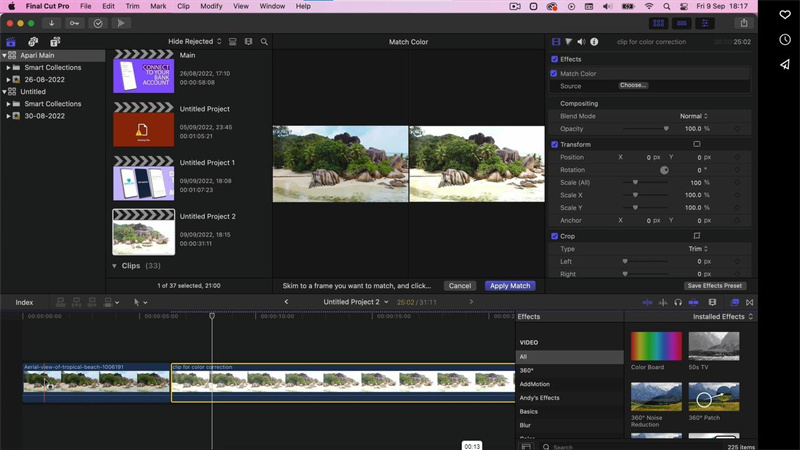
Follow the steps given below to fix overexposed video in Final Cut Pro:
- 1.Open Final Cut Pro and import the overexposed video into your project.
- 2.Click on the Inspector tab in the top right corner of the screen, and select the Color Correction option.

- 3.Adjust the slider to the left under the Exposure section to decrease the video's brightness. If this doesn't fix it completely, try adjusting the Contrast, Highlights, and Shadows sliders.
- 4.If the video is too bright, apply a LUT (Look Up Table) to the footage. Go to the Effects Browser, select the Color category, and drag a LUT into the video clip in your timeline.
- 5.If the overexposed areas are too blown out to recover, you can add a vignette effect to the footage. This adjustment will result in a darkening effect along the frame's edges and draw the viewer's focus toward the center of the shot.
Premiere Pro Barrier:
- Irrecoverable details in clipped highlights.
- Time-consuming manual adjustments.
- Risk of introducing noise in darkened areas.
- Limited advanced color grading compared to specialized software.
- Potential for unnatural results if corrections are overdone.
- Requires experience with FCPX’s color tools for optimal results.
Don’t forget your ultimate choice: AI video color enhancement tool.
part 4. How To Fix Overexposed Video In Davinci Resolve?
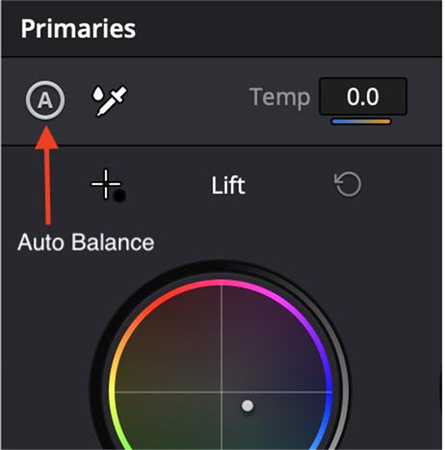
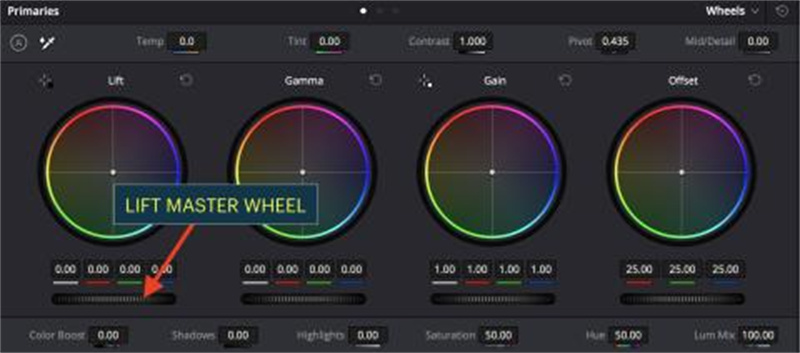
- 1.Adjust The Exposure Settings
The first step to fixing the overexposed video in Davinci Resolve is to adjust the exposure settings. Select the video clip and navigate to the Color tab to do this. Under the Basic Correction option, look for the Exposure setting and adjust the brightness level as needed.
You can also use the Contrast and Highlight settings to control the exposure levels of the video better.

- 2.Add A LUT Or Color Grade
If adjusting the exposure isn't enough to fix the overexposed video, add a LUT or color grade to the clip. A LUT (Lookup Table) is a preset that adjusts the color and tone of the video.
To add a LUT, go to the Color tab, right-click on the video clip, and select "3D LUT." Browse through the available LUTs and choose one that best suits your needs.

Alternatively, you can create a custom color grade by adjusting the individual settings, such as the shadows, mid-tones, and highlights. This allows you to have more control over the video's overall look and feel.
Premiere Pro Barrier:
- Irrecoverable detail in clipped highlights.
- Steeper learning curve for beginners due to advanced color tools.
- Potential for noise in shadows during correction.
- Risk of overcorrection leading to unnatural results.
- High system requirements for smooth performance.
- Time-consuming adjustments, especially for complex corrections.
To quickly fix overexposed video with HD quality, just try the best AI video color enhancer!
The Bottom Line
In conclusion, achieving proper exposure in your digital videos is crucial for conveying your story effectively. From HitPaw VikPea to more professional tools like Premiere Pro and Davinci Resolve, there are various options available to fix overexposed videos.
However, for simplicity and effective results, HitPaw VikPea, with its AI-powered core, should be your first choice.



 HitPaw Edimakor
 HitPaw Univd (Video Converter)
  HitPaw VikPea (Video Enhancer)

Share this article:
Select the product rating:
Daniel Walker
Editor-in-Chief
My passion lies in bridging the gap between cutting-edge technology and everyday creativity. With years of hands-on experience, I create content that not only informs but inspires our audience to embrace digital tools confidently.
View all ArticlesLeave a Comment
Create your review for HitPaw articles