Mastering Color Grading in Final Cut Pro: A Comprehensive Guide
Introduction
Welcome to the ultimate guide for mastering color grading in Final Cut Pro! Whether you're a beginner looking to enhance your editing skills or a seasoned pro aiming to refine your techniques, this comprehensive resource is designed for you. Dive deep into the world of final cut pro color grading as we explore expert tips, tricks, and strategies to elevate your videos to the next level. Get ready to unleash your creativity and transform your projects with stunning visual effects and cinematic quality.
Part 1. What is Final Cut Pro Color Grading
Color grading for Final Cut Pro involves the meticulous adjustment and manipulation of colors and tones within video footage to achieve a desired visual aesthetic or mood.
Purpose:
The primary goal of colour grading final cut pro is to enhance the overall look and feel of the footage, establish a specific atmosphere or mood, ensure consistency across different shots, correct color imperfections, and provide editors with the creative freedom to express their artistic vision effectively.
Tools available in Final Cut Pro for color grading
Final Cut Pro provides a comprehensive set of tools for color grading, empowering editors to achieve precise adjustments and creative effects. Some of the key tools available for color grading in final cut include:
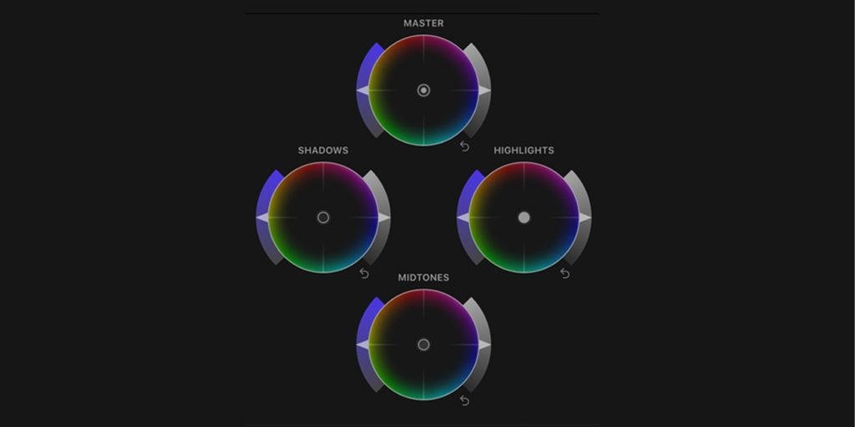
- Color Wheels: Allows adjustments of shadows, midtones, and highlights separately, enabling precise control over the tonal balance of the image.

- Color Curves: Provides a graphical interface for adjusting the color and luminance of specific tonal ranges within the image.

- Color Masks: Enables the selective application of color adjustments to specific areas of the frame, offering detailed control over grading effects.
- LUTs (Look-Up Tables): Allows for the application of predefined or custom color transformations to achieve specific looks or styles.
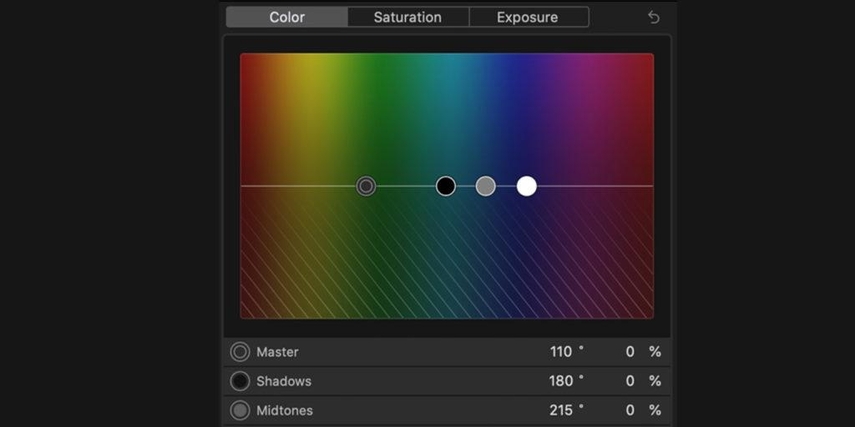
- Color Board: Offers a simplified interface for making basic color adjustments such as exposure, saturation, and color balance.

- Color Correction: Provides tools for correcting common color issues such as white balance errors, exposure problems, and color casts.
Benefits of using Final Cut Pro for color grading
Here are the benefits of color grading on final cut pro:
- Seamless integration: Final Cut Pro seamlessly integrates color grading into the editing workflow, allowing for a smooth transition between editing and grading processes.
- Real-time playback: Editors can preview color adjustments in real-time, facilitating quick decision-making and efficient iteration.
- Extensive toolset: Final Cut Pro offers a wide range of color grading tools, including color wheels, curves, masks, and LUTs, providing flexibility and control over the grading process.
- GPU acceleration: Leveraging GPU acceleration, Final Cut Pro delivers high-performance color grading, even with high-resolution footage and complex grading effects.
Part 2. Step-by-Step Guide to Color Grading in Final Cut Pro
Here are the steps for final cut colour grading:
A. Importing and Organizing Footage for Color Grading
- Import your footage into Final Cut Pro.
- Organize clips into libraries and events for easy access.
B. Adjusting Exposure, Contrast, and Saturation Levels
- Use the exposure, contrast, and saturation controls to adjust overall image brightness, contrast, and color intensity.
C. Applying Color Presets and LUTs (Look-Up Tables)
- Apply pre-made color presets or import custom LUTs to achieve specific looks or styles.
D. Fine-Tuning Color Balance and Temperature
- Use color wheels or color curves to fine-tune the color balance and temperature of your footage, adjusting for natural-looking skin tones and overall color harmony.
E. Utilizing Masks and Keyframes for Selective Color Adjustments
- Create masks to isolate specific areas of the frame for targeted color adjustments.
- Use keyframes to animate color changes over time for dynamic effects.
F. Enhancing Skin Tones and Achieving a Cinematic Look
- Use selective color adjustments to enhance skin tones and ensure a natural appearance.
- Experiment with contrast, saturation, and color grading techniques to achieve a cinematic look that suits your project's aesthetic.
G. Exporting the Graded Footage
- Once satisfied with the color grading, export the footage using Final Cut Pro's export settings, ensuring compatibility with your desired output format and resolution.
By following these step-by-step instructions, you'll be able to effectively color grade your footage in Final Cut Pro, enhancing its visual quality and achieving your desired creative vision.
Part 3. Best Recommendation: Video Colorize and Color Enhancement Tool
HitPaw VikPea (formerly HitPaw Video Enhancer) is the top choice for video repair and enhancement. Powered by advanced AI algorithms, it effectively enhances video quality. The latest version introduces new models like Frame Interpolation and Stabilize, ensuring unparalleled results. Whether it's color correction in Final Cut Pro, colorizing old footage, or enhancing colors in existing videos, HitPaw VikPea offers cutting-edge technology for professional-grade results. Just try it free to colorize video now!
Features
- AI Enhancing Tool: Seamlessly enhance video color with the Colorize Model and effortlessly add vibrancy to black and white footage with the Color Enhancement Model.
- Up to 8K Resolution: Elevate your viewing experience by upscaling videos to stunning 8K resolution, ensuring unmatched clarity and final cut color correction.
- Video Repair: Easily repair damaged video files with precision and efficiency, restoring them to their original quality.
- Mature AI Technology: Benefit from cutting-edge AI algorithms that deliver superior results, backed by years of research and development.
- Simple Interface: Enjoy a user-friendly interface designed for hassle-free navigation and intuitive operation, making video enhancement a breeze.
- Watermark-Free Preview: Preview your enhanced videos without watermarks, allowing you to assess the results with clarity and confidence.
Steps
-
Step 1.Download and install the HitPaw VikPea on your computer.
-
Step 2.Upload the video you want to enhance the software.

-
Step 3.Simply choose “Colorize Model”, it will help you upscale black and white video to color.

-
Step 4.Click on Preview to process the video and wait for a few seconds. Once satisfied, click the Export button to save the video file to your computer.

You give a modern and alluring touch to your favorite old videos with just a few clicks.
After following these steps you can enhance the color of your videos.
Learn More about HitPaw VikPea
Conclusion
In conclusion, mastering color grading in Final Cut Pro is key to achieving professional-quality videos. With its comprehensive toolset and seamless integration, Final Cut color grading offers unparalleled flexibility for enhancing your footage. HitPaw VikPea stands out as a top recommendation for further enhancing video quality. With its advanced AI technology, user-friendly interface, and watermark-free preview, HitPaw VikPea empowers you to take your videos to the next level. Don't settle for anything less than exceptional; unlock the full potential of your footage with HitPaw VikPea today.


 HitPaw Photo Object Remover
 HitPaw Univd (Video Converter)
  HitPaw VikPea (Video Enhancer)


Share this article:
Select the product rating:
Daniel Walker
Editor-in-Chief
My passion lies in bridging the gap between cutting-edge technology and everyday creativity. With years of hands-on experience, I create content that not only informs but inspires our audience to embrace digital tools confidently.
View all ArticlesLeave a Comment
Create your review for HitPaw articles