How to Extract Frames from Video on Mac (& Windows PC)
Every animation or video you see on your computer, television, tablet, or phone is created from a succession of still pictures. These pics are then played in succession several times a second making you think that the object is moving. If you are more into this thing, you might want to know how to extract frames from video. This article will help you know different methods to extract frames from video on your Mac device.
Part 1. How to Extract All Frames from Video on Mac With HitPaw Edimakor?
The methods provided online do extract frames from video Mac; however, the major reported concerns involved difficulty finding the right and easy option while trying these methods. HitPaw Edimakor is a probable solution that can help users extract frames from a video easily.
This AI video editor, regardless of providing extensive video editing features, can be used to take specific snippets from the video. Using its easy-to-use interface, you can easily extract frames from YouTube videos on Mac. It is compatible with both Mac and Windows PC and the process is the same.
Provided next are the step-by-step instructions to extract frames from a particular video while using HitPaw Edimakor for editing videos:
- Step 1. Create a New Project on HitPaw Edimakor
- Step 2. Add Video To Timeline
- Step 3. Use the Snapshot Button To Extract a Frame
- Step 4. Visit The Saved Location of Extracted Frames
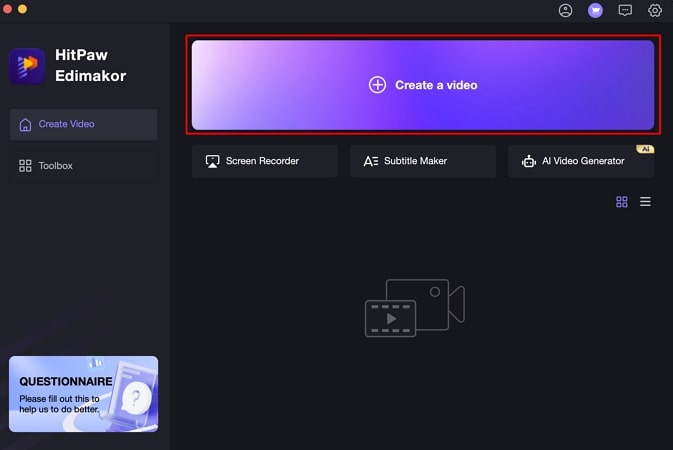
Start by launching HitPaw Edimakor on your Mac after successfully installing it. Click the Create a video button to start this AI video editor.
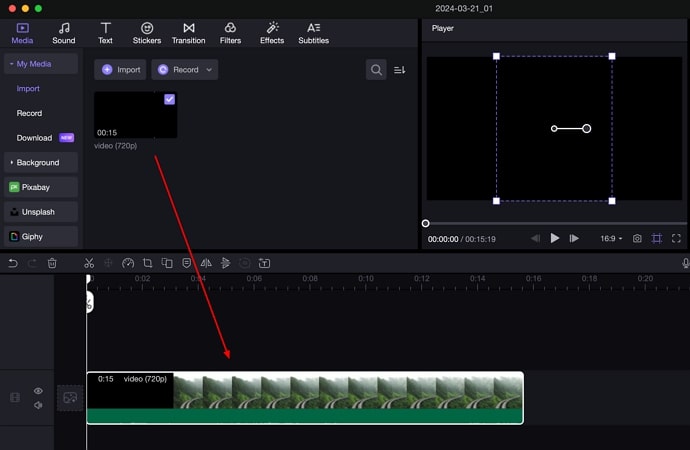
Upload the video to the timeline by dragging and dropping it. Following this, you can make any edits within the video according to your requirements.
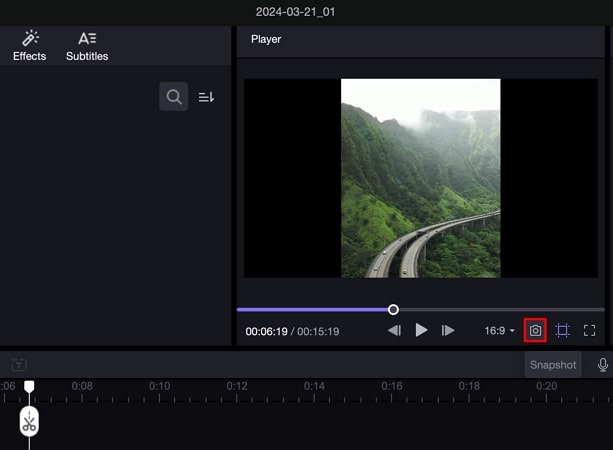
Look for the Snapshot icon in the preview window section. This automatically takes a snapshot of the current frame that is running or paused.
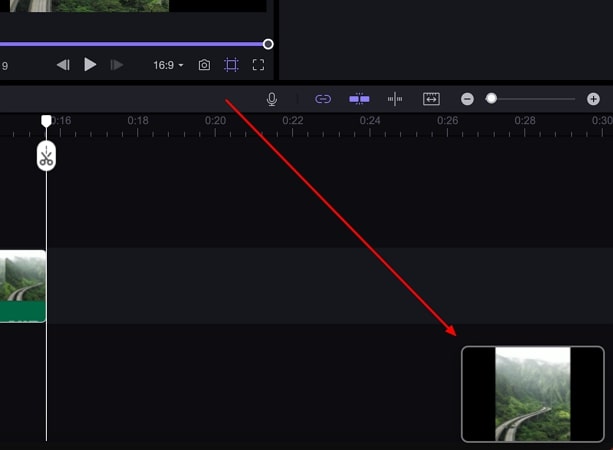
A small indication of capturing a snippet appears on the bottom-right section of the editing window. Click on it to open the snapshot location on your Mac.
Part 2. How to Extract All Frames from Video Mac Using FFmpeg?
FFmpeg is an open-source and free multimedia tool. The tool is capable of playing audio and video, recording media, switching containers, as well as extracting all frames from video on Mac. FFmpeg is also used in a number of popular conversion tools and media players.
Users can get this tool from the official website. If users have the macOS package manager "Brew" downloaded, they can just install it by typing the brew install ffmpeg terminal command. Follow the steps below to know how to extract frames from video on Mac using this tool.
-
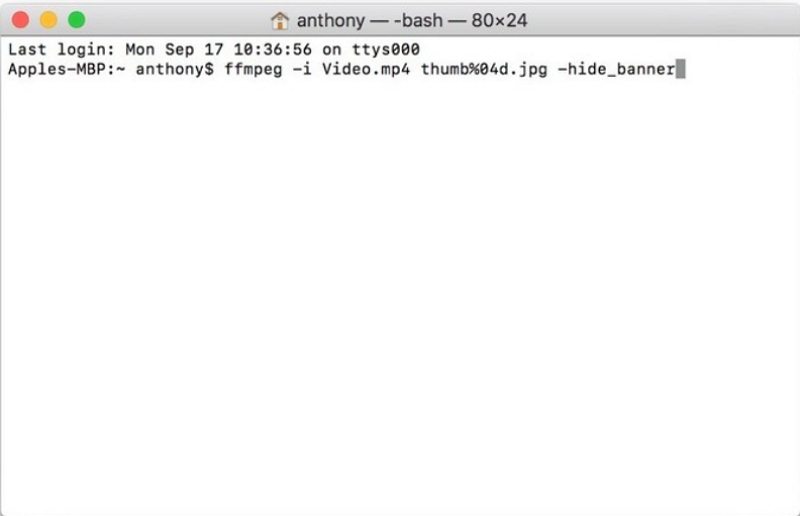
1. terminal and change the directory to where your video file is present.

-
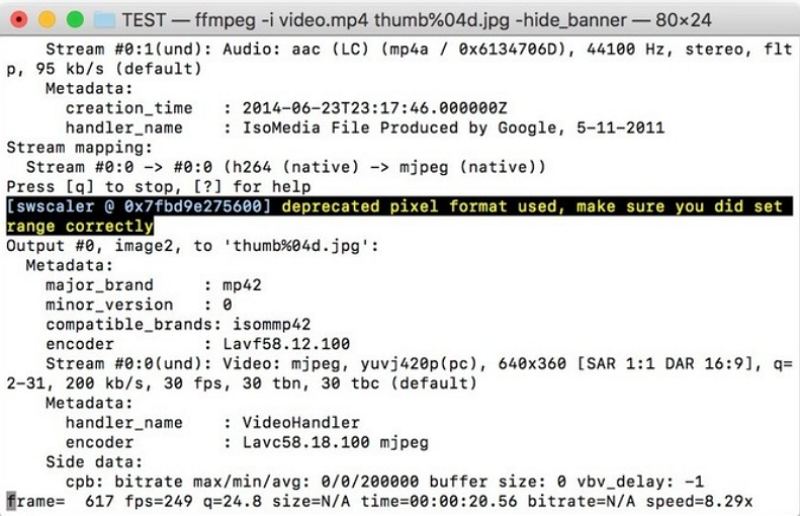
2. Type ffmpeg -i video.mp4 thumb%04d.jpg -hide_banner command. Press enter.

-
3. Now you will have all the individual frames in the same directory as the original video file.
Part 3. How to Extract All Frames from Video on Mac Using VLC?
VLC is a well-known media player that can take screenshots mamually or extract every frame from the video while playing it. Follow the below steps to know more.
-
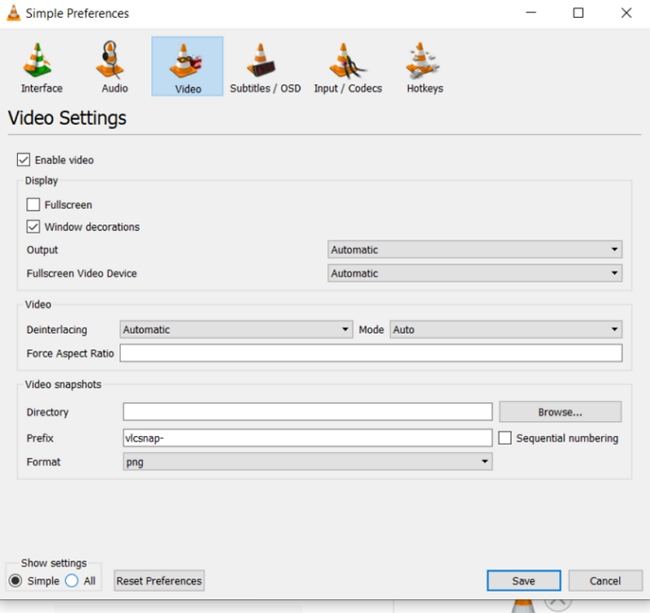
1. Download and install VLC Player on your PC. Open VLC, navigate to Preferences, and tap the Show All Settings option present at the bottom left.

-
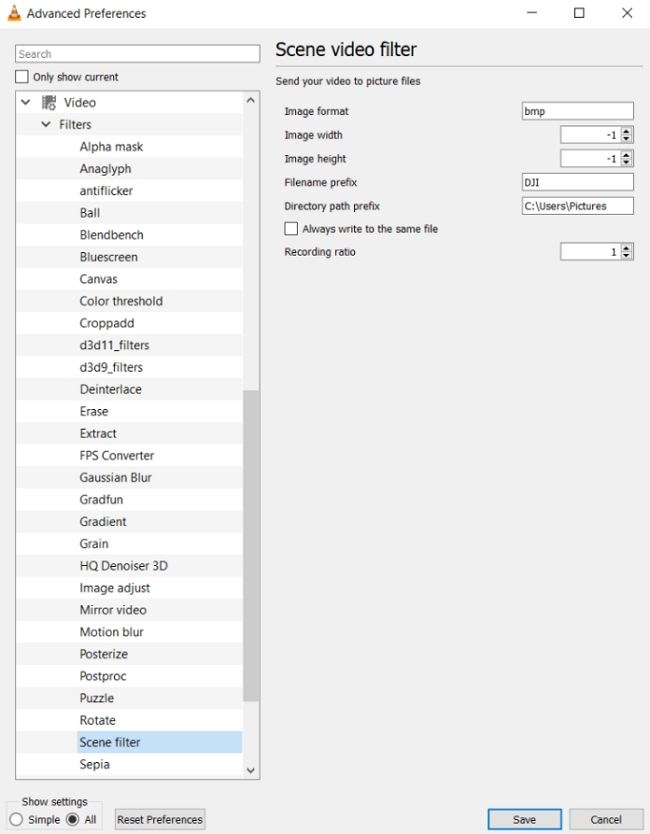
2. Go to Video and click Filters and tap the Scene Filter option. Select the path to save the files, the image format, and the recording ratio.

-
3. Click Filters option in the Advanced Preferences section. Make sure to tick the Scene video filter box near the top right. Lastly, click Save.
-
4. Now, play the video and the pics will start extracting automatically. They will continue to extract until users stop watching the video.
Part 4. How to Extract Frames from Video using macOS Photos?
Most Apple devices are capable of taking screenshots while recording a video. Of course, you can also use the Photos app on your Mac to take screenshots while playing a video. It's very simple, just open the Photos app and follow the steps below to learn how to extract frames from a video on Mac.
-
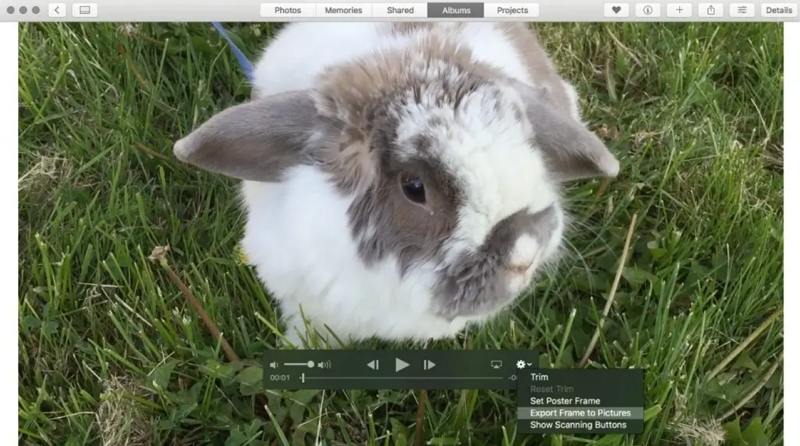
1. Open the video and go into playback mode. Click the Setting logo on the playback controls bar on the right hand side. Here you will see the Export Frame to Pictures option.

-
2. Simply play the video or go to the current frame you want to capture and click on the Export Frames to Pictures option.
-
3. The frame will be saved as a TIFF image in your Mac's Pictures folder named "Frame" followed by the date and time of the export.
The picture will not be saved to your Photos app, but you can easily import the frame from the Pictures folder if you wish to save it in your library.
Part 5. How to Capture Frames from Video on Mac with HitPaw Screen Recorder?
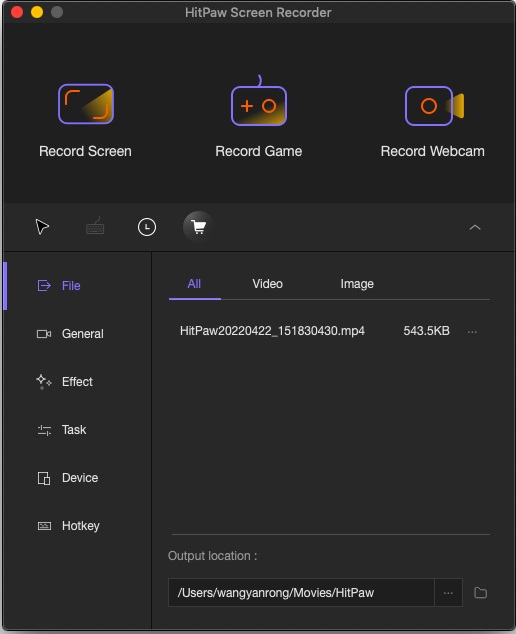
HitPaw Screen Recorder is the last tool here that can be used to extract frames from video on Mac. With it, you can easily capture frames from video while recording. You can also add text, draw or highlight on your frames. Follow the steps below to use this tool to extract frames from video.
-
Step 01 Play the video on your Mac. Run HitPaw Screen Recorder and click Screen option to record your video.

-
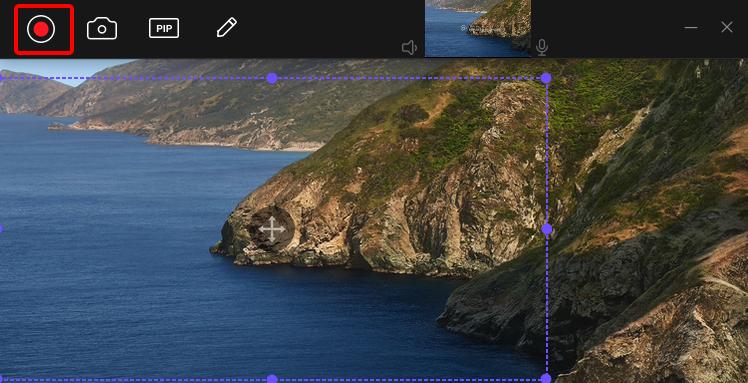
Step 02 You can select full screen or select a desired area, as per your requirement, to record the video.

-
Step 03 While recording, click the Camera icon on the tool to save or extract the frame from your video. The extracted frames will be automatically saved.
Conclusion
We reviewed the best methods to extract all frames from a video on Mac. By following the steps outlined, you can efficiently capture every frame from your video, allowing you to share or repurpose them for creative projects. HitPaw Edimakor has been presented as the ultimate solution to extract frames from videos on Mac and Windows PC.


 HitPaw VikPea
 HitPaw Video Converter


Share this article:
Select the product rating:
Joshua Hill
Editor-in-Chief
I have been working as a freelancer for more than five years. It always impresses me when I find new things and the latest knowledge. I think life is boundless but I know no bounds.
View all ArticlesLeave a Comment
Create your review for HitPaw articles