The Ultimate Guide to Deinterlace in Premiere
Introduction
Welcome to "The Ultimate Guide to Deinterlace in Premiere"! This comprehensive resource is your go-to manual for mastering the art of deinterlacing in Adobe Premiere Pro. Whether you're a beginner looking to understand the fundamentals or a seasoned editor aiming to refine your skills, this guide has you covered. Dive deep into the world of deinterlacing as we explore expert techniques, tips, and strategies to enhance the quality of your video footage. Get ready to unlock the full potential of Premiere Pro deinterlace and achieve stunning results!
Part 1. What is Deinterlace in Premiere
What is Deinterlace?
Before figuring out what deinterlace is, you should know the interlaced video. Because deinterlace is turning an interlaced video into a non-interlaced or progressive form.
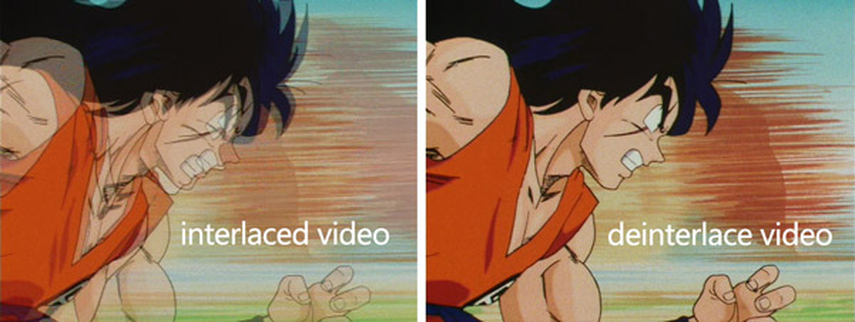
Interlace is one kind of technique to double the perceived frame rate of a video display without consuming extra bandwidth. Compared with the non-interlaced video, the interlaced signal usually contains two fields of a video frame that are captured consecutively. Interlaced video can help to enhance motion perception and reduce flicker.
Deinterlace, as mentioned above, is a converting process that can change the source material that contains alternating half-pictures to a computer screen that displays a full picture at a time. Deinterlacing video can guess the movement of every object in the video, and apply motion correction to them.
How Does Deinterlacing Work?
Here is how deinterlace in premiere pro work:
- Deinterlacing aims to eliminate these artifacts by converting interlaced video into a progressive format.
- The process involves intelligently merging the odd and even fields to create a smoother, flicker-free image.
- However, deinterlacing comes with a trade-off: it effectively reduces vertical resolution by half.
Benefits of deinterlacing in video editing
Deinterlacing premiere pro offers several key benefits:
- Improved visual quality: Deinterlacing removes the interlacing artifacts present in interlaced video footage, resulting in smoother motion and higher image quality.
- Compatibility with modern displays: Deinterlacing ensures that your videos display properly on modern digital screens, which typically use progressive scan technology.
- Enhanced viewing experience: By eliminating interlacing artifacts such as flickering lines or combing effects, deinterlacing provides viewers with a more enjoyable and immersive viewing experience.
- Professional presentation: Deinterlaced footage looks more polished and professional, making it suitable for a wide range of applications, from broadcast television to online streaming platforms.
- Creative flexibility: Deinterlacing allows editors to manipulate and enhance footage more effectively, opening up creative possibilities for post-production effects and editing techniques.
Part 2. How to Deinterlace in Premiere Pro
1. Add a Clip to the Timeline
Launch the app and take a look at the layout. We’ll be working with two key panels: the Program Monitor and the Timeline. The Program Monitor is found in the upper center of Premiere Pro.
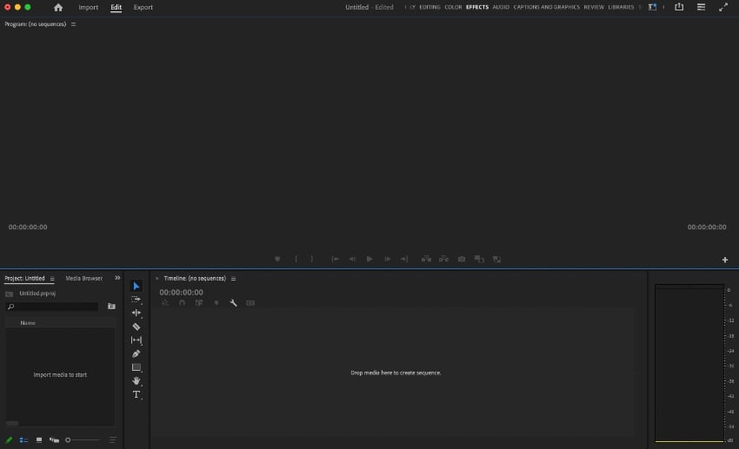
Let’s place a video clip on the Timeline. We’ll use the demo footage that we saw above. Browse to a video clip on your computer. Then, click and drag it over the Timeline. Drop it into place.
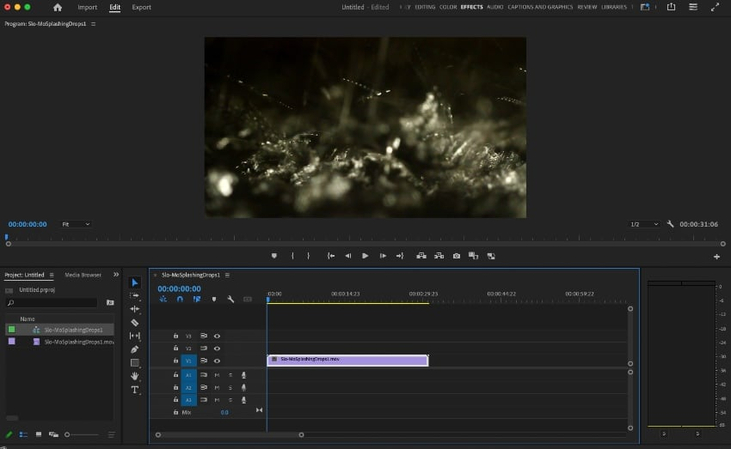
2. Find the Field Options for the Interlaced Clip
Begin by finding the clip that you want to deinterlace in your Timeline. Then, right-click on it. Clips are identifiable as the purple bars in the Timeline itself.
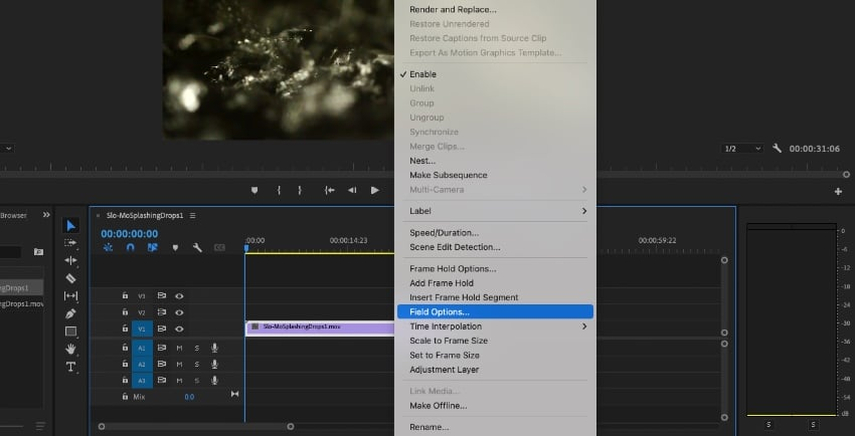
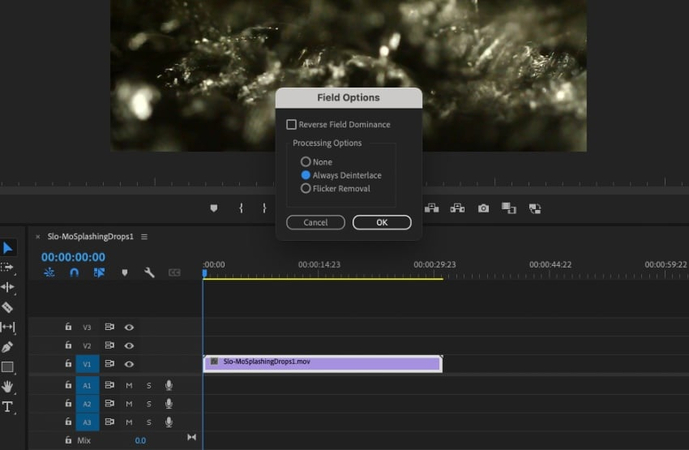
When you click on a Timeline clip, a menu will appear with a long list of options. From it, find Field Options. Click here, and the Field Options box will appear in the center of your screen.
3. Choose to Deinterlace
The Field Options menu is small, with the list of features short and to the point. To deinterlace a given clip, click the center bubble under Processing Options. It’s labeled Always Deinterlace.
With Always Deinterlace checked, go ahead and click OK. Premiere Pro will process your video clip, applying deinterlacing effects.
4. Review and Adjust the Results
Once you’ve completed the deinterlacing steps, give your video a preview in the Program Monitor. As I mentioned, you might choose to Always Deinterlace or Remove Flicker. See which of the two options makes the most impact on a given piece of footage.
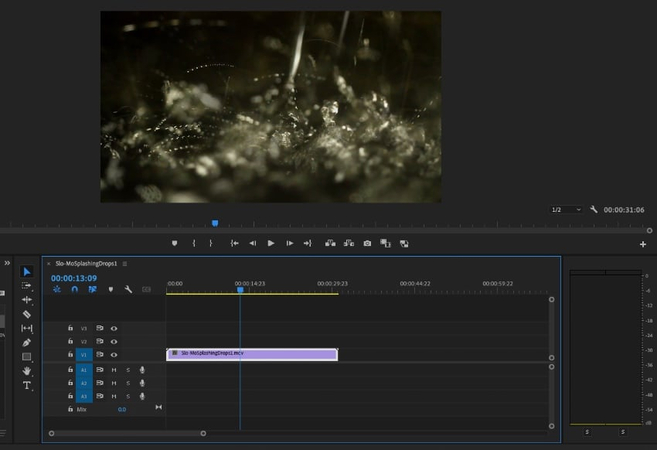
You can always make additional edits to sharpen and adjust videos. These work best after you’ve deinterlaced them. For example, you can go to Effects > Video Effects > Blur & Sharpen > Sharpen.
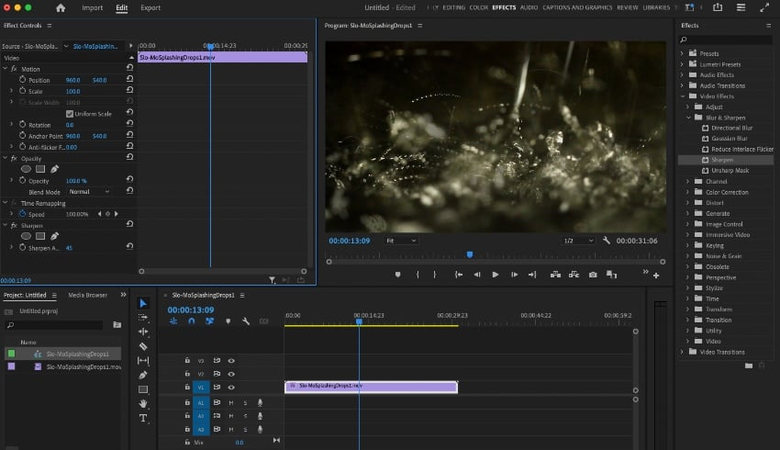
Adding a Sharpen effect can help deinterlace adobe premiere clips look their best in Premiere Pro.
Tips and tricks for effective deinterlacing
For effective "Premiere deinterlace"
- Understand your footage characteristics.
- Choose the appropriate deinterlacing method.
- Preprocess footage to enhance quality if needed.
- Apply deinterlacing conservatively.
- Preview at full resolution for accuracy.
- Use proxy files for better performance.
Part 3. Advanced Deinterlace Features in Adobe Premiere
Here's a breakdown of adobe premiere deinterlace features.
Overview of Advanced Deinterlace Settings:
- Premiere Pro offers advanced deinterlace settings within the Field Options panel.
- These settings include options for field order (Upper First or Lower First), field type (Progressive or Interlaced), and frame blending methods.
- Additionally, Premiere Pro supports third-party plugins for enhanced deinterlacing capabilities.
Customizing Deinterlace Settings for Optimal Results:
Customize deinterlace video Premiere Pro for optimal results:
- Access Field Options panel to adjust field order and type.
- Experiment with frame blending methods like Frame Mix, Pixel Motion, or Optical Flow.
- Fine-tune settings within each method for better control.
- Adjust motion estimation accuracy in Optical Flow analysis for improved deinterlacing quality.
Utilizing Plugins for Enhanced Deinterlacing Capabilities:
- Premiere Pro supports third-party plugins like RE:Vision Effects' FieldsKit or Boris FX's BCC Deinterlace for advanced deinterlacing features.
- These plugins provide additional customization options, such as advanced motion estimation algorithms, artifact reduction tools, and more.
- Install and apply these plugins to access enhanced deinterlacing capabilities beyond Premiere Pro's built-in features.
By customizing deinterlace settings and utilizing third-party plugins, you can achieve optimal results and effectively deinterlace your footage in Adobe Premiere Pro.
Part 4. Pro-tip: How To Do Frame Interpolation with HitPaw VikPea
HitPaw VikPea (formerly HitPaw Video Enhancer) is a top-rated program renowned for its unparalleled video repair and enhancement capabilities. Leveraging cutting-edge AI algorithms, it transforms ordinary footage into stunning visuals. The latest version introduces groundbreaking features like the Frame Interpolation Model and Stabilize Model, enhancing user experience and versatility. With HitPaw VikPea, users can effortlessly elevate the quality of their videos, making it a must-have tool for content creators and enthusiasts alike.
Features
- Import Video: Launch the program and import your video file.
- Select Enhancement Options: Choose from upscale, repair, stabilize, or other enhancement options.
- Adjust Settings (Optional): Fine-tune enhancement parameters to suit your preferences.
- Preview: Preview the enhanced video without watermarks to ensure satisfaction.
- Export: Once satisfied, export the enhanced video in your desired format and resolution.
Steps
Step 1. Import Your Video: Launch HitPaw VikPea and import the video file you want to enhance.
Step 2: Secondly, tap "Choose file" to browse and import the video that needs to be interpolated. You can also use the drag & drop feature.
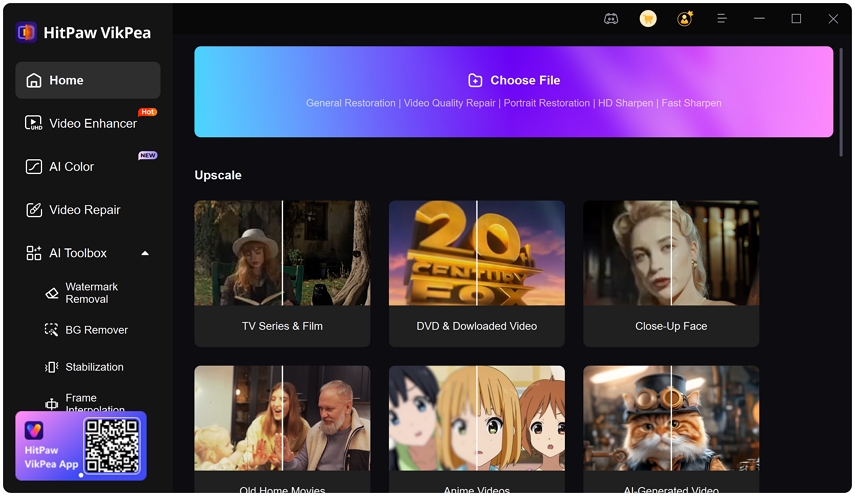
Step 3: Here, look at the "Select AI Model" section from the side column, where you can choose the desired option from the AI library. You can simply click “Frame Interpolation Model” or add it from the library.
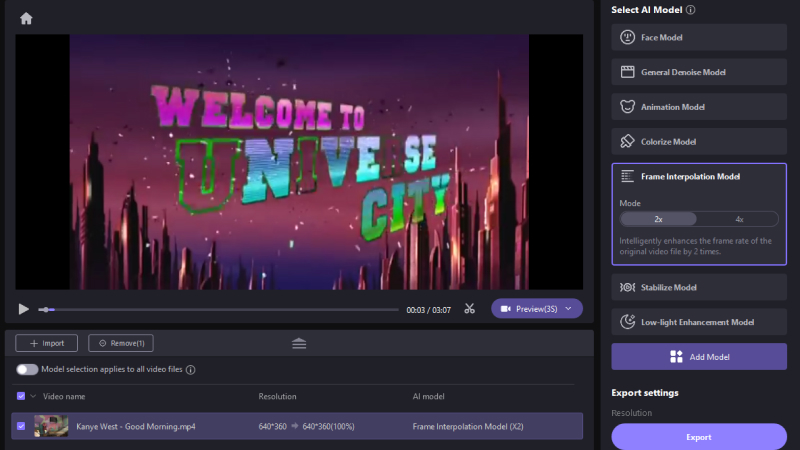
Step 4. Preview the interpolated frames to ensure the desired smoothness and quality.

Step 5. Once satisfied with the settings, proceed to apply the frame interpolation to your video.
Export: After the interpolation process is complete, export the enhanced video with interpolated frames in your preferred format and resolution.
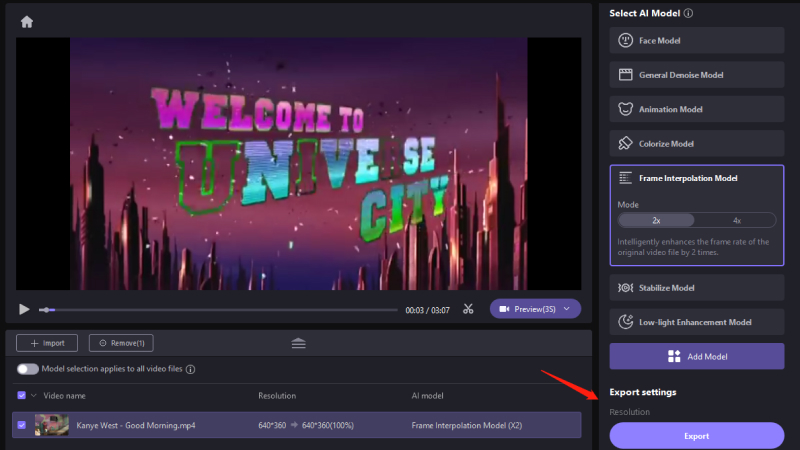
By following these steps, you can effectively utilize HitPaw VikPea's frame interpolation feature to create smoother and more fluid motion in your videos, enhancing the overall viewing experience.
Learn More about HitPaw VikPea
Conclusion
In conclusion, mastering deinterlacing in Premiere Pro is crucial for professional-quality video output. This guide equips you with the knowledge and tools to enhance your editing skills. With HitPaw VikPea's innovative frame interpolation capabilities, improving video quality is simpler than ever. We highly recommend HitPaw VikPea for its intuitive interface, powerful AI algorithms, and capacity to elevate ordinary footage into extraordinary visuals.


 HitPaw Univd (Video Converter)
  HitPaw Photo Object Remover
 HitPaw VikPea (Video Enhancer)


Share this article:
Select the product rating:
Daniel Walker
Editor-in-Chief
My passion lies in bridging the gap between cutting-edge technology and everyday creativity. With years of hands-on experience, I create content that not only informs but inspires our audience to embrace digital tools confidently.
View all ArticlesLeave a Comment
Create your review for HitPaw articles