How to Change the Speed in VLC Media Player
VLC is arguably the most popular multimedia player. Millions of people use it to watch videos of any sort. But at times, you wish to speed up or slow down the playback speed for a variety of reasons such as take a quick overview of a long video, analyze the details of a fast-motion video, and so on.
If you’re using VLC player but don’t know how to adjust VLC playback speed, then look no further. In this article, we will walk you through how to change VLC playback speed on both Windows and Mac.
Let’s cut to the chase!
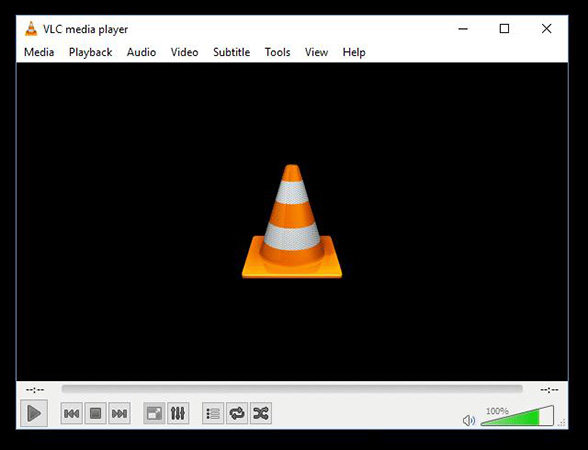
Part 1. How to Change Playback Speed on VLC for Windows?
If you’re a Windows user and want to change VLC speed, then check out the below solutions.
Method 1: Change Playback Speed in Context Menu
Wondering how to speed up VLC while playing a long video? Look no further and follow the below steps to increase or decrease the VLC playback speed:
Step 01After playing a video on VLC, navigate to Playback > Speed.
Step 02Here, just click on the relevant option to adjust the video speed as shown in the figure.
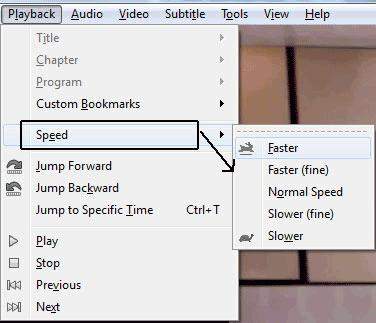
Step 03Keep pressing the wanted option until you get the wanted speed.
Method 2: Change VLC Playback Speed using Hotkeys
Another simple method to change VLC playback speed quickly. All it takes is just a few clicks to get the job done. Follow the below steps to do that:
Step 01Open a video on VLC player.
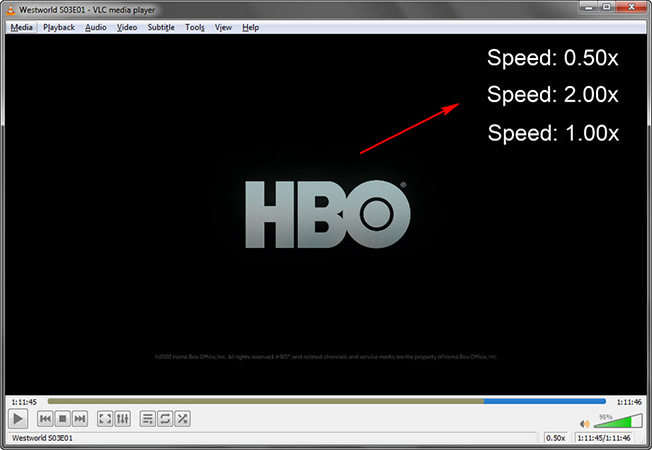
Step 02Just use the below hotkeys to increase or decrease the playback speed as needed.
Faster (fine): "]" Key
Slower (fine): "["
Faster: "+" Key
Slower: "-" Key
Normal speed: "=" Key
Method 3: Fine Tuning Audio/Video Speed in Status Bar
The last tip for changing VLC playback speed is using the status bar. This solution is as easier as it can get.
Here’s how to use it to change VLC video speed:
Step 01Launch your video on VLC.
Step 02Now, go to View at the top bar and enable “Status Bar. A tiny slider will appear right under the volume icon.
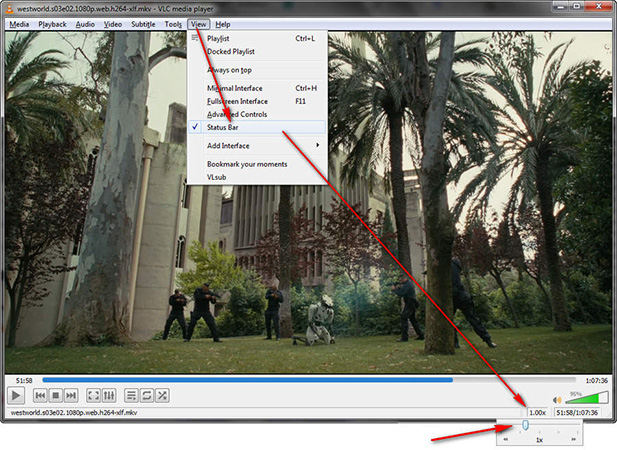
Step 03Simply click on the slider and drag it left or right to increase or decrease the speed accordingly.
Part 2. How to Change Playback Speed on VLC for Mac?
Are you a Mac use and want to adjust VLC playback speed? Below are the two simple tips to increase the VLC speed as you want.
1. Use Hotkeys to change VLC playback speed
Just as mentioned before, you can press shortcut keys on your keyboard to adjust video speed. Here are the hotkeys you should remember:
Faster (fine): "]" Key
Slower (fine): "["
Faster: "+" Key
Slower: "-" Key
Normal speed: "=" Key

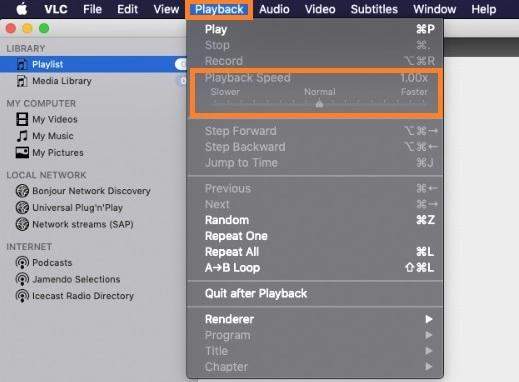
2. Use Toolbar to change VLC playback speed
Another meticulous solution for changing the vlc speed to your requirements. Before proceeding, be sure you have updated the VLC player to the latest version. The steps are shown below:
Step 01Open the video on VLC whose speed you want to change.
Step 02Head to the top bar and click on Playback.
Step 03From the drop-down options, adjust the video speed under the Playback Speed option.
Part 3. How to Save a Video with a Changed Playback Speed in VLC?
The aforementioned tips can adjust the speed only when you load the video. Your settings are lost whenever you close the VLC player. If you wish to make the playback settings permanent, then follow the below steps:
Step 01Launch VLC on your PC and navigate to Tools > Preferences.
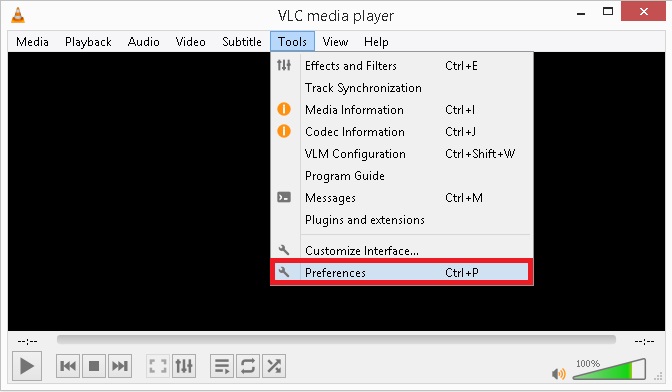
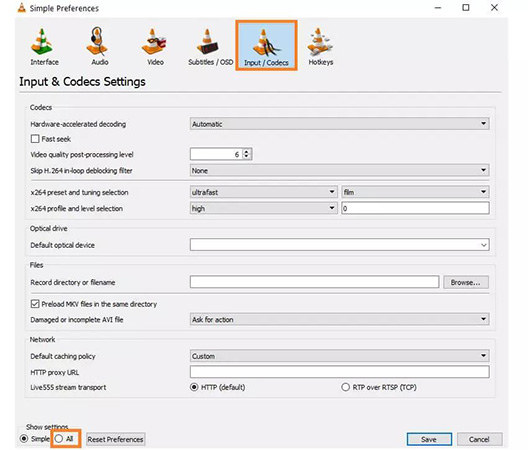
Step 02On the pop-up bar, hit the Inputs/Codecs tab. Then, click on “All” to access the Advanced Preferences dialogue box.
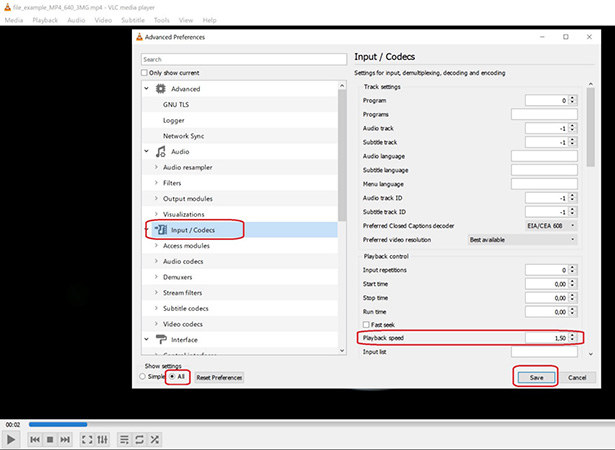
Step 03Now, click on Input/Codecs in the left tab. Then, locate the Playback Speed option and enter the new default speed you want. Hit Save.
Extra Tip: How to Adjust Video Speed with HitPaw Edimakor
As good as VLC is, it doesn’t permanently change the speed of a video. Don’t want to go through the hassle of changing the VLC playback speed every time you play a video? Get HitPaw Edimakor!
This tool offers the quickest way to change the playback speed of any video without losing its quality. Using its speed slider, you can adjust the speed as precisely as needed. Aside from setting the video at a uniform speed, it allows you to make speed ramps.
That is, you can make time nodes of a video to set different speeds for different sections of the same video. In addition, this multi-feature program offers all the impeccable editing features that you expect from a top-notch editor. Users can perform basic editing functions as well as add filters, transitions, stickers, and texts to videos.
More strikingly, it has a sleek interface that allows a beginner to master the art of editing effortlessly.
Advantages of HitPaw Edimakor
-
1
A one click procedure to adjust video speed permanently.
-
2
Doesn’t compromise the video quality.
-
3
Offers tons of amazing editing features.
-
4
Very easy to use.
Check out the below steps to change a video’s speed:
Step 01IInstall HitPaw Edimakor on your PC and run it.
Step 02IClick on the “+” icon to import your video. Drag and drop it to its interface.
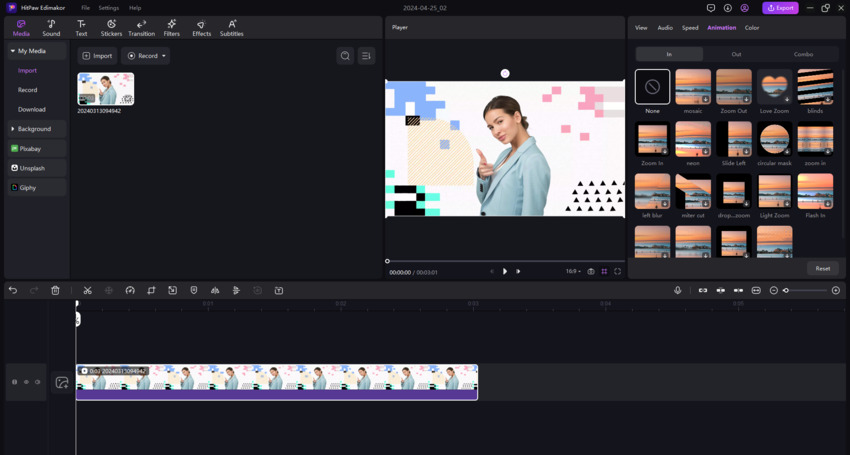
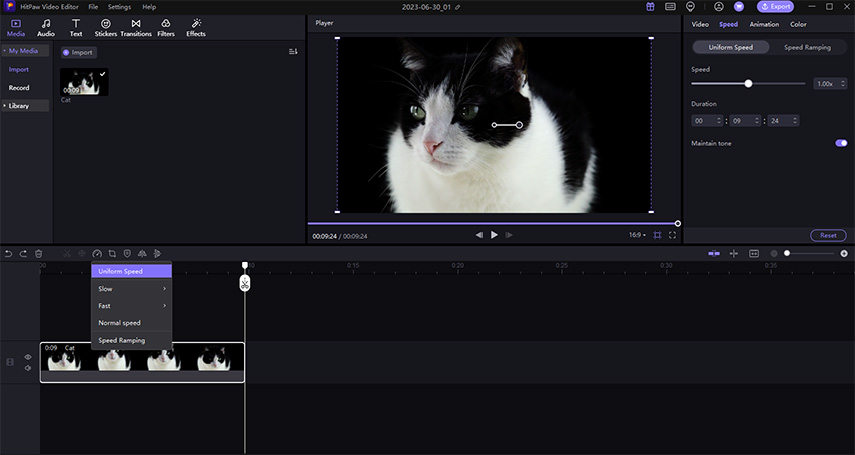
Step 03Now, click on the video in the timeline and select the Speed icon on the quick toolbar. Drag the slider to adjust the speed.
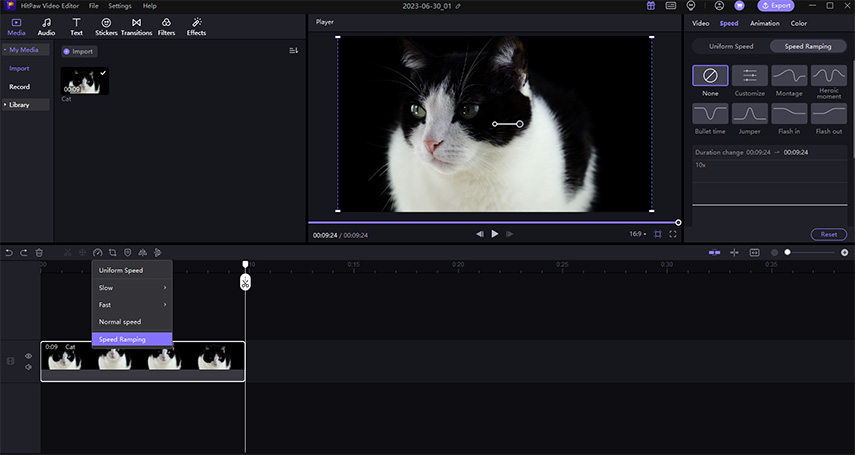
Step 04Want to make ramps? Click the Speed icon again, select speed ramping, and customize the speed from the right tool bar. Make as many time nodes as you want.
Step 05Apply any other editing actions if you want. Finally, hit Export to save your video.

Final Thoughts
This article shows that changing VLC playback speed is not a tech-savvy task. You can easily adjust the speed of a video as per your requirements. Use the above-mentioned methods to increase or decrease the VLC speed without any hassles.
But if you want to permanently change the speed of a video, then use HitPaw Edimakor. With just few clicks, users can adjust the video speed along with adding amazing filters and effects to it.


 HitPaw Screen Recorder
 HitPaw Univd (Video Converter)


Share this article:
Select the product rating:
Daniel Walker
Editor-in-Chief
My passion lies in bridging the gap between cutting-edge technology and everyday creativity. With years of hands-on experience, I create content that not only informs but inspires our audience to embrace digital tools confidently.
View all ArticlesLeave a Comment
Create your review for HitPaw articles