Adding Subtitles to YouTube Videos in 5 Ways
When you publish a video to YouTube, you can make it public, which implies the whole world can watch your video. However, people living in different parts of the world speak different languages, and it might happen that many people will need help understanding the language in which you published the video.
What should you do in this situation? Adding subtitles to YouTube videos can help the audience understand the message you're trying to deliver via your video. We'll introduce mind-blowing tools to help you know how to put subtitles on YouTube.
Part 1. [Most Recommended] How to Add Subtitles to YouTube Videos Easily
Adding subtitles to your YouTube videos can be a herculean task, but if you have access to the right tools, this can be done easily. The best tool that we recommend here is HitPaw Edimakor which is liked by professionals and amateurs alike.
The AI-based Speech to Text feature of the software is simply excellent where the spoken words are automatically transcribed into text captions and added to the video. Additionally, the software supports more than 120 languages along with a wide range of fonts& animations. The subtitles are synced accurately and automatically with the timeline and there is also an option to download the subtitle files in multiple formats like SRT, ASS, LRC, and VTT.
How to add subtitles to YouTube Videos Using HitPaw Edimakor?
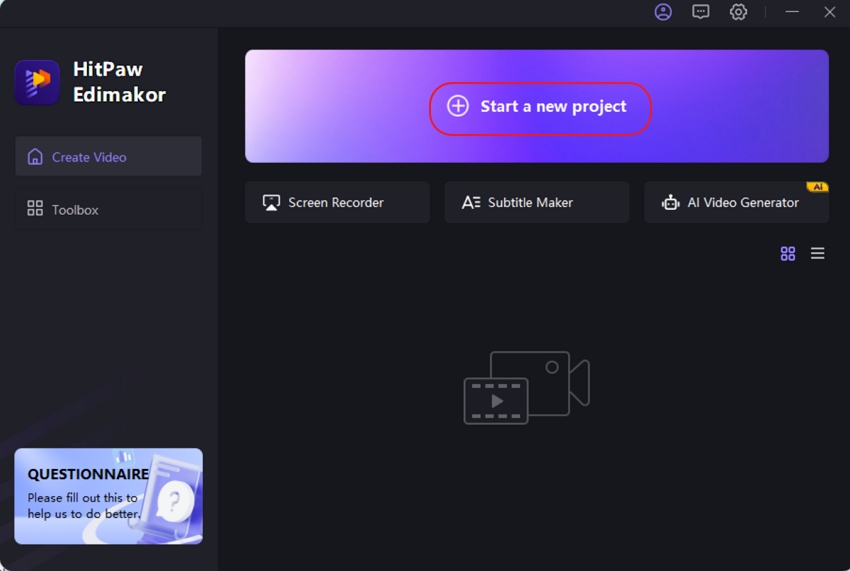
Step 1.Launch the installed software on your system and on the main interface click on 'Start on New Project'.
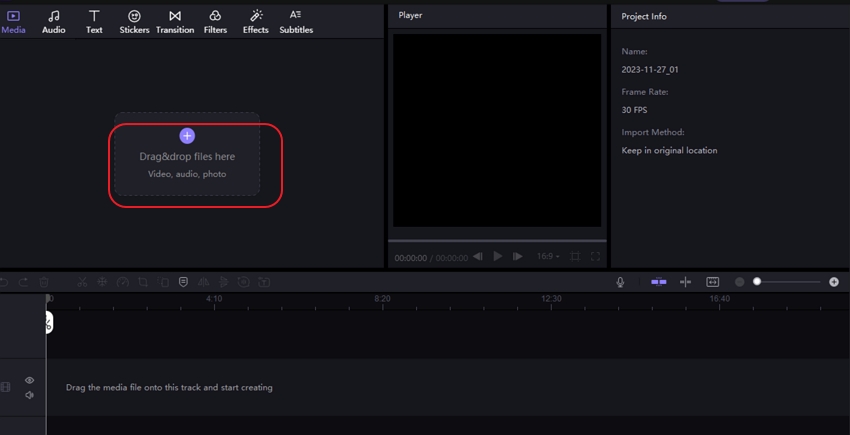
Step 2.Click on the + sign or simply drag and drop to the desired video to the software.

Step 3.Next, drag the added video to the timeline at the bottom of the interface.

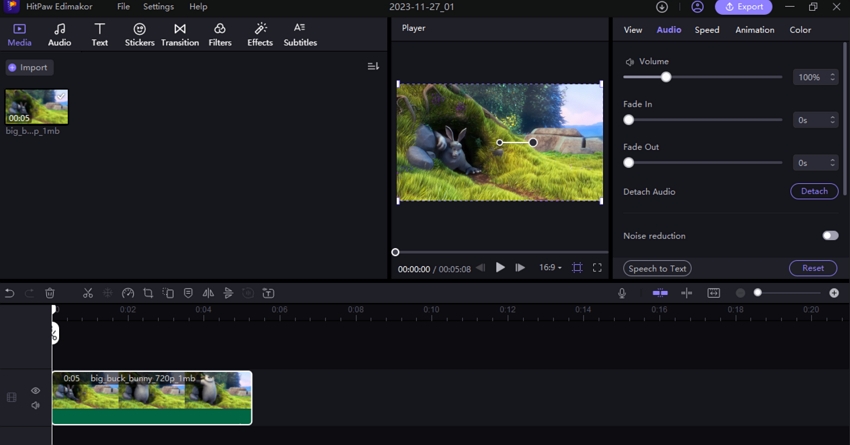
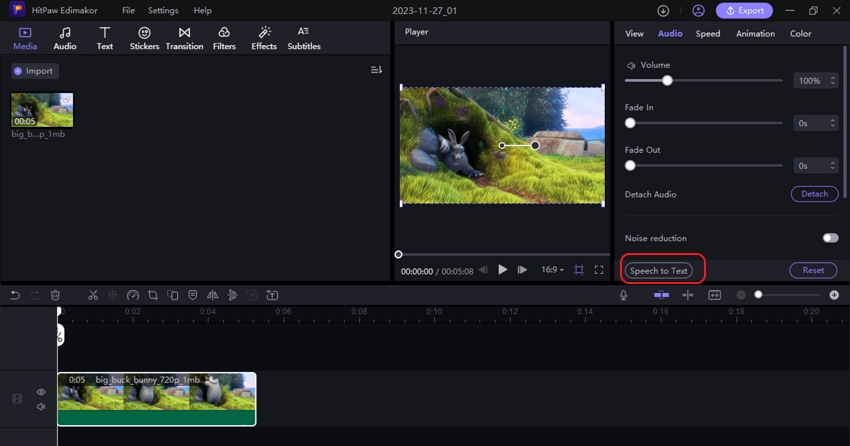
Step 4.Click on the video at the timeline and then tap on Speech to Text option.

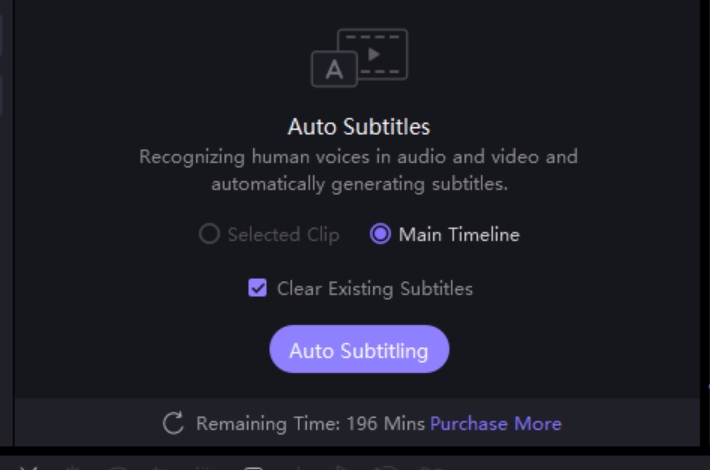
Step 5.The software will start processing video for the subtitles and when done will confirm if you to wish to add the subtitles to the Selected Clip or Main Timeline. Click on Auto Subtitling to finish adding the subtitles.

Part 2. Add Subtitles to YouTube Videos with HitPaw Univd
The emergence of the HitPaw Univd has made it pretty simple to add subtitles to YouTube videos. It is a remarkable tool that stimulates adding subtitles to YouTube videos within a few clicks.
On top of that, HitPaw Univd allows you to add unlimited subtitles to your video. After adding subtitles to YouTube video, you can download the video in multiple video formats.
Here are some unique features of HitPaw Univd[Windows & Mac]:
- Convert audio and video files to 1000+ format
- Built-in editor to generate a fascinating video
- Add subtitles with ASS, SRT, VTT, and SSA formats
- Supports JPG, HEIC, WEBP, TIFF, SVG, etc
- Download the videos from 10000+ websites, including YouTube, Twitter, Facebook, Instagram, etc
- Hardware acceleration and batch operation
- Create GIFs from videos
How to add subtitles to YouTube videos:
Step 1.Install HitPaw Univd on your PC or MacBook after downloading it by the button above.
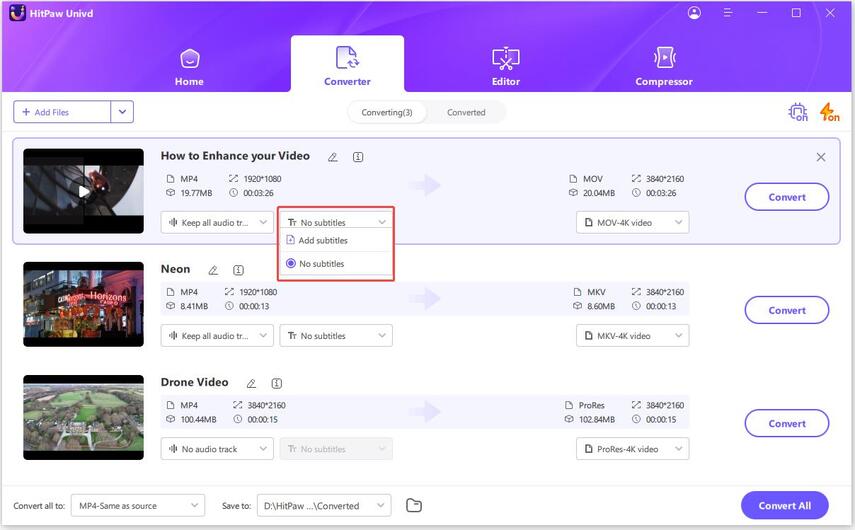
Step 2.Upload the video to the main interface of the HitPaw Univd and then navigate to the video meta info section to check the subtitle status.

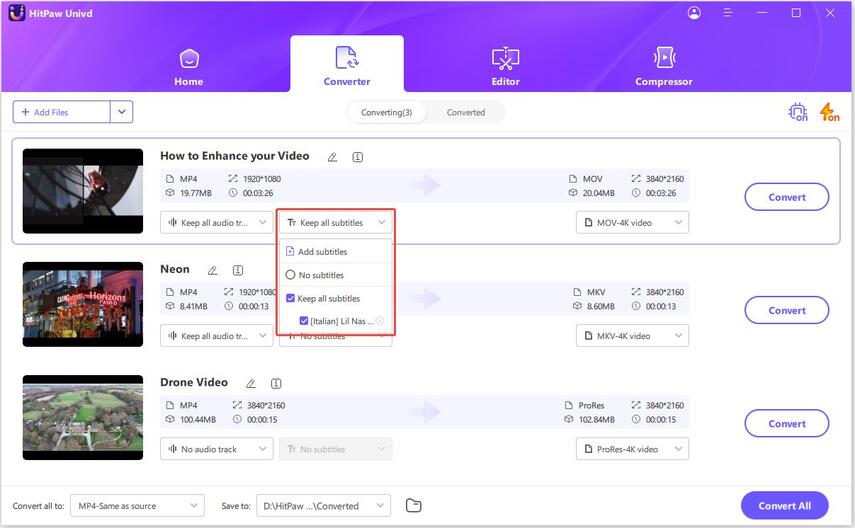
Step 3.Click on the ''Add subtitles'' icon to add the Subtitles to your video. Next, select the subtitles you'd like to add to your video. HitPaw Univd supports adding the Subtitles of the following formats, including VTT, SSA, ASS, SRT, etc. HitPaw Univd allows you to add as many video subtitles as you'd like.

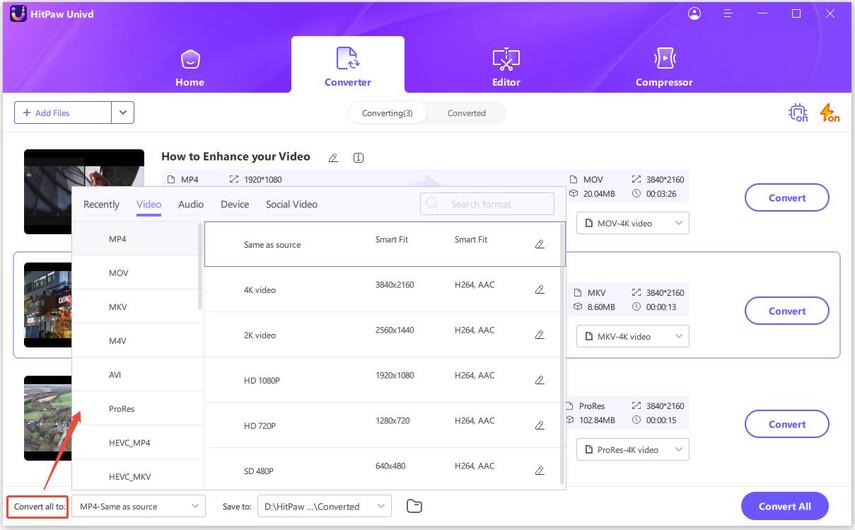
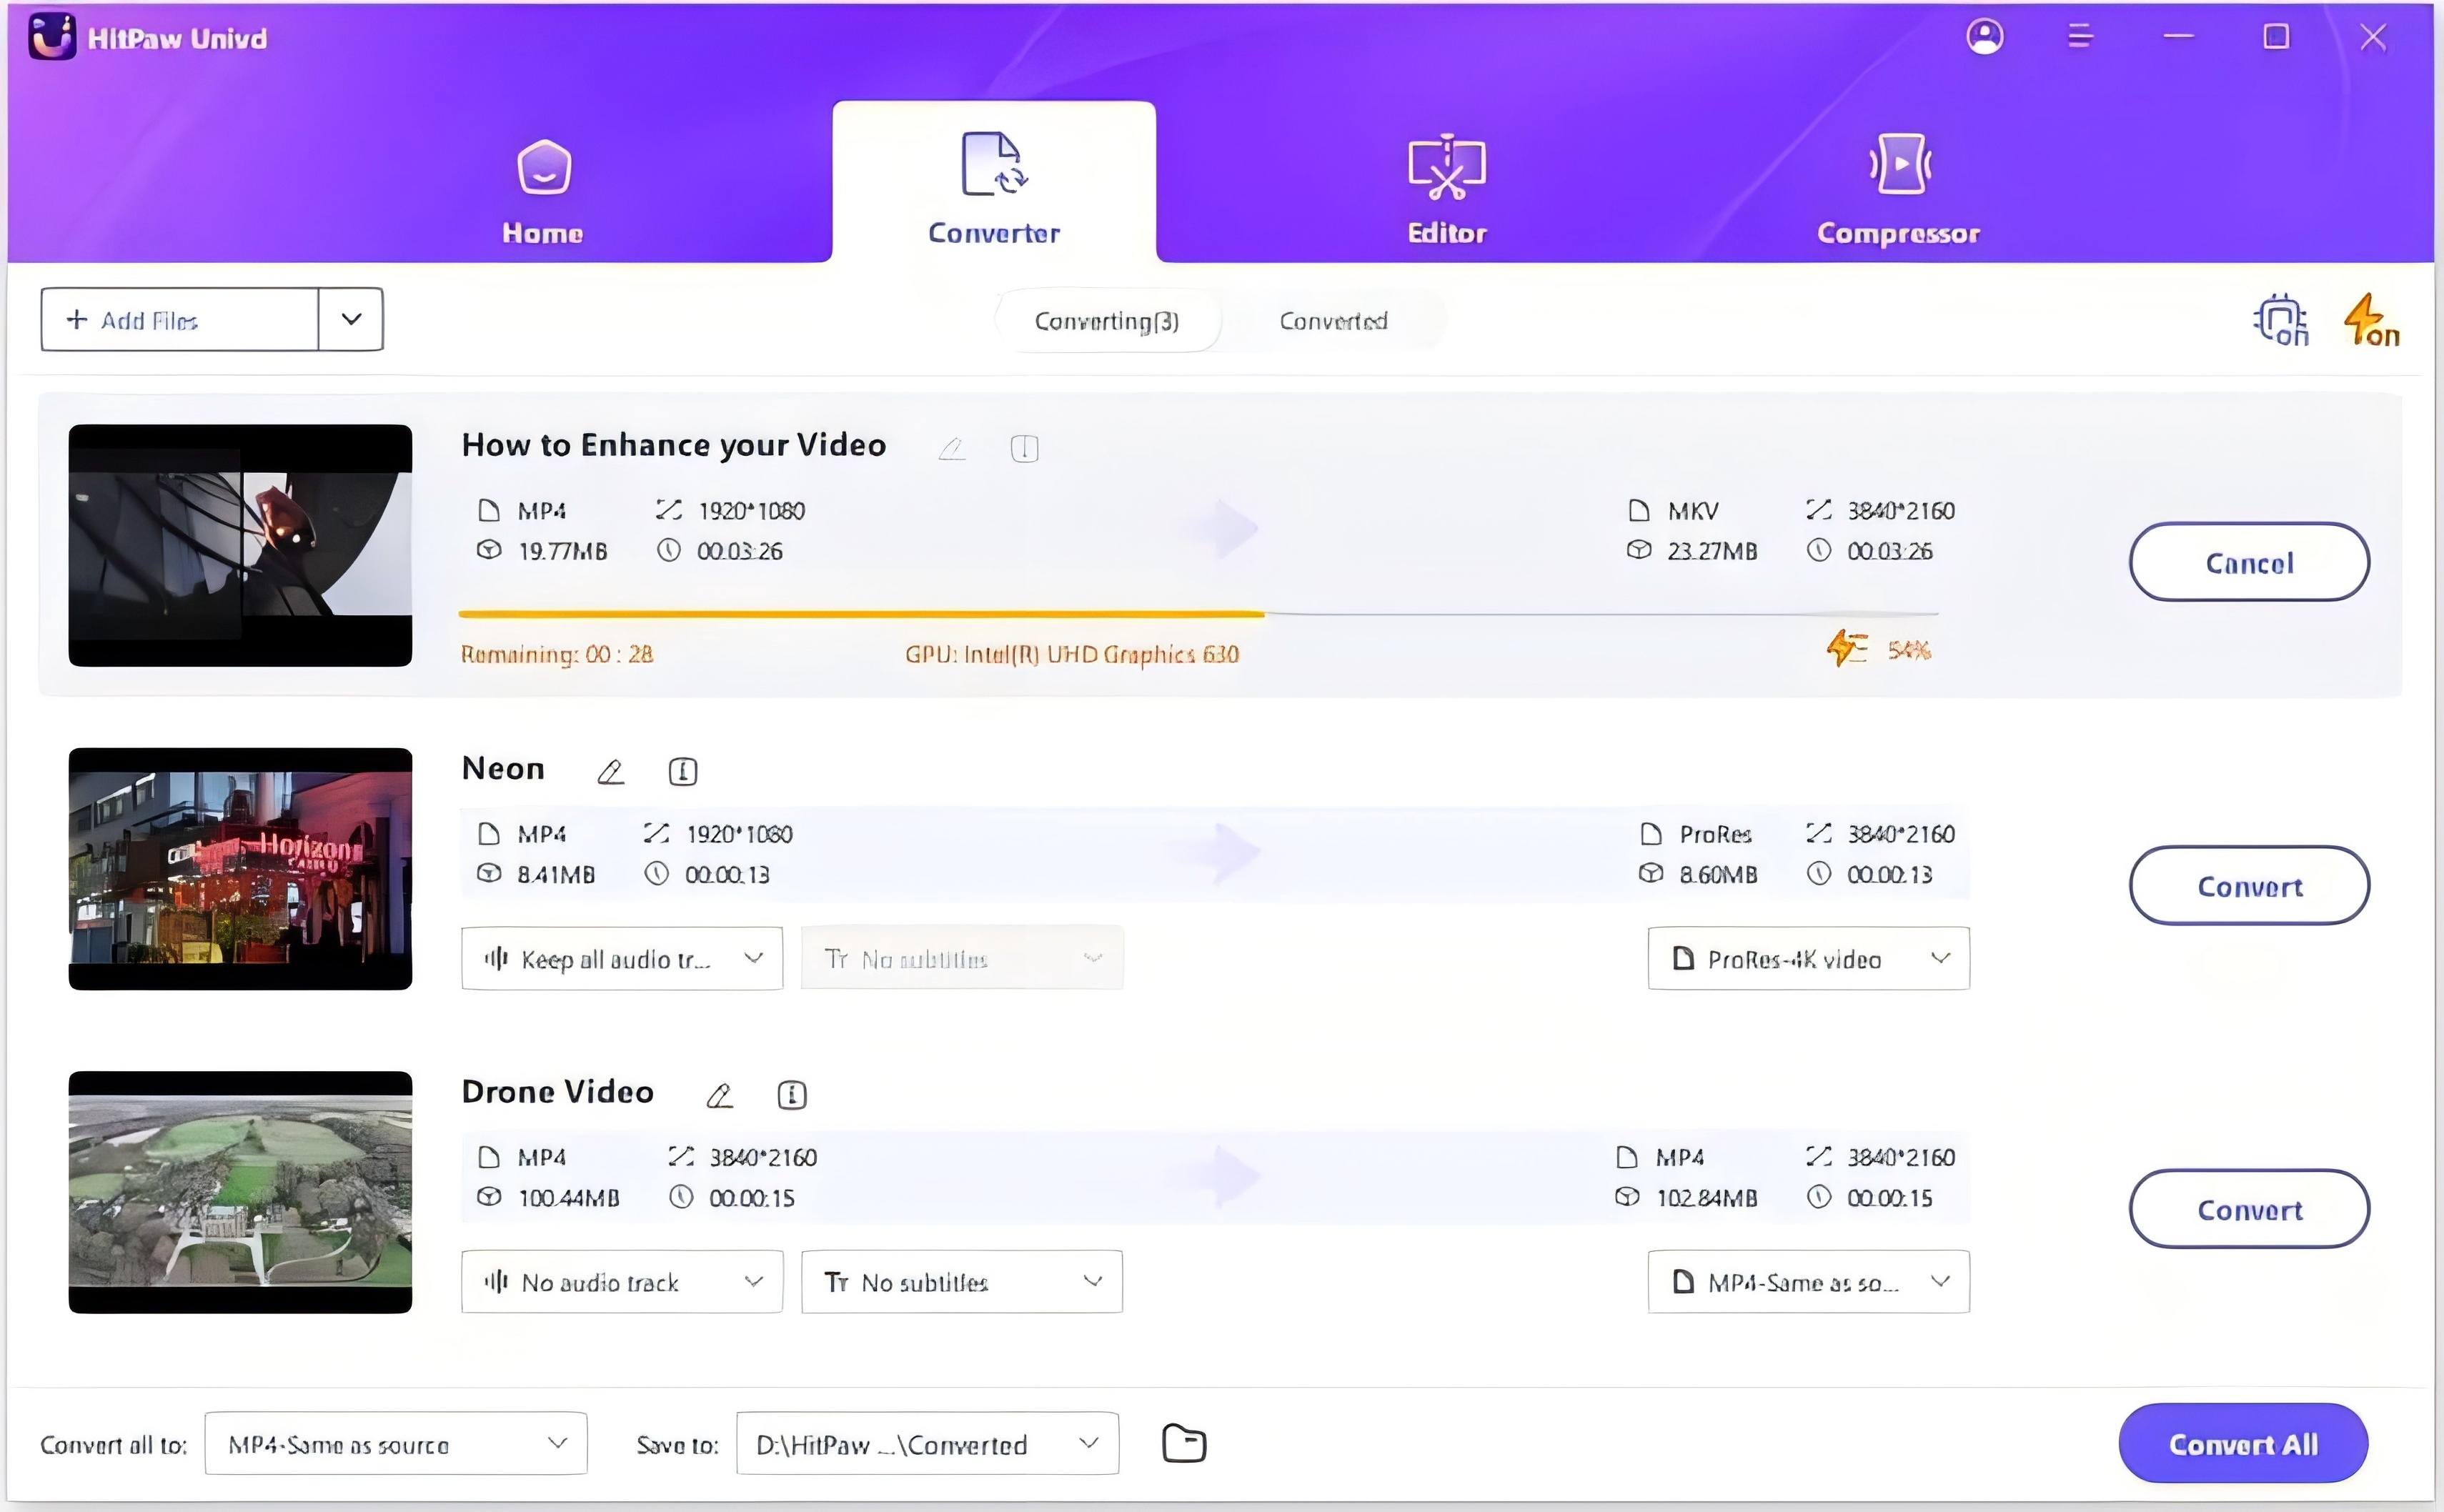
Step 4.Once the subtitles are added to your video, you'll need to select the output format you want to convert the video into.

Step 5.Tap on the ''Convert All'' or Convert icon to turn the video into the preferred file format.

Part 3. How to Add Subtitles to YouTube Videos Using the YouTube Subtitle
Adding subtitles to YouTube videos is possible courtesy of the YouTube subtitle. Here's how to add subtitles to YouTube video.
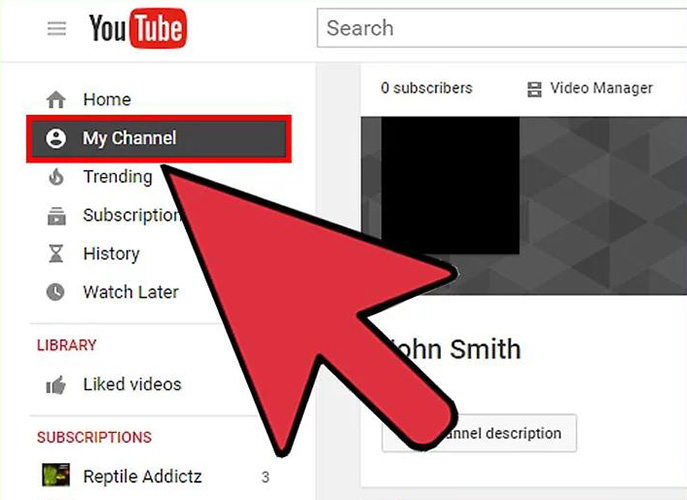
Step 1.Log in with your YouTube account and tap the ''My Channel'' icon.

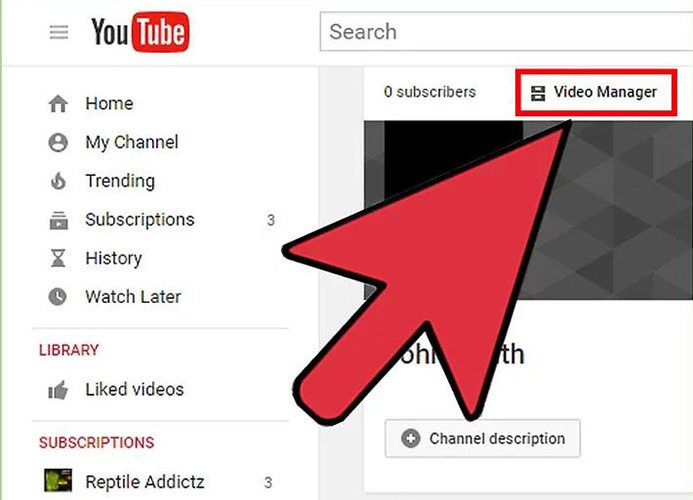
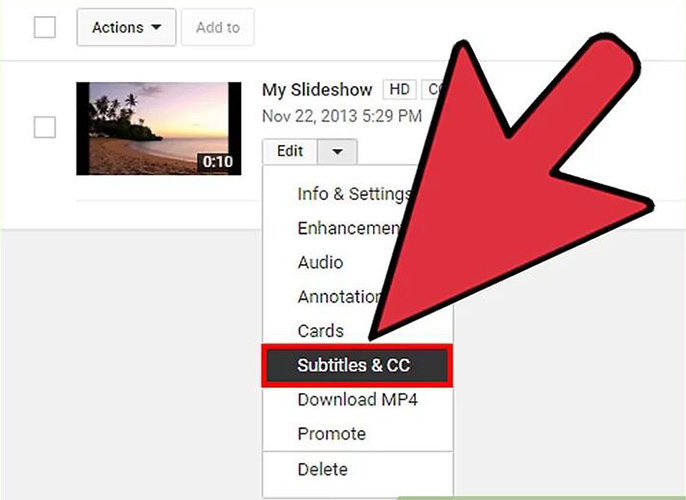
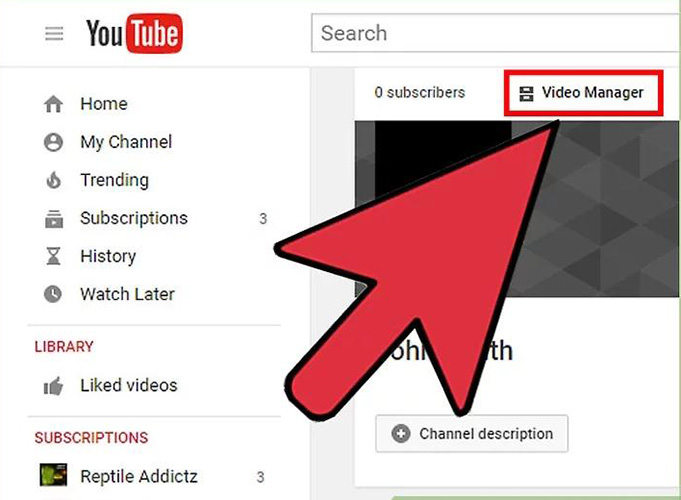
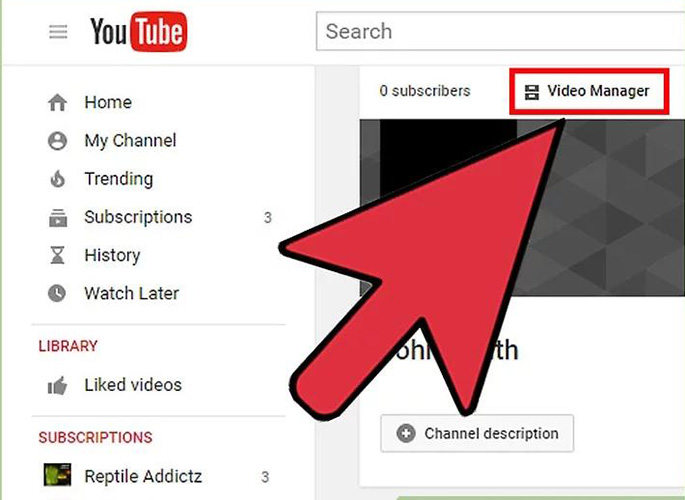
Step 2.Tap on the Video Manager, which will take you to a list of video uploads.

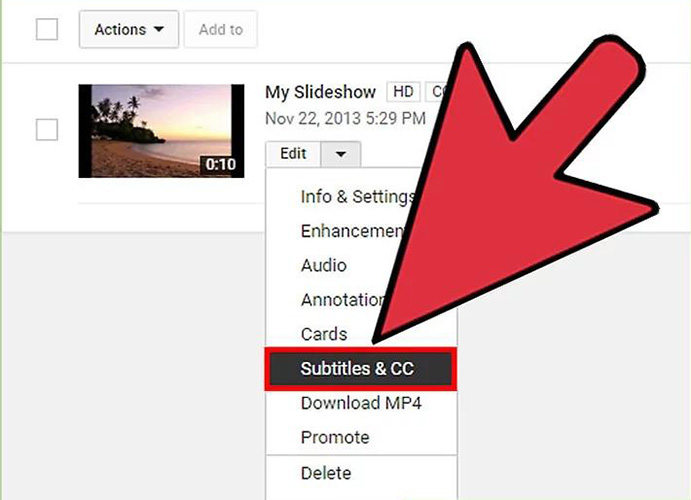
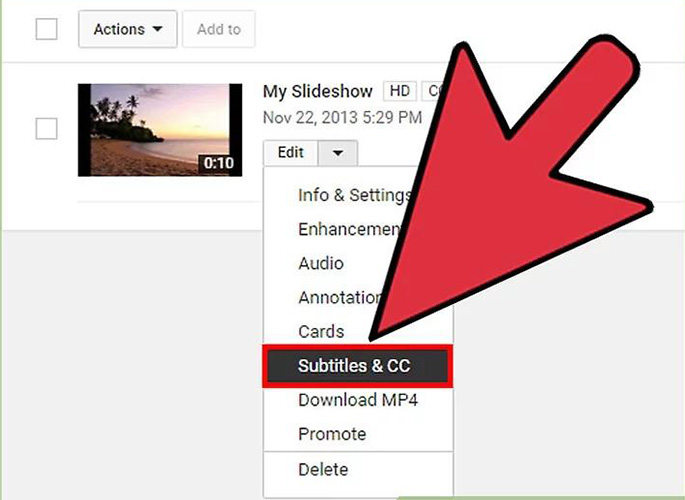
Step 3.Select the Subtitles and CC icon after hitting the ''Edit’’ dropdown arrow icon. Doing so helps you enter into the subtitling interface.

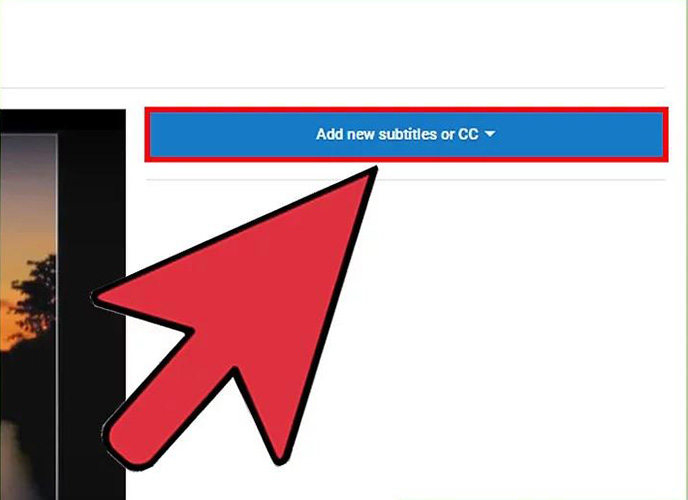
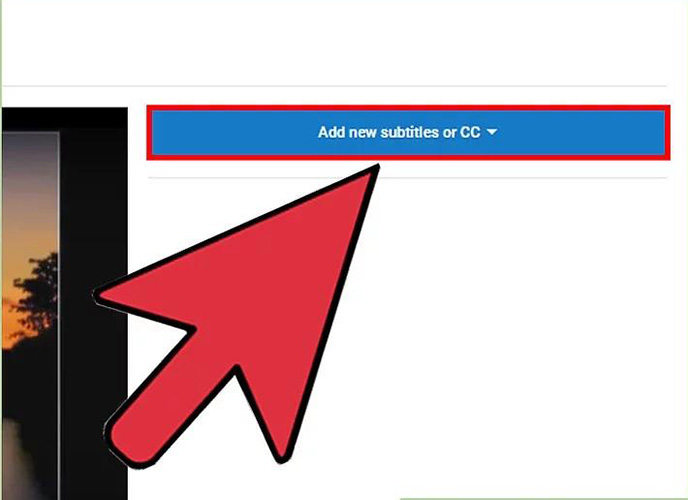
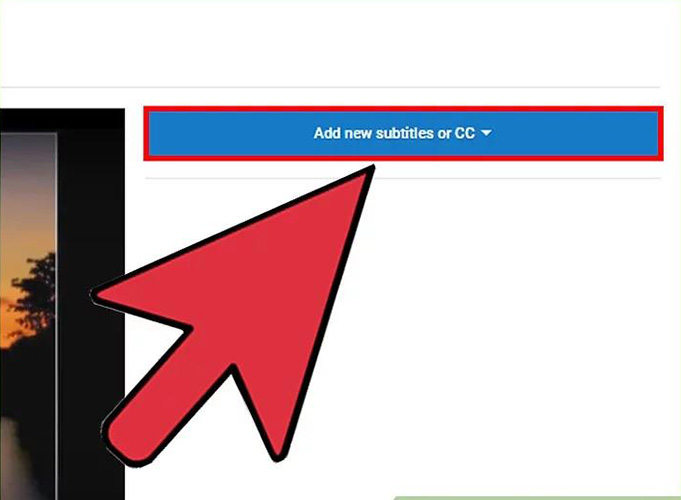
Step 4.Select the ''Create new subtitles'' after tapping the ''New Subtitles'' icon. Now a text area will emerge for subtitle entry.

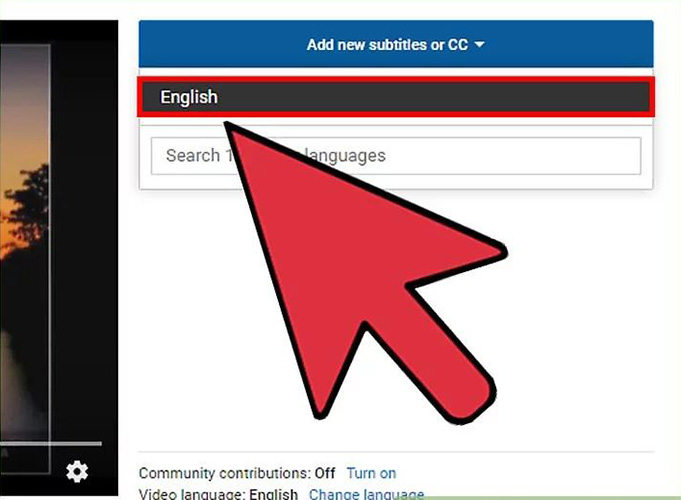
Step 5.In this phase, you'll need to select the subtitle language. Many people tend to choose English as their subtitle language.

Step 6.After playing the video, you'll need to stop when you intend to enter a subtitle.

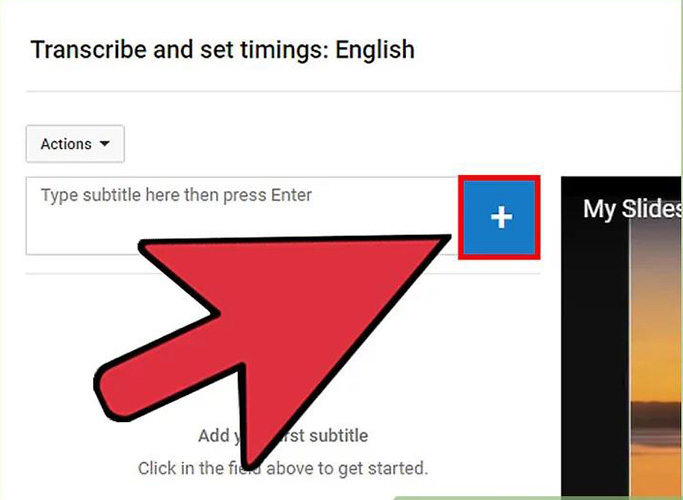
Step 7.Tao on the ''+'' icon to start adding the subtitle. You'll be able to see the subtitle on the transcript.

Step 8.The selected subtitle will be added to your timeline where you stopped the video. You can drag the bar to alter the stopping and starting in which your subtitle has been displayed.

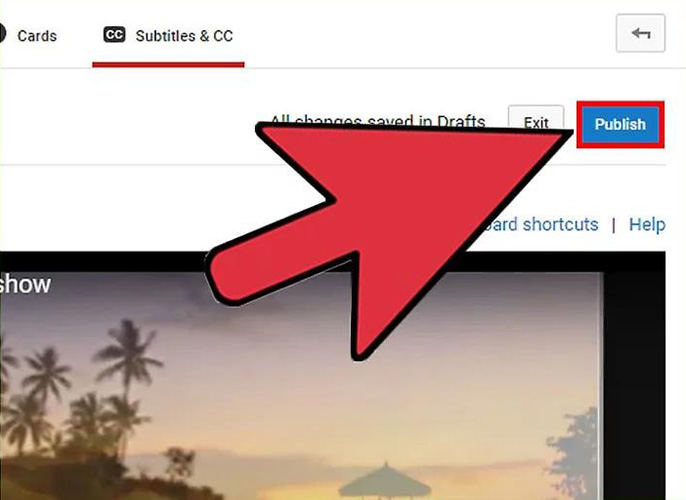
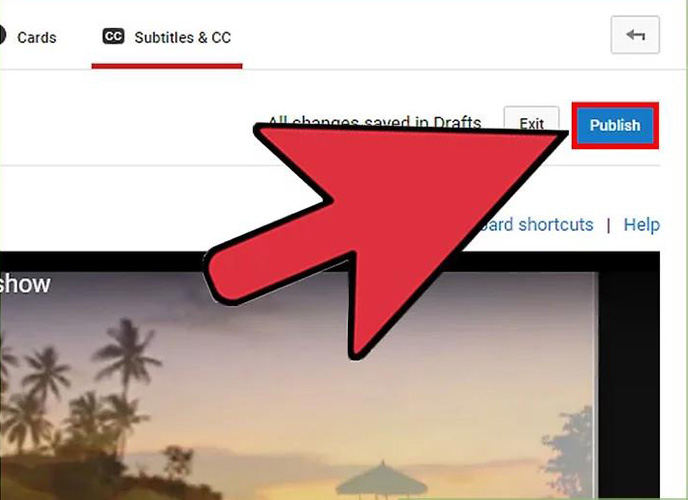
Step 9.After adding subtitles to YouTube video, you'll need to tap on the ''Publish'' icon to upload the video with subtitles.
Part 4. How to Upload Subtitles to YouTube Video from a File
Apart from adding subtitles to YouTube videos through YouTube Subtitle, you can add subtitles to YouTube videos through File. Here's how to add subtitles to YouTube video using File.
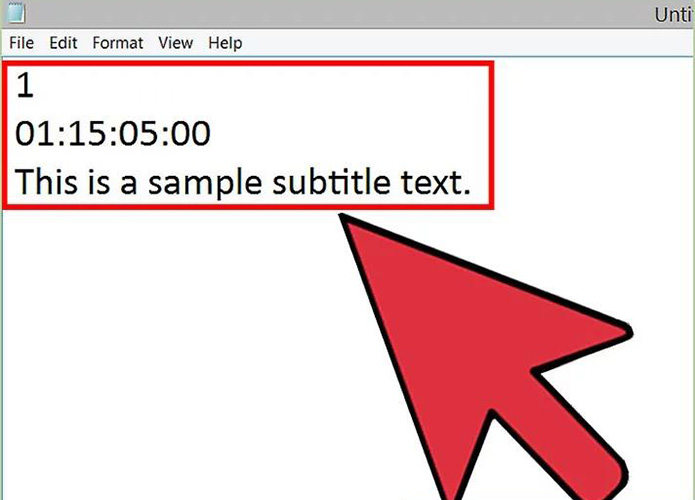
Step 1.Launch the Notepad for Windows.

Step 2.Create the Subtitles you'd like to add to YouTube videos.

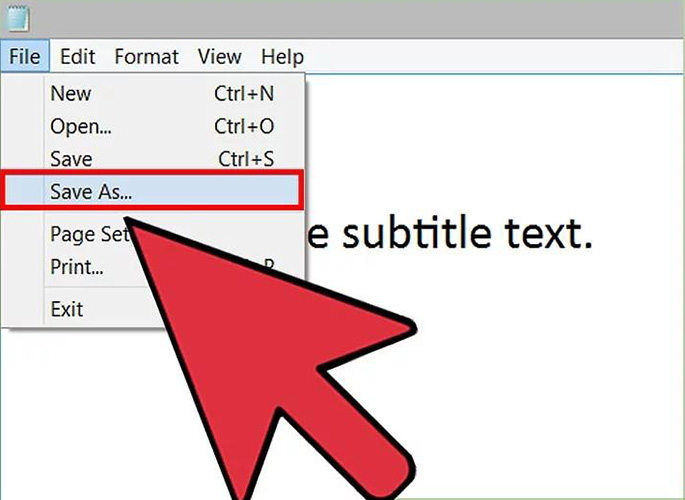
Step 3.Select the ''Save as'' icon after hitting the ''File''.

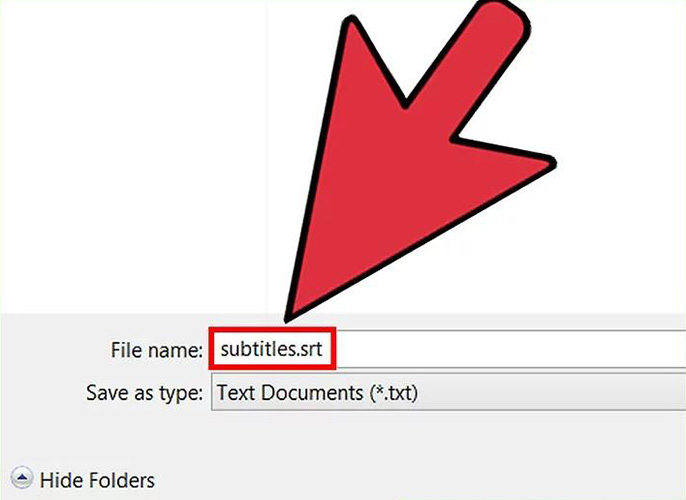
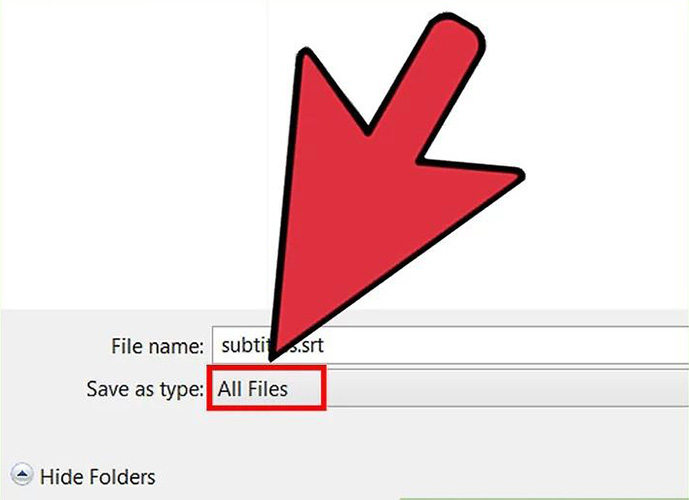
Step 4.Enter a filename, and it should end in ''.srt''. For instance: ''subtitles.srt''.

Step 5.Tap on the '' Save as Type'' icon after hitting the ''All'' icon. Choosing the ''All Files'' icon means allowing an extension to be anything but plaintext.

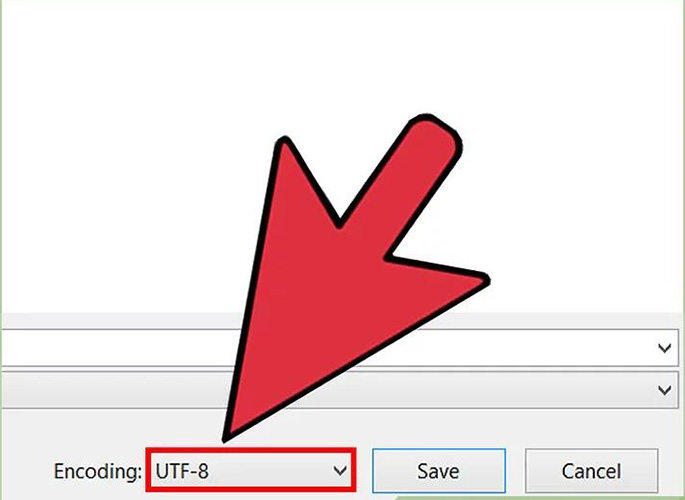
Step 6.Select the ''UTF-8'' icon after tapping the ''Encoding'' option. You will need this encoding set to make the SubRip function. Next, click on ''Save'' to proceed ahead.
Step 7.Navigate to the YouTube Video Manager and log in with your YouTube account

Step 8.Tap on the ''Subtitles and CC'' icon after tapping the ''Edit'' icon.

Step 9.Click on the '' Upload a File'' icon after pressing the ''Add New Subtitles''. Next, tap on the'' Subtitle File'' icon, which will ask you to select the file you'd like to upload.

Step 10.Click on Upload after browsing the file you've created. Next, adjust the length of your subtitles.
Step 11.Click on the ''Publish'' icon to start uploading the video.

Part 5. Using YouTube’s Automatic Transcript Sync to Add Subtitles to YouTube Videos
You can also add subtitles to YouTube by using YouTube's automatic Transcript Sync. This process also might be tricky for newcomers, but you can follow the guide below to add YouTube subtitles.
Step 1.Enter the YouTube credentials and tap on the ''My Channel'' icon. Next, click on the '' Video Manager'' icon.

Step 2.Tap on the Subtitles and CC after clicking the ''Edit'' icon You can find the Edit button next to the video you've been looking to add the subtitles.

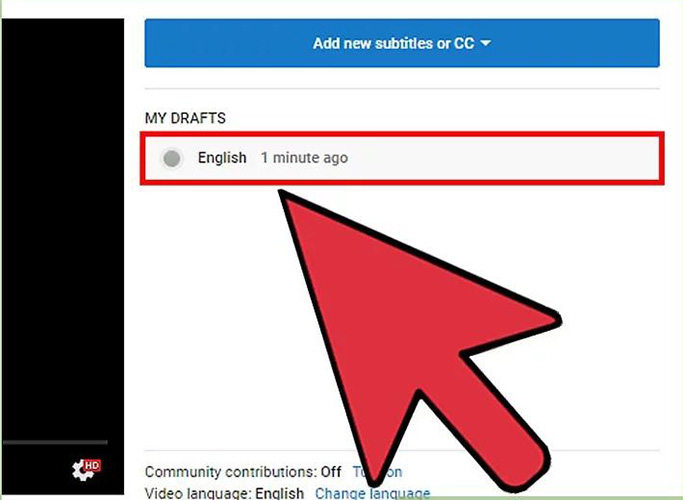
Step 3.Hit the ''Add New Subtitles'' and choose the '' Transcribe and auto-sync'' option. Now a text for subtitle entry will appear.

Step 4.Select the subtitle language. You can select the native language, as YouTube allows you to choose from multiple languages.

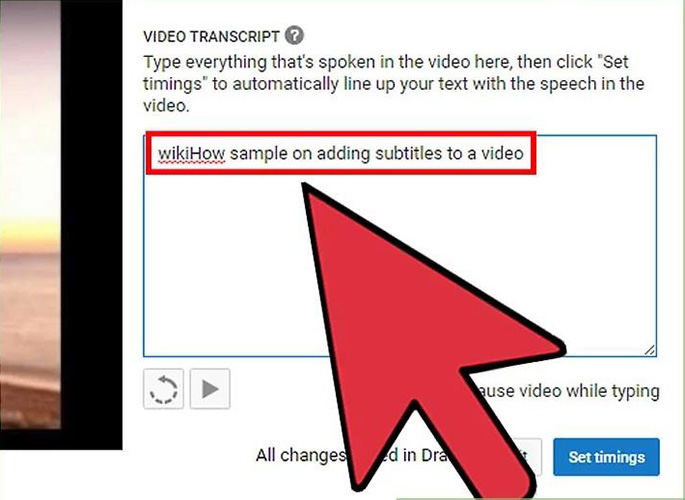
Step 5.Now, you can type the words you spoke in the video into the text area. Remember, you should be fine with the timing of the video.

Step 6.SClick on the ''Set Timings'' icon, which will assist YouTube in automatically setting the timing of what you've written to text.
Step 7.Now, you can adjust the Subtitles for timing accuracy.
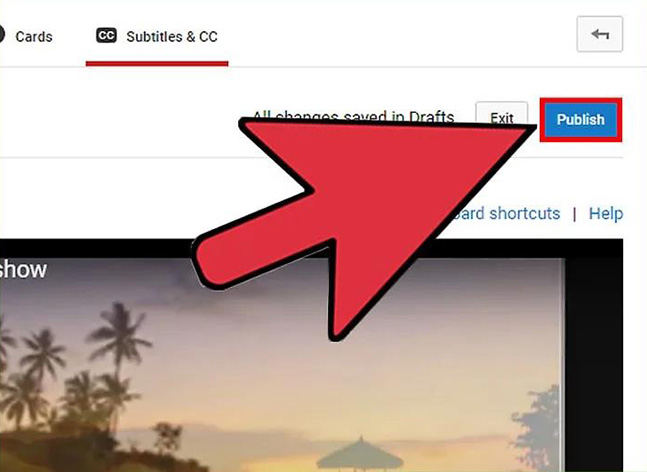
Step 8.Click on the ''Publish'' icon to start publishing the video for you. That's all you need to do to add subtitles on YouTube.

Final Words
Adding subtitles to YouTube videos has become manageable, as you can take notes from this guide to add subtitles to YouTube video. We've mentioned a couple of excellent ways, including the YouTube subtitle, File, and YouTube's automatic Transcript Sync to add subtitles on YouTube.
Of all the ways we've discussed in this post, HitPaw Edimakor seems the most reliable option. Using this tool, you can add captions to YouTube video quickly and effortlessly.




 HitPaw Univd (Video Converter)
  HitPaw VikPea (Video Enhancer)

Share this article:
Select the product rating:
Daniel Walker
Editor-in-Chief
My passion lies in bridging the gap between cutting-edge technology and everyday creativity. With years of hands-on experience, I create content that not only informs but inspires our audience to embrace digital tools confidently.
View all ArticlesLeave a Comment
Create your review for HitPaw articles