Guide to Use Warp Stabilizer Premiere Pro
If you've ever shot video with handheld camera or encountered shaky film, you understand how difficult it can be to repair in final editing. Fortunately, Adobe Premiere Pro includes a useful function called Warp Stabilizer which can assist smooth out those rough clips with no effort.
Whether you're a new or experienced editor, learning the best way to use Warp Stabilizer will save you time and effort. In this article, we will show you how to use it successfully, as well as some helpful tips and methods for getting the greatest results. Let's get started.
Part 1. What Is Warp Stabilizer in Premiere ?
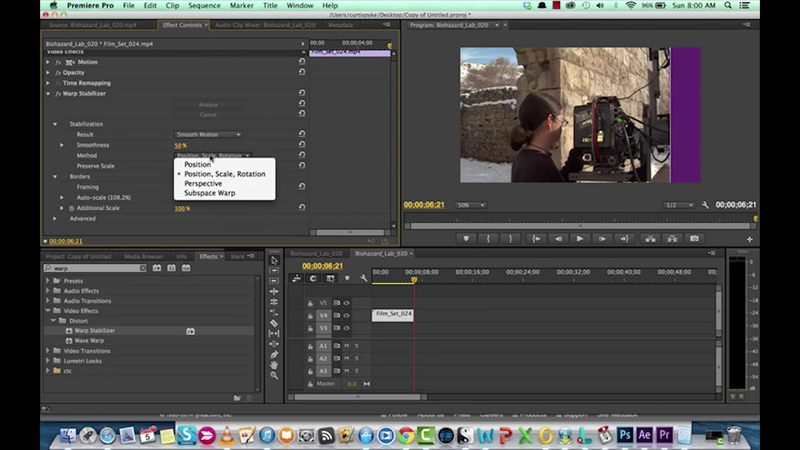
Adobe Premiere Pro's Warp Stabilizer effectively eliminates unnecessary camera shake in videos, resulting in a significantly steadier and smoother clip. It evaluates the movement inside the clip and even corrects it to stabilize the image--for those shooting by hand or with little to no stabilization equipment.
Features of Warp Stabilizer
Here are some of the key features of warp stabilizer premiere pro:
- Automatic Analysis: The Warp Stabilizer algorithm auto-analyze the motion in your footage to determine which stabilization adjustments are necessary.
- Adjustable Settings: Users can fine-tune settings such as smoothness, method and borders to achieve desired stabilization effects.
- Real-Time Feedback: The effect provides real-time feedback, hence you get the real impact of the adjustments right within the edit window.
Using the Warp Stabilizer Premiere, editors can stabilize shaky handheld footage, making it move like cinematic shots that are usually created in lab and enhance their video projects in general.
Part 2. Best Way to Use Warp Stabilizer
Premiere Pro Warp Stabilizer is a lifesaver if you have shaky footage during video editing. It analyzes your footage and applies adjustments to make it smoother from camera shake and provide a polished final product. Warp Stabilizer in Premiere Pro can help if you are working with handheld photos or filming footage without stabilization equipment. Here's how to utilize the tool to achieve the best results:
Step 1. Import and Select Your Footage
Import your shaky footage into Premiere Pro. Drag it onto the timeline, and you are all set for stabilizing.
Step 2. Apply the Warp Stabilizer Effect
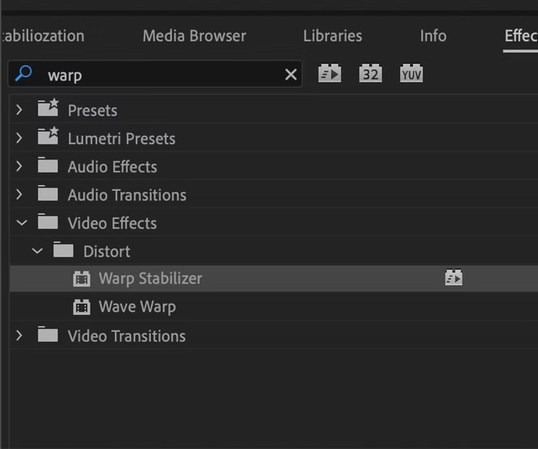
Go to your Effects panel. You will find Warp Stabilizer under Video Effects > Distort. Drag and drop Warp Stabilizer onto your clip in the timeline.
Step 3. Analyze the Effect:
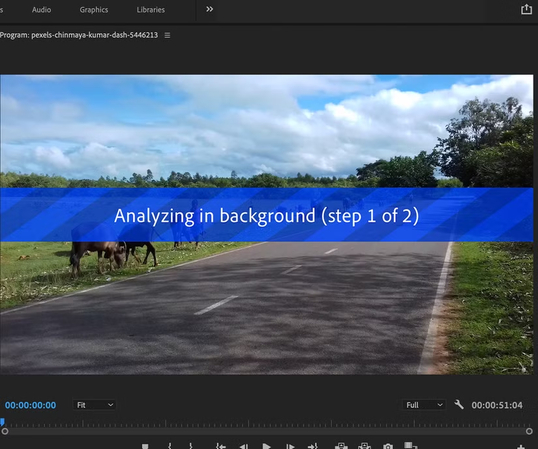
You will notice an "Analyzing" message on the footage in the timeline while this is processing.
Step 4. Set the Warp Stabilizer Settings
Identify the Effect Controls panel and the Warp Stabilizer settings there. Choose Smooth Motion or No Motion. You can gest clear footage by knowing the best warp stabilizer settings.
- No Motion: This is best used if your footage has been shot from a fixed point, with no camera movement at all
- Smooth Motion: This is best used on footage which includes some forms of camera movement including pan and zoom.
- Smoothness: Use the smoothness slider to dial in how much stabilization is applied. A higher value will give a smoother end result but is likely to clip more of the frame.
Step 5. Fine-Tune and Review
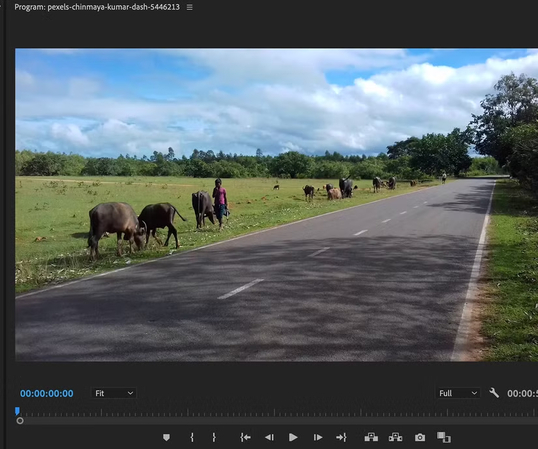
Replay the footage to see what happened. If the stabilization is too firm or the motion seems unnatural, adjust the parameters.
You can also fine-tune the stabilization using the Method and Framing parameters in the Effect parameters panel.
Part 3. How to Stabilize Video in Premiere Pro without Warp
While Premiere Pro's Warp Stabilizer is a popular tool for stabilizing film, there are situations when you may want to stabilize video without utilizing this effect particularly if you want more control over the process or want to avoid the warping that can occur. Fortunately, Premiere Pro provides alternative options for manually stabilizing unstable footage. Here is how to stabilize video in premiere pro without warp:
1. Use the motion panel.
To manually change your video, go to the Effect Controls panel and use the Position and Scale properties under Motion.
If your footage shakes vertically or horizontally, you can adjust the position keyframes frame by frame to better align the clip.
2. Use Manual Keyframes
You may also use keyframes to stabilize certain portions of your videos.
You can lock the video to fixed position or smooth down the movement without using Warp Stabilizer by modifying the Position and Scale keyframes.
3. Use Rolling Shutter Repair
If your footage has rolling shutter distortion, use the Rolling Shutter Repair effect. This can help to rectify skewing produced by quick movements, particularly in shots with fast pans.
Part 4. Pro-Tips. Best Warp Stabilizer Alternative to Premiere Pro
HitPaw VikPea (formerly HitPaw Video Enhancer) is an excellent alternative to Premiere Pro's Warp Stabilizer because it is simple to use and allows users to obtain excellent stabilization and video clip improvement. Whether you are a beginner or experienced editor, this software gives a simple way to create an outstanding videoto make it excellent choice for anyone wishing to improve video quality without mastering Premiere Pro.
Why Choose HitPaw VikPea
- Using high-quality processing, noise can be removed perfectly and grainy videos improved.
- Export videos without a watermark.
- User-friendly interface with step-by-step online instructions.
- Fast output; the quicker the results, the shorter the waiting time.
- AI-powered recognition which doesn't require a lot of expertise to operate.
Steps to Stabilize Video
Step 1.Download the software from the official website and then install it on your computer.
Step 2.Launch the program. Select the video you wish to stabilize and then click the HitPaw VikPea icon on your desktop or in the Start menu.

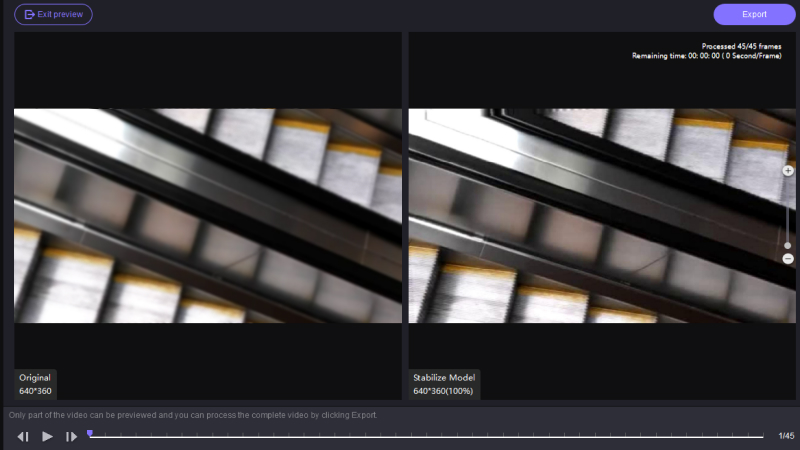
Step 3.Select the AI model like stabilization. For stabilization level, adjust the setting to light, medium, or strong.

Step 4.If you are satisfied with the end results Preview the effect of the stabilization. Now, save the stabilized video in your computer.
Learn More about HitPaw VikPea
Conclusion
Creating the smooth, stabilized video is critical for producing professional-looking footage, and Adobe Premiere Pro's Warp Stabilizer is an excellent tool to help you do so. If you're looking for simpler and more efficient option, HitPaw VikPea provides an easy solution for enhancing and stabilizing videos.
It's simple to use and extremely effective, making it ideal for anyone who wants high-quality results without having to make complicated modifications. Try HitPaw VikPea to easily improve your video quality!



 HitPaw Univd (Video Converter)
 HitPaw VoicePea
  HitPaw FotorPea


Share this article:
Select the product rating:
Daniel Walker
Editor-in-Chief
My passion lies in bridging the gap between cutting-edge technology and everyday creativity. With years of hands-on experience, I create content that not only informs but inspires our audience to embrace digital tools confidently.
View all ArticlesLeave a Comment
Create your review for HitPaw articles