The Xvid Video Codec in VLC: Enhancing Your Video Playback Experience
Undoubtedly, the secret to good video quality lies in its codec, which is crucial for an immersive playback experience while watching TV shows, movies, or other content. The Xvid video codec is one of the best for ensuring high video quality without taking up much storage space. And when paired with VLC Media Player, you can have the best cinematic experience. Want to know more about the Xvid video codec for VLC? No worries. This detailed post will provide everything about this codec, including its advantages, configuration, and troubleshooting.
Part 1. Introduction to Xvid Video Codec and VLC

Video codecs are essential tools for compressing and decompressing digital video files. They reduce file size while maintaining video quality, making storage and streaming more efficient. Various codecs are available, each designed for specific needs, including Xvid, which is renowned for its balance between compression and quality.
VLC is among the most popular media players due to its versatility and ability to play various file formats. The Xvid codec is particularly important for VLC users who want to play Xvid-encoded videos. It ensures that videos are played back smoothly and in high quality without additional plugins or software.
This blog post aims to provide a comprehensive guide on understanding, installing, and using the Xvid video codec with VLC. It will also address common issues and offer solutions, ensuring you get the best out of your video playback experience.
Part 2. What is the Xvid Video Codec?
The Xvid codec is an open-source video codec based on the MPEG-4 standard. It is primarily used for compressing video files while ensuring they take up less space and maintain good quality. Due to its efficiency and quality, it is widely used for sharing and streaming videos without compromising playback performance.
Using the Xvid codec for VLC Player offers several advantages. Here are a few:
High Compression Efficiency: Reduces file size while preserving video quality, making storing and sharing videos easier.
Wide Compatibility: Xvid-encoded videos can be played on various devices, including those running VLC, without requiring additional software.
Open Source: Xvid is free to use and constantly updated by the community, ensuring it remains reliable and effective.
No Requirement for Special Hardware: Xvid does not require specific hardware for decoding, thus enhancing its accessibility. Also, you don't need special equipment or gadgets to play Xvid encoded videos.
Compared to other video codecs like DivX, AV1, H.264, H.265, or HEVC, Xvid stands out for its simplicity, ease of use, and effectiveness in balancing compression and quality. While newer codecs like H.265 and AV1 offer better compression rates and visual quality, Xvid remains popular due to its widespread compatibility and open-source nature.
Part 3. How to Install and Use Xvid Video Codec VLC
In this section, you will learn about the Xvid codec installation, configuration, and troubleshooting.
Let's begin with installing the Xvid video codec:
Step 1. Visit the Official Website
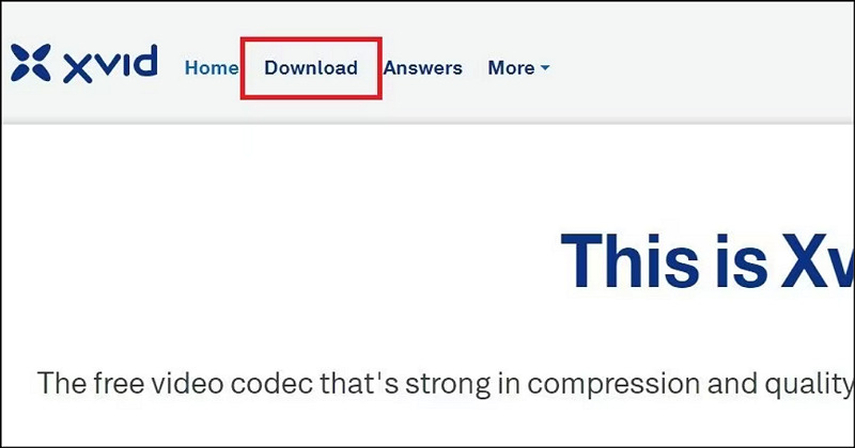
First, open the official Xvid website and find the download section.
Step 2. Download Xvid Codec
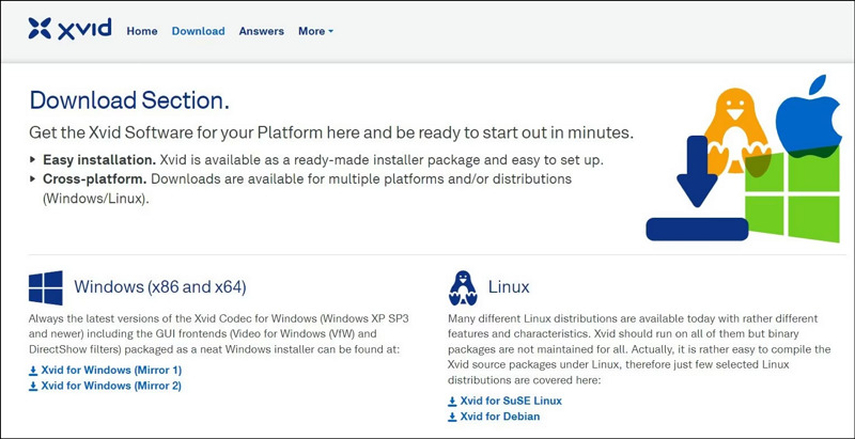
Now, select the Windows or Linux version for your operating system and download the codec.
Step 3. Finish the Installation
Double-click the downloaded files and complete the installation following the on-screen instructions. Restart your computer.
To use the Xvid codec on VLC, you must configure the media player. Let's learn how:
Step 1. Open Tools in VLC Player
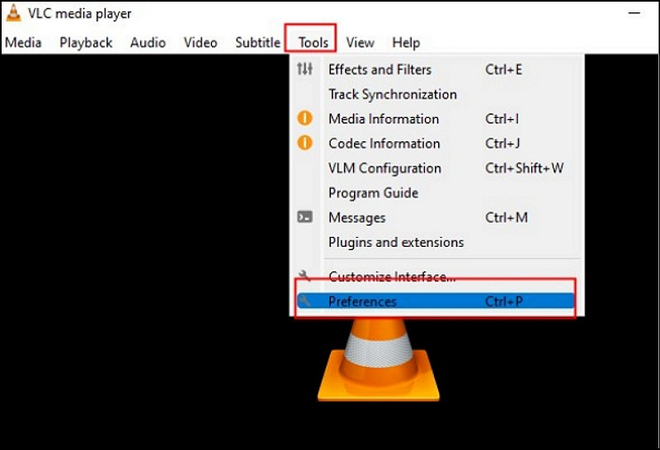
Launch the VLC Media Player and click the "Tools" tab. Now, select "Preferences" from the menu.
Step 2. Adjust the Codecs Settings
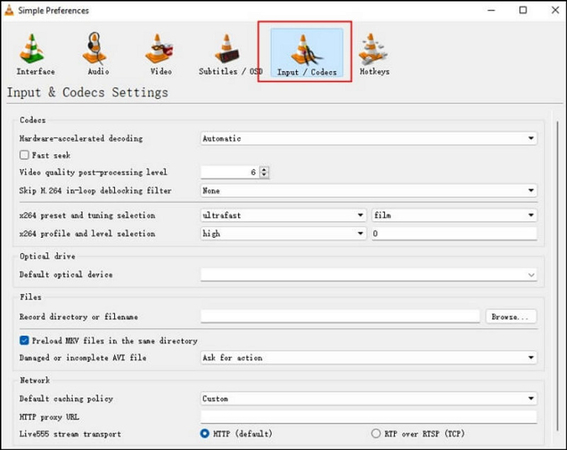
It's time to choose the "Input/Codecs" tab and change the settings for the hardware acceleration.
Although the downloading process for Xvid is quite easy, you may face some issues later.
Here is how to troubleshoot common issues:
1. Reinstall or Update VLC
Reinstallation or updating VLC Player often resolves the playback issues. You can uninstall and then reinstall the media player. However, to update VLC, here is the guide:
Step 1. Go to VLC Help
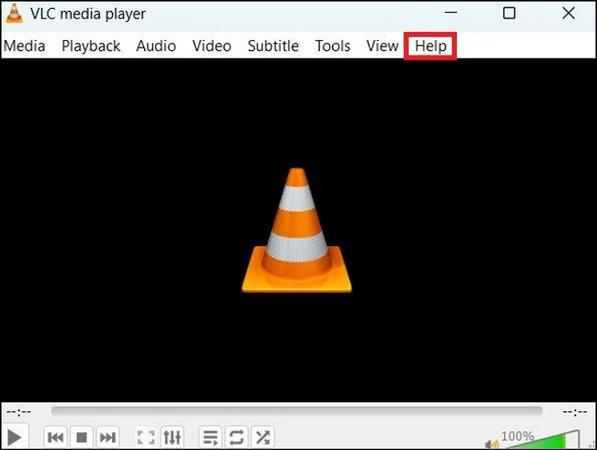
Open VLC Media Player and click the "Help" tab from the main menu.
Step 2. Check for Updates
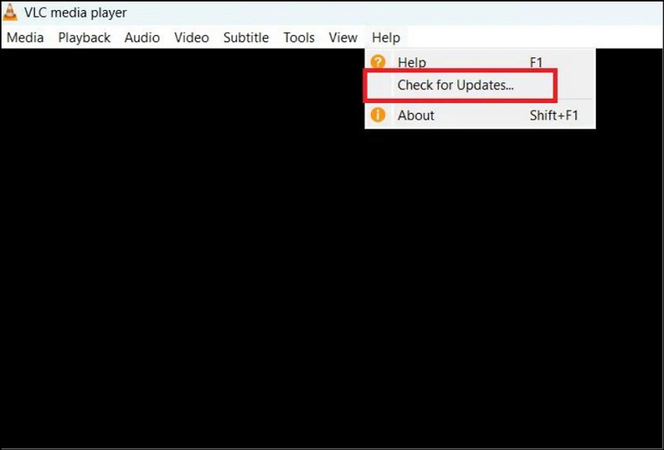
Press the "Check for Updates" button from the drop-down menu.
Step 3. Recheck Version
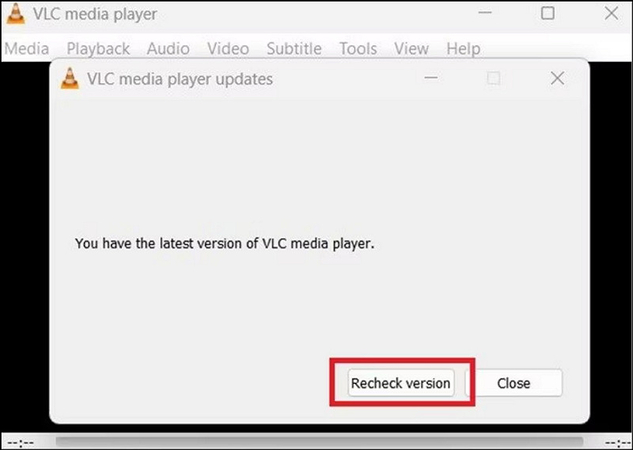
If an update is available, click "Recheck version" to confirm that you're using the latest version.
2. Check Your Codec Information
Sometimes, the Xvid is not listed in the codecs of VLC Media Player, which can result in a recognition issue. Here is how to check it:
Step 1. Open Media Information
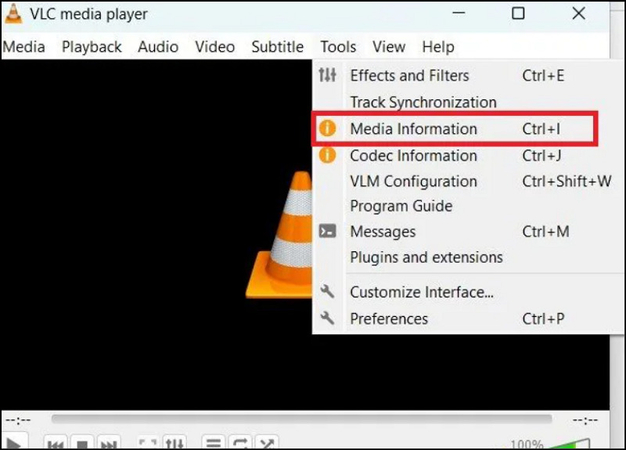
Open VLC Player and press "Tools" from the main menu. Now, select the "Media Information" button.
Step 2. Check Codec
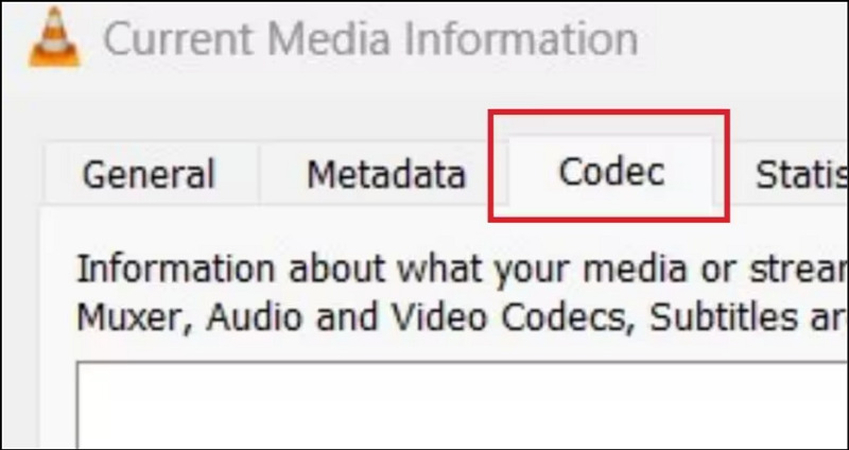
Now, click the "Codec" section and check if the Xvid codec is listed as one of these codecs.
Part 4. What If VLC Doesn't Play Xvid Codec?
If VLC cannot play an Xvid-encoded video, the problem might be with your video file. In this scenario, consider using HitPaw VikPea (formerly HitPaw Video Enhancer). This powerful video repair tool employs AI technology to repair and enhance video files, ensuring smooth playback. You can choose from the six available modules to repair your video, such as fixing unplayable videos, solving video lag, fixing video screen loss, and more. Besides its easy and quick processing, you won't have to worry about the output quality.
Key Features
HitPaw VikPea - The Best 8K Video Enhancer with Only 1 Click
Secure Verified. 349,500 people have downloaded it.
- Come up with a simple and clean interface
- Upscale your Xvid video up to 8K resolution
- Help you repair damaged/corrupted video files
- Offer smooth processing with mature AI technology
- Allow you to preview the output without watermarks
Secure Verified. More than 120,860 people have purchased it.
Steps for using HitPaw VikPea to repair videos:
Step 1. Select Video Repair Module
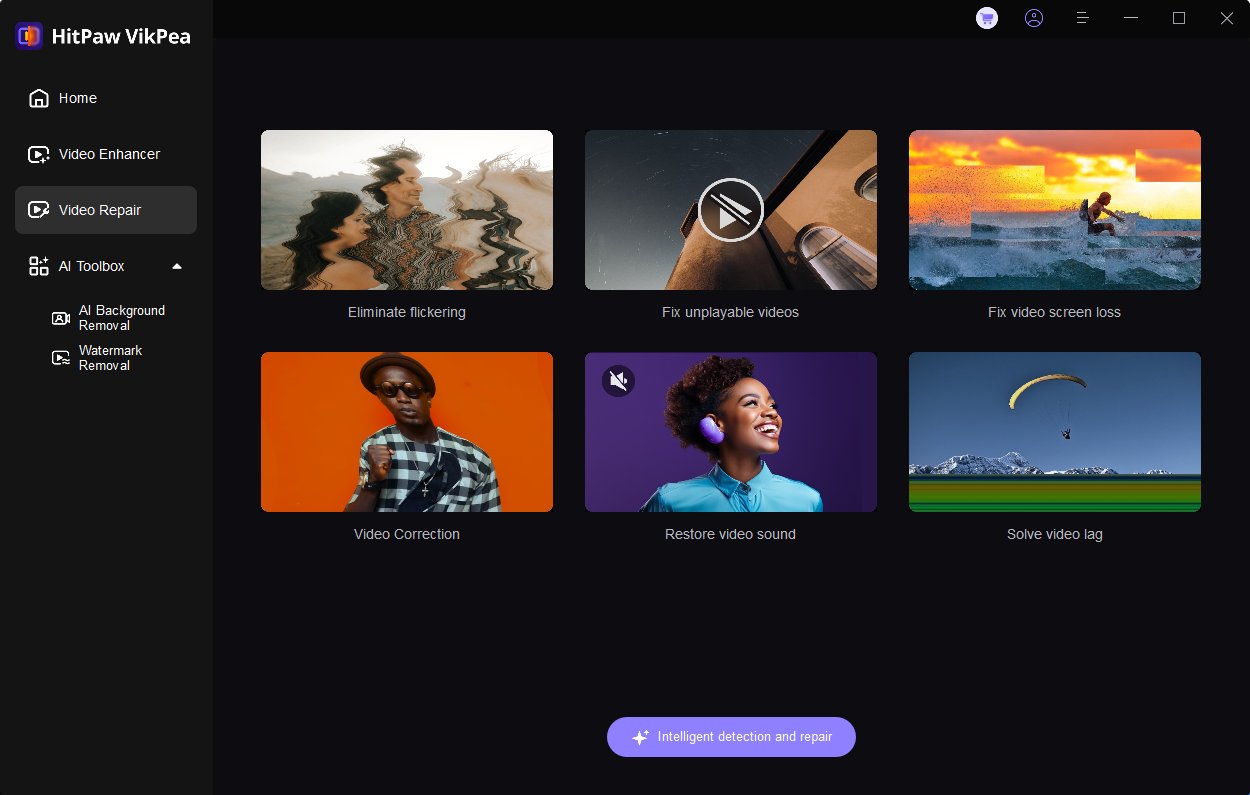
After installing and launching this program, click the "Video Repair" section from the side column. Choose the module you want, such as "Fix unplayable videos," "Video Correction," or any other. You may also select "Intelligent Detection and Repair."
Step 2. Import Video File
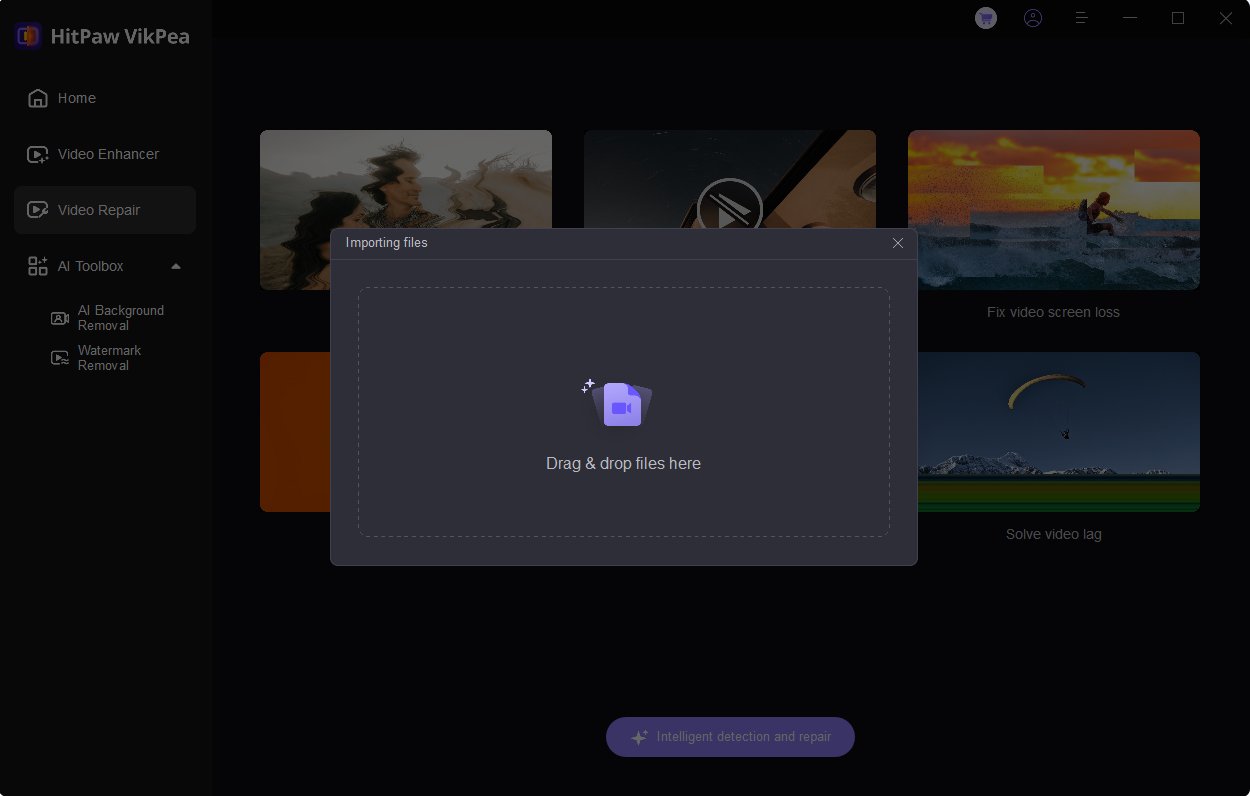
It's time to click or drag and drop the damaged video files into this program. It also supports batch processing.
Step 3. Hit Start Repair
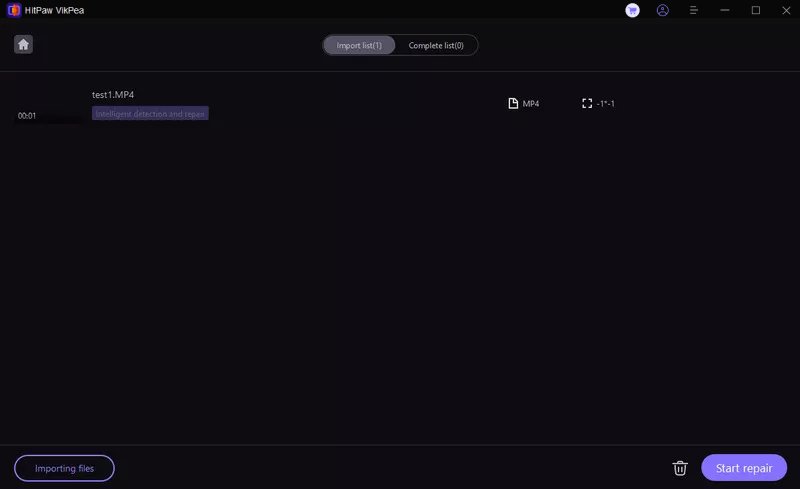
Next, hit the "Start Repair" button and let this software repair the damaged video files.
Step 4. Repair Completed
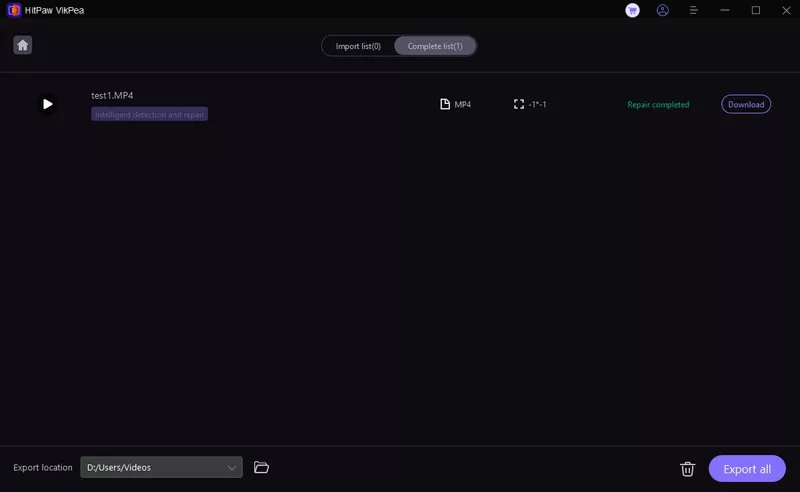
You can find the files in the "Complete list" section when the repair is completed.
Step 5. Check the Output
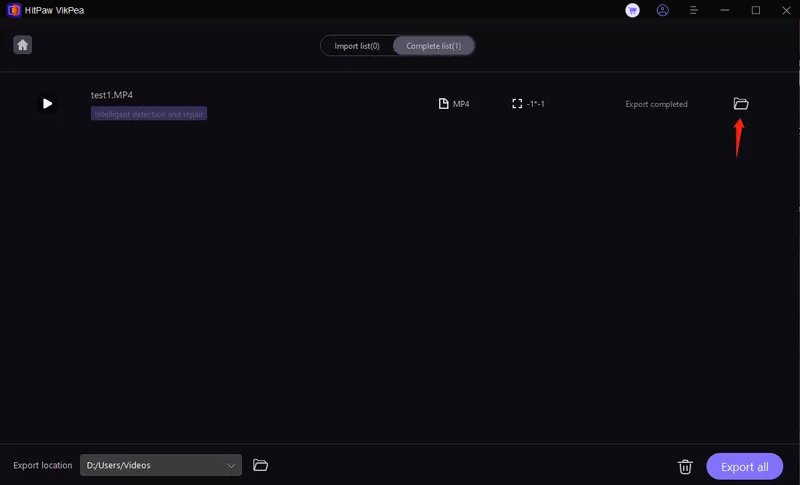
Lastly, press the "Folder" icon in front of the video file to find its folder on your device. All done!
Learn More about HitPaw VikPea
Part 5. FAQs of Xvid Video Codec VLC
Q1. Can VLC play Xvid files directly?
A1. Yes, VLC can play Xvid files directly because it comes up with built-in support for this codec. So, you don't have to install any special software or codec for Xvid-encoded videos.
Q2. Why is my Xvid video not playing in VLC?
A2. Multiple reasons exist for your Xvid video not playing in VLC Media Player, such as the Xvid codec not being properly installed, the VLC being outdated, or the wrong configuration settings.
Q3. How do I fix audio sync issues in VLC when playing XVID files?
A3.
To fix audio sync issues in VLC, adjust the audio synchronization settings:
1.Open VLC Player and click "Tools." Then, select "Effect and Filters."
2.Press "Track Synchronization Value" under "Audio/Video."
3.A negative entry will hasten the audio in the video.
Bottom Line
The Xvid video codec is an excellent choice for compressing and playing video files on VLC. Following this guide, you can install Xvid codec, enhance your video playback experience, and resolve any issues you encounter. But for those seeking an all-in-one solution for video repair and enhancement, HitPaw VikPea is highly recommended. Try it today to take your video quality to the next level!


 HitPaw Edimakor
 HitPaw FotorPea
 HitPaw Univd (Video Converter)

Share this article:
Select the product rating:
Daniel Walker
Editor-in-Chief
My passion lies in bridging the gap between cutting-edge technology and everyday creativity. With years of hands-on experience, I create content that not only informs but inspires our audience to embrace digital tools confidently.
View all ArticlesLeave a Comment
Create your review for HitPaw articles