How to Split Video in Final Cut Pro
Need to cut a video into multiple clips in Final Cut Pro? Whether you're editing a film, trimming unnecessary parts, or creating dynamic sequences, splitting a video is an essential skill. In this guide, we'll walk you through how to split a video in Final Cut Pro using different methods. Follow these steps to streamline your editing workflow and create professional-quality videos with ease!
Part 1. Step by Step Guide: How to Split Videos in Final Cut Pro
Splitting video clips in Final Cut Pro is a simple but essential technique. It helps you remove unwanted sections of footage, organize your timeline, and even combine clips from different sources. Here's how to get started:
Option 1. Split Clip with the Blade Tool
The Blade tool is one of the most frequently used tools in Final Cut Pro. It lets you make precise cuts on your clips, dividing them exactly where you want.
Steps by Step Guide to Split Clip using Blade Tool:
- Open your project in Final Cut Pro and import your media files.
- Drag the clip onto the Timeline where you want to make the split.
- Play the video and pause at the point where you want to split it.
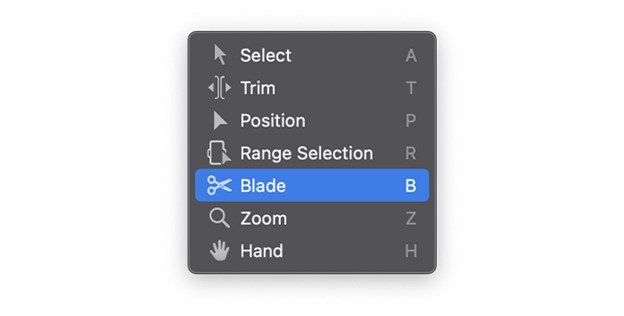
- Click on the Tools icon in the upper left corner of the Timeline and choose the Blade tool.

- Alternatively, you can press the B key on your keyboard to activate it.
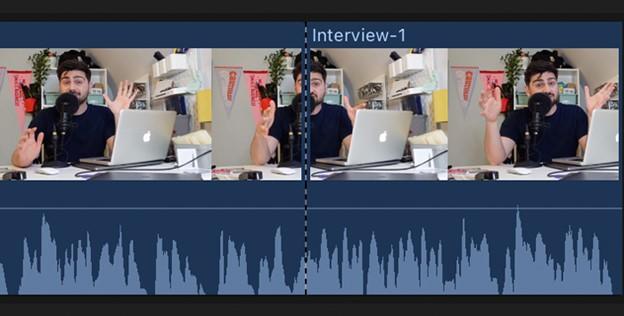
- Click on the clip at the point where you want to split. The video will be divided into two parts. A dotted line will appear to indicate the clip has been cut.

- Now, you have two separate clips on your Timeline. You can edit them independently.
Option 2. Split on the Go: Using Shortcuts
Sometimes, speed is crucial. Final Cut Pro offers keyboard shortcuts to quickly split a clip while the video is playing.
Steps by Step to split clips using shortcuts:
- Drag the clip you want to split to the Timeline.
- Play the clip and pause it at the desired point.
- Press Command + B to split the clip.
- You can use the space bar to play and pause the video quickly.
This method is great for when you need to split clips on the go without stopping your workflow.
Option 3. Split Clips by Inserting a Clip
Another way to split clips is by inserting a new clip into your existing Timeline. This method doesn't overwrite your original clips but creates a split by adding a new segment in between.
Steps:
- Import the new clip you want to insert.
- Move the playhead to the position where you'd like to insert the new clip.
- Press the Wkey to insert the new clip.
- Your original clip will be split, with the new clip inserted in between.
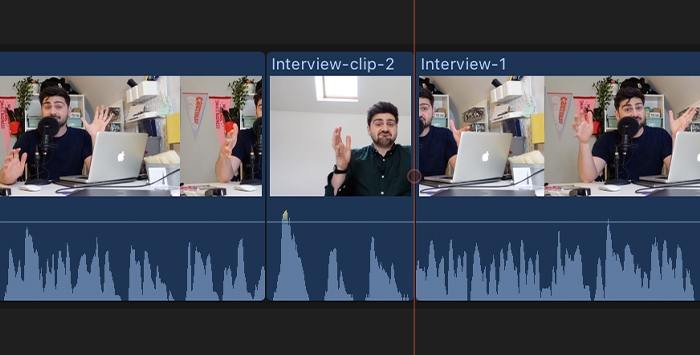
This technique is useful when you need to create a break or transition between two clips.
Option 4. Split Clips With the Position Tool
The Position tool allows you to split clips by inserting a new one, but with a twist. Instead of just inserting a clip, the Position tool will overwrite part of your original clip.
Step by Step Guide to Split Clips Using Position Tool:
- Add the new clip to your browser and place the existing clip on the Timeline.
- Move the playhead to the point where you want the split.
- Open the Tools menu and choose the Position tool, or press P to activate it.
- Drag the new clip to the primary storyline at the position of the playhead.
- The original clip will be split, and part of it will be overwritten by the new clip.
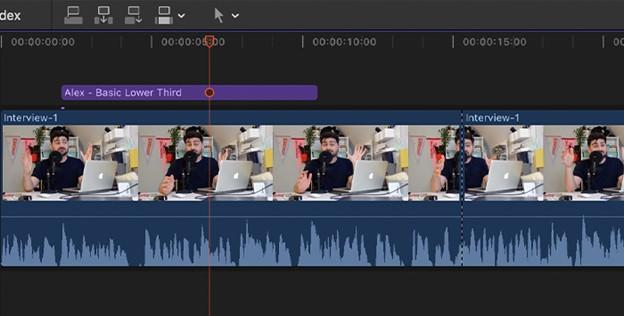
This method is handy when you need to keep the duration of the original clip and maintain the same flow in your video.
Option 5. How To Split Multiple Clips in Final Cut Pro
Sometimes, you may have multiple clips on your Timeline and need to split all of them at once. Final Cut Pro makes this process easy by allowing you to cut multiple clips simultaneously.
Step by Step Guide to Split Multiple Clips:
- Step 1:Move the skimmer to the point where you want to split.
- Step 2:Press Shift + Command + B to split all clips on the Timeline at once.
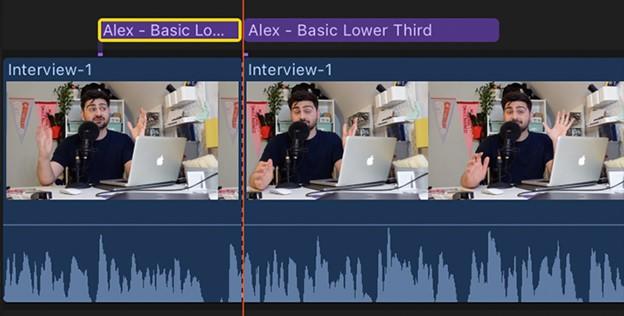
This technique is especially helpful when working with large video projects where you need to split numerous clips without interrupting your workflow.
Option 6. How to Split Selected Clips Together in Final Cut Pro
If you only want to split specific clips while leaving the others intact, you can select and split them individually.
- On the Timeline, select the clips you want to split.
- Move the skimmer to the position where you want to make the cut.
- Switch to the Blade tool or press Command + B to split the selected clips.
This method gives you control over which clips are affected, allowing for more precise editing.
Part 2. How To Create a Split-Screen Project in Final Cut Pro
Creating a split-screen effect is a fun and dynamic way to display multiple clips in the same frame. In Final Cut Pro, you can use this effect to show different videos side by side.
Step by Step Guide to Create Split Screen Project:
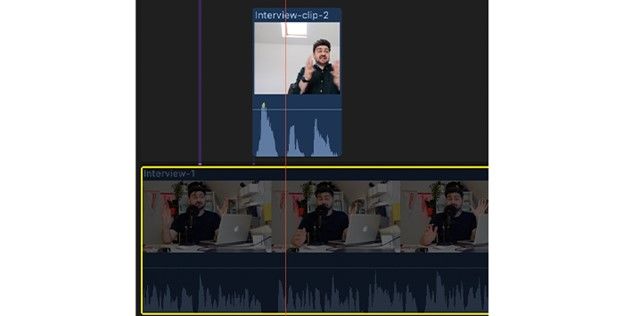
Step 1:Import your media files and drag them to the Timeline.
Step 2:Arrange the clips on different layers so that they can play at the same time.

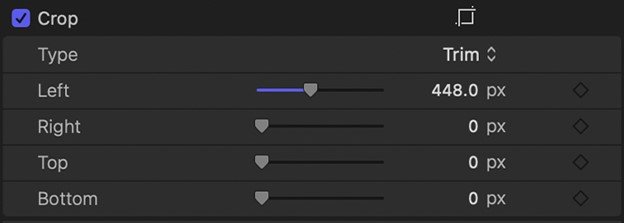
Step 3:Use the video inspector to crop and adjust the size of each clip by sliding the bar.

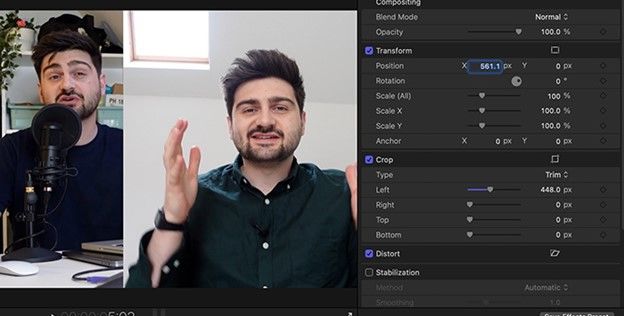
Step 4:In the Transform section, use the X and Y controls to adjust the position of the clip, setting up the split-screen view.
Step 5:Once you're finished, press V to deactivate the video and move on to the next clip.

Step 6:Select the next video you want to edit, press V to activate it, and repeat the process.
Step 7:Enable all video clips and preview the project. The split-screen video should now be fully functional. You can adjust the sizing of the split-screen if needed.
The split-screen tool in Final Cut Pro is essential for seamlessly displaying multiple videos together. This feature will save you a lot of time when editing multiple clips and ensure that the clips fit together perfectly in the timeline.
Part 3. Pro Tip: Create Stunning Videos with HitPaw Univd
If you're looking for an alternative or advanced video editing tool, HitPaw Univd is a great option for both Mac and PC users. It offers an easy-to-use interface and powerful features like cutting, merging, trimming, rotating, and adding watermarks. With AI-powered tools and a variety of output formats, it's perfect for anyone looking to enhance their video editing experience.

HitPaw Univd - All-in-one Video Solutions for Win & Mac
Secure Verified. 254,145 people have downloaded it.
- Provides diverse editing optionsincluding trim, merge, cut, add filters, watermarks, and more.
- Automatically stabilize and blur videos with AI technology
- Supports editing videos of any video type without losing quality
- Compresses videos and photos to smaller size without compromising quality
- Adjustable video speed for slow motion or fast motion effects.
- Comes with AI tools to enhance video, remove background noises, etc.
Secure Verified. 254,145 people have downloaded it.
Conclusion
Learning how to split video in Final Cut Pro is a fundamental skill every video editor should master. Whether you're working on a professional film or a personal project, splitting clips allows you to make precise edits and create smooth transitions. By incorporating these techniques, you can ensure your videos look polished and professional. If you're looking for even more features, consider using HitPaw Univd as an additional tool for editing and enhancing your videos.



 HitPaw VoicePea
  HitPaw VikPea (Video Enhancer)
 HitPaw FotorPea


Share this article:
Select the product rating:
Daniel Walker
Editor-in-Chief
My passion lies in bridging the gap between cutting-edge technology and everyday creativity. With years of hands-on experience, I create content that not only informs but inspires our audience to embrace digital tools confidently.
View all ArticlesLeave a Comment
Create your review for HitPaw articles