The Essentials of Re-encoding Video for Optimal Quality and Compatibility
Video has become an integral part of digital communication and content in the 21st century. From YouTube videos to video chatting, streaming movies, and sharing video memories with friends and family, video is embedded in our daily digital lives. Videos are available in a variety of formats, resolutions, codecs.
We use many different devices to watch them as well. However, compatibility issues can arise when videos are shot on one device and need to be watched or shared on another platform. Additionally, optimizing video quality while minimizing file size is important for sharing and streaming efficiency. This is where re-encoding video enters the picture. Re-encoding allows you to convert videos from their source format into a more suitable format for your playback device. Let's see how a video encoder can help you do it.
Part 1: Understanding Video Re-encoding
Video re-encoding refers to the process of taking an existing video file and converting it into an alternative video codec or file format. Re-encoding is an important tool for achieving better playback quality, smaller file sizes, and wider compatibility of your videos across diverse platforms and devices. At its core, re-encoding changes how a video file is compressed by using a different codec than the original. Codecs are the algorithms behind video compression, determining factors like the encoding efficiency, compression rate, and final output quality.
Common reasons you may need to re-encode a video include converting unsupported formats for certain devices, optimizing streams for your playback scenario, editing video chunks together, reducing resolution to save bandwidth, and decreasing file size for sharing. With the complexity of today's cross-device digital ecosystem, re-encoding empowers you to fine tune videos to thrive in your intended viewing environment rather than be restricted by their original encoding format. Done properly, re-encoding can provide smaller files for quicker loading without sacrificing quality.
Part 2: What are Video Codecs and Why need to Re-encode Video?
1. What are Video Codecs?
What is a video codec? Video codecs are algorithms that compress and decompress digital video files. Codecs aim to store video efficiently by reducing redundancy and unnecessary data, allowing file sizes to shrink tremendously while maintaining adequate visual quality upon playback. Different codecs have various strengths. For instance, some codecs excel at compression efficiency, while others focus on speed or top-notch quality. Codec choice majorly impacts the cost of storage and distribution versus retained image fidelity.
Some popular video codecs include:
- H.264/MPEG-4 AVC - Offers efficient compression and widespread compatibility. Used for online streaming and HD video.
- HEVC/H.265 - Newer than H.264, this compresses at double the efficiency. Best for 4K/HDR content.
- VP9 - Created for web video by Google. Enables HD streaming with lower bitrates than H.264.
- AV1 - An open, royalty-free codec designed for next-gen UHD streaming. Offers superior compression over VP9.
- MPEG-2 - The standard for DVDs and digital television broadcast encoding.
2. Why Need to Re-encode a Video?
- Compatibility
- File Size Reduction
- Quality Enhancement
Today we access video across TVs, PCs, mobiles, and more using various software players. Re-encoding standardizes your videos to formats and codecs supported across your target playback ecosystem. For example, re-encoding iPhone videos to H.264 lets you play them on most non-Apple devices which don't natively support Apple's codec choices and can expand your potential audience.
Re-encoding into a more efficient codec shrinks file sizes drastically so users can stream/download video faster and you save on storage and distribution bandwidth costs. You can also downscale resolution or alter the bitrate to selectively shrink file size without visibly sacrificing quality for your playback requirements.
Legacy videos may suffer quality issues such as low resolution, muddy colors, and interlacing artifacts. Re-encoding outdated formats into modern codecs can breathe new life into such videos by allowing upgrades to contemporary resolutions and enabling chroma subsampling improvements that enhance detail and color accuracy. Dynamic range and framerate boosts are also possible in re-encoding.
Part 3: Using HitPaw Univd (HitPaw Video Converter) for Effective Video Re-encoding
Are you looking for the easiest way for video encoding or re-encoding? Then you should consider using HitPaw Univd. HitPaw Univd is one of the most powerful video converters that you can see out there as of now. It supports hundreds of video and audio conversions. Along with that, you can also use it for video re encoding. By using this video converter, you can enhance video resolution, bitrate, and many other parameters. You can also compress the size of any video with the help of it.
Key Features of HitPaw Univd
- AI-powered video encoding engine allows blazing 120x faster conversions. This will help you to convert videos fast.
- Embeds lossless audio transcoder to shift favorite tunes into platforms like YouTube Music, and Spotify.
- Aside from video transforms, also competently burns Blu-Rays without quality loss. This is one of the best examples of how it can re-encode videos.
- Inherent creative editing capabilities help customize and enhance videos. If you want to edit videos before re encoding, you can do it with ease.
- Can additionally download online videos from all platforms for archiving offline. If a video that you download from the internet doesn't work, you can re-encode it from the software itself.
Guide on Video Re-encoding with HitPaw Univd
Here are the steps that you should follow to re encode video on HitPaw Univd.
Step 1 - Add your video files to HitPaw Univd
To begin with, you should add the video files into HitPaw Univd. Launch HitPaw Univd, select the “Convert” tab and then click “Add Video”.

Step 2 - Select the output format
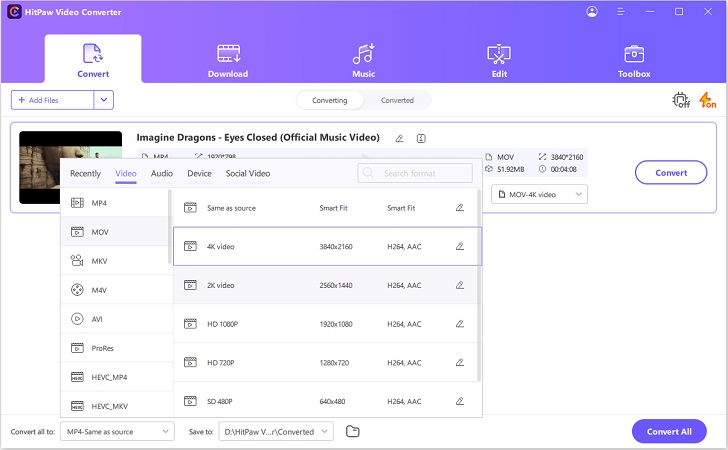
You can next select the output format where you wish to convert the video. It is better to select MPEG4 as the output format for better reencoding under the Encoder tab. You can also change bitrate, frame rate, and quality of the video as per your preferences.

Step 3 - Converting Video
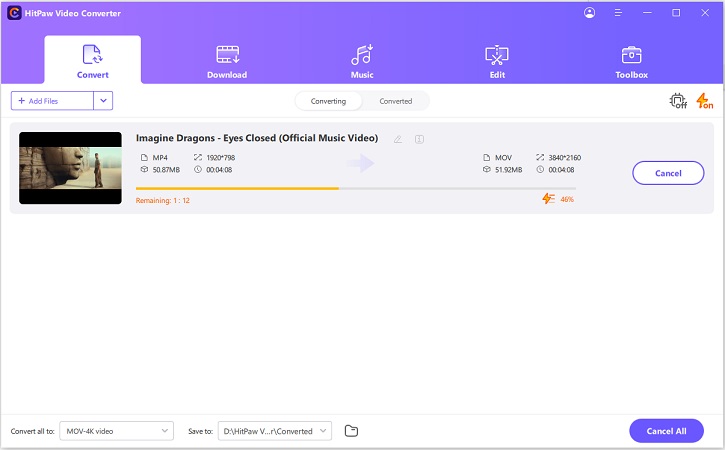
You can next select video metadata and hit on the “Convert” button. If you have added more than one video, you can see it as “Convert All”.

Step 4 - Open the Converted Video
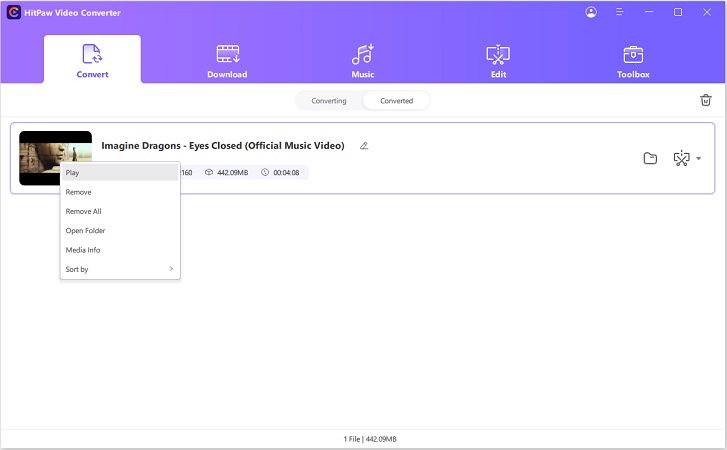
After conversion, open the folder that contains converted videos. These are your re-encoded videos.

Part 4: Bonus Tips for Effective Video Re-encoding
1. Choose the Right Format
Select your output format based on the platforms where you intend to share the videos. Know the codec and file type support across your target devices and choose one with widespread compatibility like MP4/H.264 when unsure. Explicitly check the format needs if distributing to media centers or mobile apps.
2. Balance Quality and File Size
Quality and file size have an inverse relationship in encoding. Compare various codec bitrate presets to find the “sweet spot” with the highest perceivable fidelity at lowest file size for your priorities. Leverage resolution proportionate to your playback screen sizes as well. Measure objective video quality using PSNR/SSIM metrics before finalizing the encode.
3. Use a Reliable Tool
Invest in a quality encoding application that exposes both basic and advanced settings across a range of device/format preconfigured presets. Verify that it encodes efficiently leveraging GPU hardware acceleration to save time. Check for comprehensive codec choices, support forums/documentation, and continuous updates ensuring format compatibility. Test with various source clips before relying on an encoder for all your video assets during bulk processing.
FAQs about Re-encode Video
Q1. What does it mean to encode a video?
A1. Video encoding is the process of compressing raw digital video data to shrink file size using an encoding algorithm called a codec. Encoding allows efficient video storage and transmission. The trade off is between file size versus retaining visual quality and codec complexity.
Q2. What is the difference between transcode and re-encode?
A2. Transcoding refers to conversion from one codec/format to another. It adapts the video to an alternative playback environment. Re-encoding involves decoding an already encoded file and then re-compressing it with the same or different codec. Reasons to re-encode include reducing file size, boosting compatibility, or enhancing quality issues with the initial encoding.
Conclusion
Now you know how to re encode video in the correct way. Correctly re-encoding videos is important for playback accuracy across our expansive device ecosystem. Whether you need to widen compatibility, economize file size, enhance aged footage, or simplify editing workflows - intelligent video conversion software like HitPaw Univd aims to tackle the intricacies behind complex transcoding tasks. It strives to balance efficient compression against retention of perceivable quality. Go ahead and get your hands on HitPaw Univd to secure the best video encoding experience.


 HitPaw VikPea
 HitPaw Watermark Remover


Share this article:
Select the product rating:
Daniel Walker
Editor-in-Chief
My passion lies in bridging the gap between cutting-edge technology and everyday creativity. With years of hands-on experience, I create content that not only informs but inspires our audience to embrace digital tools confidently.
View all ArticlesLeave a Comment
Create your review for HitPaw articles