Best Video Codec Checker to Check Video Codec Online/Windows/Mac
Understanding video codecs is essential for anyone working with digital video files. A video codec determines how video files are encoded, stored, and decoded for playback. It directly impacts file size, quality, and compatibility with devices and media players. Whether you're troubleshooting playback issues, ensuring compatibility for editing, or simply analyzing video properties, having the right video codec checker can save time and effort. This guide introduces some of the best tools and methods to check video codecs on Windows, Mac, and online.
Part 1: What is Video Codec?
A video codec is a combination of software and hardware technologies used to compress (encode) and decompress (decode) digital video files. Without codecs, video files would be too large for storage and streaming. Popular codecs like H.264, HEVC (H.265), and VP9 enable efficient storage and playback across devices and platforms.
Knowing the video codec of a file is crucial for resolving compatibility issues, optimizing playback, and ensuring high-quality editing or streaming.
Part 2: How to Check Video Codec on Windows and Mac?
Checking the codec of a video file is critical for resolving playback errors or understanding technical specifications. Both Windows and Mac users have multiple ways to identify video codecs, ranging from built-in features to specialized software. Here, we outline three reliable methods.
1. How to Check a Video Codec in VLC Media Player?
VLC Media Player is a powerful and widely-used media player that supports almost all video formats. Beyond playing videos, it offers built-in tools for analyzing codec details, making it a go-to option for anyone looking to check video codec on Windows or Mac.
1.Open VLC Media Player and load your video file.
2.Pause the playback and navigate to the top menu bar.
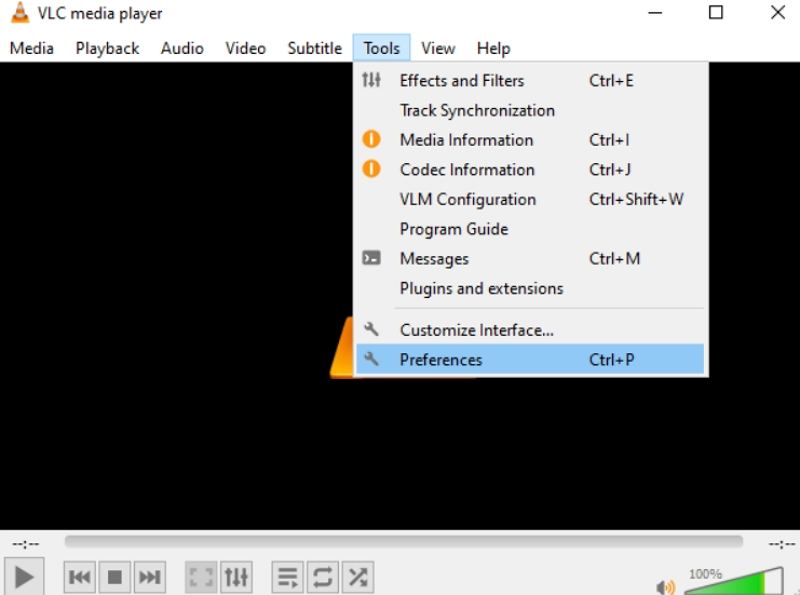
3.Click on Tools and select Codec Information (or press Ctrl + J on Windows or Cmd + I on Mac).

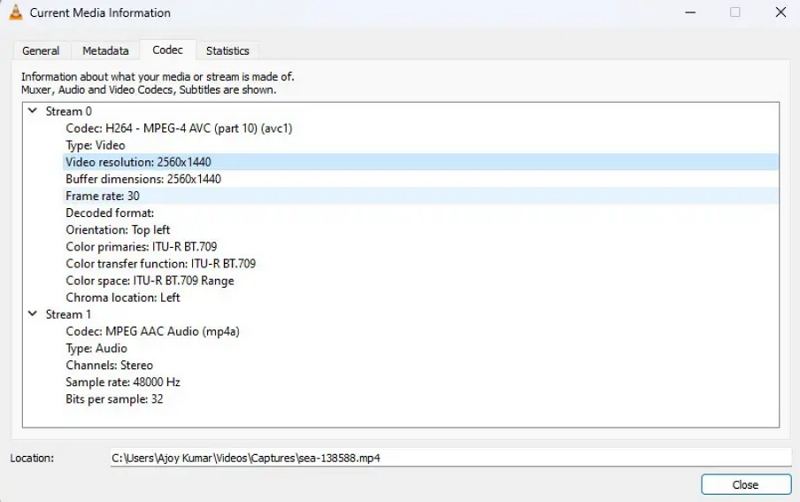
4.A window will appear showing detailed codec information for both video and audio streams.

With just a few clicks, VLC provides comprehensive details about the file's encoding methods.
2. How to Check a Video Codec with Get Info on Mac?
If you’re a Mac user, you don’t need additional software to identify video codecs. The Get Info option provides a simple way to analyze file properties, including codec details.
1.Locate your video file in Finder.
2.Right-click on the file and choose Get Info from the dropdown menu.
3.In the information window, expand the More Info section.
4.Look for the Codecs field to identify the video and audio codecs used in the file.

This straightforward method is ideal for quick checks and doesn't require installing third-party programs.
3. How to Check Video Codec with MediaInfo?
MediaInfo is an all-in-one solution for analyzing and displaying technical details of video and audio files. It’s a preferred tool for professionals and enthusiasts due to its simplicity and detailed reporting capabilities.
1.Download and install MediaInfo from its official website.
2.Open the program and drag your video file into the MediaInfo window.

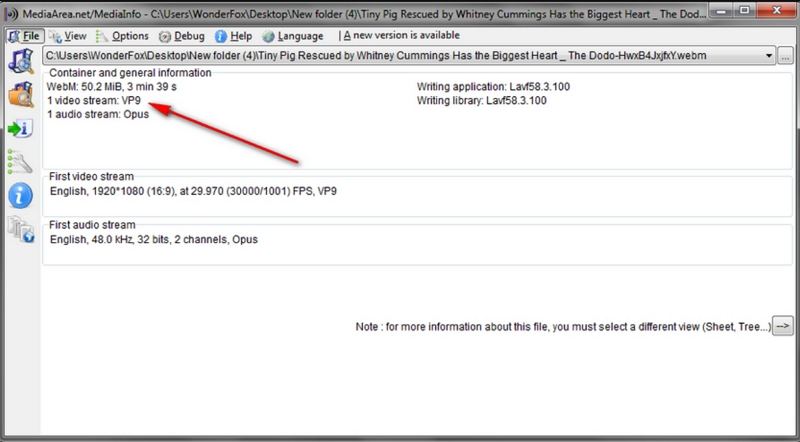
3.The tool will immediately display key details, including the video codec.

4.For in-depth analysis, select the View menu and choose Tree View, which organizes the information in a hierarchical format.

5.Optionally, export the video details by clicking File > Export for sharing or troubleshooting.
MediaInfo is a lightweight yet comprehensive tool for identifying video codecs and other technical details.
Part 3: How to Check Video Codec Online?
Online tools are perfect for quick codec checks without the need for downloads or installations. MediaInfoOnline is one such tool that simplifies the process while ensuring your files remain secure. Steps to check video codec online with MediaInfoOnline:
1.Visit MediaInfoOnline.
2.Drag your video file into the upload box.
3.Instantly view detailed codec information, including video and audio codecs.
4.Download the report or copy the details to your clipboard.

Online tools like MediaInfoOnline are fast, secure, and convenient for on-the-go checks.
Part 4: Best Video Converter to Change Video Codec
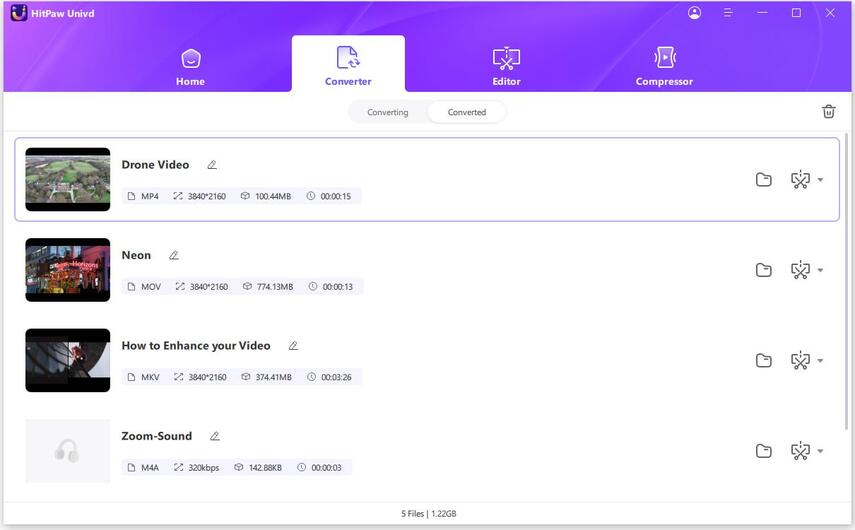
Sometimes, a video’s codec may not be compatible with your device or media player. In such cases, converting the codec to a more widely supported format is the best solution. HitPaw Univd (HitPaw Video Converter) simplifies this process, offering a user-friendly interface and robust features. HitPaw Univd makes changing codecs straightforward, ensuring your videos are compatible with any device.
- Supports a wide range of video and audio codecs.
- Maintains high-quality output during conversions.
- Batch processing for multiple files simultaneously.
- Customizable output settings, including codec selection.
Steps to Change Video Codec with HitPaw Univd:
Step 1.Open HitPaw Univd and add your video files by clicking Add Video or dragging them into the program.

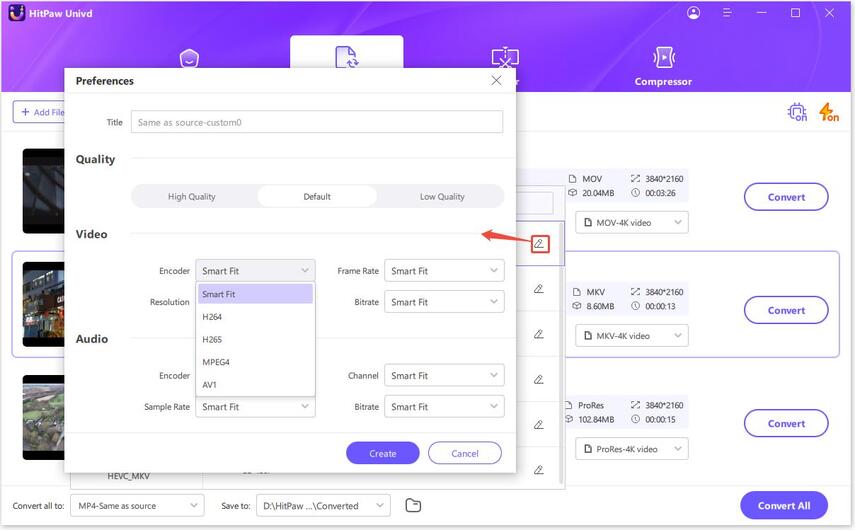
Step 2.Choose an output format by clicking the inverted triangle icon next to the file. Customize the codec by clicking the edit icon in the format settings.

Step 3.Select a target folder and click Convert (or Convert All for batch processing).

Conclusion
Whether you want to check video codec online or analyze files on Windows and Mac, tools like VLC Media Player, MediaInfo, and HitPaw Univd offer practical solutions. For quick checks, MediaInfoOnline is an excellent choice. If you need to convert incompatible codecs, HitPaw Univd stands out for its simplicity and efficiency. Master your video files today by using these reliable video codec checkers and converters!






 HitPaw VikPea
 HitPaw Watermark Remover

Share this article:
Select the product rating:
Daniel Walker
Editor-in-Chief
My passion lies in bridging the gap between cutting-edge technology and everyday creativity. With years of hands-on experience, I create content that not only informs but inspires our audience to embrace digital tools confidently.
View all ArticlesLeave a Comment
Create your review for HitPaw articles