How to Reduce Video Size Using iMovie
With high resolution comes large video files that quickly run you out of space on Mac. When getting rid of them is not an option, perhaps downsizing them could be. This is especially true when uploading or sharing a video file online. The smaller the video size, the quicker and more convenient it is to share and upload. However, if you've tried to reduce video size using iMovie, you've probably discovered that you end up with a same-sized, blurrier version of the video file. This guide will help you reduce video file sizes on a Mac using iMovie without seriously compromising the video quality.
Part 1: Step by Step Guide to Compress a Video in iMovie
iMovie is a basic video editor for Mac, MacBook, and iOS devices. While certainly not the best video editor out there, iMovie does fulfill the common needs of a casual user looking to edit their homemade videos. The exact steps for compressing a video using iMovie may differ slightly depending on your device and your software version. However, the broad steps involved would be something as described below:
- Step 1: Check the Video File Size
- Step 2: Launch and Set Up iMovie
- Step 3: Import Video File to Compress
- Step 4: Edit Video if Needed
- Step 5: Export Video
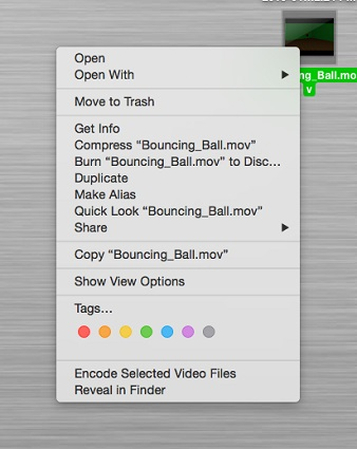
Before we begin compressing the video file, let's start by checking its current size. Follow these steps to do just that: Right-click on the video >> Click "Get Info." The pop-up window displays the video file size alongside other pertinent details.
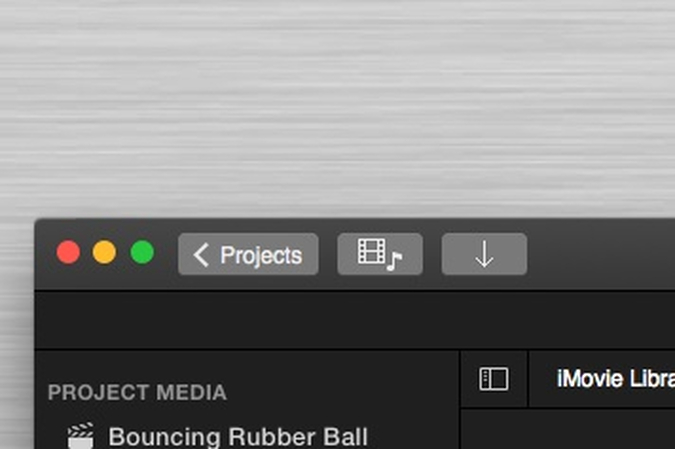
Launch iMovie >> Navigate to "Projects" or "Library" >> Hit the "+" button in the top left corner >> Select "Movie" >> Make your "Theme" selection >> Name the output movie file.

Click the "Import Media" button >> Double-click the file you need to compress >> Click and drag on the video strip to summon the yellow "crop" box >> Adjust the "crop" box dimensions to indicate how much of the video you want to keep >> Drag selected video section to gray area at the bottom
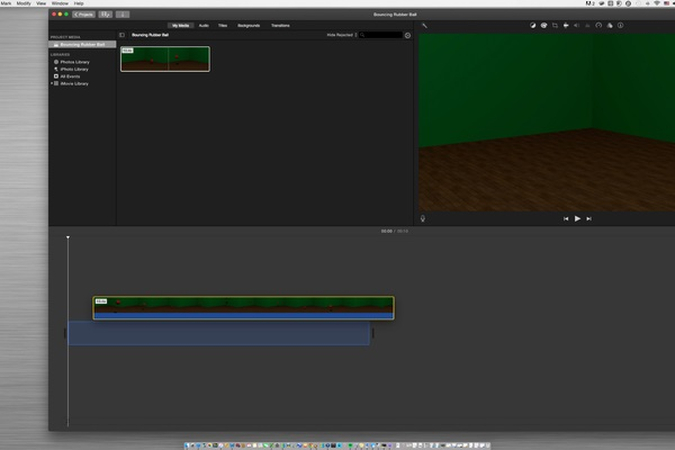
This is an optional step. Any changes you make here will affect the size of the output video.
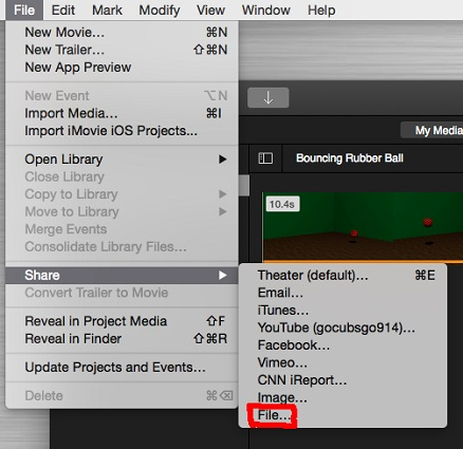
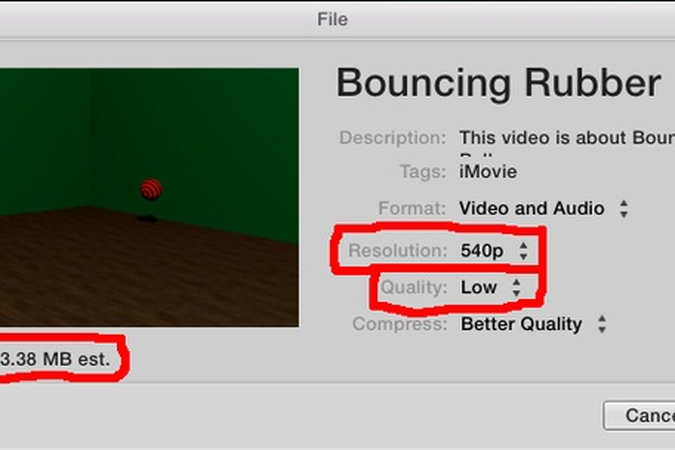
This is the final and most important step. In the Menu bar, click "File" >> Hit "Share" >> Select "File" >> Select Resolution and Quality settings >> Hit "Next" >> Type the output file name and select its location >> Click "Save"
When choosing Resolution and Quality, higher resolutions and quality settings increase the video file size, while lower settings decrease it. You can experiment with different values for these settings until you arrive at a suitable file size and quality settings.
Now, you can follow Step 1 again to check the size of the compressed video file. If it meets your expectations, that's great. Else, you can repeat Steps 2 to 5, while changing Resolution and Quality settings in Step 5.
Part 2: Alternative to iMovie Reduce File Size on Mac
iMovie is a pretty good video compression tool for amateurs learning to do it for the first time. However, if you need advanced features like lossless compression or conversion to another video format, you'll find iMovie to be quite limited in its capabilities. Fortunately, HitPaw Univd (HitPaw Video Converter) offers all the features necessary to compress your video files in ways iMovie can never do. Experienced users and professionals rely on HitPaw Univd to edit videos in advanced ways, including reducing their sizes without losing their quality. Here are some of the reasons HitPaw Univd is growing popular recently:
HitPaw Univd - All-in-one Video Solutions for Win & Mac
Secure Verified. 254,145 people have downloaded it.
- Highest Quality Compression: Lossless conversion means reducing file size without losing its quality
- No Watermarks: No pesky watermarks on your videos once it's compressed
- Batch Video Compression: Compress up to 5,000 videos in a single batch
- No File Limit: Doesn't matter if your videos are 5GB or 50GB, compress them all
- Multiple Format Support: Compress MOV, MP4, WEBM, AVI, MKV, WMV, and many other formats
- 120X Process Speed: Hardware acceleration ensures your files are compressed at lightning speeds
Secure Verified. 254,145 people have downloaded it.
Guide to Reduce Video File Size on Mac with HitPaw
Whether you need to compress one video or a thousand, all it takes is a 4-step process to compress your videos to a size convenient to you. Here's how you do it:
- Step 1: Access to HitPaw Video Compressor
- Step 2: Add Videos to Compress
- Step 3: Customize Compression Settings
- Step 4: Compress Video Files on Mac
Launch HitPaw Univd >> Navigate to "Toolbox" tab >> Click "Video/Image Compressor"
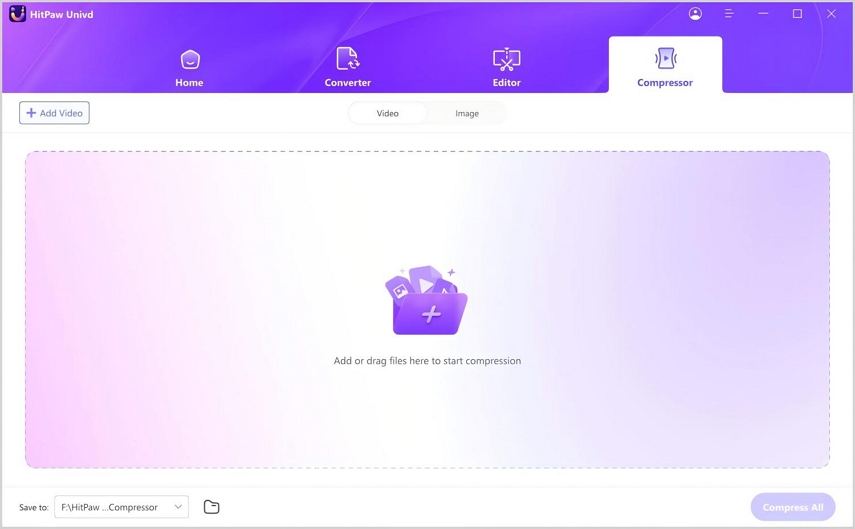
Navigate to "Video" tab >> Click "Add Video" >> Select all videos you'd like to compress
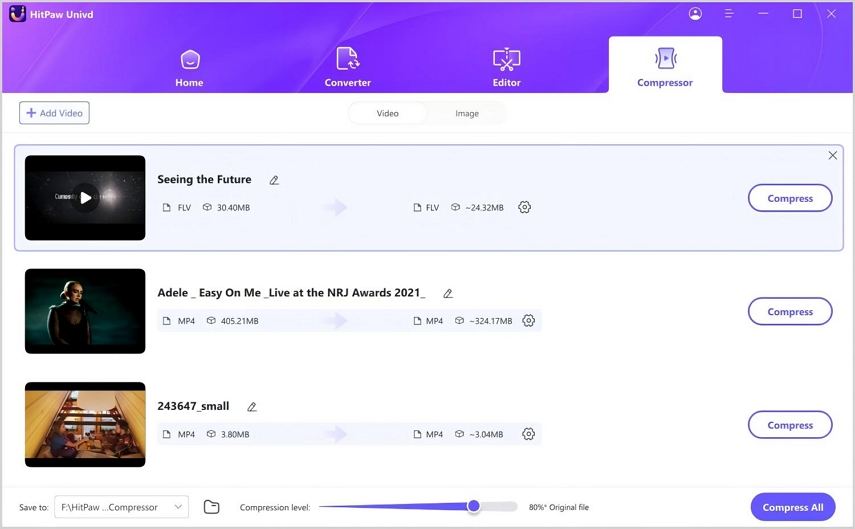
Once the video files are imported into the software, you'll notice a "Gear" icon beside each video file. Click on it to open the compression settings window and set the various options. "Preview" the output file and change compression settings if needed.
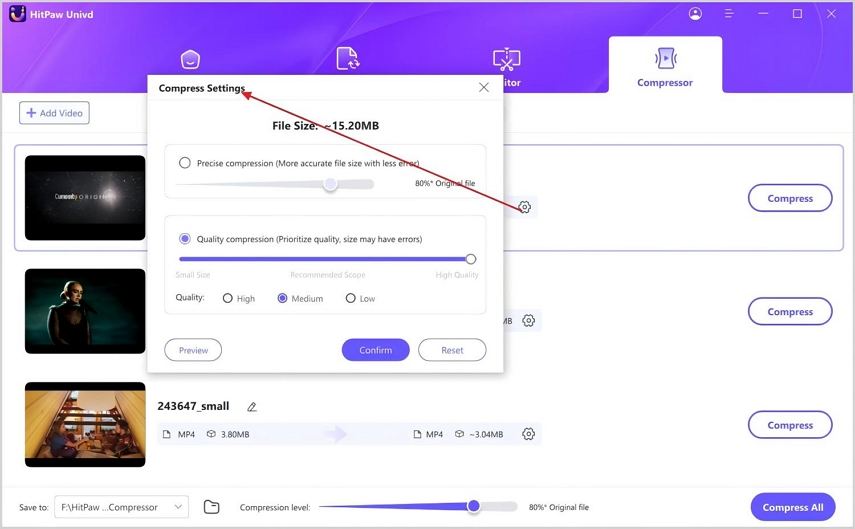
Alternatively, you can set the compression settings for the entire batch using the "Compression Level" setting at the bottom left corner.
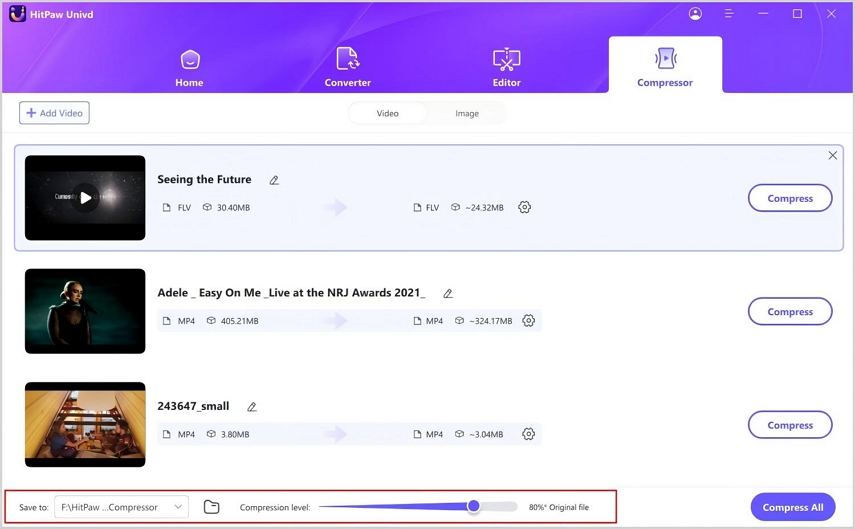
Click "Compress" or "Compress All" to start compressing the videos.

FAQs about iMovie Compress Video
Q1. Can iMovie compress MP4?
A1. Yes, iMovie can compress MP4 video files with ease.
Q2. How to compress iMovie file on iPhone?
A2. In the phone version of the iMovie app, you need to use the "Share Video" feature to compress the videos on your iPhone. However, the compression options are woefully limited on the iMovie app for iPhone.
Q3. Why is my iMovie video so large?
A3. When you import a video into iMobile, it decompresses the video file automatically. So, if you export the file using default settings, the file size would be massive. You need to set the compression settings to the original video settings to keep the video file the same. Also, iMobile video files can become large when you add too many clips to your project.
Q4. How to compress an iMovie video to email?
A4. To compress your iMovie video into an email-friendly format, follow these steps on iMobile: "File" menu >> Click "Export Movie" >> In the "Export Using QuickTime" pop-up window, hit the "Export" drop-down menu >> Choose "Movie to MPEG-4." Your video will now be compressed to an email-friendly format. If your email service does not support the video size, you may have to reduce the quality settings further to make it suitable for emails.
Conclusion
iMovie is a handy tool for amateur video editors who need basic editing features. Among the many things the software can do, compressing videos to smaller sizes is popular. Use it to give your video editing skills a spruce up and free up some storage space on your Mac. If you need more advanced video editing features, make it a point to give HitPaw Univd a try. This AI-powered tool compresses your videos losslessly to a fraction of their original size.


 HitPaw VoicePea
  HitPaw VikPea (Video Enhancer)
 HitPaw FotorPea


Share this article:
Select the product rating:
Daniel Walker
Editor-in-Chief
My passion lies in bridging the gap between cutting-edge technology and everyday creativity. With years of hands-on experience, I create content that not only informs but inspires our audience to embrace digital tools confidently.
View all ArticlesLeave a Comment
Create your review for HitPaw articles