Guide to Fix Bright Colors Losing Detail GIMP Colorize
Are you struggling with bright colors losing detail in GIMP? You're not alone there. Sometimes you'll find images colored with bright colors losing their sharp and deep details. It is frustrating, especially when you want your artwork to stand out.
Luckily, you no longer have to worry because this guide will help you with simple, effective solutions to preserve the bright colors losing detail gimp colorize feature. Let's get started now!
Part 1. Why Does Bright Colors Losing Detail GIMP Colorize?
When you use GIMP's Colorize feature, you find that bright colours lose their detail leaving the images rather flat or unvibrant.
This occurs because the Colorize tool can overcome the image's inherent contrast and brightness differences by applying a single hue throughout the layer. Because of the consistent color application, delicate highlights and shadows are sometimes lost in bright hues.
Additionally, Colorize frequently caus oversaturation in bright regions because it is unable to distinguish between darker and lighter areas. if you are aware of these effects, you can preserve image depth by making better modifications.
Part 2. Fix Bright Colors Losing Detail GIMP Colorize in GIMP
If your vibrant colors appear to fade when you use Colorize in GIMP, don't worry. You can still preserve fine detail and keep your colors vibrant in a variety of ways. We'll show you some simple, step-by-step techniques in this part for preserving the clarity, depth and texture of your vibrant colors with GIMP.
Step 1: Duplicate the Layer
Make a duplicate of your image layer to begin. You can always modify or eliminate effects as needed because this will enable you to work effectively.
- 1.First go to "Layer" and then to " Duplicate Layer".
- 2.Rename the new layer for easier identification such as "Colorize Layer".
Step 2: Apply Colorize to the Duplicate Layer
Now apply the Colorize filter to the duplicated layer.
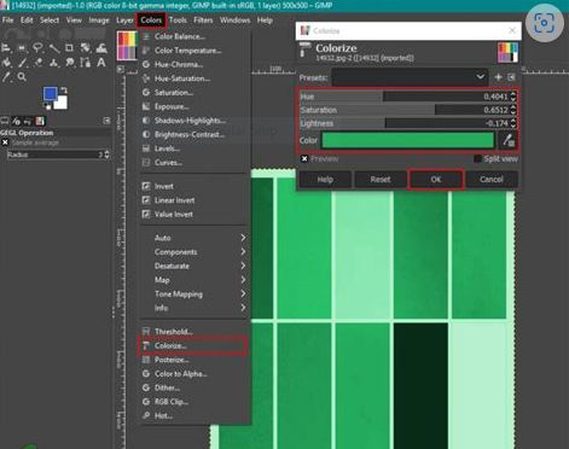
- 1.Select Duplicate Layer and go to "Colors" and select "Colorize".
- 2.Adjust the Hue, Saturation and Lightness sliders to your desired color. Brighter colors requires a more subdued saturation and lightness setting to avoid over-registering against details.
Step 3. Set Layer Mode to "Color" or "Overlay"
Change the layer mode to blend the colorization with the underlying details to preserve textures and highlights.
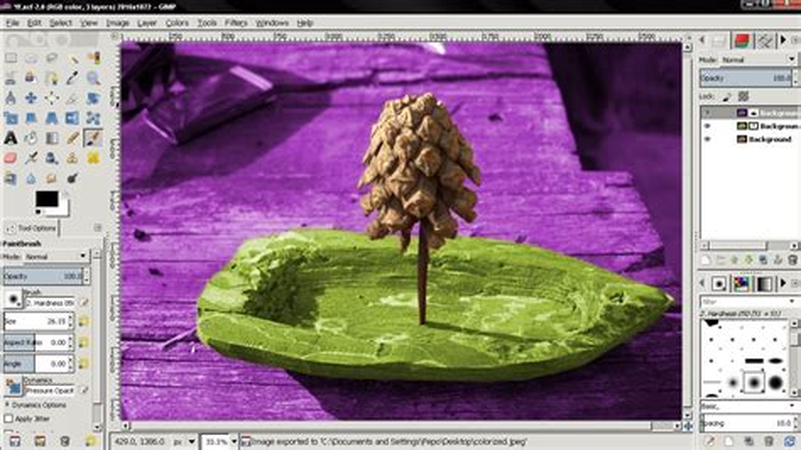
- 1.Go to the Layers panel and change the layer mode of the duplicated layer to Color or Overlay.
- 2.Color mode will add a tint with preserved textures; Overlay will increase contrast - excellent for bright images.
Step 4. Use Layer Mask to Control the Effect
If you want more control, apply the effect only in certain areas to make use of a layer mask.
- 1.Click on the layer and right-click. Next, check the 'Add layer mask' command from the menu.
- 2.Set the layer mask to Black, which means full transparency to hide the effect.
- 3.Using a soft white brush, paint the areas where you want the color effect to appear naturally.
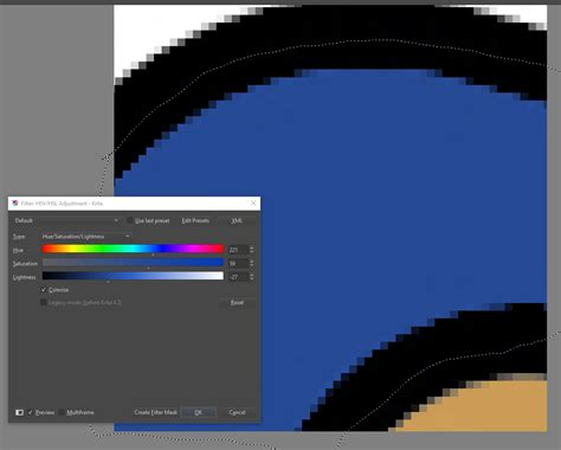
Step 5: Fine-tune and adjust.
Once you're happy with the color, change the Opacity of the Colorize layer as needed to make the colors appear more natural. This will help to balance color vibrancy and detail.
By following these steps, you will have a balanced and colorful image with conserved details in bright hues, resulting in a polished and natural appearance.
Part 3. Best Video Color Enhancement Free Try without Error
HitPaw VikPea (formerly HitPaw Video Enhancer) is a great choice for anyone looking to easily increase the color quality of their videos. It provides a simple method for enhancing colors and allows you to obtain brilliant and professional-looking results.
With a free trial, you can experience for yourself how HitPaw VikPea can successfully and efficiently improve the color quality of your videos.
Why Choose HitPaw VikPea
- Upscales your videos effortlessly with the assistance of AI which is highly advanced.
- Converts lower formats 720p into high-quality videos, 4K.
- Eliminates noise for sharp video output.
- Colorizes black-and-white videos or enhance the colors of videos.
- Works on more than 30 formats like MP4, AVI, MKV.
Steps to Enhance Video Color
1. Download and Install HitPaw VikPea
Download HitPaw Video Enhancer from the official website and install on your computer.
2. Launch the Software and Import Video
Open HitPaw VikPea, click "Choose File," and upload the video you want to enhance.

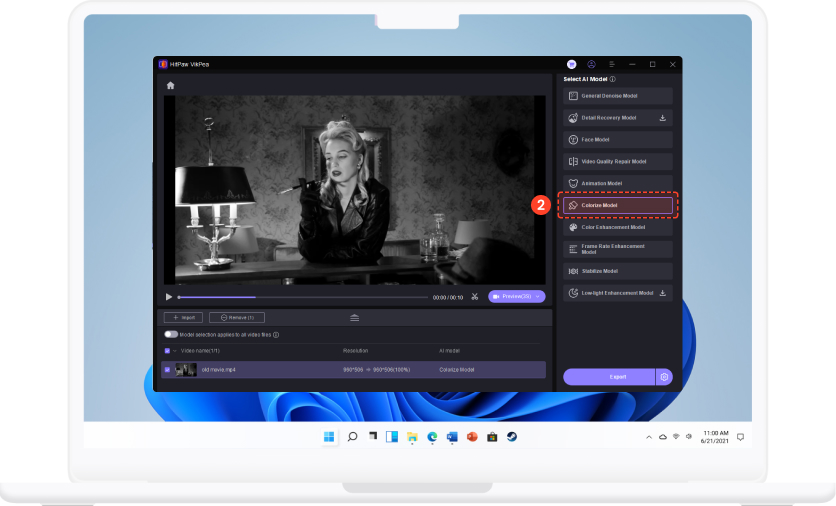
3. Select AI Model for Color Enhancement
Choose the more recent AI model to work specifically with black-and-white videos or to enhance brilliant colors.
4. Adjust Settings
Customize resolutions like upscaling to 4K along with other improvements according to the requirements of the video.
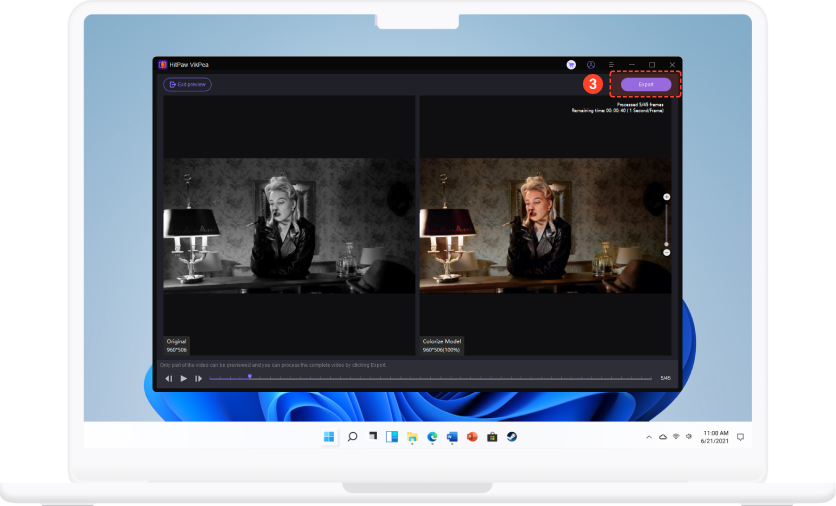
5. Preview and export
Press the preview button to preview how the color enhancements will work. Then, click on export to save your video with enhanced colors to your preferred location.
Learn More about HitPaw VikPea
Part 4. FAQs of Bright Colors Losing Detail GIMP Colorize in GIMP
Q1. What color space does GIMP use?
A1. GIMP work primarily in the RGB color space which is ideal for web and digital media. It defaults to an 8-bit RGB mode but it also supports higher bit depths and other color spaces such as grayscale and indexed color. GIMP does not natively support CMYK, which is commonly used in print media.
Q2. Which kind of GIMP tool is used to colorize image elements?
A2. GIMP's Colorize tool is created to colorize grayscale or monochrome sections of a picture. This tool, available under Colors > Colorize, allows users to apply a single hue to a layer or selection which make it simple to add color to specific objects. The Hue-Saturation tool is also useful for changing existing colors in an image.
Q3. What is the limit of color palette in GIMP?
A3. When using the Indexed color mode, which is commonly used for GIFs and other graphics with low color requirements, GIMP's color palette can support up to 256 colors. However, in RGB mode, the color limit is greatly increased, allowing for millions of colors for detailed and bright images, making it excellent for photographs and high-quality digital art.
Conclusion
In this guide, we looked at why bright colors lose detail while using GIMP's Colorize tool, and how you can fix it. Color brightness and depth can be preserved by modifying layers, employing layer modes and applying masks.
HitPaw VikPea is useful tool for individuals who want to improve their videos with outstanding color and clarity. It's a simple, effective way to boost video colors and details with a few clicks. Try it now and see how quickly you can improve your video material.


 HitPaw Univd (Video Converter)
 HitPaw VoicePea
  HitPaw FotorPea


Share this article:
Select the product rating:
Daniel Walker
Editor-in-Chief
My passion lies in bridging the gap between cutting-edge technology and everyday creativity. With years of hands-on experience, I create content that not only informs but inspires our audience to embrace digital tools confidently.
View all ArticlesLeave a Comment
Create your review for HitPaw articles