[Step-by-step] How to Capture Screen with VLC
Screen capturing is an everyday task to save the videos/streaming for later use or sharing with friends. Also, it is pretty beneficial when you record videos to make presentations and tutorials, including the training and troubleshooting videos.
The thing is that people always go for the default or other third-party software to record streams, even having the VLC Media Player already installed on their systems. Simply, they are unaware of the VLC recording video feature.
No wonder this guide will cover how to record with VLC efficiently. Go ahead to learn the details!
Part 1: Get to Know about VLC
Finding an ideal software to record desktop and other videos is not a challenging task because you probably already have it. Yes, it is none other than the VLC. Besides working as a media player and converter, it also helps you with screen capture, recording, and other relevant functions.

You can perform the task using its Capture Devices feature. People also ask if they can VLC capture streaming videos. Yes, it does while working as a screen recorder. Supporting webcams and camcorders is proof. You will get four options for VLC screen recording to play, convert, stream, and enqueue. So, you can perform a VLC capture screen, VLC record streaming, and even the VLC capture desktop function.
Furthermore, it allows you to use various audio and video effects. Even you can do video synchronization with subtitles and soundtracks. And when it comes to its audio/video playback properties, they are a bonus!
Pros:
- Support the interface customization
- Offer shield against the user-tracking
- Open multiple files at a time
- Aid in changing aspect ratio
- Local rendering feature
Cons:
- Not a professional video recorder
- It does not offer to add tags
- Complex to understand the interface for beginners
Part 2: Easily Capture Screen using VLC
Though the advanced users can easily figure out how to capture a screen with VLC, other ones will surely need a detailed guide to get through this process. Let’s move forward toward the steps that can also solve your question of how to capture Netflix streaming video with VLC!
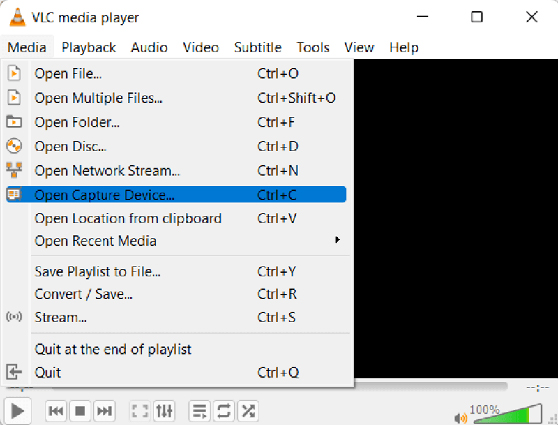
Step 01 First of all, you have to check if the VLC Media Player is installed on your device. Click Media > Open Capture Device to open up a new interface.
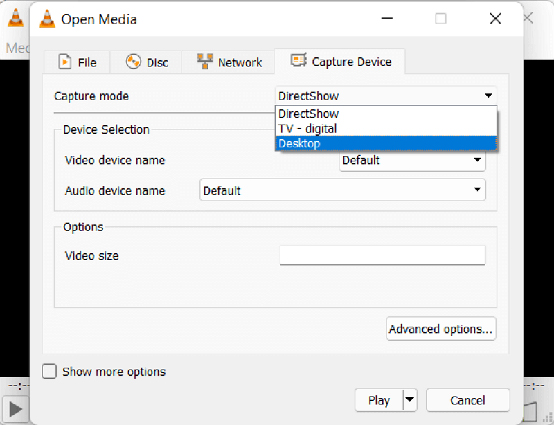
Step 02 Now, open the “Capture Mode” drop-down menu and choose “Desktop.” Also, set the VLC frame capture rate in this step.
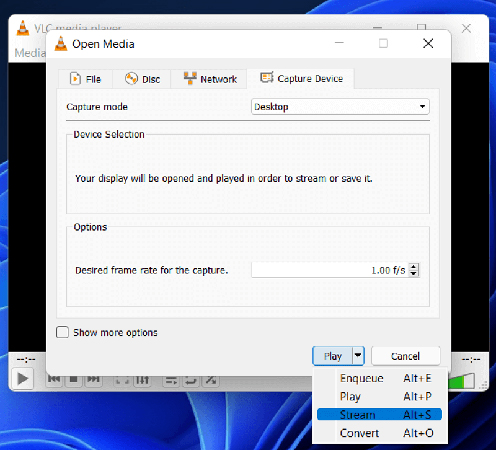
Step 03 Finally, press the “Play” button to capture the screen directly. Otherwise, open the “Play” drop-down menu and select from the options, i.e., Enqueue, Stream, and Convert.
Tips:
Where does VLC save the recorded video? You can check the “Videos” folder to get the VLC screen capture on Mac and Windows.
Part 3: Best Screen Recorder of the Year
HitPaw Screen Recorder is the coherent and credible solution when it comes to screen capture or recording desktop. It does not only help you in screen capturing but also in gaming video recording. Also, you can enjoy the live streaming options both for personal and professional purposes. It has also made it easier to record lectures with the virtual camera.
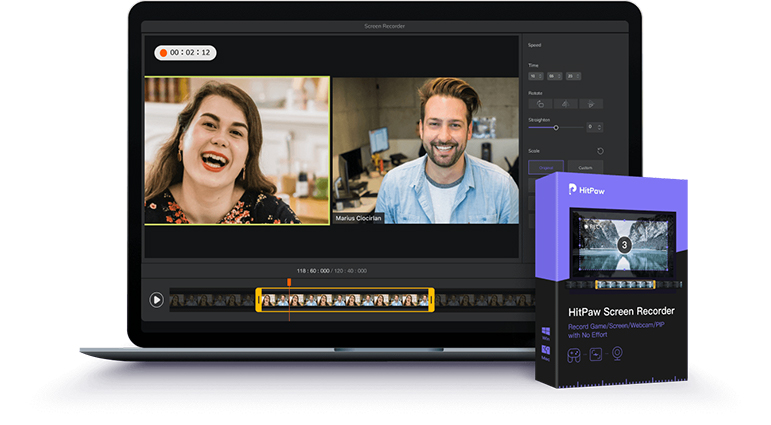
You can record webcams for professional and high-quality videos. Moreover, when you need picture-in-picture recording or schedule a recording to save time, this software is the top choice. Last but not least, you can avail yourself of several templates to proceed. Besides working as a screen recorder, it also serves as an amazing live streaming tool. If you are interested in gaming streaming, click here to know more!
Amazing Features of HitPaw Screen Recorder
- Offer to record and live to stream of the game, screen, and lecture
- Support virtual camera and devices like webcam, iPhone, iPod
- Take screenshots and capture keystrokes
- Option to select the area to record
- Educational and gaming templates availability
- Change output format along with video aspects like frame rate and resolution
How to record screen via HitPaw Screen Recorder:
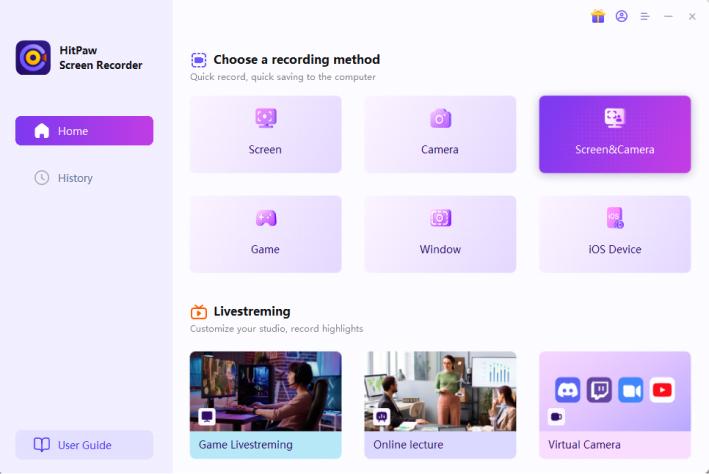
Step 01 Firstly, download, install and open the HitPaw Screen Recorder on your system. Click Record > Screen. It will offer you the option to select the recording area.
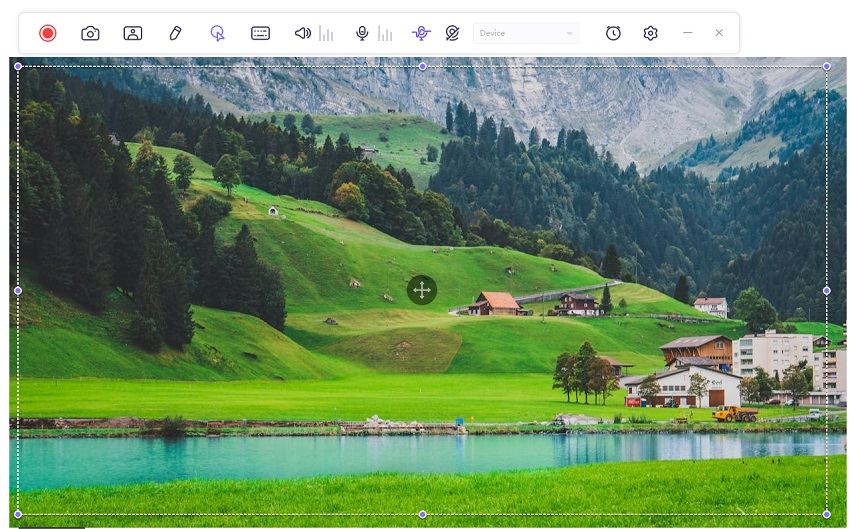
Step 02 Now, press the red “Start” icon to proceed with the video recording. Also, you can change the video aspects by hitting the “Settings” icon. Then click the small “Video,” which will open up the basic editing options.
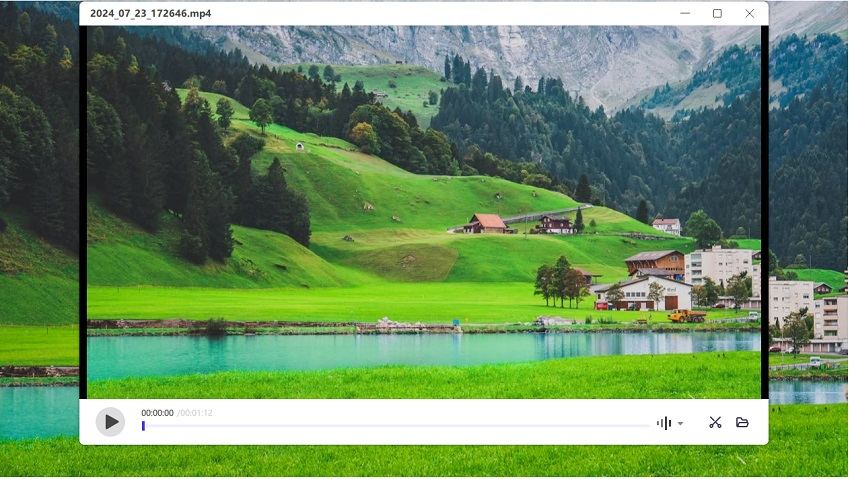
Step 03 Finally, if you’re done with the recording, press the small red “Stop” icon and the video can be played or found under the right side of your screen.
VLC Media Player vs HitPaw Screen Recorder
| Aspects | HitPaw Edimakor | VLC Media Player |
|---|---|---|
| Supported System | Windows & Mac | Open-Source |
| Availability | Both Free & Paid Plans | Free of Cost |
| Features’ Versatility | ||
| Recording Area Selection | ||
| Schedule Recording | ||
| Resolution | 4K | 1080p |
Conclusion
For whatever reason you need to record video, the VLC Screen Capture feature is considered a good choice. The reason is that almost everyone already has it installed already for music/video playing. Though it offers a list of unique features, you might face the problem of a VLC desktop capture crash. So you must choose the best screen recorder of the year, the HitPaw Screen Recorder. It allows you to do high-quality live streaming, picture-in-picture recording, and more.


 HitPaw Univd (Video Converter)
  HitPaw Watermark Remover


Share this article:
Select the product rating:
Daniel Walker
Editor-in-Chief
My passion lies in bridging the gap between cutting-edge technology and everyday creativity. With years of hands-on experience, I create content that not only informs but inspires our audience to embrace digital tools confidently.
View all ArticlesLeave a Comment
Create your review for HitPaw articles