[Fixed!] How to Use OBS Virtual Camera MacOS
Although the deadly Covid-19 has started to disappear from the scenes, the influence of online platforms like Zoom, Teams, and Skype doesn't tend to get distracted. Many people still want to conduct their important office meetings on Zoom or Skype to save time. Surprisingly, OBS comes with a virtual camera option that helps you host media and other stuff on online platforms. We've something interesting for you if you don't know how to set up and use OBS virtual camera macOS. All you need to do is keep reading this article.
Part 1: How to Set Up OBS Virtual Camera Mac
Luckily, you don't need to install Mac's OBS virtual camera plugin, as OBS studio has a built-in virtual camera feature. If you're looking to set up and use the virtual camera for any purpose, all you need to do is take care of a few things, and you'll be done with it.
Here's how to set up and use OBS Mac virtual camera.
Step 01Install OBS Studio
Before doing anything, you'll need to navigate to the OBS Studio's official website and then try downloading the latest version of OBS studio. Next up, you'll only need to install the software and launch it afterward.
Step 02 Set Up Scenes and Sources
You'll need to set up your OBS Virtual Camera for Mac. To begin with, you'll need to set various sources and scenes you'd like to use in Skype, Zoom, or Teams meetings. All you need to do is navigate to the "Sources" box icon and then hit the + icon to perform this task. Next up, you'll need to select a source you'd want to add, like Display Capture or Media Source.
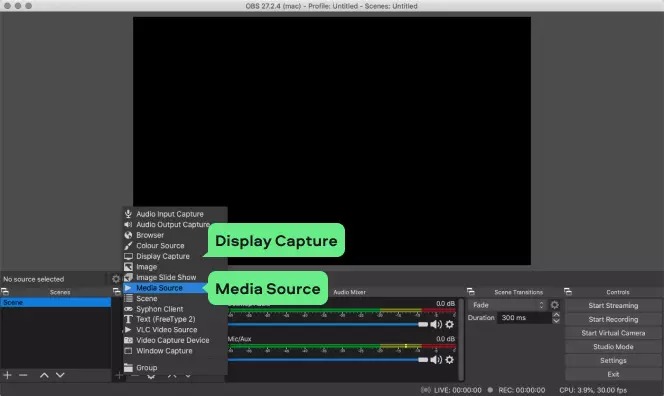
Step 03 Launch the Camera
After configuring the settings and sources, you'll need to activate your virtual camera. It would be best to hit the "Controls" icon and navigate the Start Virtual Camera icon. After visiting there, all you need to do is enable the camera by hitting "Start Virtual Camera".
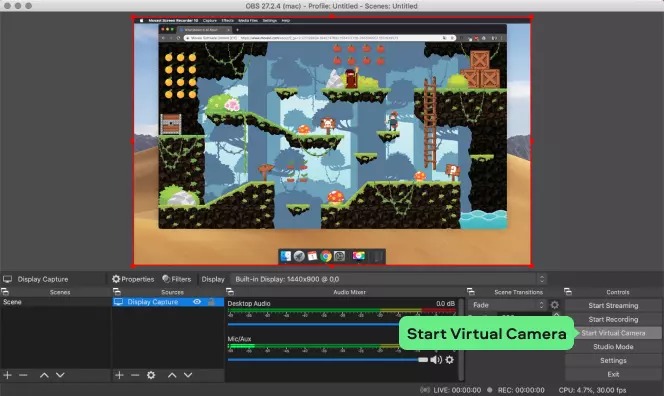
After setting up the virtual camera, you can use it on any online streaming platform. Let us use a virtual camera on Zoom meeting.
Step 01After starting a Zoom meeting, you'll need to set up the OBS Virtual camera as a webcam feed. You can visit the Zoom Settings and then hit the'' video'' icon. Next up, you'll need to hit OBS Virtual Camera.
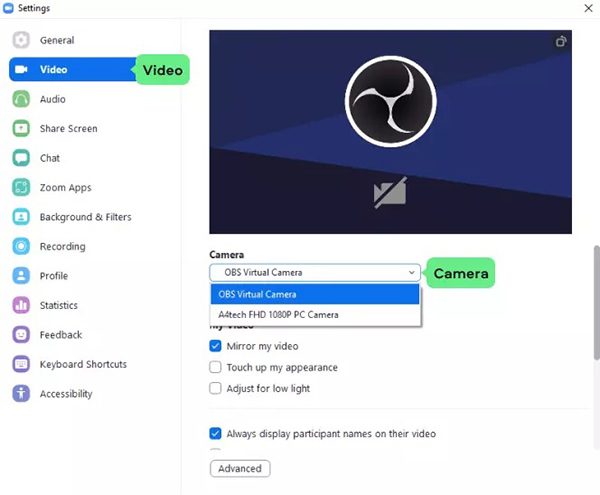
Step 02You'll need to launch OBS cam again and select Start Virtual Camera to sync with Zoom.
Step 03After syncing with Zoom, you can now share the media with your audience via virtual camera. You'll need to switch between sources using the OBS Studio window to show off media to your audience.
Part 2: How to Remove OBS Virtual Camera Mac
If you're facing the "OBS virtual camera Mac not working" issue, you can remove the virtual camera. Sometimes, you tend to install the plugin of the virtual camera that helps you capture media on various platforms.
However, it happens when you tend to face many issues with your virtual camera, as you might not be able to view the footage. Hence, if you want to remove the OBS Virtual Camera, you must follow the step-by-step guide below.
Step 01Head to the "/Library/CoreMedialO/Plig-Ins/DAL/" folder first.
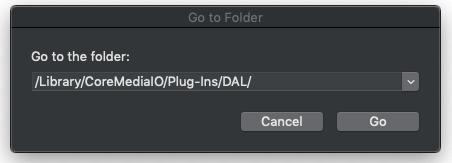
Step 02You'll need to right-click on the Open file location and select the OBS studio icon. Next up, you'll need to visit OBS plugins and select Win-show. You need to right-clicking on the "Move to Trash" option to uninstall OBS Virtual Camera plugin.

Now, your virtual camera will be removed from there, and all you need to do is visit the Video Settings of OBS studio and ensure that the virtual camera doesn't present there anymore.
If you want to use the virtual camera, you'll need to install the latest version of OBS studio again.
Part 3: Best Virtual Camera for Mac Instead of OBS
OBS virtual camera is fairly useful, and many people have been using it, but there are some issues with it. Hence, if you're to look for the best virtual camera, going for HitPaw Edimakor(Video Editor) and HitPaw Screen Recorder makes a lot of sense. It is a brilliant screen recorder that helps you stream and record your video magnificently with incredible templates. Surprisingly, you can also record and stream your conferences, gaming, classes, lectures, etc. Moreover, you can also record your video's audio and tweak it whenever you'd want.
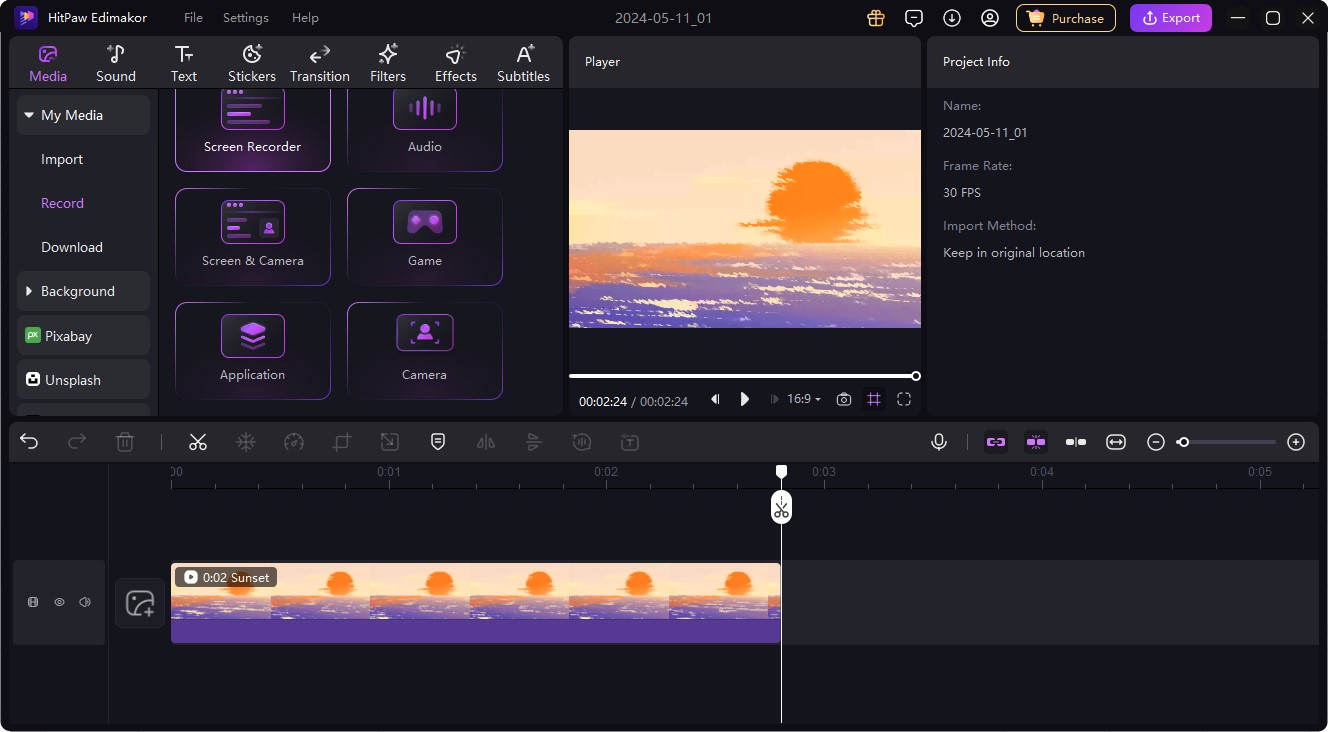
How to Use HitPaw Edimakor(Video Editor)
- 1.Download it
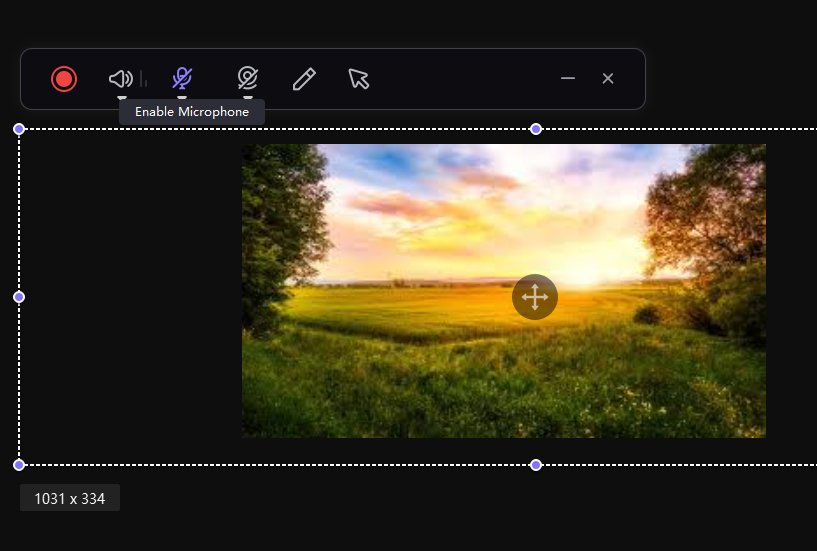
- 2.Open the Screen Recorder
- 3.Select the target Screen
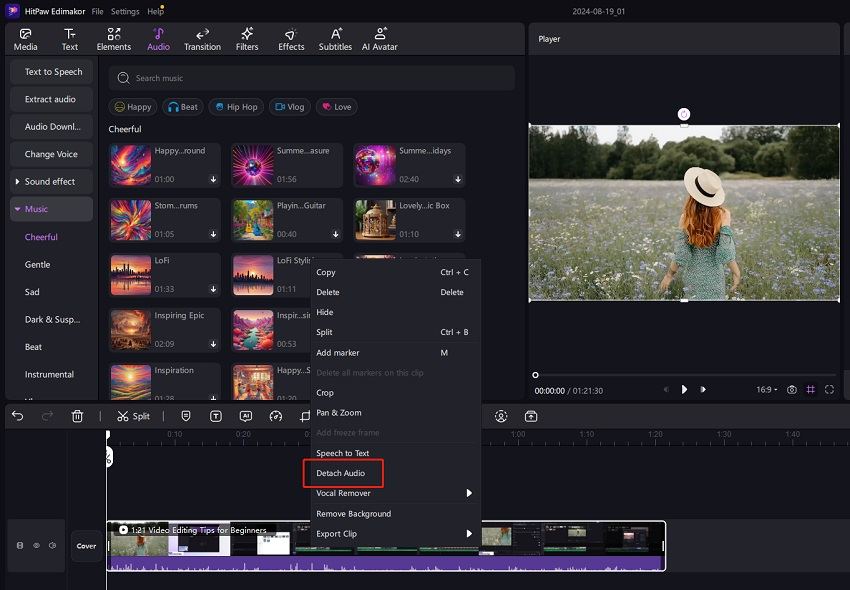
- 4.Edit the recorded video with Edimakor's features
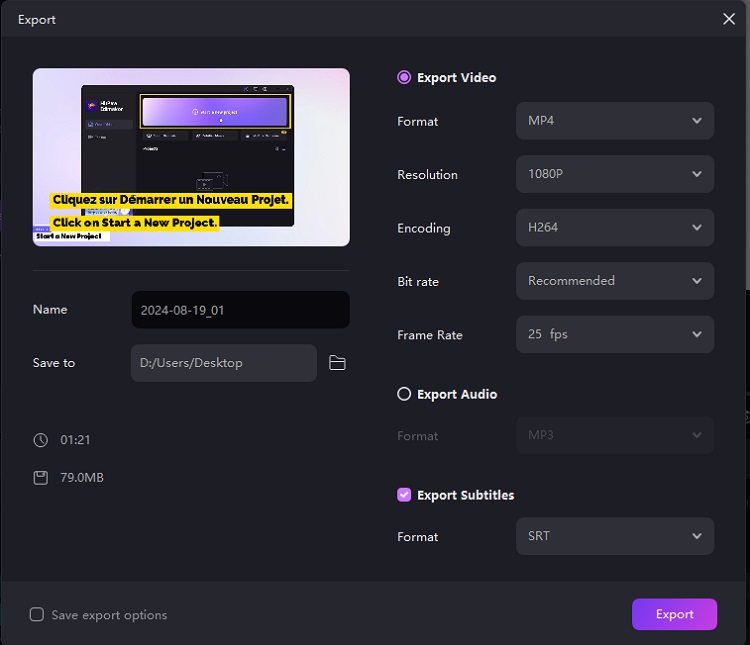
- 5.Export the Edited Record Video
Click the follow button and download it now!
It's perfect for video game uploaders of all video sharing platforms, such as YouTube, TikTok, etc.
How to Use HitPaw Screen Recorder
1. Features of HitPaw Screen Recorder:
-
Step 1
It helps you edit and tweak the audio.
-
Step 2
You can also record a microphone or speaker with minimal effort.
-
Step 3
It also enables you to schedule the recording.
-
Step 4
You can explore various templates, styles, texts, and stickers for your video.
2. Steps of Using HitPaw Virtual Camera MacOS:
Step 01 Install HitPaw Screen Recorder
Navigate to HitPaw Screen Recorder's official webpage; you'll need to install the software and start the program without any delay.
Step 02 Select Virtual Camera
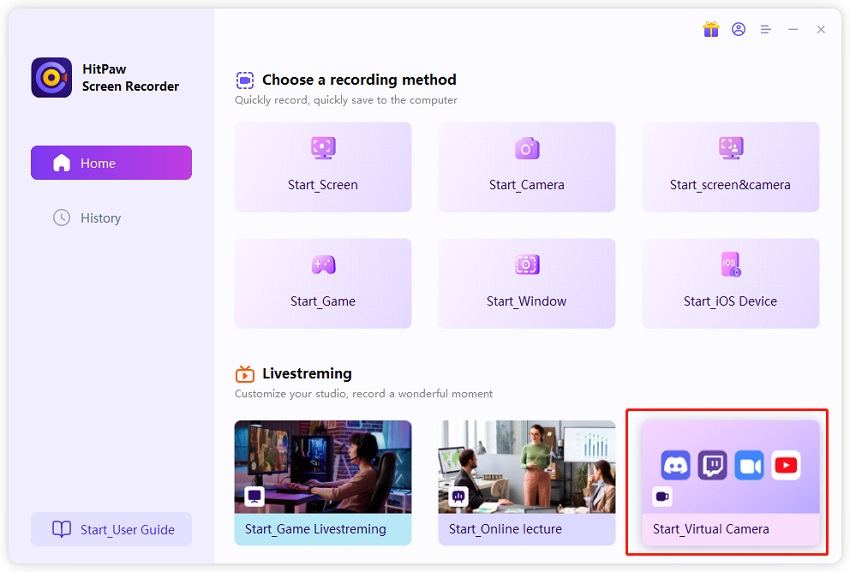
In this phase, all you need to do is click on "Live" and then select the "Virtual Camera" icon. Now, you can select the template you'd like to use in your video recording. Now, you can also change the templates' colors. Next up, you'll need to select the webcam as your source by hitting the "Add Source" icon.
Step 03 Select A Streaming Platform
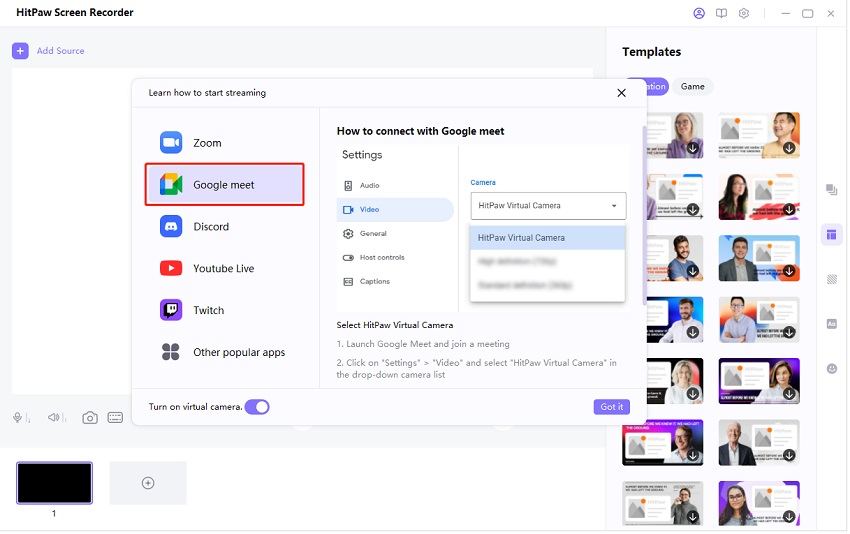
You'll need to hit the option next to the "Recoding" icon. Next up, you'll need to select a platform you'd like to use a virtual camera. You can select Zoom or another online platform.
Step 04 Start Recording
You'll need to start the recording by hitting the "Record" icon. This process will help you record your screen webcam simultaneously. Once the entire recording process ends, you'll need to hit the "Stop" icon. Next up, you can export the recorded files to your favorite destination.
Conclusion
If you didn't know about the virtual camera OBS Mac, hopefully, after reading this guide, you'll know about it. In this guide, we've tried to talk about setting up and using OBS virtual for Mac. Using OBS virtual camera isn't a daunting task as you'll only need to get through some small things to put the things in order.
However, if you find any inconvenience with OBS virtual camera, you can opt for HitPaw Screen Recorder. An unbelievable screen recorder enables you to record the screen and webcam simultaneously.
FAQs About OBS Virtual Camera for Mac
Q1. Can I build the OBS Virtual Camera plugin from source?
A1.
Yes, the README.md file includes instructions for building the virtual camera plugin from the source code, if you want to compile it yourself.
If you have any other questions or issues related to the OBS Virtual Camera on Mac, be sure to check the OBS Studio GitHub repository, as it is the authoritative source of information for this feature.
Q2. How do I check if the virtual camera is not working in OBS Studio?
A2. In OBS Studio, go to the "Tools" menu and make sure the "V4L2 Video Capture" option is checked. This enables the virtual camera functionality.
Q3. Where can I download the OBS Virtual Camera?
A3. The OBS Virtual Camera is not a standalone download. It is a feature that is part of the OBS Studio software. To get the OBS Virtual Camera, you need to download and install OBS Studio.


 HitPaw Watermark Remover
  HitPaw FotorPea

Share this article:
Select the product rating:
Daniel Walker
Editor-in-Chief
My passion lies in bridging the gap between cutting-edge technology and everyday creativity. With years of hands-on experience, I create content that not only informs but inspires our audience to embrace digital tools confidently.
View all ArticlesLeave a Comment
Create your review for HitPaw articles