How to Use Virtual Camera in Microsoft Teams
The importance of Teams, like another online platform, increased after the arrival of the deadly Covid-19. When conducting a meeting on Teams, everyone wants to make it perfect and professional.
If you want to share your live footage and screen simultaneously, do you need to opt for Microsoft Teams Virtual camera? However, do you know how to use the virtual camera?
Many people don't know how to use Teams virtual camera as it might be a new term for many people. However, HitPaw Screen Recorder made this term pretty easy, and we'll tell you how in this guide as we're going to reveal the procedure of using virtual cameras in Microsoft Teams.
Part 1: What is the Virtual Camera?
You'd have heard the virtual camera term many times, but only a few people understand this term as it should be.
When conducting a Teams meeting, a virtual camera Teams prevents you from using a live webcam to share videos, images, and other sources during a session. Instead, a virtual camera allows you to share the screen using the computer's resources.
It means the virtual camera acts as primary output when you tend to conduct a Teams meeting. The arrival of the virtual camera has made everything possible, and you can make your meeting professional and brilliant, courtesy of the software that offers the virtual camera.
Part 2: How to Use HitPaw Virtual Camera in Microsoft Teams
The arrival of HitPaw Screen Recorder has made it easy to understand Microsoft Teams' virtual teams. Using HitPaw Screen Recorder, you can efficiently use the virtual camera during Teams meetings.
Besides, HitPaw Screen Recorder is pretty good at recording the meeting with high-class sound and resolution quality.
The best thing about HitPaw Screen is that it doesn't make the items look complicated for you. Instead, it aims to provide you with a simple procedure to use the virtual camera in Teams meetings.
Apart from using it on Teams, you can also use it on platforms including Discord, Google Meet, Zoom, etc.
Key Features of HitPaw Screen Recorder:
How to use the virtual camera for Microsoft Teams with HitPaw Screen Recorder?
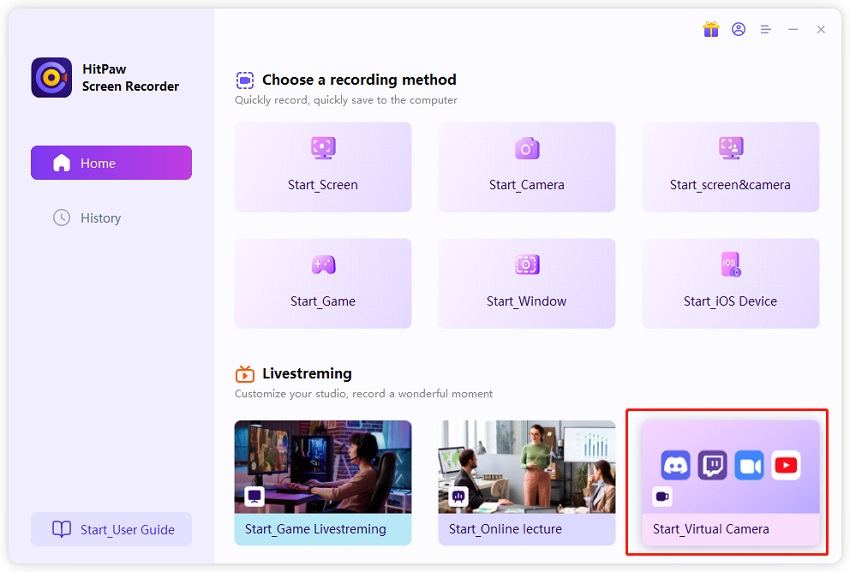
Step 01Launch HitPaw Screen Recorder
First of all, you don't need to do much other than downloading and installing HitPaw Screen Recorder on your computer and then starting it afterward without any delay.
Step 02Select Add Source.
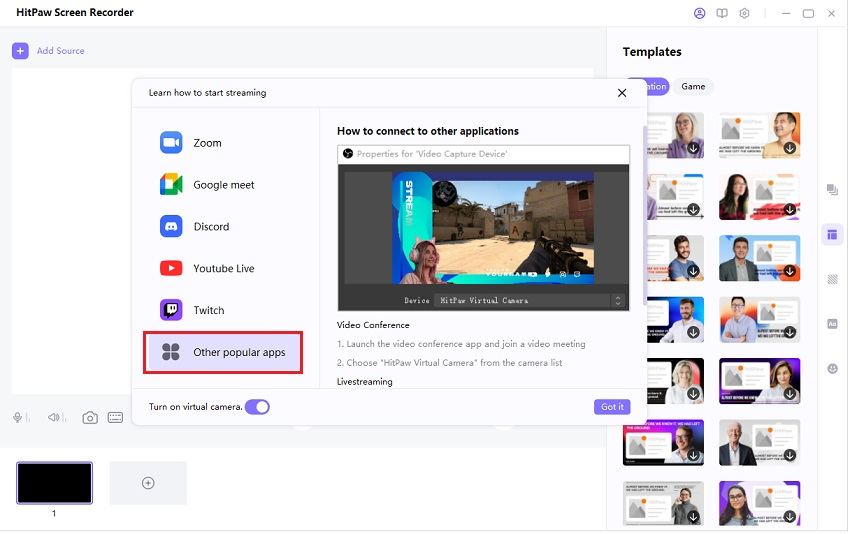
After entering into the tool's interface, you'll need to tap ''Live'' and select the ''Virtual Camera'' option afterward. Luckily, you can also favor templates, stickers, and texts from there, as HitPaw Screen Recorder offers these features to enhance your Teams meeting experience. Next up, you'll only need to select the webcam as your source by tapping the'' Add Source'' icon.

Step 03Open the Microsoft Team and select "HitPaw Virtual Camera" in the camera source.
In this phase, all you need to do is select the Teams platform after tapping the icon next to '' recording''. After selecting Teams, you can start a meeting there.

Moreover, if you want to record the meeting, you can tap the ''Recording'' icon as HitPaw Screen Recorder allows you to record your webcam and screen simultaneously.
Note:
HitPaw Screen Recorder has now introduced the feature that allows you to connect the iPhone to a PC and then record the screen on iPhone.
It can become a webcam, streaming recording the Teams, Zoom, or other platform's meetings with minimal effort.
You'll only need to connect your iPhone to a PC and select the '' Device'' from the HitPaw Screen Recorder software. After selecting it, you'll be able to record anything you'd want on the iPhone screen.
Part 3: How to Add Virtual Backgrounds in Microsoft Teams
Apart from using Microsoft Teams' virtual camera, you can also now explore the virtual backgrounds in Microsoft Teams.
Teams come with 20 different virtual background options that allow you to efficiently change your background appearance at Teams meetings.
You can follow the guide below to learn how to enable the virtual background in Teams Meeting or call.
Step 01First of all, you'll need to install the Microsoft Teams on your Device and then create an account. Next up, you'll need to launch the Teams and then start a call or meeting on it.
Step 02 After starting the meeting, you'll need to navigate to the meeting setting bar and hit the three dots there. Next up, you'll only need to select the'' Show background effects'' icon from there.
Step 03In this phase, you'll need to select your favorite background after visiting the background settings pane.
Now, you can hit Apply or Preview to set the virtual background you selected earlier. In this way, you'll be able to use a virtual background when speaking, and people will think as if you're sitting outside of your home.
Conclusion
Using virtual cameras during Teams isn't as difficult as many people would have considered it. For instance, you can use a virtual camera in Teams using HitPaw Screen Recorder. Luckily, it only asks you to follow a few simple steps to put things in order.
Moreover, we've also highlighted the ways to add virtual backgrounds in your Zoom meeting to make the Teams meeting more professional.
In addition, you'll get a clue about what a custom background is and how to apply it in Teams meetings.


 HitPaw Watermark Remover
  HitPaw Univd (Video Converter)


Share this article:
Select the product rating:
Daniel Walker
Editor-in-Chief
My passion lies in bridging the gap between cutting-edge technology and everyday creativity. With years of hands-on experience, I create content that not only informs but inspires our audience to embrace digital tools confidently.
View all ArticlesLeave a Comment
Create your review for HitPaw articles