[Solved!] How Long Does It Take Zoom to Process a Recording
It's a fact that Zoom was considered an ordinary meetings and screen sharing platform. However, its popularity got a hike during the pandemic. Now Zoom is mainly used for delivering lectures, managing interviews, team/corporate meetings, and much more. Even the eLearning programs have their base in recordings. The purpose is to access, manage, and share the recordings for later use.
Here is a thing to consider Zoom takes some time to process the recordings. Also, it depends upon the duration of the video, so you might have to wait longer than usual. Let's explore the details about effortlessly managing zoom recording and how long it takes to process a Zoom recording.
Part 1. How Long Does It Take Zoom to Process a Recording?
When it comes to an estimation for how long Zoom take to process a recording, it's much. On average, Zoom takes twice the recording time; if the session is of 1 hour, you need to wait for 2 hours to get the recording. Sometimes, it might take longer due to the high usage of the app at that time.
Zoom Recording Get Stuck at 'Processing Recording'?
Zoom has indicated that processing times for Cloud Recordings can typically take 24-72 hours to process. Please contacted Zoom support if your recording is still processing a week after the meeting/webinar and and they were able to resolve this and retrieve the recording.
Part 2. How Much Time Does It Take for a Meeting to Get Uploaded to Zoom Cloud?
We have been making some recordings recently and have noticed that the alert email stating that the recording(s) are ready arrives roughly 3-3.5 hours after the completion of a 2-hour recording to be uploaded to the Zoom cloud.
If you have used Zoom Cloud before, I believe you will obviously feel that this is happening more and more frequently. Why? I believe the reason is not new to you: COVID-19 pandemic. Now Zoom is mainly used for delivering lectures, managing interviews, team/corporate meetings, and much more. Even the eLearning programs have their base in recordings. And this is exactly why its popularity got a hike during the pandemic, which means the cloud needs more time to process the recording under this kind of unusually high volume.
Part 3. Common Issues that You May Encounter When Recording Zoom Meetings
Besides that, you might have to face certain situations that may hinder your Zoom recording. Let's look at these, along with the solutions.
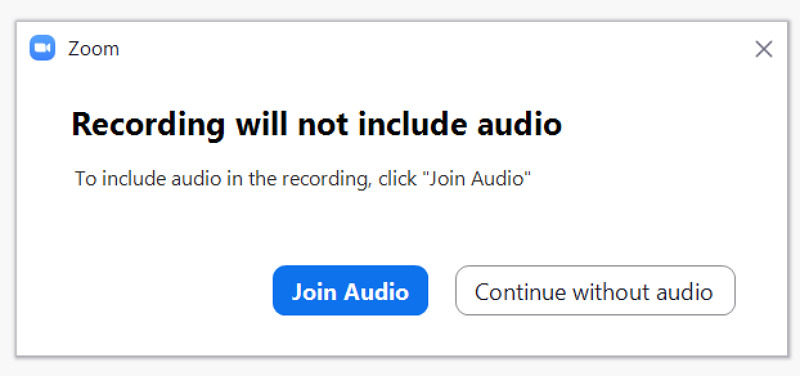
1. Zoom is not recording audio
Whenever you start recording the video, a pop-up appears to ask if you require the audio recording or not. You have to checkmark this option for smooth Zoom audio recording with video.
2. Zoom recording not showing video
Often it happens because of the insufficient storage space in your system. Zoom is not able to process the video recording in that case. Moreover, you must check the settings once where it's a must to enable the Zoom Cloud recordings option and then record thumbnails while sharing.
3. Zoom recording keep stopping
If you are facing the issue of Zoom crashing, it might be due to the Zoom servers. Even you should check the local path of recording. The reason can be the invalid local storage path.

4. Zoom is not recording the full session
It happens mostly when you are using the free version. Here the screen recording time is only 40 minutes, and if your video is lengthy, you won't get the full recording. For complete recording, you need to switch to paid plans.
5. Deleting the Zoom recording accidentally
Sometimes, people delete the Zoom recording accidentally. In this scenario, you should open the Zoom web portal and the Recordings. It might be present in the Cloud storage, but you can't recover it if it's not.

Part 4. How to Record Zoom Meetings without Any Time Delay or Limit
If you are looking for coherent, stable, efficient, and less time-taking software to record Zoom meetings, HitPaw Screen Recorder must be your way to go. It does not only help you in recording screens but also the devices like Webcam, iPad, and iPhone. You can record lectures and games if required. And the option of segment and schedule recording makes it stand above all the other tools. Along with that, it lets you pick the area of recording at ease. Most importantly, you can benefit from the various unique educational templates.
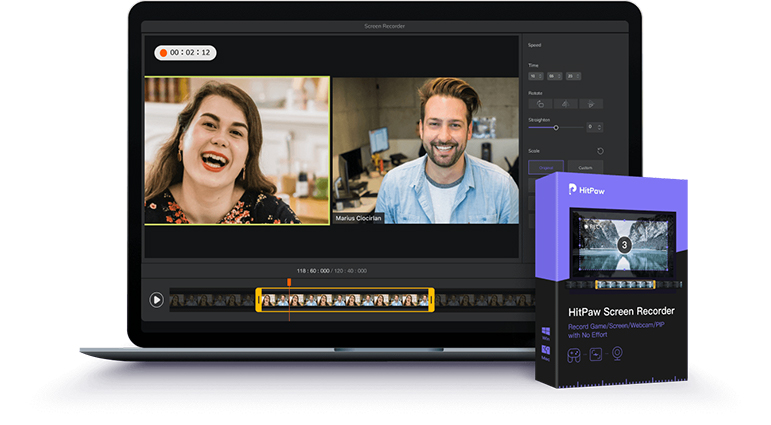
Let's learn more about its features!
- Offer live streaming with Virtual Camera
- Support changing the background when necessary
- Add elements like text and stickers to videos
- Disable microphone and speaker while streaming/recording
- Let you alter the output resolution, frame rate, and format
- Keep the history of your recorder videos
Here are the detailed steps to record Zoom with HitPaw Screen Recorder
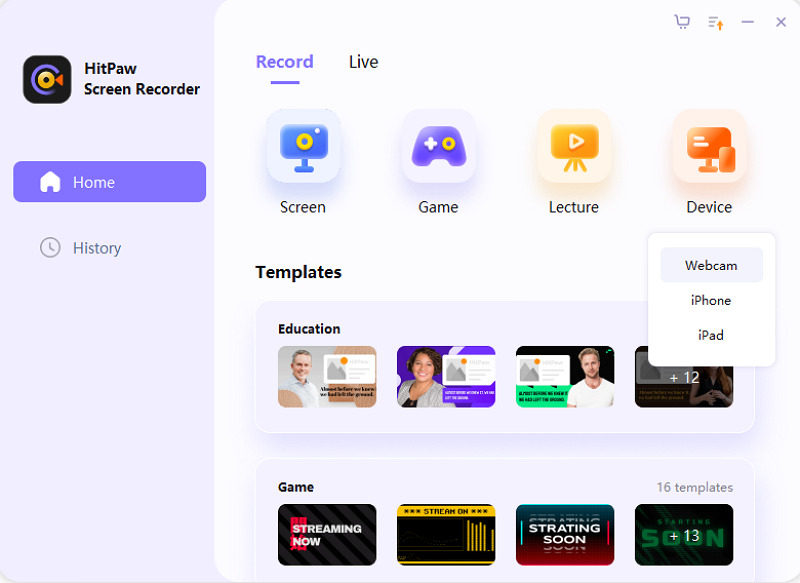
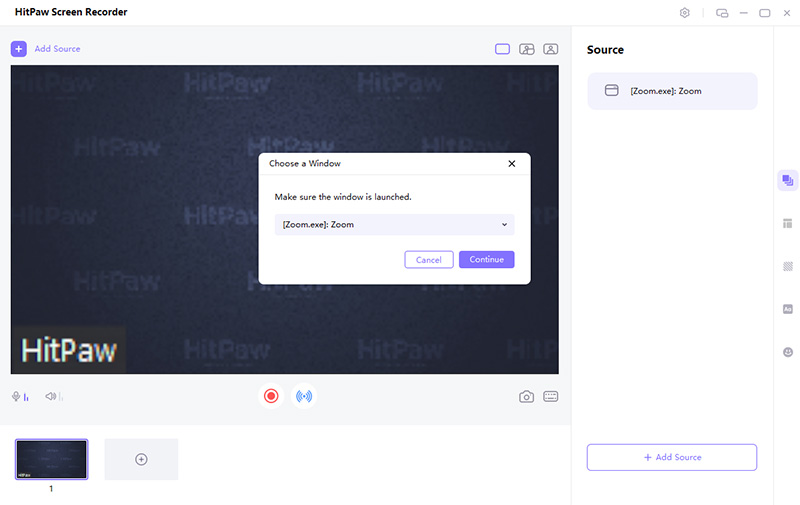
Step 01 First of all, you need to download and launch the HitPaw Screen Recorder on your system. Now, select Record > Device > Webcam. It will open up a new window where you will see the option to select Source.
Step 02 Secondly, launch the Zoom app after installation and click "New Meeting." You can share any type of content here. Even it lets you join a meeting as a participant.
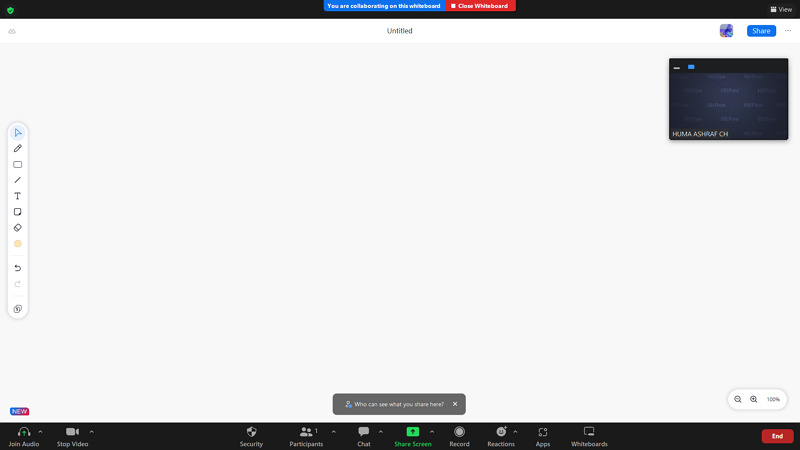
Step 03 From the HitPaw Screen Recorder Window, click "Add Source" and choose Window > Zoom Meeting, and the Zoom session will start streaming there. Click the small "red" button in the middle, and it will start recording. When you want to end it, press again. That's all!
Extra Tips: How to Manage Zoom Recording
Zoom offer recording in two ways; one is local, and the other is Cloud storage. The Cloud recording option is available in paid plans, so you can only enjoy local storage in free mode. If you are unaware of handling Zoom recording, follow the steps below.
Here is a step-by-step tutorial on how to manage the local storage Zoom recording!
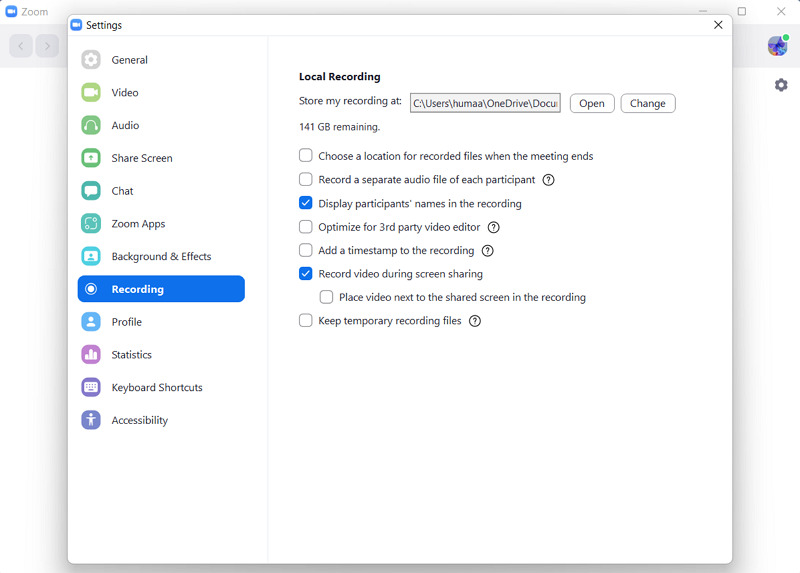
Step 01 First of all, go to the official Zoom website to download the app as per your system requirements. Press the small "Settings" tab and then the "Recording" category. Here is the recording destination; you can change it if required.
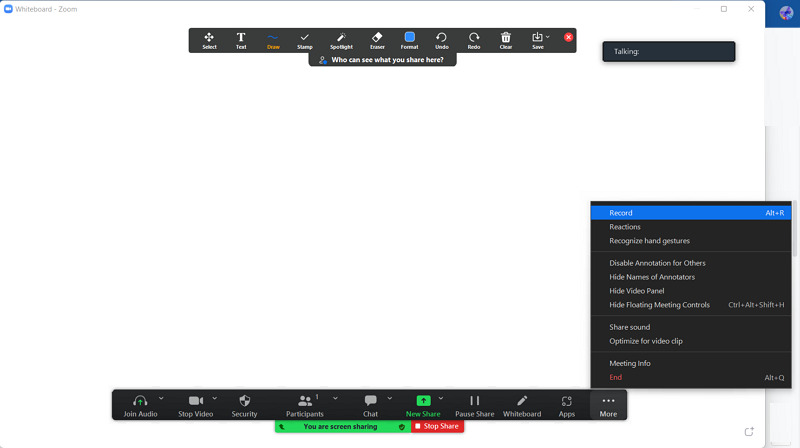
Step 02 After starting or joining a meeting, you have to click the "three-dots" menu on the right side of the bottom. Now, click on the "Record" button. You can do a recording with or without audio. Select an option from the pop-up menu.
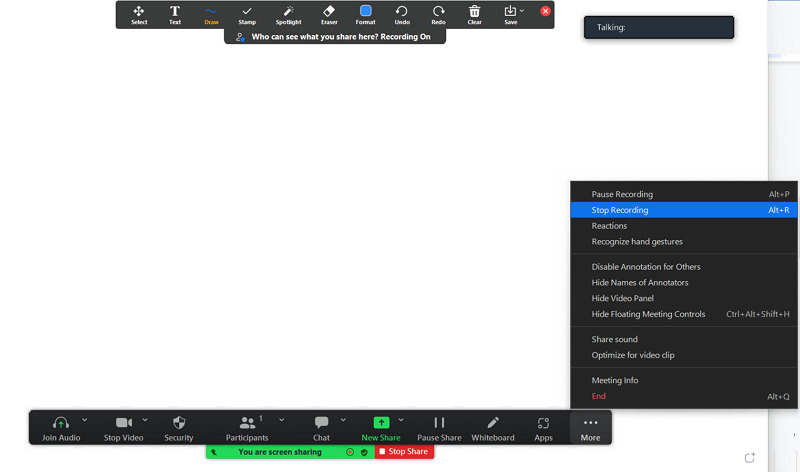
Step 03 Now, whatever happens in the Zoom will be recorded until you expand that three dots menu again and select "Stop Recording." Your video will convert automatically; once it's done, you will see it in the local storage. You are done!
Tips:
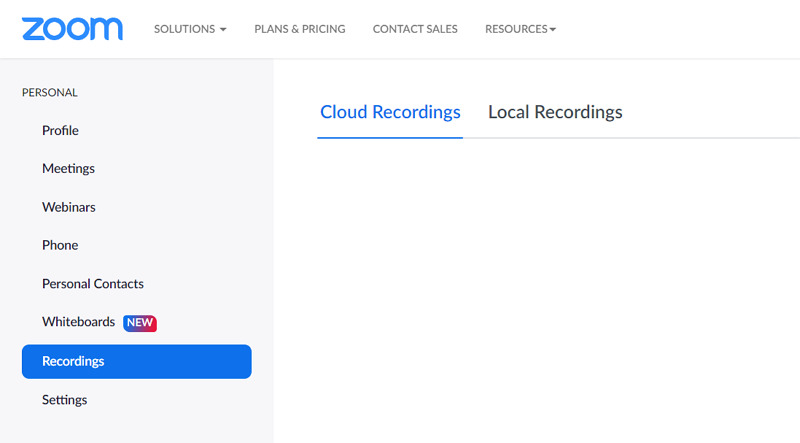
All the process remains the same in the Zoom Cloud recording; the only difference is when you click "Record" in the second step, you have to select the option "Record to Cloud." However, you can check this option by opening the Zoom web portal, signing in to your account, click Recordings > Cloud Recordings. That's all!
Conclusion
It is no doubt that Zoom is famous for sharing screens and recording meetings. However, the above content explains all about the Zoom recording management and also the time that Zoom takes to process recordings. For free, high-quality, and speedy recording, you can choose HitPaw Screen Recorder, which lets you record the Zoom sessions without hassle. Not only does it help you in recording screen content but also the lectures, devices like iPhone, iPad, Webcam, and games.


 HitPaw Univd (Video Converter)
  HitPaw Watermark Remover


Share this article:
Select the product rating:
Daniel Walker
Editor-in-Chief
My passion lies in bridging the gap between cutting-edge technology and everyday creativity. With years of hands-on experience, I create content that not only informs but inspires our audience to embrace digital tools confidently.
View all ArticlesLeave a Comment
Create your review for HitPaw articles