How to Screenshot on Dell (Laptop & Desktop) – Step-by-Step Guide
Screenshot on Dell laptop or desktop is an extremely simple yet very valuable skill to capture information, troubleshoot issues, or share content. While you want the whole screen or just a window, Dell has several ways to take screenshots. This step-by-step guide explores the most efficient screenshot methods on Dell devices, along with some best editing tips and bonus insights into screen recording. Here's how to screenshot on dell step by step.
Part 1: Quick Methods to Take a Screenshot on Dell
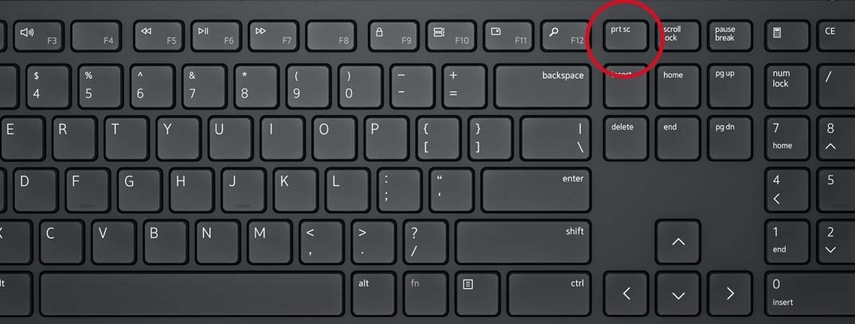
Method 1: Using the Print Screen (PrtScn) Key
The light-speed way you can capture your Dell is with the use of the Print Screen (PrtScn) button. Chances are, this particular button is already sitting comfortably in your keyboard. What's great about this button is that you can capture the whole screen by simply clicking the key once. Once you press the PrtScn key, it captures the picture and copies it to your clipboard, and you can then paste it directly into a document or an image editor like Paint. The same combination of keys can be applied along with other keys to save screenshots in a folder directly.
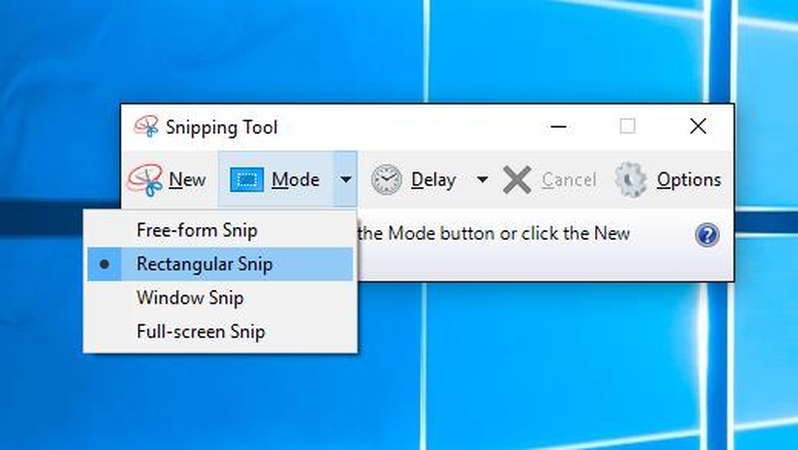
Method 2: Snipping Tool
The Snipping Tool is the in-built application of Windows which helps to capture tailored screenshots on Dell computers. This utility allows you to select a region, snip any free-form, or even the entire window. Snipping Tool is very handy when more control is required in the screenshot area or cases where one would want to avoid snipping the whole screen. After capturing the image, one gets options to annotate or save it, which makes it a convenient choice for detailed screenshot ting.
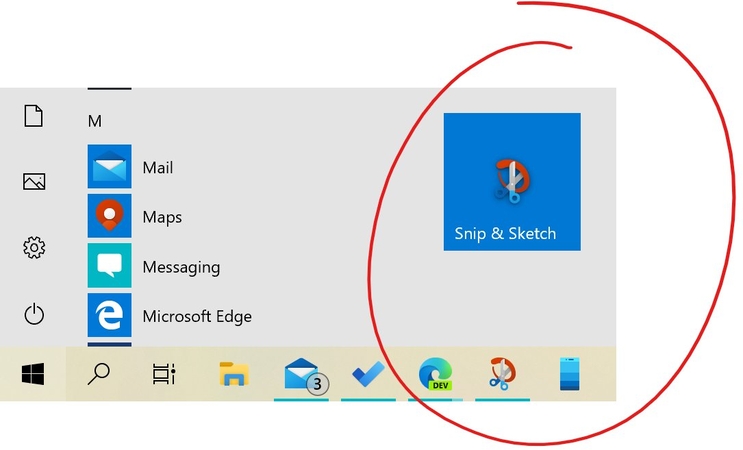
Method 3: Snip & Sketch Tool
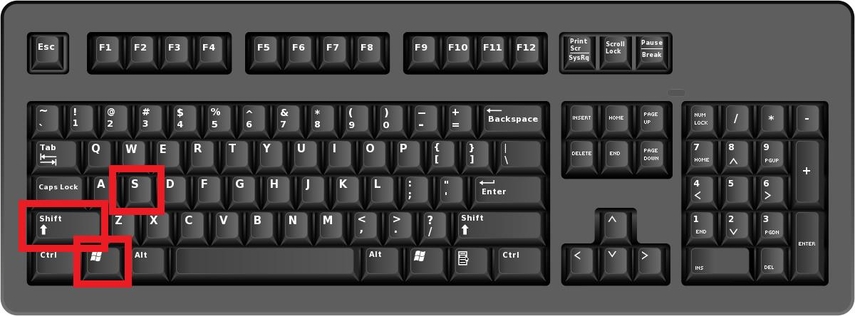
Snip & Sketch is an enhanced screen capture utility available on almost all modern Windows-based Dell computers. Snipping Tool captures the same functionality, but it adds some extra convenience features to annotate quickly. To access Snip & Sketch, use the Windows + Shift + S shortcut or open the app. You can screenshot, edit, and mark up areas within the tool at once, making it perfect for sharing detailed screenshots with annotations. Great for those how can i take screenshot in dell laptop with native editing tools.
Method 4: Using Windows + Shift + S for Partial Screenshots
Within quick partial screenshots, Windows + Shift + S is a rather good shortcut available on Dell devices. These keys generate a menu that lets you choose which part you want to capture-a rectangle, freeform, window, or full-screen snip. Once you choose, the screenshot is copied to the clipboard, where you can paste it into any app. It's fantastic for those who need precision and speed with their screenshots: just what you want, with no extra effort involved.
Part 2: Tips for Editing and Saving Screenshots on Dell
Quick Cropping and Adjustments
You will occasionally want to crop or trim an image of a screenshot so it's clearer. Most all screen capture tools, Snip & Sketch included, have basic editing capabilities for images like cropping and resizing. Crop out anything outside the relevant part of the image so your screenshots are focused with minimal room for confusion when sharing tutorials or pointing out important information. This might be done using the screenshot tool or pasted into an image editor like Paint or Photos.
Annotating Screenshots for Clarity
Annotations such as arrows, text boxes, and highlighting make screenshots really information-rich and interesting. Whether you are providing instructions or just adding notes, annotating a screenshot would allow the message to get communicated more clearly. Snip & Sketch, Snipping Tool, and third-party applications offer options that make marking up your screenshots for sharing easier. Sometimes, these include focusing on key areas by highlighting them and adding comments.
Choosing the Right Format (PNG, JPEG, etc.)
The right format should be selected to have the right file size and image quality. The most common formats include PNG, JPEG, and GIF. PNG is good for high-quality screenshots with clear details. JPEG files are smaller in size and used on the web. GIFs are used for animation or moving images. The choice of format depends on the purpose of your screenshot to ensure the images are clear and suited for different purposes, either for how do i print screen on a dell laptop, web, or casual sharing.
Part 3: Bonus: Screen Record by HitPaw Univd (HitPaw Video Converter)
In case screenshots are not enough, you can capture real-time activities on your Dell computer with its screen recording feature. HitPaw Univd comes with a super friendly interface about its screen recording feature that will help record the screen to ease and precision. This can be for demonstrations, recording gameplay, or even presentations-just capture any screen activity and use it to present demos or whatnot.
Key Features of HitPaw Univd
- High Definition Recording: It supports HD recording as well as 4K recording at full resolution for sharp video quality.
- Flexible Recording Area: Record a whole screen, window, or a custom area to take more control.
- Audio Recording Options: Record system audio, microphone, or both in real-time.
- Real-time Annotation: Add text, shapes, and highlights to your recordings for enhancing educational videos.
- Record in multiple output formats for playback across various platforms.
Simple steps to use HitPaw Univd
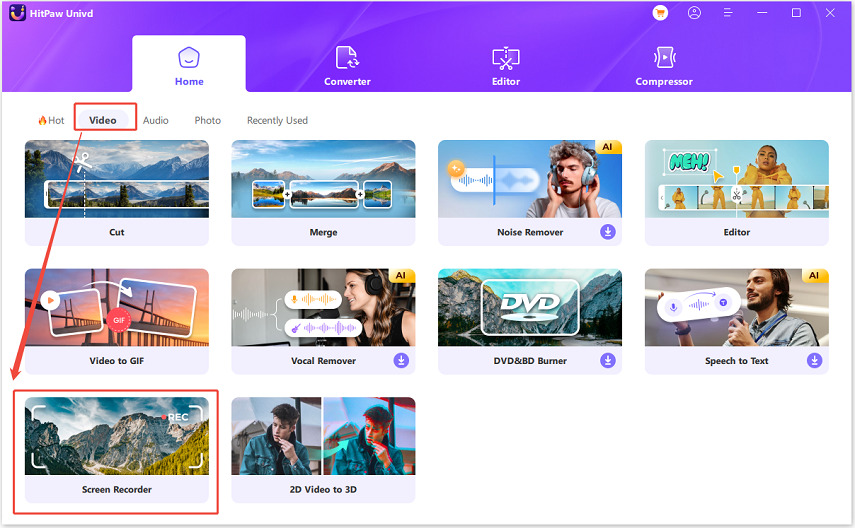
Step 1: Open HitPaw Univd and go to the Toolbox. Choose the Screen Recorder option.
Step 2: Set the recording area by dragging to select a portion of your screen. To record the full screen, simply press the Space bar.
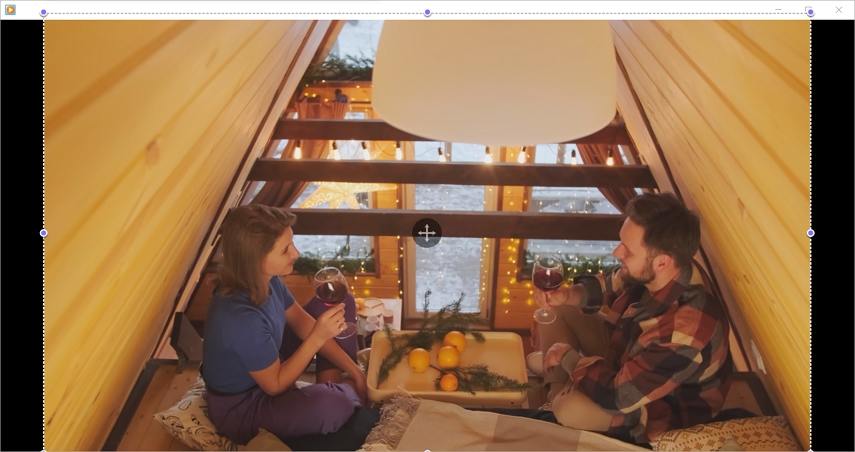
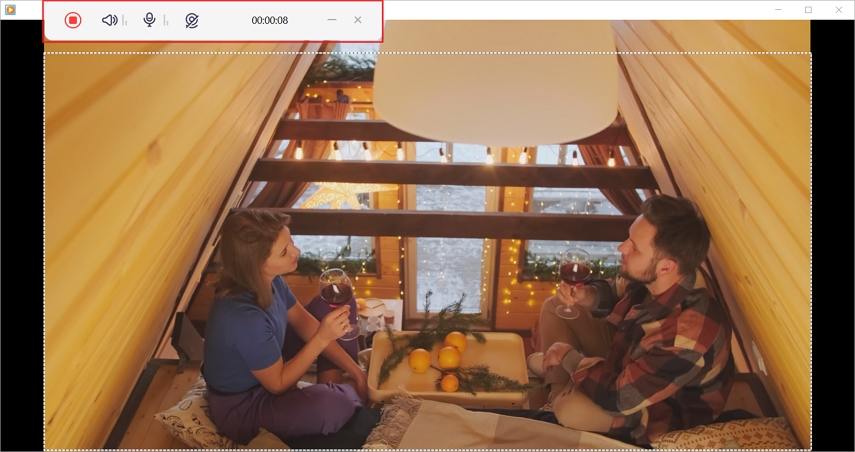
You can also toggle options to enable or disable system audio, microphone, and webcam as needed.
Step 3: Press the red button to start recording. You can pause and resume as needed.
Step 4: Once done, click the "X" button to stop recording. Head to the output folder to preview your saved video.
Part 4: FAQs on How to Screenshot on Dell
Q1. How are screenshots saved on a Dell computer?
A1. Screenshots made using the PrtScn key and the Windows + Shift + S keyboard shortcut are added to the clipboard. Using Windows + PrtScn automatically saves them to the "Screenshots" folder, which is located in the "Pictures" directory.
Q2. Why is my Print Screen not working?
A2. How do i print screen on dell laptop? If Print Screen does not work, its key might be disabled in your settings. Some Dell devices allow the function keys to be customized as one wishes, so that will help if it is not enabled. It could also be a case of other software interfering with the shortcut.
Conclusion
With all the tools and shortcuts built-in on a Dell laptop or desktop, it is easy and versatile to how to screenshot on dell. Whether you need a full-screen capture with the Print Screen key or a precise screenshot by pressing Windows + Shift + S, it's easy to find the right tool for the task at hand. The HitPaw Univd offers quality-driven solutions for professional and personal recording for more significant tasks.


 HitPaw Edimakor
 HitPaw FotorPea
 HitPaw VikPea (Video Enhancer)

Share this article:
Select the product rating:
Daniel Walker
Editor-in-Chief
My passion lies in bridging the gap between cutting-edge technology and everyday creativity. With years of hands-on experience, I create content that not only informs but inspires our audience to embrace digital tools confidently.
View all ArticlesLeave a Comment
Create your review for HitPaw articles