How to Share Screen on Facetime [Full Guide]
Screen sharing is commonly used in various scenarios, including: meetings and webinars, tech support, collaborative work, learning and training. We aim to teach you how to screen share on facetime.
Part 1: How to Screen Share on Facetime on Mac
FaceTime is a video chat application developed by Apple. It allows users to connect with others over Wi-Fi or cellular networks. FaceTime is available exclusively on Apple devices. You can use FaceTime from your iPhone, iPad, or Mac computer. Both you and the person you're contacting must be using Apple devices for FaceTime to work.
How to Use FaceTime:
On iPhone or iPad:
- Access FaceTime through Settings, where you’ll need to enter your Apple ID.
- You can make video calls or choose audio-only mode.
On Mac:
- Launch the FaceTime app.
- Use it for video calls or group FaceTime.
Group FaceTime:
- To initiate a group FaceTime call, open the app and tap the "+" button in the contacts list.
- Type the name or number of the first person you want to call.
- Add more participants by typing their names or numbers.
- Tap the "Video" or "Audio" button to start the call.
Here's how to share screen on facetime on macbook:
- Make sure the Mac you want to access has Screen Sharing turned on in System Settings. You can find this option under System Preferences & Sharing. Enable the Screen Sharing checkbox.
- Click the Launchpad icon in the dock.
- Type "Screen Sharing" in the search field and click the Screen Sharing icon.
- In the Screen Sharing app, you have a few options:
- Click "Network" in the sidebar, hover over the computer you want to access, and click "Connect".
- Click "All Connections" in the sidebar, hover over the desired computer, and click "Connect".
- Use the Add Connection button in the toolbar to enter a hostname or Apple ID and then click "Connect".
- If prompted, enter a user name and password and click "Sign In".
Notes:
If the Select Screen Sharing Type window appears, choose either Standard or High Performance (available on Macs with Apple silicon and macOS Sonoma 14 or later).
Part 2: How to Screen Share on iPhone Facetime

How to screen share on iPhone FaceTime:
- Launch the FaceTime app on your iPhone.
- Initiate a video call with a contact.
- Share Your Screen:
- While in the FaceTime call, tap on the screen to reveal the controls.
- Look for the "Share Screen" button and tap it.
- Select "Share My Screen" from the options.
To Join a Screen Sharing Session:
- During a FaceTime call, tap "Open" next to "Join Screen Sharing" if someone else is sharing their screen.
- If you want to take over screen sharing from someone else, tap the "Share Screen" button again.
- Choose "Share My Screen" and then "Replace Existing".
- When you're done, at the top of the FaceTime call, tap the "Share Screen" button again to stop sharing your screen.
Part 3: How to Screen Share Netflix Without Black Screen on Facetime
Screen sharing Netflix on FaceTime can be a fun way to watch your favorite shows or movies with friends and family. However, there's a catch: Netflix does not directly support SharePlay, which is the feature used for screen sharing on FaceTime.
SharePlay works with various apps, but Netflix is not one of them. While you can stream other services like Disney+, HBO Max, and Hulu using SharePlay, Netflix remains elusive.
For how to screen share netflix on facetime, you need not just any third-party apps, but the ones which support SharePlay, such as, Apple TV+, Disney+, ESPN+, Hulu, MUBI etc.
Extra Tip: How to Do Screen Record on Mac & PC with Ediamkor
Launch HitPaw Edimakor
From the home interface, you'll see several options. To record your screen, click on "Screen recorder".

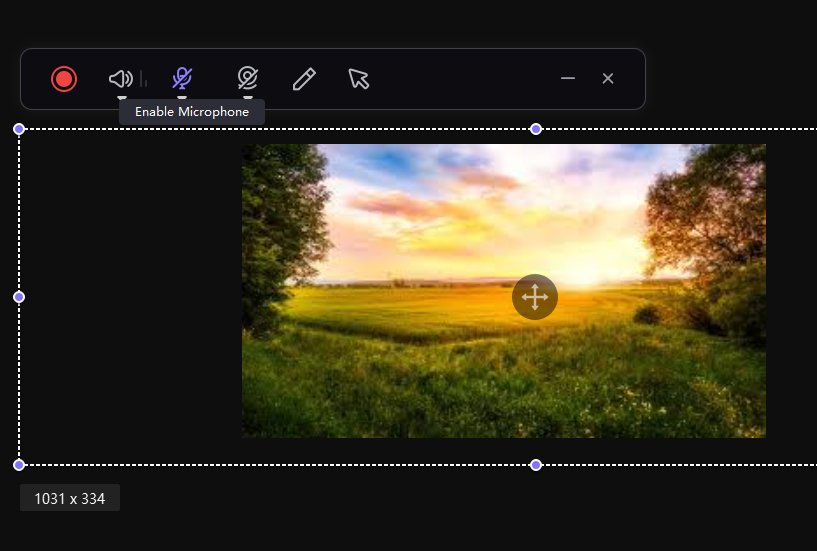
Select the Recording Area:
- You can choose to record the full screen by pressing the Space bar or define a custom recording area by long-clicking and adjusting the window as needed.

Start Recording:
- Click the recording icon to start recording your screen.
- During recording, you can click the pause button to pause if necessary.

To finish recording, click the stop button.

Configure the following preferences:
- General: Set output frame rate, resolution, and format (MP4 or MKV).
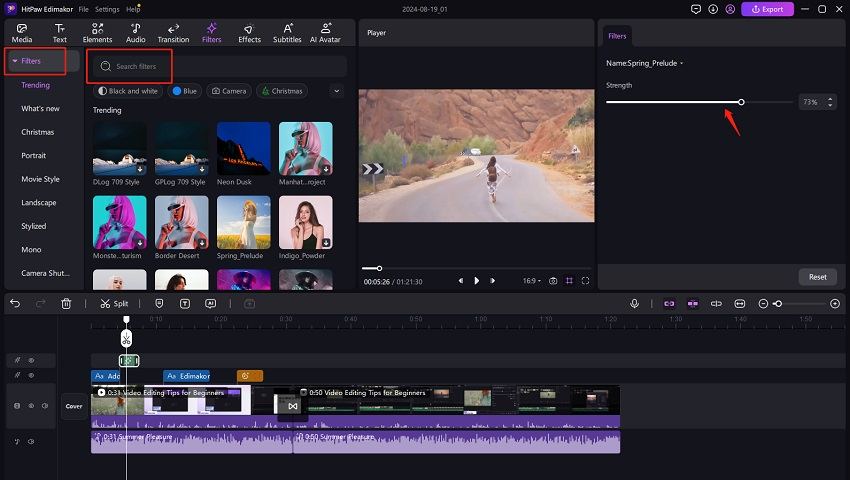
- Effect: Choose your desired filter, transition, effect etc. You can use other features of Edimakor to enhance your experience.

Use Additional Features:
- Use the camera icon for quick screenshots.
- Switch to webcam recording or picture-in-picture recording using the PIP icon.
- Add voice by using the speaker and microphone icons.

Conclusion
Ultimately, we have studied all about screen sharing, it's usages, and implications for Netflix. We have also learned how to share screen on facetime. Hitpaw Edimakor is an AI-powered video editing software, that has powerful screen recording capabilities. You could simultaneously use Webcam and record audio.
FAQs About How to Share Screen on Facetime
Q1. Can I share my screen on FaceTime with multiple people?
A1. Yes.
Q2. Are there any limitations to screen sharing on FaceTime?
A2. You cannot use FaceTime to screen share with Android or Windows users.
Q3. Can I share specific apps or windows instead of my entire screen?
A3. Yes.
Q4. How can I prevent others from viewing certain content during screen sharing?
A4. Use provided handles to adjust windows and reveal only a specific part of the screen.
Q5. Is screen sharing on FaceTime available on all devices?
A5. No. FaceTime is exclusive to only Apple products.


 HitPaw Watermark Remover
  HitPaw Screen Recorder
 HitPaw VikPea (Video Enhancer)


Share this article:
Select the product rating:
Daniel Walker
Editor-in-Chief
My passion lies in bridging the gap between cutting-edge technology and everyday creativity. With years of hands-on experience, I create content that not only informs but inspires our audience to embrace digital tools confidently.
View all ArticlesLeave a Comment
Create your review for HitPaw articles