Best Ways to Record on YouTube TV in 2024
As a TV lover, learning how to record on YouTube TV could be helpful in the long run. While the streaming platform has its built-in DVR for YouTube TV recording, it has certain limitations, and it also requires a 4K Plus add-on in addition to the Base plan before allowing you to save your favorite shows for offline viewing or streaming on unlimited devices.
Considering these factors, the following sections teach the process of YouTube TV recording using the integrated DVR option and a few other effective solutions comprising more advanced features for better control, fine-tuning, and improved management.
Part 1: How to Record on YouTube TV with DVR
The YouTube TV recording process using DVR is pretty easy, and you can learn the method by following the instructions given below:
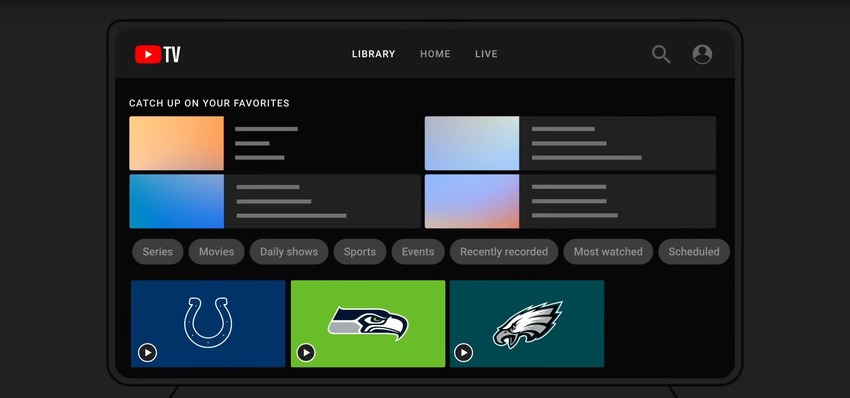
- Launch YouTube TV on your preferred device
- Tap the + (Add) icon from the top-right corner of the thumbnail of the show you want to record
- Wait while YouTube TV records the program in your library
Although the above procedure appears to be simple, as explained earlier, it comes with the following restrictions:
- You cannot record YouTube TV without a 4K Plus add-on subscription in addition to the Base plan
- If you record an already streaming show, DVR records it from the time you started recording
- You must connect your device to the home Wi-Fi network at least once in 90 days to keep the recorded shows for offline viewing
Because of these restrictions, many people search for alternate solutions for YouTube TV recording. Luckily, you are here. The following two sections explain how to record shows on YouTube TV and keep them on your computer/smartphone/tablet forever until you remove them manually.
Part 2: How to Record Shows on YouTube TV Free with the Best AI Video Editor
YouTube TV recording becomes extremely simple with the right tool under your sleeves. While several recording applications are available in the market, not many are AI-powered, and therefore they require you to do complex tasks manually.
Thankfully HitPaw Edimakor is now here to have your back. The application supports Windows and Mac platforms and allows you to record your screen for free. Screen recording in HitPaw Edimakor comprises several advanced features and options, including picture-in-picture, webcam recording, microphone and system audio capturing, etc.
Furthermore, Edimakor also has an integrated video editor for basic-to-complex post-production tasks. This means that after YouTube TV recording, you can edit and fine-tune the clips to get the optimum output to enhance your offline viewing experience.
Follow the steps given below to learn how to record on YouTube TV using HitPaw Edimakor:
Step 1: Set up YouTube TV Recording Preferences in HitPaw Edimakor Screen Recorder
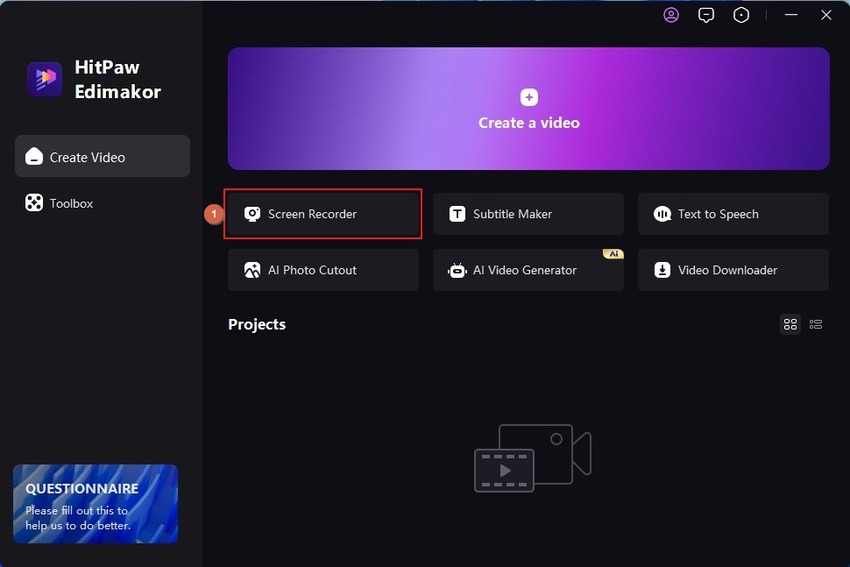
Open HitPaw Edimakor on your Mac or Windows computer and click Screen Recorder on the first window.
Press the Spacebar key to set the entire computer screen as the recording area.

On the Recording panel, click and turn off the Microphone, Webcam, and Mouse Pointer options to prevent Edimakor from capturing any inputs from these devices.

Step 2: Start and Stop YouTube TV Recording on Edimakorp
Open YouTube TV and go to the show you want to record (do not start streaming yet).
Click the Record button on the Recording panel or press F10 on the keyboard to start screen recording on Edimakor. Start streaming the show, and sit back and relax while the program continues to stream till its end.

Once the show finishes streaming, press F10 to stop YouTube TV recording and automatically open the recorded clip in the Edimakor video editor.
Step 3: Edit and Export the Video on HitPaw Edimakor
Drag the recorded clip’s thumbnail to the Timeline if not already added. Place the Skimmer on the frame where the show starts streaming and click the Click to split icon on the Skimmer. Click to select the initial portion with no crucial information and press Delete on the keyboard.
Repeat this process to trim off the unwanted segment at the end of the video as well.
Click Export from the upper-right corner, define output preferences in Edimakor’s Export box, and click Export from the bottom-right to export the video.
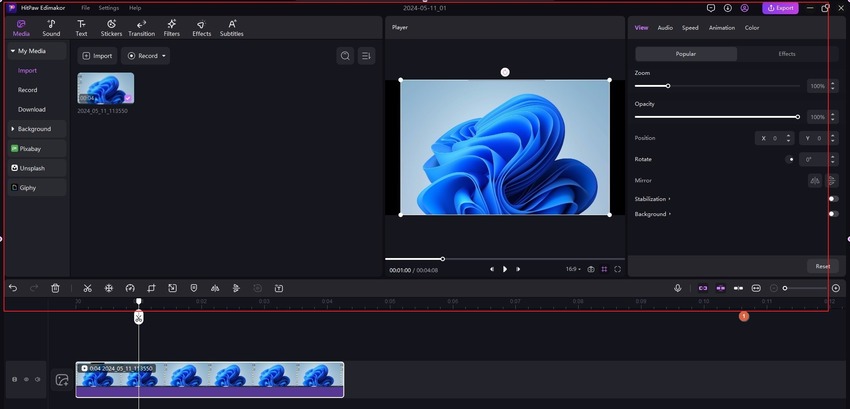
Go to the target folder you defined in the Export box and access the file from there.
Part 3: How to Record on YouTube TV with the Best Screen Recorder
YouTube TV recording using HitPaw Edimakor is free, and in most cases, the tool is sufficient and serves the purpose well. However, if you want a full-fledged recording application to prepare educational tutorials, interactive videos, and, of course, do YouTube TV recording, another robust program by HitPaw is Screen Recorder.
Using HitPaw Screen Recorder is even easier. Follow the steps given below to learn how to record on YouTube TV using HitPaw Screen Recorder:
Step 1: Define an Output Folder in HitPaw Screen Recorder
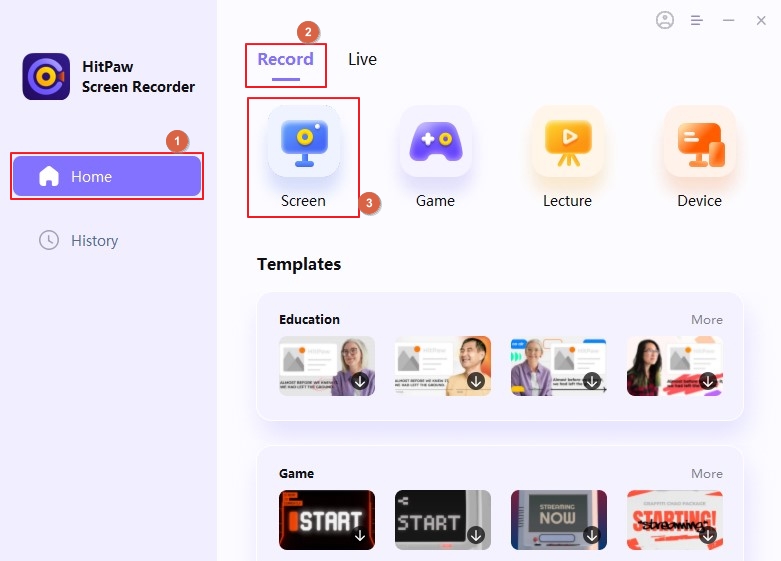
Open HitPaw Screen Recorder on your computer and click Screen from the Record tab on the right. Press Spacebar to set the whole screen as the recording region.
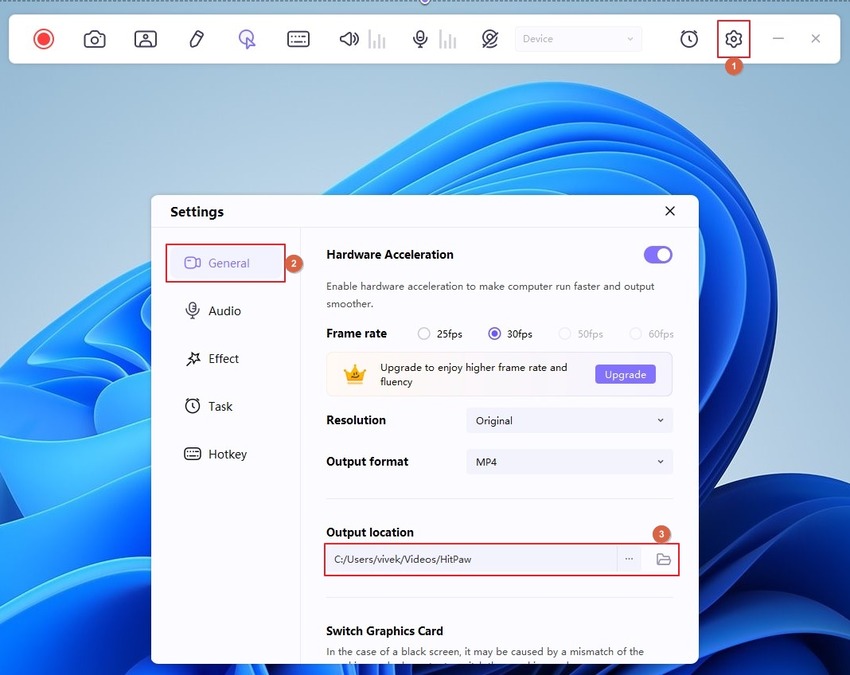
On the Recording panel, click the Settings icon. Ensure that you are in the General category of the Settings box, and define an output folder in the Output location field in the right pane. Close HitPaw Screen Recorder’s Settings box when done.
Step 2: Set Recording Preferences in HitPaw
Click and turn off the Webcam, Microphone, Keyboard, and Mouse Pointer tools on the Recording panel to avoid accidental inputs during the recording session.

Step 3: Record and Access the HitPaw’s Video File
Once everything is done, open YouTube TV and start streaming the show you want to record. When the streaming begins, Click the Record button or press F10 to start the YouTube TV recording.

After the show completes, press F10 one more time to turn off the recording and automatically open the Preview window. Click the Open output folder icon from the right of the Preview window’s progress bar to open the destination location and access the recorded clip.

Part 4: FAQs on How to Record on YouTube TV
Q1. What's the best way to record a program on YouTube TV?
A1. If you purchased the 4K Plus add-on subscription with your YouTube TV Base plan, using the built-in DVR for YouTube TV recording might be easy. For a more convenient recording process and to lift the restrictions YouTube TV imposes, recording shows with HitPaw Edimakor or HitPaw Screen Recorder would be your best bet.
Q2. How early can you schedule recordings on YouTube TV?
A2. YouTube TV DVR can record all upcoming episodes of the show you want to add to your library.
Q3. Does YouTube TV have unlimited recording?
A3. Yes, it does. However, you must connect your device to your home Wi-Fi network at least once every 90 days to keep the recorded shows for offline viewing.
Q4. How long can you keep recorded shows on YouTube TV?
A4. You can keep YouTube TV recording for as long as you want, as long as you keep connecting your device to your home Wi-Fi at least once in 90 days.
Conclusion
YouTube TV recording is not a complex task. However, when you use the streaming portal’s DVR, it imposes certain restrictions, which many users do not appreciate. To remove these limitations, HitPaw Edimakor has a built-in free screen recorder and a video editor that produces quality recordings for offline viewing. Furthermore, it is easy to learn how to record on YouTube TV using HitPaw Screen Recorder, as it doesn’t require in-depth technical knowledge.


 HitPaw Univd (Video Converter)
  HitPaw Screen Recorder
 HitPaw VikPea (Video Enhancer)


Share this article:
Select the product rating:
Daniel Walker
Editor-in-Chief
My passion lies in bridging the gap between cutting-edge technology and everyday creativity. With years of hands-on experience, I create content that not only informs but inspires our audience to embrace digital tools confidently.
View all ArticlesLeave a Comment
Create your review for HitPaw articles