How Does Screen Recording Record Sound on Mobile, Windows & Mac
Screen recording has become an indispensable tool for various purposes that clarify the query: does screen record record audio. This process involves sophisticated technology that synchronizes audio input with on-screen visuals.
Part 1: How Does Screen Recording Record Sound on Mobile
You may be wondering how our screen recording also contains the voice from the surroundings as well as the microphone. This is done through special technologies and this is how you can enable and disable this feature:
Does Screen Recording Record Sound on iPhone?
If you want to clear does screen recording record audio iphone then given steps will be helpful:
● Tap the Screen Recording Icon
Swipe down from the top-right corner of your iPhone to access the Control Center. Locate the screen recording icon, typically represented by a circle within a circle, and tap it to initiate screen recording.
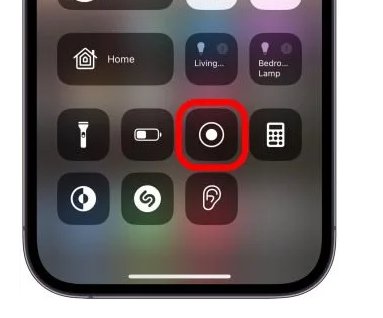
● Choose the Microphone Option
Before starting the recording, long-press or firmly press the screen recording icon to reveal additional options. Here, ensure that the microphone audio option is enabled by tapping on it. This allows your iPhone to capture both system audio and external audio through the microphone.
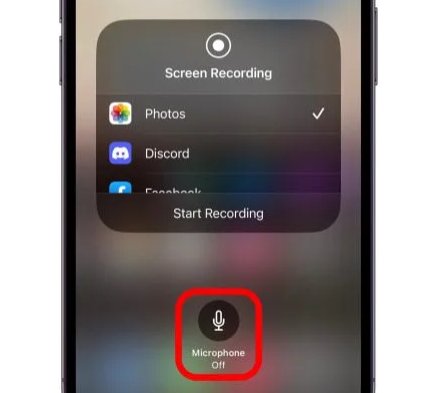
● Start Recording
After selecting the microphone option, tap the Start Recording button. Your iPhone will begin recording the screen activity along with any accompanying audio.
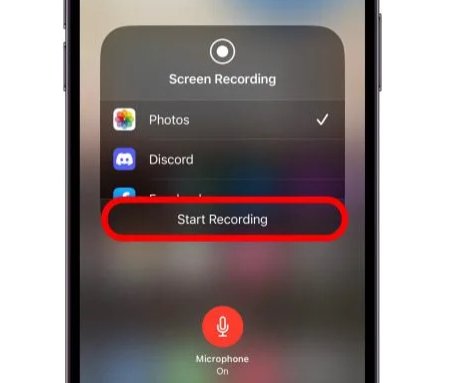
● End the Recording
To end the recording, simply tap the red status bar at the top of your screen or return to the Control Center and tap the screen recording icon again. Confirm your action if prompted. Your screen recording, complete with sound, will be saved to your Photos app for easy access and sharing.
Does Screen Recording Record Audio on Android?
Screen recording on Android devices does indeed capture audio that allow users to create comprehensive recordings of their screen activities. Given steps clarify when you screen record does it record audio on an Android device or not:
● Access Screen Recording Option
Depending on your device and Android version, access the screen recording option by swiping down from the top of your screen to open the Quick Settings panel. Look for the screen recording icon, which may appear as a Screen Record or Screen Capture option. If you don't see it, you may need to add it to your Quick Settings panel through the Edit option.
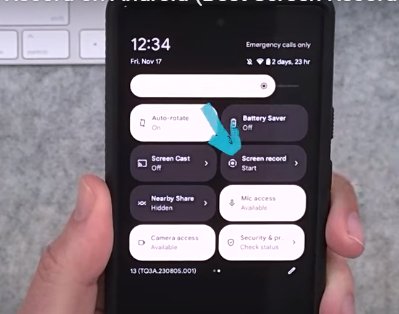
● Choose Sound Option
Before starting the recording, long-press or tap the screen recording icon to access additional options. Look for an option related to audio or sound. Ensure that it is enabled to capture both system audio and external audio through the microphone.
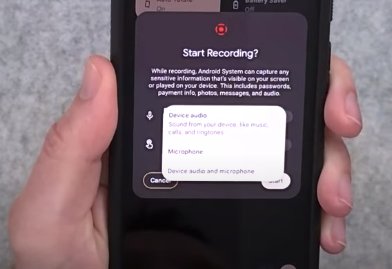
● Start Recording
After selecting the desired audio options, tap the Start Recording button. Your Android device will begin recording the screen activity along with any accompanying audio.
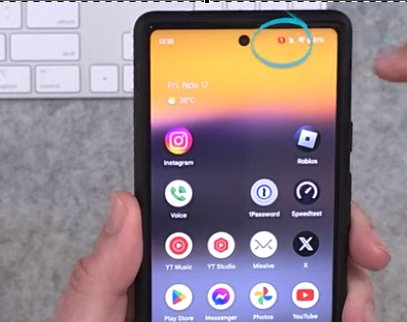
● Save Recording
Once you've finished recording, you can stop the recording by tapping the stop button in the notification shade or by returning to the screen recording option in the Quick Settings panel and tapping the stop button. Your screen recording, complete with audio, will be saved to your device's gallery or video folder for easy access and sharing.
Part 2: How Does Screen Recording Record Audio on iPad?
Screen recording on an iPad includes the ability to capture audio that provide users with a comprehensive recording experience. Here's the guideline on does screen record have audio on iPad:
Choose Screen Recording from the Control Center
Begin by accessing the Control Center on your iPad. Depending on your iPad model and iOS version, swipe down from the top-right corner or swipe up from the bottom of the screen to open the Control Center. Locate the screen recording icon, which looks like a circle within a circle, and tap it.

Turn On the Microphone Audio
Before starting the recording, ensure that microphone audio is enabled. To do this, long-press or firmly press the screen recording icon to reveal additional options. Look for an option related to audio or microphone and make sure it is turned on.
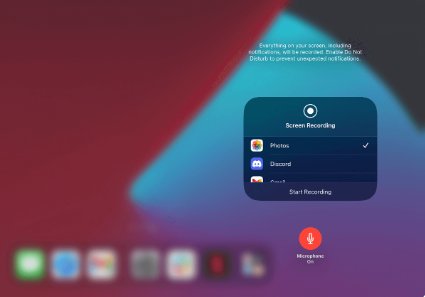
Start Recording
After selecting the microphone audio option, tap the Start Recording button. Your iPad will begin recording the screen activity along with any accompanying audio.
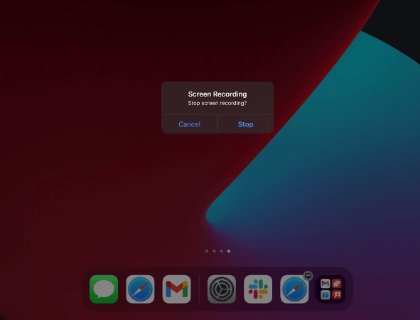
Stop Recording
To end the recording, tap the red status bar at the top of the screen or return to the Control Center and tap the screen recording icon again. Confirm your action if prompted. Your screen recording, complete with audio, will be saved to your Photos app for easy access and sharing.
Part 3: How Does Screen Recording Record Audio on Windows
Hitpaw Edimakor provides a user-friendly interface and comprehensive features to ensure that does screen recording have audio of high quality:
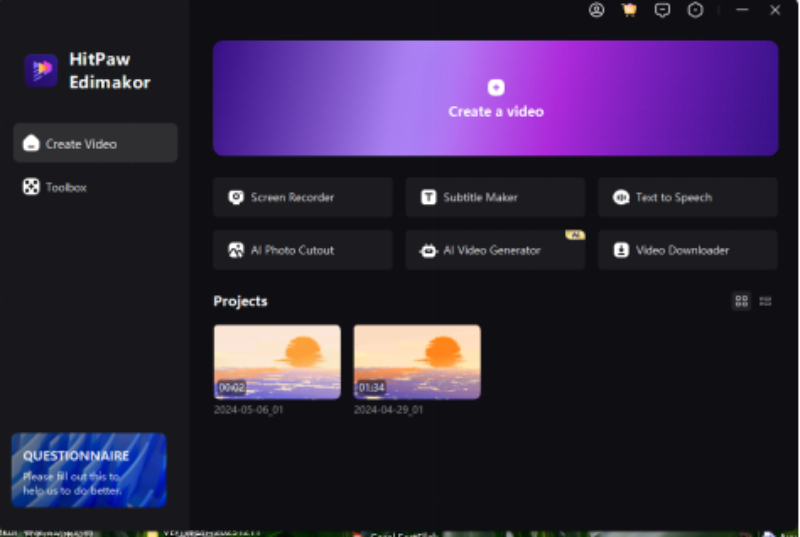
Step 1. Open HitPaw Edimakor
Launch HitPaw Edimakor software on your Windows computer by double-clicking its icon on the desktop or searching for it in the Start menu.
Step 2. Start Screen Recording
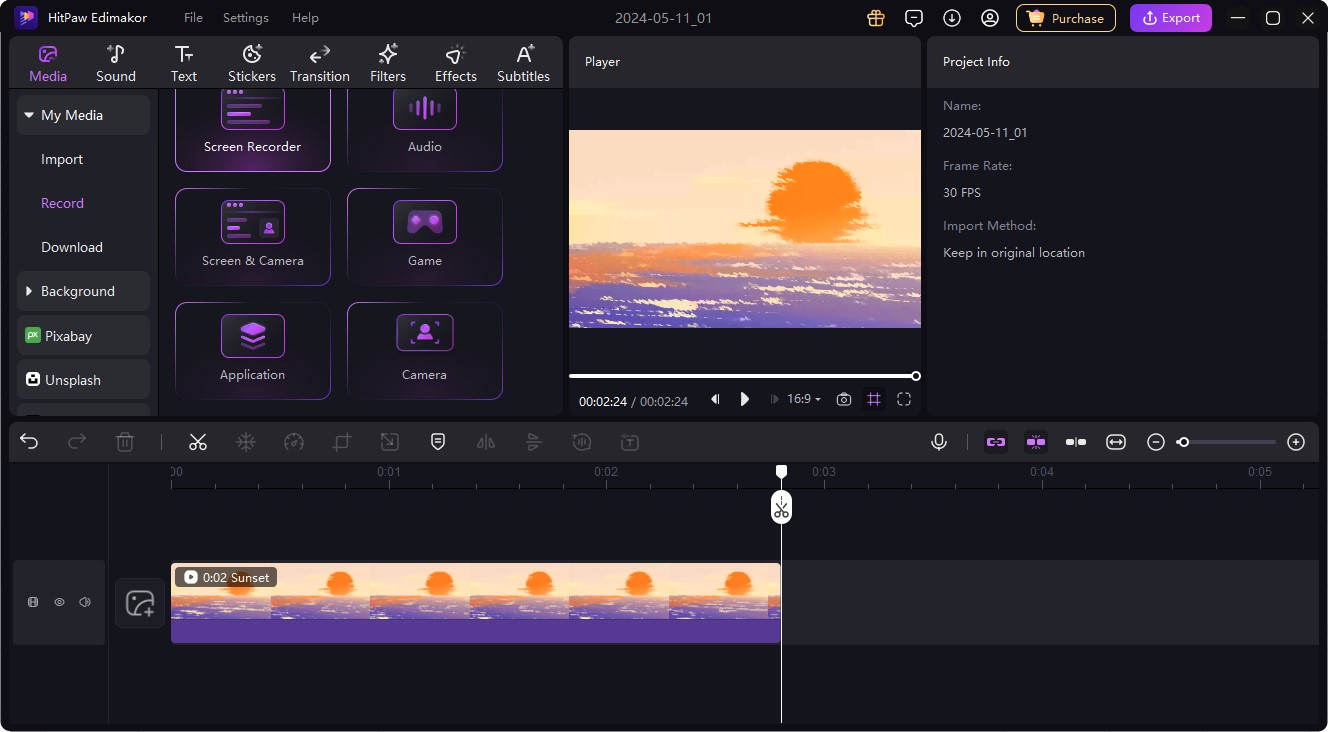
In the HitPaw Edimakor interface, select the Screen Recorder option to begin screen recording. You'll be presented with various recording options and settings.
Step 3. Enable Microphone
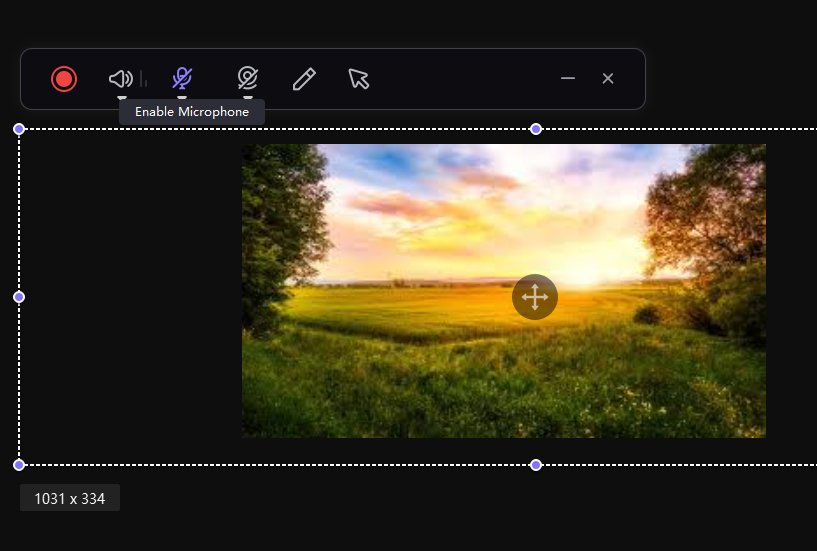
Before initiating the recording, ensure that the microphone option is enabled. This allows HitPaw Edimakor to capture both system audio and external audio input from your microphone. You can typically find the microphone option in the recording settings or preferences menu.
Step 4. Use Editing Features
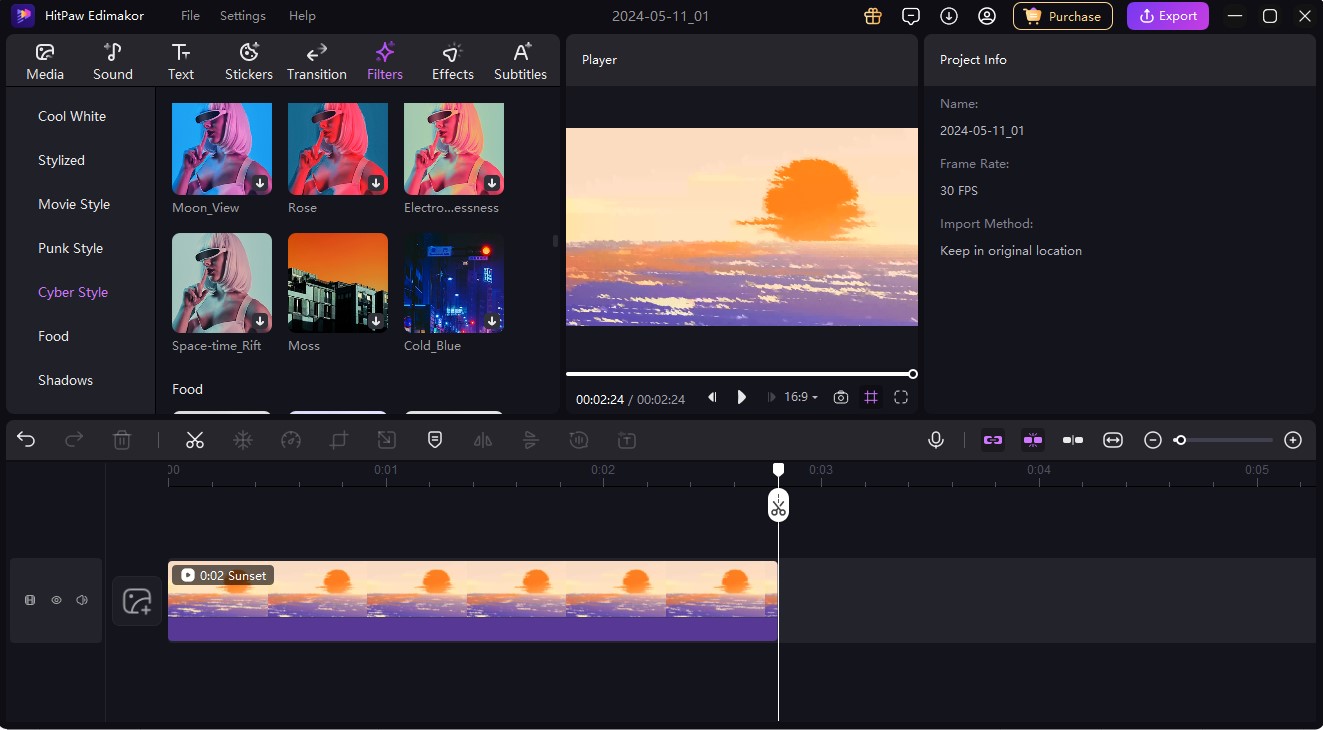
After completing the screen recording, you can utilize HitPaw Edimakor's built-in editing features to enhance your recording. These features may include trimming, cutting, merging, adding effects, captions, or annotations to your recording.
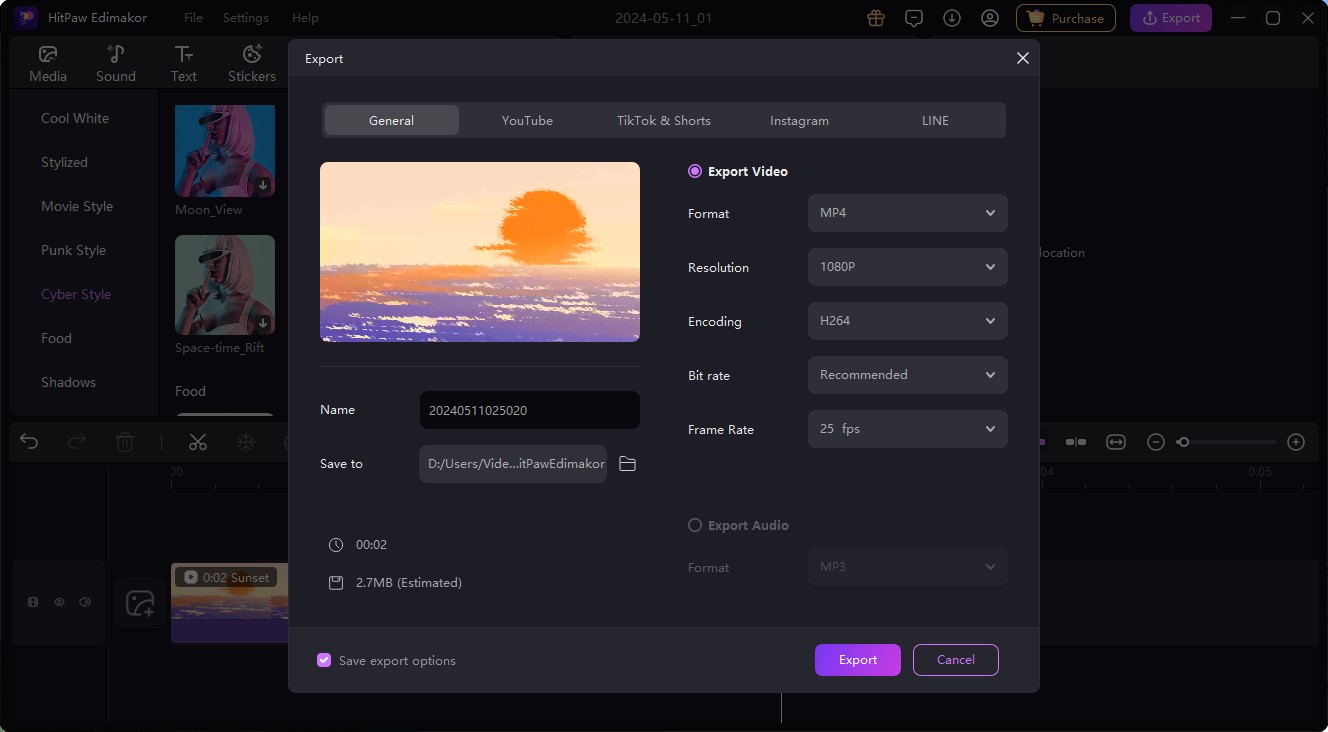
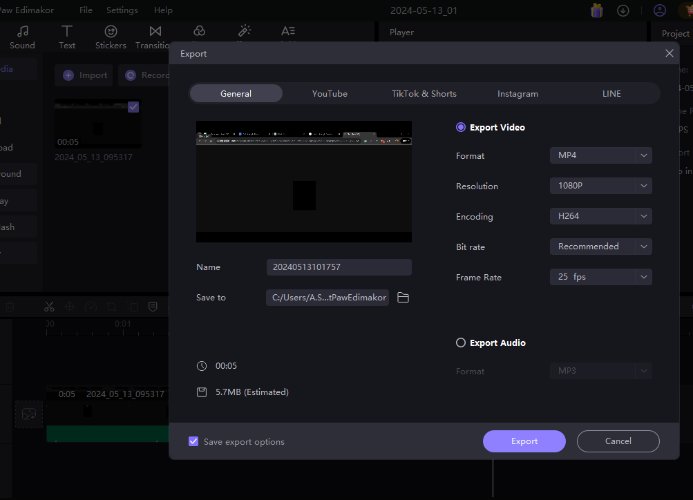
Step 5. Export the Recording
Once you're satisfied with the editing, it's time to export the recording. Choose the desired export settings and click on the Export button to save the recording to your computer.
Part 4: How Does Screen Recording Record Audio on Mac
By following these steps, you can effectively figure out does screen recording record audio on mac using HitPaw Edimakor which ensures high-quality screen recordings for various purposes.
Step 1: Launch HitPaw Edimakor
Open HitPaw Edimakor on your Mac computer by locating it in the Applications folder or using Spotlight search.
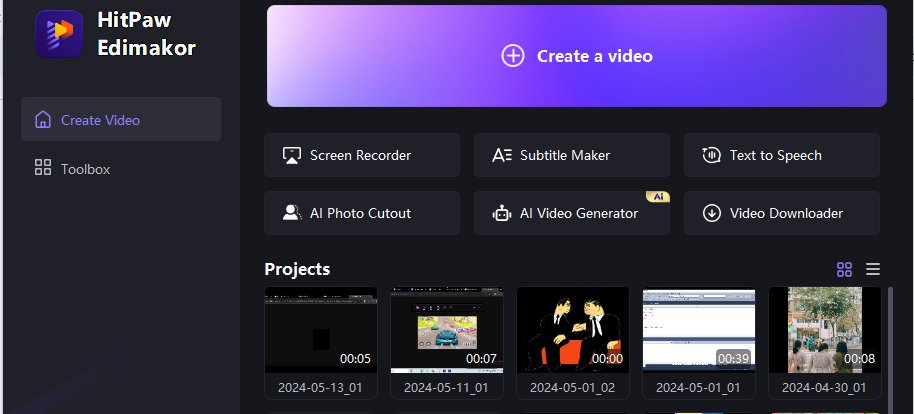
Step 2: Select Screen Recorder Mode
In the HitPaw Edimakor interface, choose the Screen Recorder mode to initiate the screen recording process.
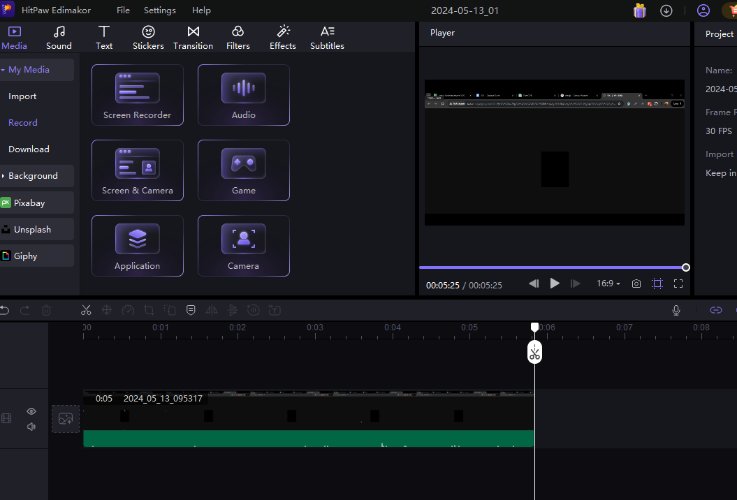
Step 3: Configure Settings
Before starting the recording, ensure that the audio recording options are properly configured. Enable the microphone option to capture external audio input from your Mac's microphone.
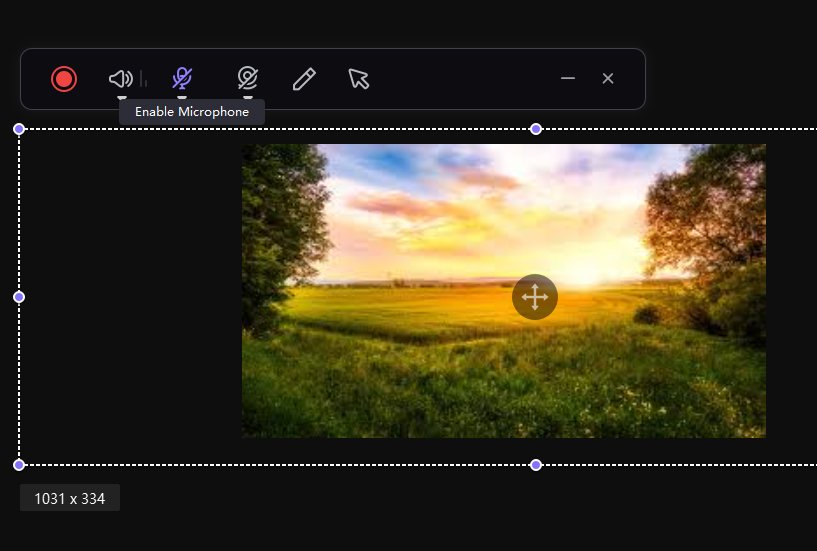
Step 4: Stop and Save Recording
When you're done with the recording, click on the Stop button or use the designated hotkey to stop the recording process. HitPaw Edimakor will automatically save the recorded screen activity along with the audio to your specified location on your Mac.
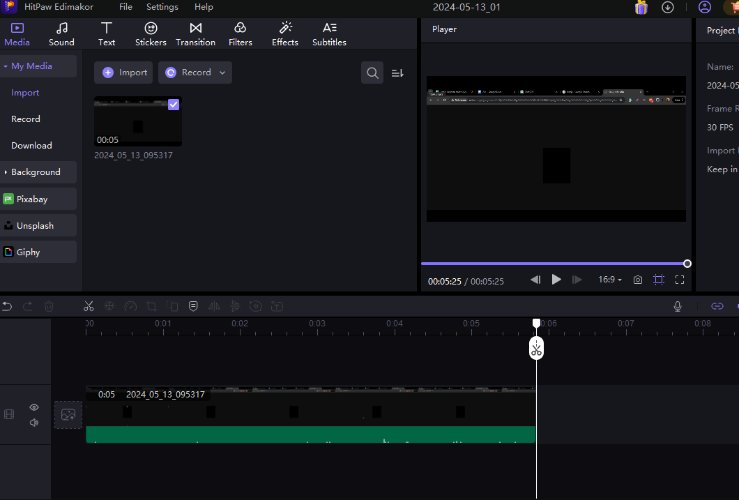
Step 5: Export the Recording
Once editing is complete, export the recording to your preferred format. HitPaw Edimakor typically offers various export options.
Final Words
Understanding does screen recorder record audio sheds light on the intricate mechanisms behind multimedia content creation. This technology not only facilitates effective communication but also opens up new avenues for education, collaboration, and entertainment. You can visit HitPaw Edimakor (Video Editor) for screen recording on Windows as well as Mac.


 HitPaw Univd (Video Converter)
  HitPaw Screen Recorder
 HitPaw VikPea (Video Enhancer)


Share this article:
Select the product rating:
Daniel Walker
Editor-in-Chief
My passion lies in bridging the gap between cutting-edge technology and everyday creativity. With years of hands-on experience, I create content that not only informs but inspires our audience to embrace digital tools confidently.
View all ArticlesLeave a Comment
Create your review for HitPaw articles