Best Review to Record Computer Audio With Audacity
Audacity is a renowned audio recording software that offers a plethora of features for both beginners and professionals. In this review, we are going to explore what Audacity is and find out how we can manage to record computer audio with audacity.
Part 1: Overview of Audacity
Being an open-source audio editing program, Audacity is robust and flexible that provides a large range of functions for users of all experience levels. With support for several file types, its user-friendly interface makes audio recording, editing, and mixing effortless. With so many effects and tools already included, Audacity gives users the creative freedom to improve their audio creations.
Audio enthusiasts throughout the world continue to turn to audacity how to record computer audio for sound design, podcasting, and music creation. It is an essential tool for any audio editing project because of its wide range of features, accessibility, and strong community support.
Part 2: Audacity | How to Record Computer Audio
Audacity is a cross-platform, free, open-source speech recorder that lets you edit, record, and download audio files to your computer. Windows, Mac, and other operating systems may all use Audacity.
How to Record Computer Audio on Windows
If you want to record computer audio on Windows using Audacity then the following steps for how to record computer audio with audacity will be helpful for you.
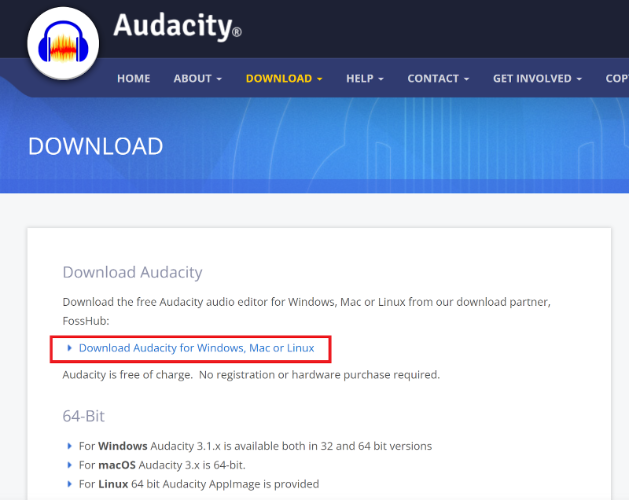
Step 1: Download Audacity
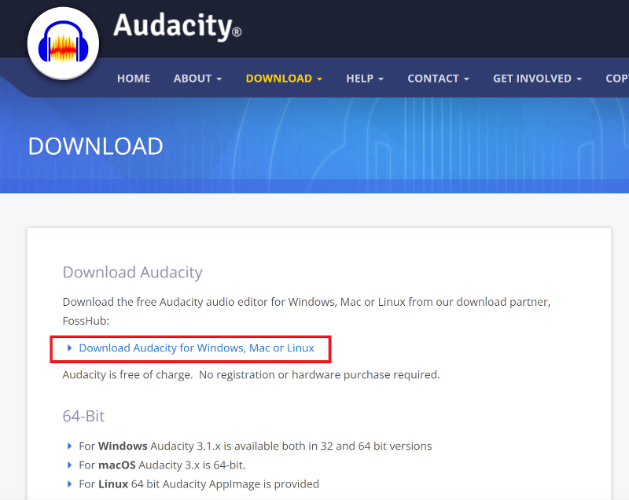
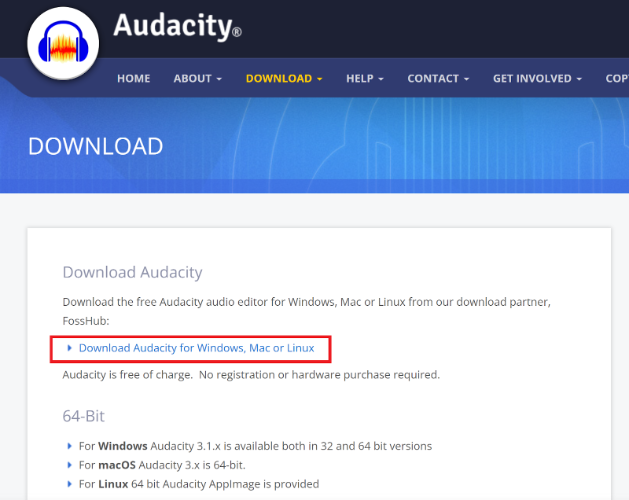
Get Audacity for your PC by downloading it. When you click "download," Audacity will ask you to choose the type of PC you're using to finish the download.
Step 2: Open the Audio file
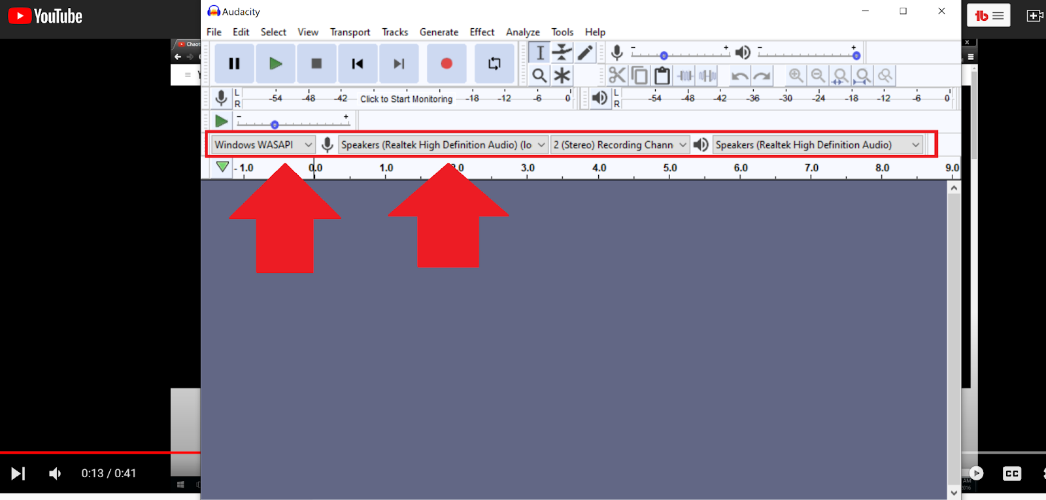
Open the audio file on your computer that you want to record. Next, launch Audacity on your PC and adjust the parameters to correspond with the picture below. These options tell Audacity that your computer's audio is being recorded instead of your microphone.
Step 3: Recording Audio
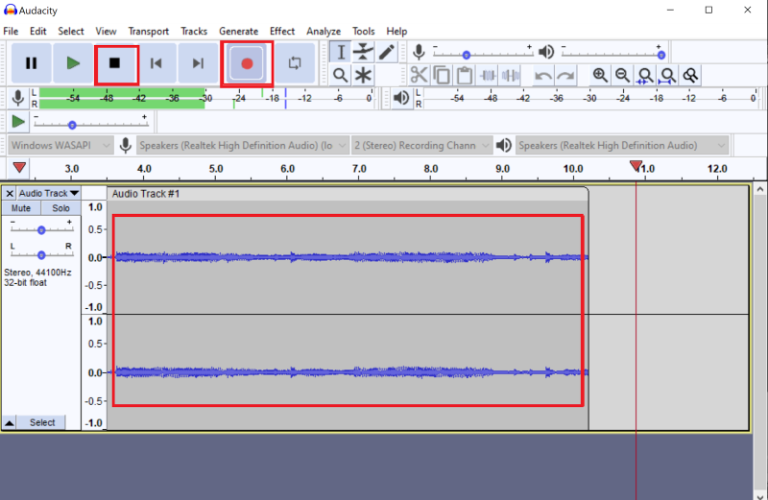
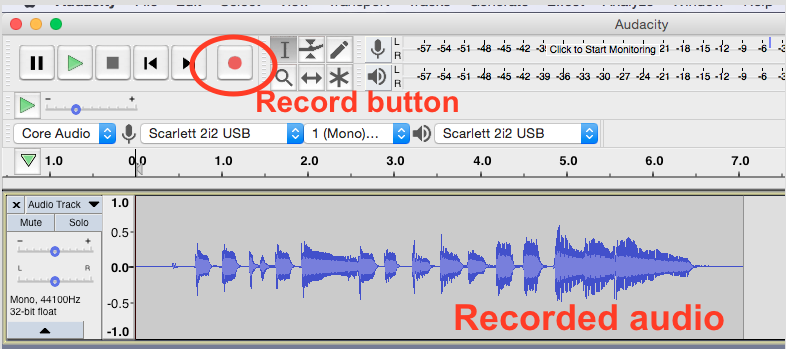
On the Audacity screen, click the red record button located at the top. Sound bars should show up on the Audacity interface when you play your audio, indicating that Audacity is picking up and recording your audio. Click the stop button at the top of the screen to end the recording.
Step 4: Export
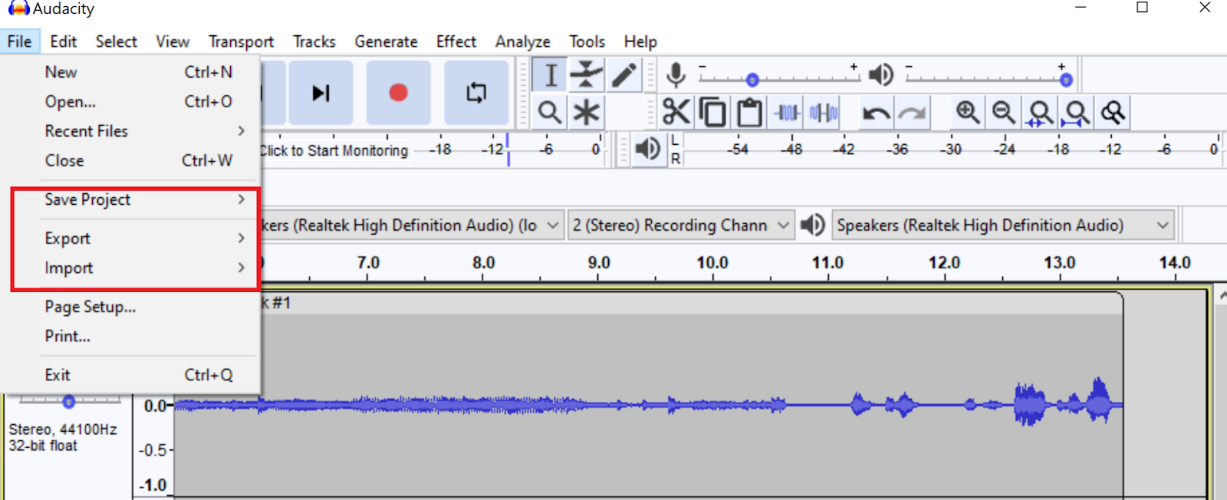
When you're done recording, click File and then Export to save the audio file to your computer.
How to Record Computer Audio on Linux
If you want to know the steps to record audio from computer audacity on Linux then the following methods will be beneficial for you.
Step 1: Install Audacity and Additional Software
Begin by installing Audacity on your Linux system. You can typically find Audacity in your distribution's software repository or download it from the official Audacity website.
Step 2: Configure Audio Settings
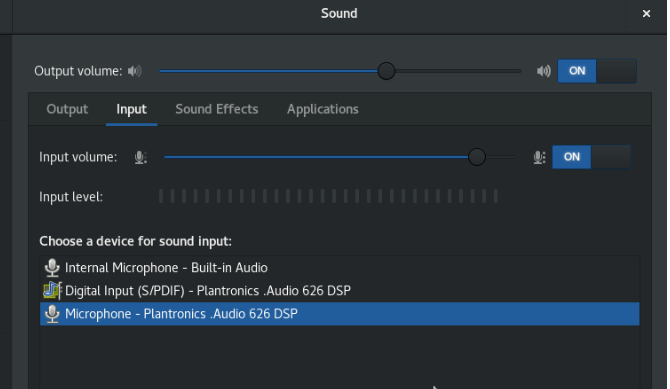
Once Audacity is installed, launch the application and access the Preferences menu. Navigate to the Devices section and ensure that the correct audio input and output devices are selected.
Step 3: Enable Loopback Recording
To capture computer audio, you'll need to enable loopback recording in PulseAudio. Open the PulseAudio Volume Control application and navigate to the Recording tab. Locate the audio source that corresponds to your computer's sound output.
Step 4: Start Recording
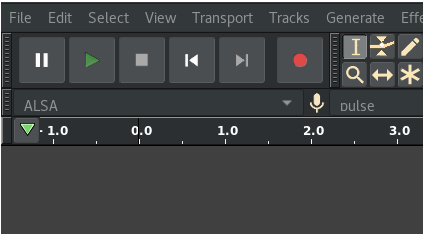
With the audio settings configured and loopback recording enabled, return to Audacity and click the record button to start recording. Audacity will now capture the audio output from your computer.
How to Record Computer Audio on Mac
The process of audacity record computer audio mac involves a few simple steps. Some of them are provided below.
Step 1: Download and Install Audacity
Get Audacity and install it. To download and set up Audacity on your Mac, go to the official Audacity website.
Step 2: Adjust Sound Settings
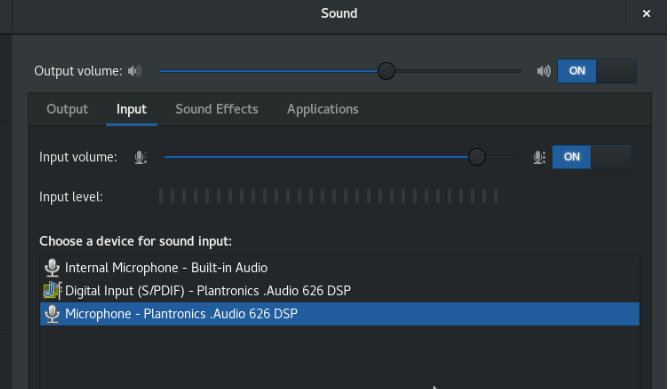
On your Mac, open the System Preferences menu and select Sound. You can choose Soundflower as the output device under the Output tab. This sends computer audio to Audacity so that it may be recorded.
Step 3: Start Recording
Open the Mac version of Audacity. To record computer audio, select Soundflower (2ch) as the recording source in Audacity. To begin recording the audio on your computer, click the record button.
Step 4: Edit and Save
Audacity's editing features allow you to make changes to the audio after it has been recorded. As necessary, trim, edit, or add effects. After you're happy, save your recording in the format of your choice.
Part 3: Audacity | How to Record Computer Audio and Microphone
Audacity is a free, open-source audio editing software available for Windows, macOS, and Linux. Moreover, the process of audacity how to record computer audio and mic offers a range of features for recording, editing, and mixing audio tracks. It can also be used for recording Computer audio and microphones.
Step 1: Open Audacity
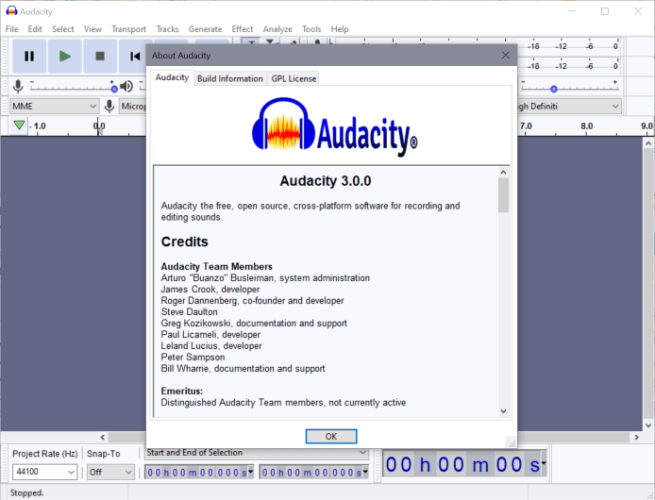
Open Audacity on your PC to get started. Usually, you may look for Audacity in the computer's search bar or in your list of installed programs.
Step 2: Getting to the Recording Devices
When Audacity is open, select the toolbar located in the upper-right corner of the screen. Locate the microphone-shaped symbol, which denotes the recording devices tab.
Step 3: Use the Dropdown Menu to Navigate
To view the dropdown menu, click the recording devices tab. All of the tilable recording devices that are installed or connected to your computer are shown in this menu.
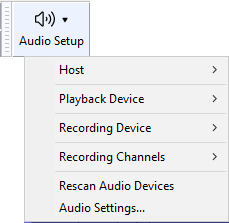
Step 4: Select Microphone
Within the dropdown menu, you'll see a list of recording devices such as microphones and other input sources. Carefully review the options and choose the microphone you intend to use for the recording session.
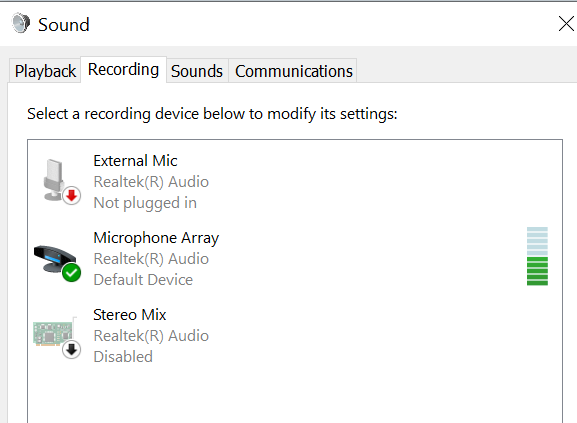
Step 5: Confirm Selection
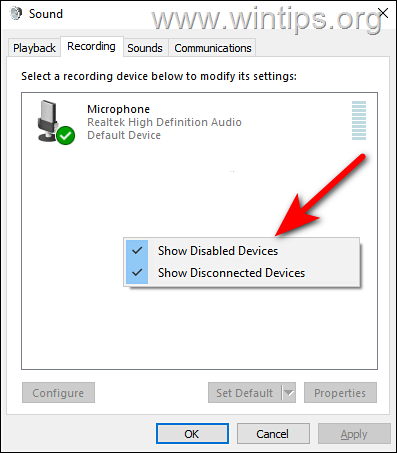
Once you've selected the desired microphone, confirm your choice by clicking on it within the dropdown menu. Audacity will now recognize the selected microphone as the input device for your recording.
Extra Tip: Best Screen Recorder for PC & Mac (Hitpaw Edimakor)
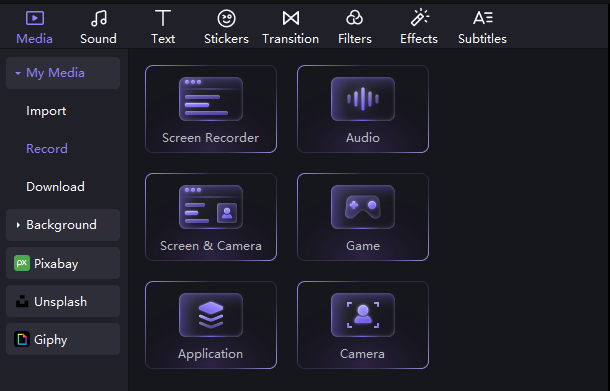
Another excellent screen recorder after learning how to record audio with audacity from computer is HitPaw Edimakor, which is notable for its dependability and performance and for easily producing high-quality recordings.
HitPaw Edimakor
Whether you're recording tutorials, gameplay, presentations, or any other on-screen content, Edimakor offers customizable recording options to suit your needs. HitPaw Edimakor appears as a top-tier screen recording solution for both PC and Mac users with offering a seamless and feature-rich experience.
Features
- Users can easily explore and utilize HitPaw Edimakor's screen recording functions thanks to its user-friendly interface.
- To accommodate varying recording requirements, users can opt to record the full screen or only particular regions.
- With Edimakor, users may alter recording parameters like frame rate, video resolution, and audio input source to create recordings that are specifically catered to their tastes.
Final Words
Audacity stands as a versatile audio recording tool, providing users with the ability to capture computer audio effortlessly. Through this review, you've learned about Audacity's functionality and steps for recording computer audio with audacity. If you want to access the best screen recorder for PC and Mac then HitPaw Edimakor is perfect for you.


 HitPaw Univd (Video Converter)
  HitPaw Screen Recorder
 HitPaw VikPea (Video Enhancer)

Share this article:
Select the product rating:
Daniel Walker
Editor-in-Chief
My passion lies in bridging the gap between cutting-edge technology and everyday creativity. With years of hands-on experience, I create content that not only informs but inspires our audience to embrace digital tools confidently.
View all ArticlesLeave a Comment
Create your review for HitPaw articles