Fix 'Video Won't Play in PowerPoint' Issues- Mastering Video Playback in PowerPoint
PowerPoint presentations are a staple in both professional and educational settings, but running into issues with video playback can be frustrating.
In this guide, we'll explore common problems that cause video wont play in Powerpoint and provide detailed troubleshooting steps. Additionally, we'll show you how to use HitPaw Univd (HitPaw Video Converter) to download videos, ensuring smooth playback in your presentations.
Part 1. Common Problem for Video Won't Play in PowerPoint
Many users encounter issues when trying to play videos in PowerPoint presentations. These problems can stem from various sources, such as unsupported file formats, missing codecs, or corrupted video files. Recognizing these common issues is the first step toward resolving Powerpoint video won t play effectively.
- Unsupported video formats
- Missing codecs
- Corrupted video files
- Incompatible PowerPoint versions
- Incorrect video embedding methods
Part 2. Troubleshooting for Video Won't Play in PowerPoint?
1. Check the Link for YouTube Video
Apart from inserting videos from your computer, PowerPoint also allows you to embed YouTube videos into your presentations. If the YouTube video isn't playing, first ensure that the video is still available on YouTube and that your system has a stable internet connection. Here are some additional tips to fix the Powerpoint won t play video:
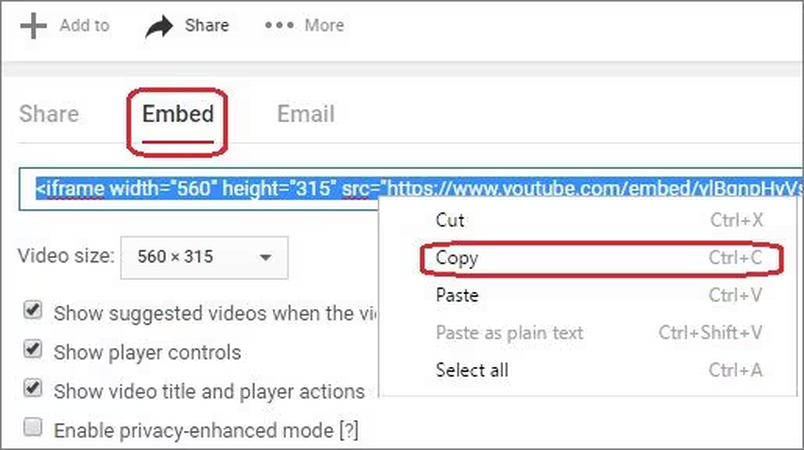
Step 1: A common mistake is using the YouTube URL instead of the embed link. If you add only the video URL, it won't work in PowerPoint.

Step 2: Open the YouTube video and click the "Share" button beneath the video player to obtain the embed link. Then, select the "Embed" option to get the embed code. Copy this code and insert it into PowerPoint.
2. Embed the YouTube Video Code
To embed a YouTube video in your presentation, simply copying and pasting the link won't work. Instead, you must use the embed code. Here's how to do it:
Step 1: Go to the YouTube video you want to add to your PowerPoint. Click on "Share" below the video and select "Embed."
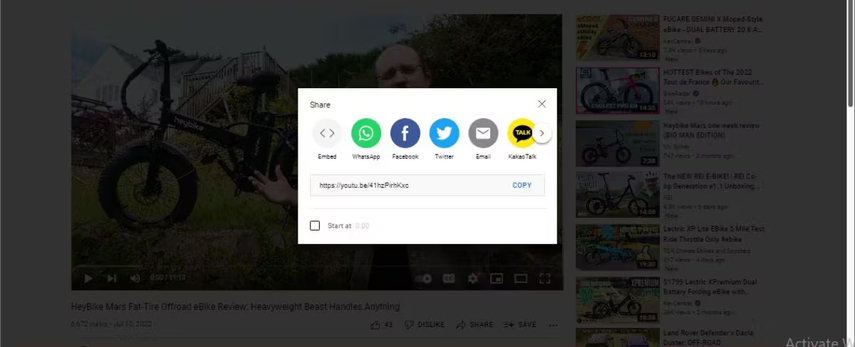
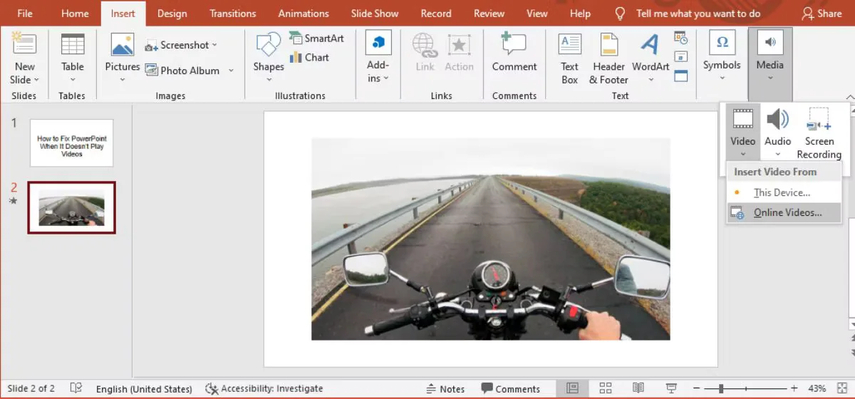
Step 2: Copy the embed code provided. In PowerPoint, open the "Insert" tab, then click on "Media" and choose "Video."
Step 3: Select "Online Videos" and paste the embed code from YouTube. Click "Insert" to add the video to your presentation.
3. Reset the Playback Options for your Video
You may already be aware of the different ways PowerPoint allows you to use movies in your presentations. If your video isn't playing automatically, playback settings may be the cause. You can fix the video in Powerpoint won t play issue by modifying PowerPoint's autoplay settings.
Step 1: Open your PowerPoint file and click on the video that isn't playing automatically. This will activate the Video Tools in the ribbon (navigation bar). Navigate to the "Playback" tab.
Step 2: In the "Playback" settings, find the "Start" options. Here, you can choose how you want the video to start: automatically, when clicked, or as part of a click sequence. Adjust the settings as needed and check if the video plays correctly in PowerPoint.

4. Enhance PowerPoint's Media Compatibility
Even though PowerPoint can play almost every popular video file, including MP4, MPEG, and AVI, there's a good risk that some films won't work with it. If the PowerPoint-embedded video isn't playing because of a compatibility issue, this would resolve the issue.
Step 1: Open your presentation in PowerPoint after launching the program if the video isn't playing.
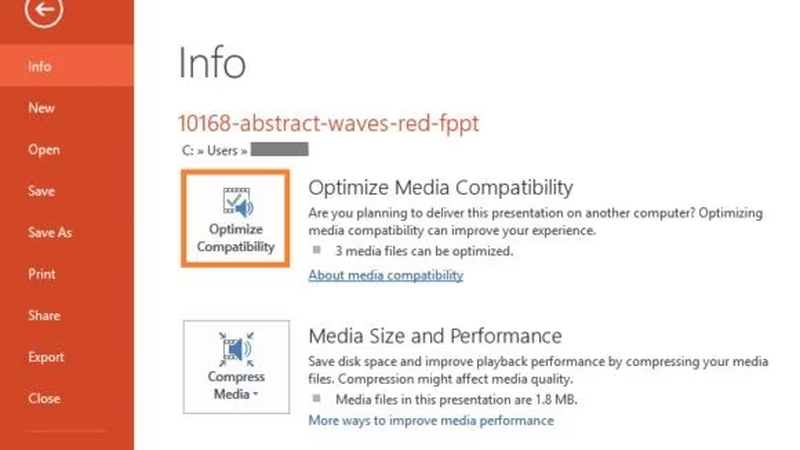
Step 2: Select the Optimize Compatibility function from the File > Info area of the main menu.
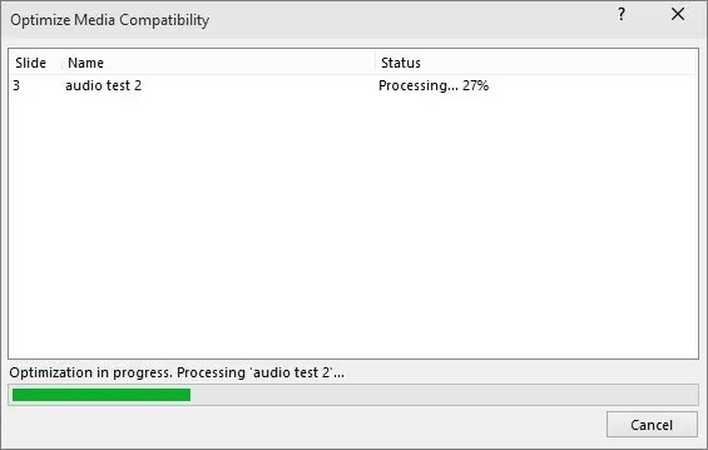
Step 3: The program will automatically recognize the video files you've inserted and optimize them to ensure no compatibility problems.
5. Eliminate All of the Temporary Unwanted Content
An excessive amount of temporary data on your Windows system may be causing unwelcome problems for your PC. Nonetheless, this straightforward exercise could resolve the issue of the PowerPoint video not playing automatically.
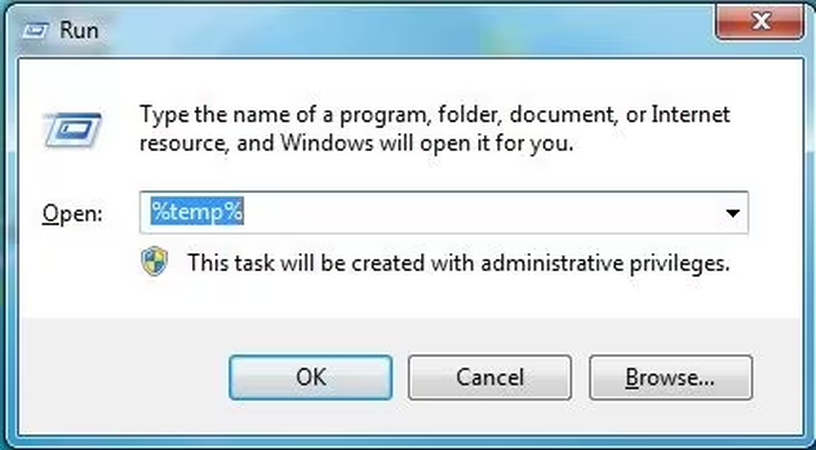
Step 1: First, open the Run prompt by going to the Start menu on your computer. Type the %temp% command into the Run prompt window and hit Enter. This will cause your system's TEMP folder to open, allowing you to choose and remove any temporary data.
Step 2: Go to the Windows drive to look for the ".tmp" string. This will enable you to look for and remove temporary files from your computer. Restart your computer after removing the temporary data, then reopen the PowerPoint presentation to verify it.
Part 3. Download Videos to Avoid Playback Issue with HitPaw Univd
Sometimes, even after adjusting the playback settings, videos might still face issues in PowerPoint due to format compatibility or internet connectivity problems. These issues can disrupt the flow of your presentation and cause unnecessary frustration. To ensure your videos play smoothly and without interruptions, consider downloading them using HitPaw Univd.
Features:
- Convert videos to AVI, MOV, MP4, and other formats.
- Quick and easy download and conversion.
- Simple, intuitive design makes the interface easy to use.
- Preserving the video's original quality is known as quality preservation.
- Download several videos at once with batch downloading to save time and effort.
- Before conversion, edit videos by cropping, trimming, and adding effects.
- Download videos with subtitles or add your own with our subtitle support.
- Audio extraction allows you to save audio in MP3, WAV, and other audio formats by removing the audio from video files.
- Transcode videos into file types ideal for various gadgets, including game consoles, tablets, and smartphones.
How to download videos via HitPaw Univd?
Step 1: First, head to HitPaw Univd's official web page, download, and run it. Open the HitPaw Univd application on your computer. Make sure your internet connection is stable before downloading the video.
Step 2: In the HitPaw Univd, paste the video URL you wish to download. Choose the format and quality settings you prefer. Click "Download" to save the video to your device.

Step 3: After downloading, find the video in the HitPaw Univd interface. Select it and pick a format compatible with PowerPoint, such as MP4. Hit the "Convert" button to change the video format.

Step 4: Open your PowerPoint presentation and go to the slide where you want to add the video. Click the "Insert" tab, then "Video," and select "Video on My PC." Locate the converted video file, select it, and click "Insert" to add it to your slide.

Conclusion
In summary, dealing with video wont play in Powerpoint can be straightforward with the right approach. By understanding common problems and following the outlined troubleshooting steps, you can resolve most playback issues efficiently. Additionally, using HitPaw Univd to download and convert videos ensures compatibility and smooth playback. This powerful tool simplifies the process and enhances the quality and reliability of your presentations.
Whether you are preparing for a professional meeting, an academic presentation, or any other scenario requiring seamless video integration, HitPaw Univd proves to be an invaluable resource.


 HitPaw Edimakor
 HitPaw Watermark Remover
  HitPaw VikPea (Video Enhancer)


Share this article:
Select the product rating:
Daniel Walker
Editor-in-Chief
My passion lies in bridging the gap between cutting-edge technology and everyday creativity. With years of hands-on experience, I create content that not only informs but inspires our audience to embrace digital tools confidently.
View all ArticlesLeave a Comment
Create your review for HitPaw articles