2025 Latest Tips for Ecommerce Product Photography on Black Friday
In e-commerce, product photography plays a significant role in modifying shopper behavior. In the online market, no doubt the product needs to be of high quality, but what makes that product standout among the competitors and drive higher sales is product photography.
As the much-anticipated Black Friday is around the corner, it's critical to optimize your ecommerce photography to elevate your product presentation and maximize your chances of success. Well, in this we'll explore different types of product photography for ecommerce, essential photography techniques, and must-have tools and equipment to ace your product photography game.
Part 1: What Are the Types of Ecommerce Photography?
Ecommerce photography isn't just about clicking a picture of a product. Instead, it involves several distinct styles that can each have a unique impact on the customer's perception.
Let's explore some of the most common types:
1. Simple Product Image

Simple product images are the backbone of ecommerce photography, which are often the straightforward, clean shot of a product against a plain background. This type of image showcases the product's features and details from multiple angles and is typically used on the product page itself, where customers want an uncluttered, detailed view. To create a focus pint on the product and let the customer visualize the item, shoot it against white backgrounds.
2. Lifestyle Product Images

Lifestyle product images go beyond the basic product shot, showcasing the product in action or in a real-life setting. Generally, lifestyle product images depict the products in use, giving customers a hint as to how they will fit into their lives. For example, an outdoor camping tent might be photographed in a natural setting, surrounded by trees and grass. Lifestyle photos work well on social media, landing pages and ad banners.
3. Flat-Lay Product Images

Flat-lay images feature products arranged on a flat surface and photographed from above, giving viewers the bird's-eye view. This style is popular for small items, such as accessories, cosmetics, and fashion items.
Part 2: Techniques for Effective Product Photography for Ecommerce
High-quality product photos require more than just a good camera. To capture impactful ecommerce product photogrpahy, you need to have a keen eye for details and the mastery of various techniques.
Let's explore the essentials.
1. Lighting Techniques
No matter the type of photography, proper lighting plays a crucial role in capturing clear and attractive photos. Particularly in product photography, the proper use of lighting can dramatically enhance the product's visual appeal. Therefore, while doing the production photography, experiment with different lighting techniques.
Generallly, natural lighting works well for lifestyle and flat-lay images, especially when you are looking for soft, bright aesthetic vibes. However, artificial lighting provides better control and consistency, which is essential for simple product shots on a white background. Don't forget to use the Softbox lights or LED ring lights for diffusing light evenly and avoiding harsh shadows.
2. Background Choices
The background of your e-commerce product images can make or break the overall composition. Therefore, for a simple product shot, always go with a clean, plain background, such as seamless paper or a solid-colored backdrop.
This will not only minimize the distraction but also make sure the product remains the focal point. Lifestyle photos, however, benefit from natural, thematic backgrounds that complement the product's use. For instance, a kitchen appliance might be shown in a kitchen setting, creating a stronger association in the customer's mind.
3. Composition Tips
Composition is about arranging the elements within the frame to create balance and focus. In product photography, a common technique known as "rule of thirds" is used, which involves placing the product slightly off-center for a dynamic look. Close-up shots can showcase details, while wide shots provide context.
So don't be afraid to experiment with different camera angles, use the rule of thirds, and consider incorporating negative space to create a balanced and captivating composition. You can also use supportive elements such as props and accessories.
Part 3: Tools and Equipment for Professional Photography for Ecommerce
Professional-looking photos require not only the right techniques but also reliable equipment. Here's a look at some essential tools for ecommerce prodcut photography:
- Cameras
- Tripods
- Lighting Equipment
- Backdrop
- Table
- Editing Tools
A quality camera is one of the most important aspects, as it can impact your product image. While smartphones today have impressive capabilities, a DSLR or mirrorless camera offers greater control over exposure, focus, and lens selection. Therefore, while selecting the cameras, consider factors such as image resolution, manual control capabilities, and low-light performance, as this will drastically improve image quality.
The use of a tripod is a game-changer in ecommerce photography, as it ensures stable and consistent shots, especially when shooting at slower shutter speeds or for close-up shots. This will eventually help you with precise framing and composition and take multiple images of the same product.
Softbox lights, LED ring lights, and reflectors help achieve consistent lighting, especially in indoor settings or where there is limited natural light. Therefore, using these adjustable lighting setups, you can easily control the shadows and highlights on the product.
A clean backdrop, especially a white or light-colored one, will help you keep the focus on the product. So in order to create the visual appeal of your product image, select the background carefully and use complementary props alongside.
In product photography, a sturdy table or flat surface is essential for setting up small to medium-sized products. Having this will provide you a stable area to arrange products for simple or flat-lay shots.
Post-production editing is critical to fine-tune product images, and there are multiple editing tools available in the market. Adobe Lightroom and Photoshop are two of the popular choices to adjust lighting, remove imperfections, and ensure a consistent look across all images. However, mastering these tools will require a lot of time and effort. That's why some photographers use other tools for quicker edits.
Part 4: Best AI Photo Editing Tool for Product Photography in Ecommerce
Using Adobe Lightroom and Photoshop can be time-consuming and requires a lot of manual editing to achieve the desired result. However, with the advent of technology, there are multiple AI tools available on the market that streamline the editing process in no time.
One such tool is HitPaw FotorPea, offering a wide range of AI-powered features that cater specifically to the needs of e-commerce product photography. Using this, you can simply enhance the product image, remove or change the background, or even even generate an AI-created product image with a few clicks.
Some of the main features of HitPaw FotorPea include:
HitPaw FotorPea - All-in-one Photo Editing Tool for Win & Mac
Secure Verified. 212,820 people have downloaded it.
- AI photo enhancement to elevate product photo quality
- Automatica background removal to change product background
- AI image generation to generate AI product photos
- Batch Processing to save more time and energy
Secure Verified. 212,820 people have downloaded it.
How to enhance E-commerce images using HitPaw FotorPea?
Step 1: Download And Install HitPaw FotorPea
From the official website of Hitpaw FotorPea, download and Install the software on your Winow or Mac. The process is pretty straightofrward.
Step 2: Choose AI Enhancer
Once the installation is completed, launch HitPaw FotorPea and you will see a clean and user-friendly interface with multiple features.

Click on “AI Enhancer”. Then click on "Choose File" and upload the product photo you want to enhance. Alternatively you can also drag or drop photo or upload multiple photos.

Step 3: Select the preferred AI model
Now after uploading the photo, this is where the actual business happen. Carefully select the preferred AI model from the given options (such as Face Model, General Model, Denoise Model, Colorize Model, Color Calibration, Scratch Repair, Low-light Model).
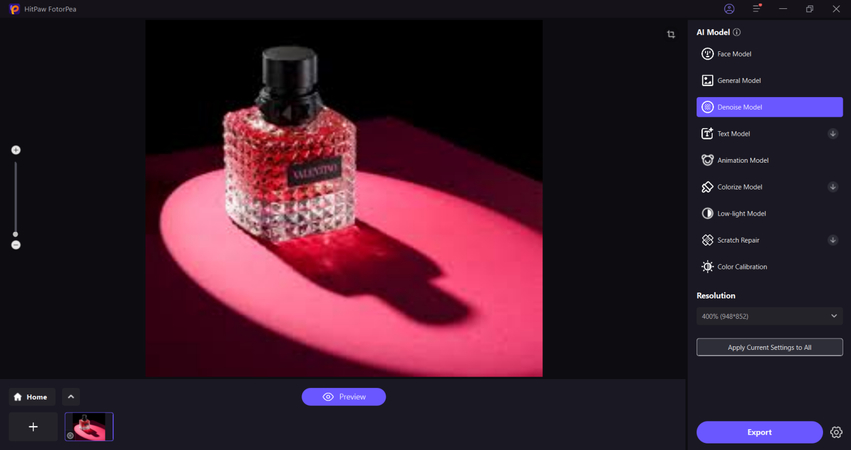
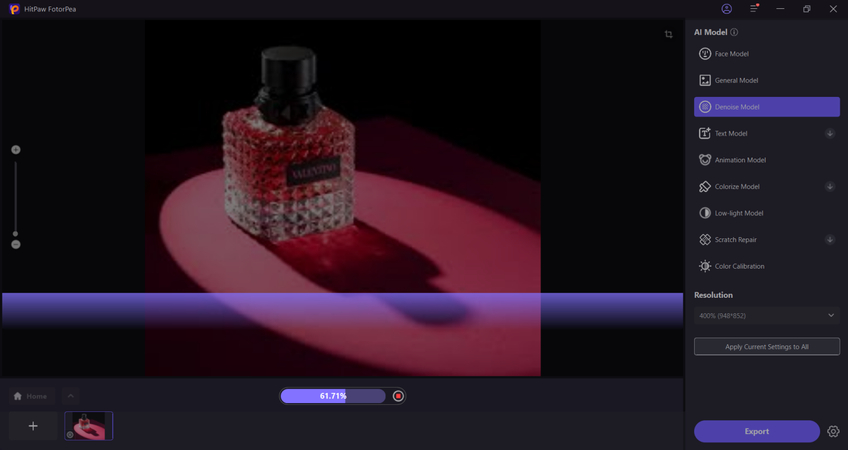
Step 4: Start Enhancing
Once you have selected the desired AI model, now click on Preview and let the ai do its work. The software will start enhancing the image automatically.
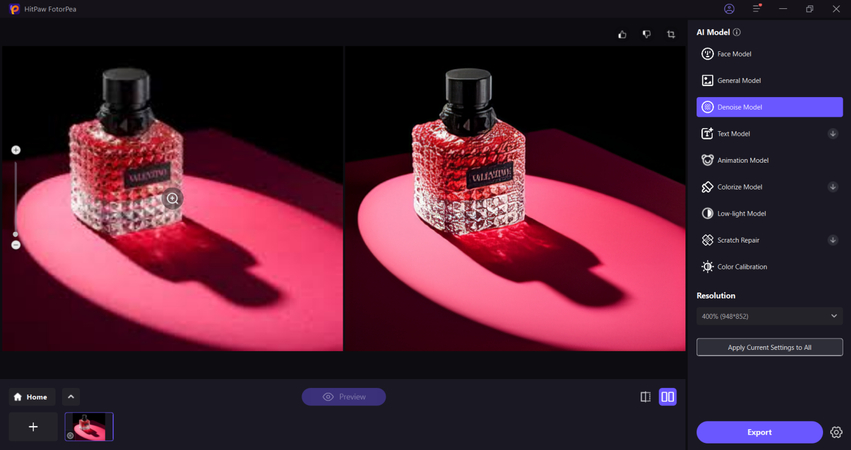
Step 5: See the Before an After image
Now preview the result and compare the before and after images. If the outcome is satisfactory, you can download the enhancned image by clicking on “Export”.
This is the ultimate guide of HitPaw FotorPea
Conclusion
Ecommerce photography is a critical part of a successful online business. By using a combination of product types, implementing effective photography techniques, and using the right tools, you can create a visually appealing and professional product catalog.
However, to really entice the customers and bring more sales, don't forget the post-production editing to fine-tune the product image. To do this with ease, you can leverage AI tools like HitPaw FotorPea to further enhance the image and elevate the product visuals. This will not only make your catalog look professional but also captive the audience and make your e-Commerce store a success this Black Friday and beyond.




 HitPaw Univd (Video Converter)
 HitPaw VoicePea
  HitPaw VikPea (Video Enhancer)
Share this article:
Select the product rating:
Daniel Walker
Editor-in-Chief
This post was written by Editor Daniel Walker whose passion lies in bridging the gap between cutting-edge technology and everyday creativity. The content he created inspires the audience to embrace digital tools confidently.
View all ArticlesLeave a Comment
Create your review for HitPaw articles