[Step-by-Step] How to Use Smooth Tool in Illustrator with Two Tips
When opting for the pen tool or pencil tool to draw, the smooth tool in Illustrator could be a game for you. Apart from allowing you to draw the perfect lines, the best thing about Illustrator is that it is pretty easy to manage. Hence, this post will help you learn about the smooth tool illustrator to draw smooth lines.
Part 1. Editing Preparation: How to Find the Smooth tool on Illustrator
Here's the detailed guide below to learn how to find the smooth tool on illustrator.
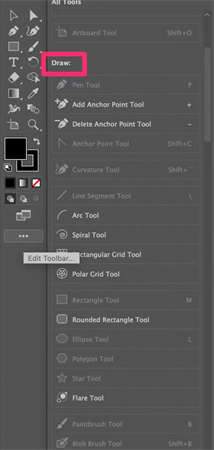
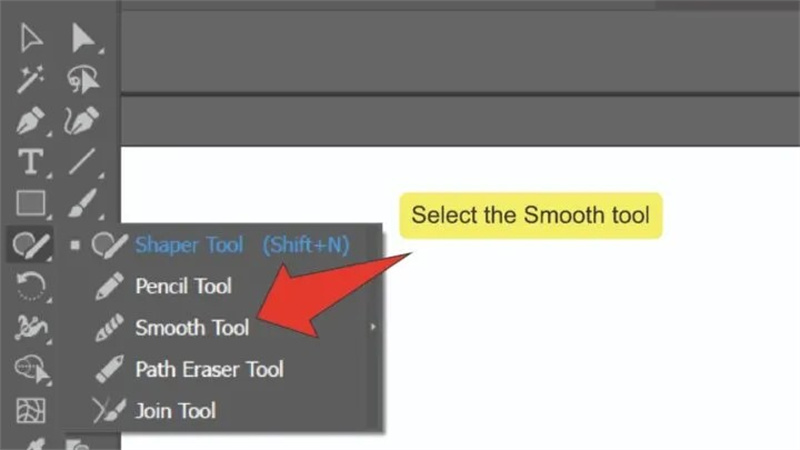
1.Launch the Adobe Illustrator and press the Edit Toolbar button afterward. Navigate under the Draw button and search for the Smooth Tool button.

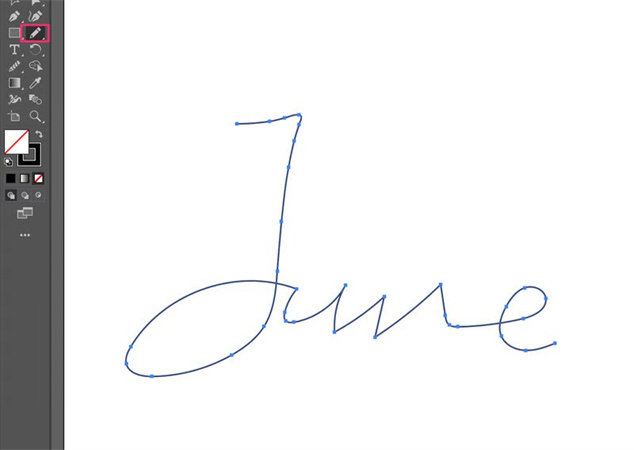
2.Select the Pencil tool or Pencil to create the preferred thing there. For instance, we're trying to create a signature with the rough Edges.

3.Navigate to the Smooth Tool, and you'll need to know that seeing the anchor points on the lines to use the Smooth Tool is quite simple. Next, you'll need to zoom in on the part of the signature you're going to work on.

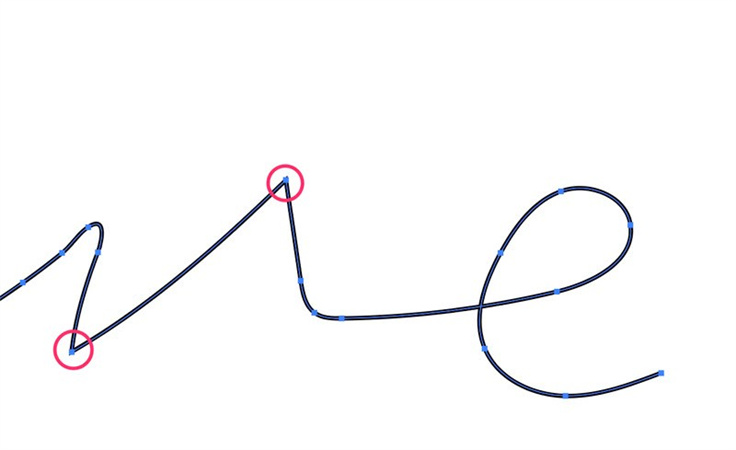
4.Draw over your signature's rough edges you'd like to smoothen by clicking and drawing the signature. You must hold the mouse when drawing the signature. Try doing it again and again until you get the desired results.

Part 2. Two Tips on Using Smooth Tool in Illustrator
Using the Illustrator Smooth tool doesn't require you to put in extra effort to get things. Instead, all you need to do here is to act upon the few simple steps to do the job for you.
Tips 1. How to round corners in Illustrator
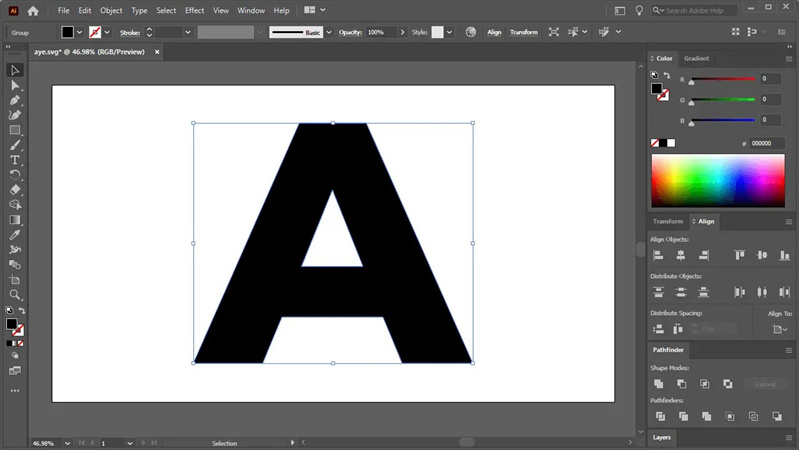
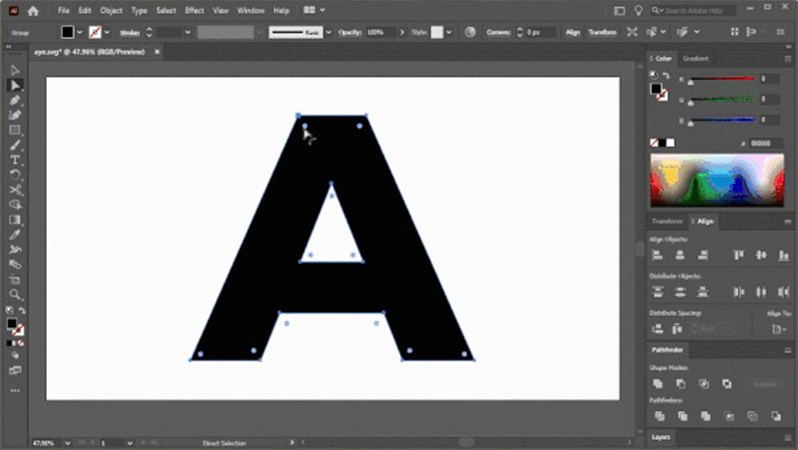
Opting for the Illustrator round corners is more straightforward than you think. The best part of Adobe Illustrator is that it doesn't mess up with the quality of things you've drawn on Illustrator while rounding all the corners. Let us use the A letter to round all the corners.
1.After selecting the object, navigate to the ''Direct Selection Tool''. Next, look for the circular handles on your design's inside. The circular handles must be near your corners, representing a little white dot having a little blue circle inside them.

2.You can call the Live Corner Widget, which lets you change the object's corners in real time. Press and drag the Live Corner Widgets to round the corners. That's all you've had to learn how to round corners in Illustrator.

Tips 2. How to Use Illustrator Smooth Path
Besides using the illustrator round corners, Adobe Illustrator also enables you to use the Illustrator smooth path. Illustrator smoothing path enables you to make the design object look relevant and flawless, and you won't have any issues with the thing going forward.
Smoothening the paths means you're smoothing the curves and edges of the path of the art you've designed or created.
Here's how to use the Illustrator smooth path.
1.Start the Adobe Illustrator, navigate to the Edit icon, and select the Selection tool. Next, use the Selection tool to select the Path.

2.Draw over the path various times on your art to smooth the curves and Edges. Double press the Smooth button to launch the Smooth Tools options. Next, modify the anchor's number of points added to the path by using the Fidelity of the tool. That's what you've had to do to smooth the path of the art you've selected on Adobe Illustrator.

Part 2. The Best PC Tool to Enhance Images with HitPaw FotorPea
You can make the edges of the art photo smoother by using the smooth tool Illustrator, but it could also mess up the resolution of the images. In that scenario, looking at the HitPaw FotorPea makes complete sense.
With the stunning 6 AI models and intuitive user interface, HitPaw FotorPea only asks you to import the photo and upscale it. Whether you're struggling with old images, blurred photos, underexposed images, or your images are poorly shaped, HitPaw FotorPea has answered everything.
Features of HitPaw FotorPea to Enhance Image
- Allows you to enhance image quality
- Enables you to eliminate the blur and noise from pictures
- It doesn't affect the quality of the images
- Colorize the black and white images.
- Resize the images in no time.
- Blesses you with the 6 outstanding AI models
- Supports Mac and Windows
Detailed Guide to Enhance Image Easily
Here's the step by step guide to learn how to enhance image quality through HitPaw FotorPea.
Step 1:Install the HitPaw FotorPea and start it afterwards. Next, you'll need to start the program to begin the proceedings. Press the Choose Files button to upload the photo you want to upscale.

Step 2:With the HitPaw FotorPea, you've got the chance to 6 AI models, including the color calibration, colorize model, face model, Denoise model, General model, etc. The general model is a brilliant way to enhance the real snaps, including the flowers, animals, buildings, etc.
You can fix the low light or high ISO images through the Denoise Model. Removing the images through Face Model is quite possible, and you can colorize the black and white photos using the Colorize Model.
Opting for Color Calibration makes it possible to fix the underexposed images. HitPaw FotorPea also empowers you to increase the resolution of the photos by navigating to the Resolution settings.
Step 3:Press the Preview button to review the images and then click the Export icon to download the images into the selected location on your PC.

Video Guide for You to Increase Resolution
Part 3. FAQs of Smooth Tool in Illustrator
Q1. What is the shortcut for smooth tool in Illustrator?
A1.
If you want to save time while using the smooth tool in Illustrator, you can go for its shortcut.
To do it, you'll need to press and hold the ALT, which will take you to the smooth tool illustrator. Next, you can click and drag the lines on your art's rough edges to make them smoother and flawless.
Q2. How do I turn on smoothing in Illustrator?
A2.
Illustrator smooth tool is enabled by default, but if you've found that this tool is disabled, you can find it effortlessly. To do it, you'll need to Edit Toolbar button on the tool panel's bottom side and select the Smooth tool under the Draw button.
Now, you'll be able to find the smooth tool, and smoothening the edges of the art becomes possible.
Takeaways
If the art you create on Adobe Illustrator has some shortcomings, it doesn't serve your purpose, which you're expecting from it. By revealing the credentials of the smooth tool Illustrator, we've helped you eliminate all the flaws in the designed art.
We've listed the ways to do round corners in Illustrator and smooth the paths of the designed art. If the art images you've edited lose the resolution while editing them, you can upscale their quality through HitPaw FotorPea. It is an outstanding photo quality enhancer that makes it fairly simple to remove the blur and noise from the images automatically.





 HitPaw VikPea (Video Enhancer)
 HitPaw Watermark Remover

Share this article:
Select the product rating:
Daniel Walker
Editor-in-Chief
This post was written by Editor Daniel Walker whose passion lies in bridging the gap between cutting-edge technology and everyday creativity. The content he created inspires audience to embrace digital tools confidently.
View all ArticlesLeave a Comment
Create your review for HitPaw articles