Newly 10 Sample Passport Photos to Guide Your Photoshoot Ideas
When applying for a passport, one must submit a photo passport sample. Having the correct sample passport photo is critical since an improper or low-quality photograph might cause your application to be delayed or even rejected. This detailed tutorial helps you learn the significance of passport photo sample and the main things to consider.
We'll review the usual passport photo standards and criteria, such as facial and posture measurements, hair and accessories, dress code, and shadows. Let us assist you with the best practices for shooting a sample photo passport, including a step-by-step tutorial that fulfils all the requirements.
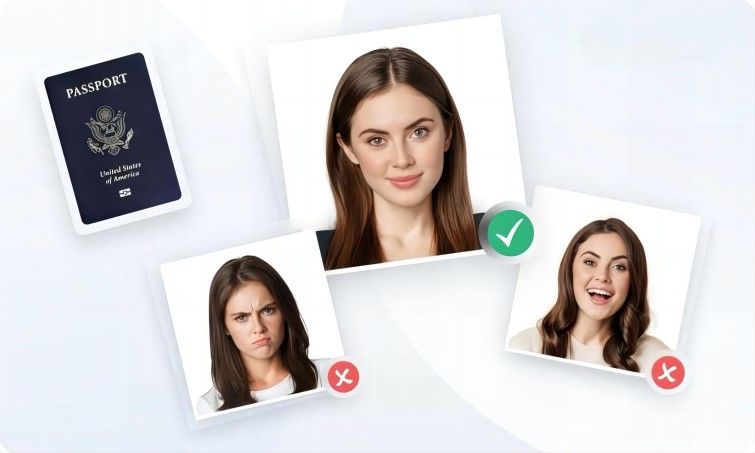
Part 1: Standard Requirements of Photo Passport Sample
If the passport photo sample requirements are met, your application will be processed quickly. The most important things to consider are as follows.
1. Measurements (US)
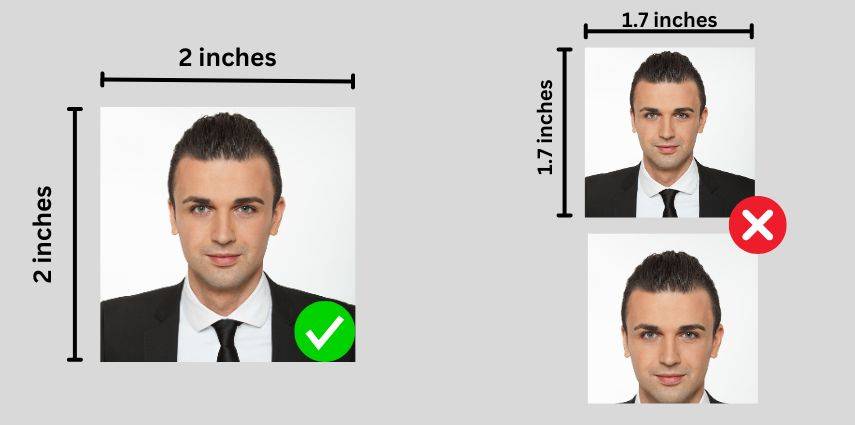
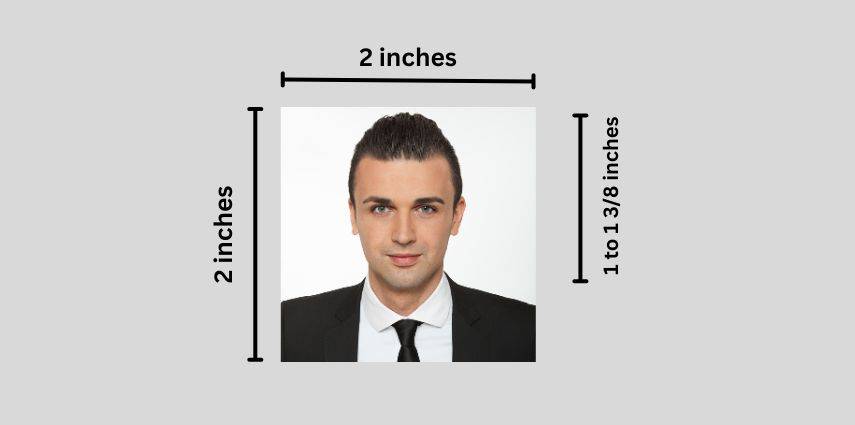
Photo Passport Sample must be not smaller than 2 x 2 inches (51 × 51 mm) and have no variations and additional spaces. Remember that the photo should measure from the top of your head to the bottom of your chin, with a vertical distance of 1 to 1 3/8 inches (25 to 35 mm).
2. Face & Posture
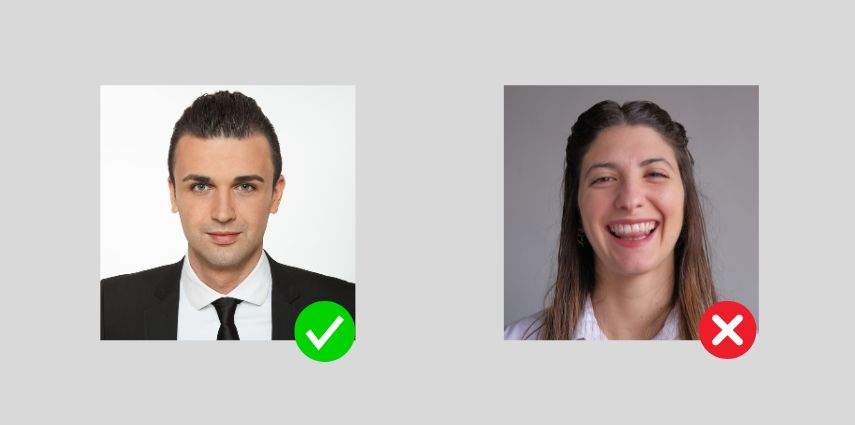
A neutral facial expression is required; you should keep both eyes open, as seen in the passport photo sample image. Keep a straight head and look straight into the camera undeterred; moving or wavering is not the desired state. The picture must be from the front, and you should be smiling.
3. Dress Code
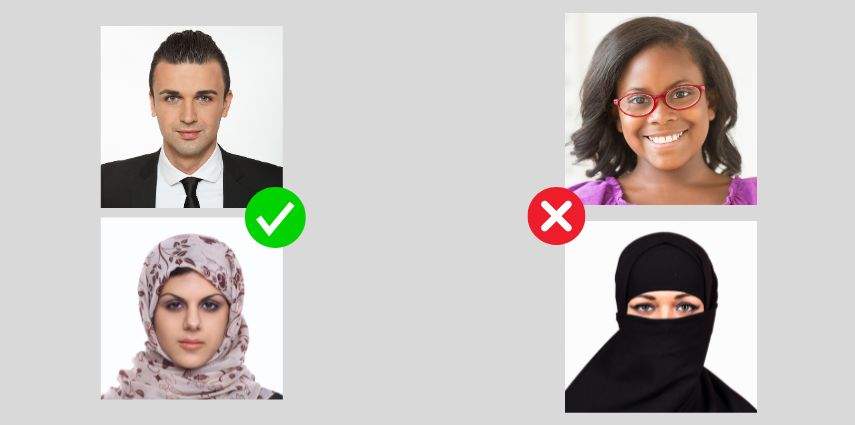
Wear casual clothes in neutral tones or simple patterns for passport pictures, and avoid any bold and bright colours. To conclude, substituting uniforms, camouflage prints, and logos for a professional appearance, it is advisable to steer clear of t-shirts, hats, and other apparel items likely to spoil the image in a passport. Also, don't wear hijab, headbands, or eyeglasses.
4. Hair and Accessories
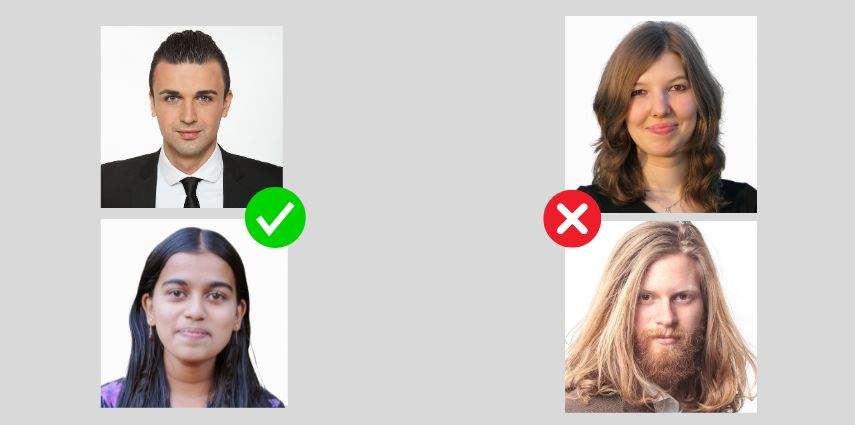
Make sure your hair is pulled away from your face and perfectly groomed, as shown in a passport photos sample. Your facial hair or any accessory should not cover your natural features or create shadows in the photo.
5. Shadows
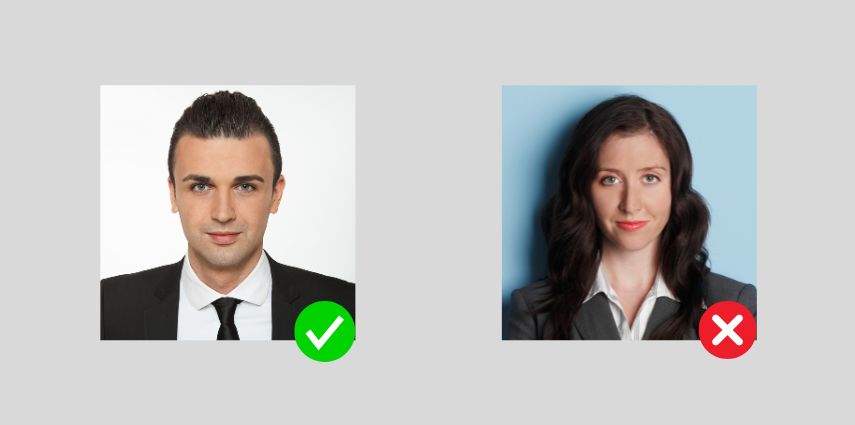
The right lighting is, of course, necessary. Otherwise, the subject could be back-lit, or their face might be in shadow while taking a photo. The photo of the required passport samples shall be taken under the same lighting conditions, which are not shadowy.
Part 2: 5 Tips for Photo Passport Samples
You might think that taking a suitable passport photo is plain and nothing or no one will notice it, but you will only be accepted if you follow all the requirements strictly. Follow the next five instructions to ensure your passport photo samples meet the requirements and are accepted without causing inconvenience.
1. Solid & Neutral Color Background
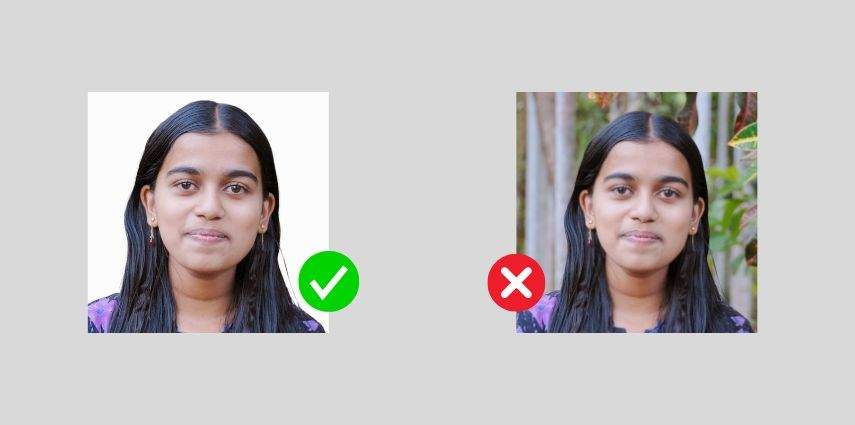
We must remember when trying to obtain any passport photos that to have these, we need to use a suitable, non-colored background. Avoid normally seen patterns, textures or overlaps that can draw unwanted attention or obscure your features. The background should be plain, white or off-white for sound passport size photo sample.
2. Common ID Photo Size
Most nations have size specifications for passport size photo sample. The typical passport photo size in the United States is 2 inches by 2 inches (51 mm x 51 mm), with the distance between the bottom of your chin and the top measuring 1 to 1 3/8 inches (25 and 35 mm). Make sure the dimensions of your passport-size photo sample match the standards for your particular nation or area.
3. Even Light for Both Sides of the Face
Correct lighting is the best way to get a good-quality illustration during a passport photo shoot. Make sure that both sides of your face are evenly lighted, and while doing that, look out for the absence of harsh shadows and unsightly spots. The perfect lighting can be achieved using two light sources (one in front of the other) placed at 45-degree angles on both sides; you can also use a ring light or softbox. Proper lighting will enable your face to be clear through a passport sample.
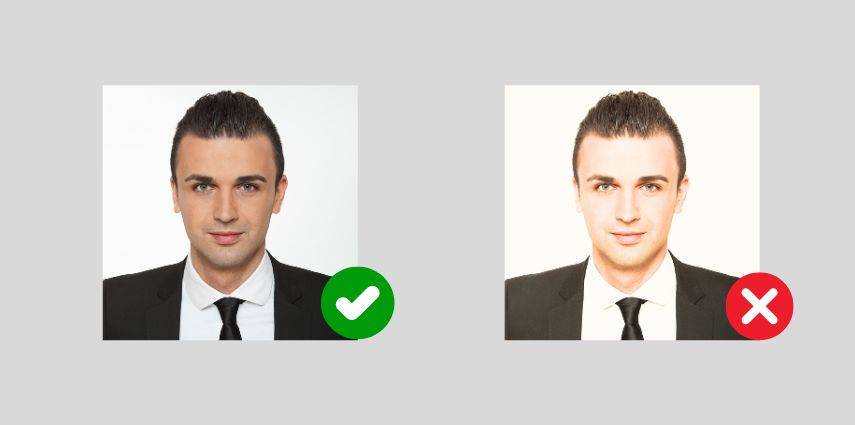
4. Visible Full Face
The sample passport photo should include your full face, i.e. the complete face from the top of the head to the chin. Do not lower or rotate your head to one side, and avoid that not all face areas are obscured by tilting your head or turning it to the side. Ensure your eyes are open and your glance is directed at the camera with a medium distance between both and no obstacles for clear visibility.
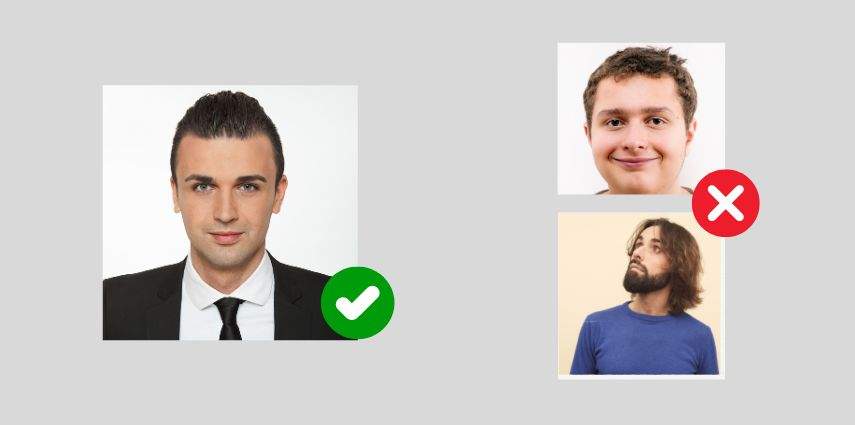
5. Natural Facial Expression
In this case, the faculties held to be natural and neutral should be used when creating a passport photo. Refrain from happy smiles, frowning lines, or exaggerated expressions, which can make your facial features look unusually distorted. The smooth, neutral expression is not wide open and about the mouth. It will be more suitable, for example, for passport-size photos.
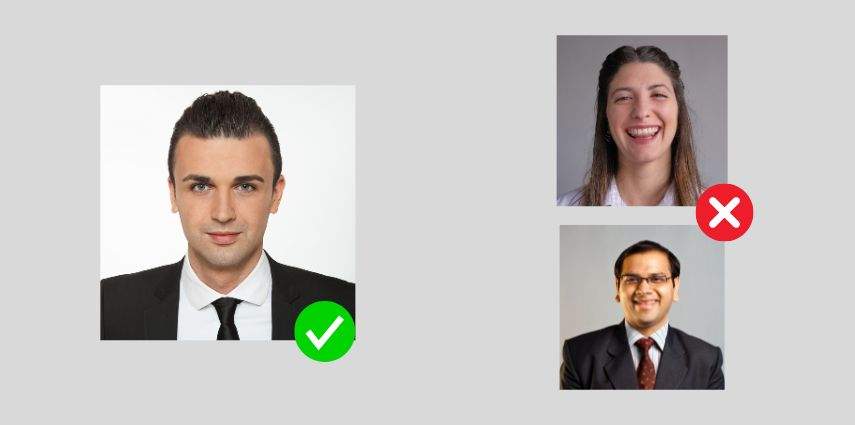
With these five tips, you can increase the chance of your passport photo being accepted without issues. Remember, a properly taken passport photo is essential for a smooth and efficient application process.
Part 3: Step-by-Step Guide to Taking a Perfect Photo Passport Sample
Ensuring your sample of passport photo meets all the requirements can be daunting, but HitPaw FotorPea is here to make the process a breeze. This powerful photo editor is designed to help you create the perfect sample photo for passport applications, with a range of features tailored to the strict guidelines.
HitPaw FotorPea has the ability to enhance your photos, ensuring they are clear, well-lit, and free from blemishes or distractions. With its advanced facial enhancement tools, you can easily improve lighting, remove imperfections, and highlight your best features, resulting in a polished and professional sample photo for passport applications. HitPaw FotorPea also offers a range of background editing options, allowing you to easily change the background colour of your photo to achieve the solid, neutral-coloured background required by most passport agencies.
Key Features of HitPaw FotorPea
Here are some of the key features of HitPaw FotorPea that make it the ultimate tool for creating ID photos, including passport photos:
- Photo Enhancement: Adjust lighting, contrast, and colour for optimal clarity
- Background Removal and Replacement: Change the background colour to a solid, neutral tone
- Crop and Resize: Ensure your photo meets the precise size requirements for ID photos
- Facial Editing: Smooth skin, remove blemishes, and enhance facial features
Steps to Create Perfect Passport Photo
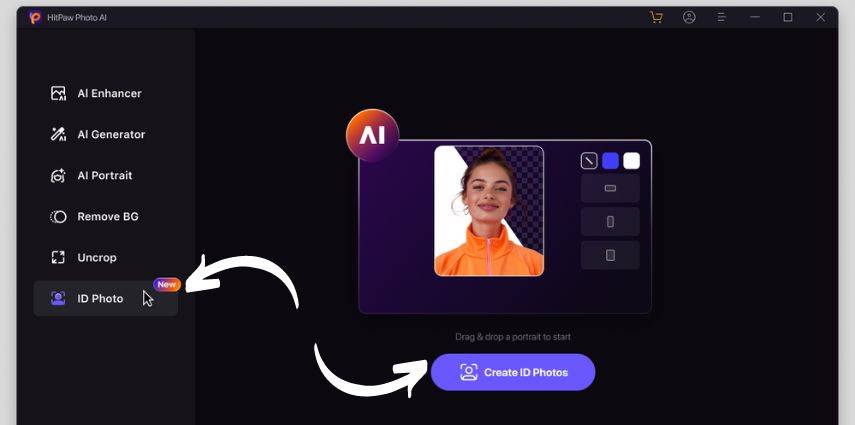
Step 1:Download the software and install. Then open 'ID photo' tab and click on 'Create ID photos' button.

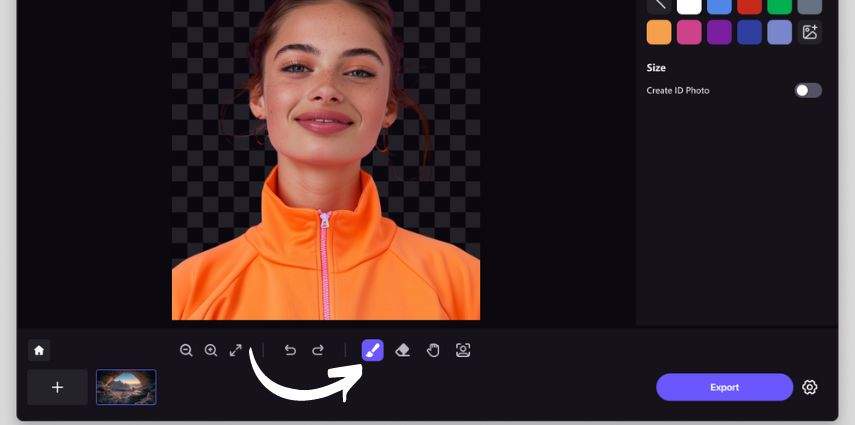
Step 2:You can remove the background with magic tool and refine the edges with eraser.

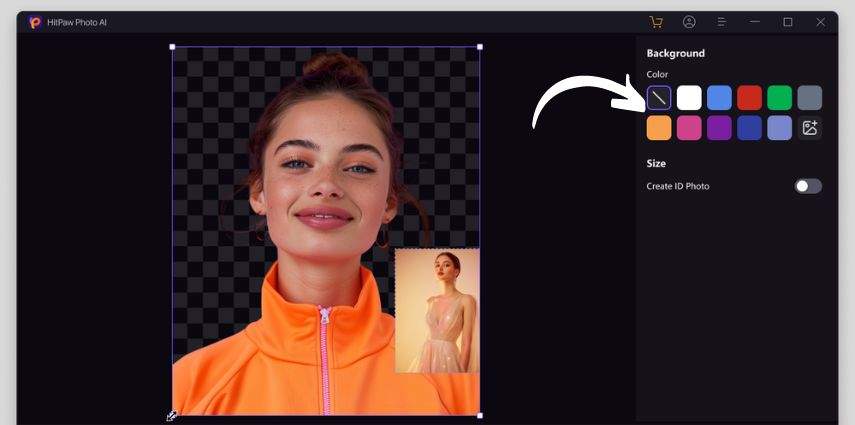
Step 3:Choose from provided background colors.

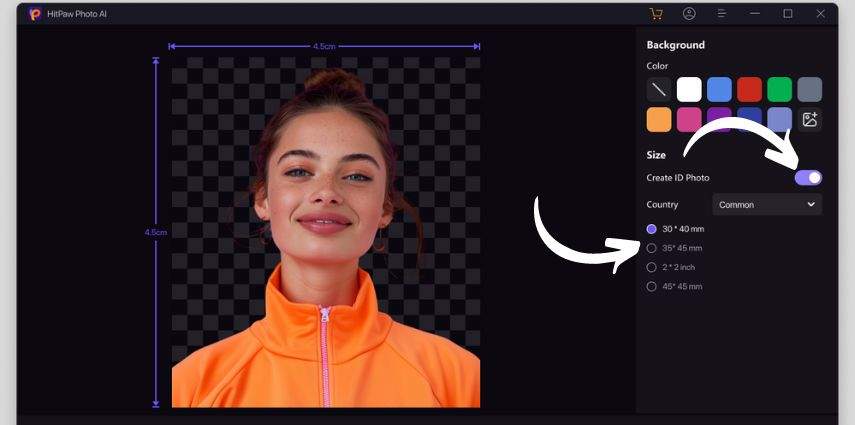
Step 4:Enable the create ID photo option and choose the country for available official photo size options.

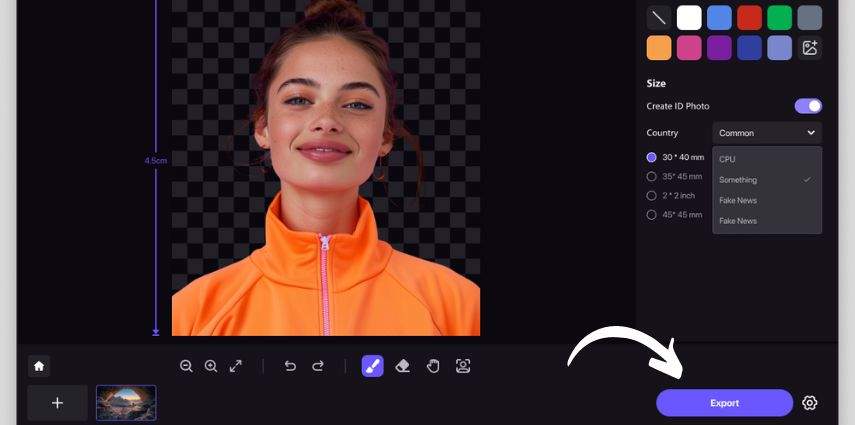
Step 5:Export the final photo when done.

Video Guide for You to Make Photo Perfect
Conclusion
The photo passport sample is necessary to make the process effortless and clear. In this article we will consider the passport photo standards covering dress code, proportions, lighting, posture, and facial expressions.
Following the guidelines with every detail of the neutral expression, excluding the items that cover your face, and ensuring that the lighting is the same and without any shadows will help you get your passport photo accepted for the first time during this process. Moreover, using a hassle-free tool as HitPaw FotorPea to ensure your photo is correctly done.



 HitPaw Univd (Video Converter)
  HitPaw Watermark Remover
  HitPaw VikPea (Video Enhancer)

Share this article:
Select the product rating:
Daniel Walker
Editor-in-Chief
My passion lies in bridging the gap between cutting-edge technology and everyday creativity. With years of hands-on experience, I create content that not only informs but inspires our audience to embrace digital tools confidently.
View all ArticlesLeave a Comment
Create your review for HitPaw articles