[Detailed] How to Save A Illustrator File As A JPEG?
Are you struggling to save your Adobe Illustrator file as a JPEG? Look no further! This detailed guide will walk you through the most effective methods to accomplish this task seamlessly. Whether you're a beginner or an experienced designer, you'll find the steps easy to follow and implement. Let's dive in and unlock the secrets to saving your Illustrator creations as JPEG files.
Part 1. What Is An Illustrator File?
An Illustrator file, often denoted by its file extension ".ai," is a proprietary vector graphics format created using Adobe Illustrator software. It is commonly used for creating illustrations, logos, diagrams, and other graphical elements. Illustrator files consist of mathematical equations that define lines, shapes, colors, and text, rather than pixels like raster images. This allows for scalability without loss of quality, making Illustrator files ideal for both print and digital media.
Key features of Illustrator files include:
- Precise Control over Shapes and Paths: Illustrator allows users to create and manipulate shapes and paths with precision, enabling detailed and intricate designs.
- Support for Gradients and Transparency Effects: Users can apply gradients and transparency effects to objects within Illustrator files, adding depth and dimension to their designs.
- Editable Text as Independent Objects: Text elements in Illustrator files are treated as independent objects, allowing users to easily modify text properties such as font, size, color, and style even after they have been created. This provides flexibility and ease of editing when working with textual elements in illustrations and designs.
Part 2. How to Save A Illustrator File As A JPEG Quickly?
Saving an Illustrator file as a JPEG is a simple process that allows you to convert your vector artwork into a raster image format suitable for web or digital use. Follow these steps in Adobe Illustrator:
- Open Your Illustrator File: Launch Adobe Illustrator and open the file you wish to save as a JPEG.
- Go to File > Export > Export As: Navigate to the "File" menu, then select "Export" and choose "Export As."
- Choose JPEG as the File Format: In the export options dialog box, select "JPEG" from the dropdown menu under "Format."
- Adjust Settings: Set the desired quality level and resolution for your JPEG image.
- Select Export: Click "Export" to save your Illustrator file as a JPEG. Choose a destination folder and name for your file, then click "Save."
By following these steps, you can quickly save your Illustrator file as a JPEG for digital use or sharing on the web.
Part 3. Why We Need to Save Illustrator File As JPEG?
Saving an Illustrator file as a JPEG offers several advantages for various purposes:
- Compatibility: JPEG is a widely supported image format compatible with most devices, operating systems, and software. Converting Illustrator files to JPEG ensures that your artwork can be easily viewed and shared across different platforms without compatibility issues.
- Smaller File Size: JPEG files are compressed, resulting in smaller file sizes compared to Illustrator files. This makes them ideal for web use, email attachments, and sharing on digital platforms where smaller file sizes are preferred for faster loading times and reduced storage space.
- Image Compression: JPEG compression allows for significant reduction in file size while maintaining acceptable image quality. This compression is beneficial for online distribution and transmission, as it helps optimize bandwidth usage and download speeds.
- Social Media: Many social media platforms and online services require images to be in JPEG format for uploading and sharing. Converting Illustrator files to JPEG ensures that your artwork
Part 4. Pro-Tips. Convert Video/Audio with HitPaw Univd (HitPaw Video Converter)
While looking for an ideal audio and video converter, several factors matter such as functionality, security, and stability. HitPaw Univd is the best choice for users looking for a convenient audio and video conversion experience.
HitPaw Univd has an intuitive interface and robust features that provide efficient results and its simple design makes it easy to use not just for professionals, but also for beginners.
Why Choose HitPaw Univd
- Compatible with different types of files by providing a wide range of audio formats.
- The conversions are fast and efficient all while maintaining the quality.
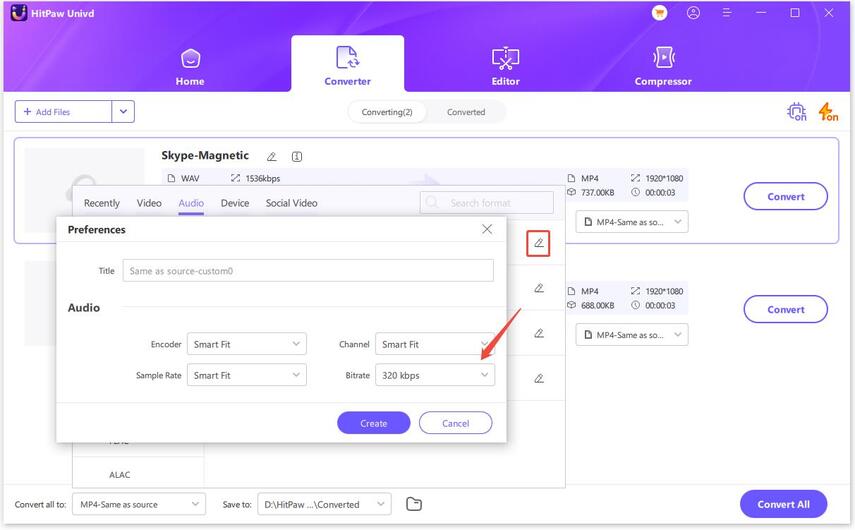
- Allow users to adjust various settings such as bitrate, sample rate, and audio codec according to their liking.
- Allow users to convert more than one Audio or Video file simultaneously, saving the users their time and effort.
- Allow users of all skill levels to easily access it with the help of its intuitive design and straightforward controls.
Steps to Convert Video files
Step 1. Open the HitPaw Univd. Add video files you want to convert by clicking on the "Add Files" button.

Step 2. Select the output format you desire from the dropdown menu.
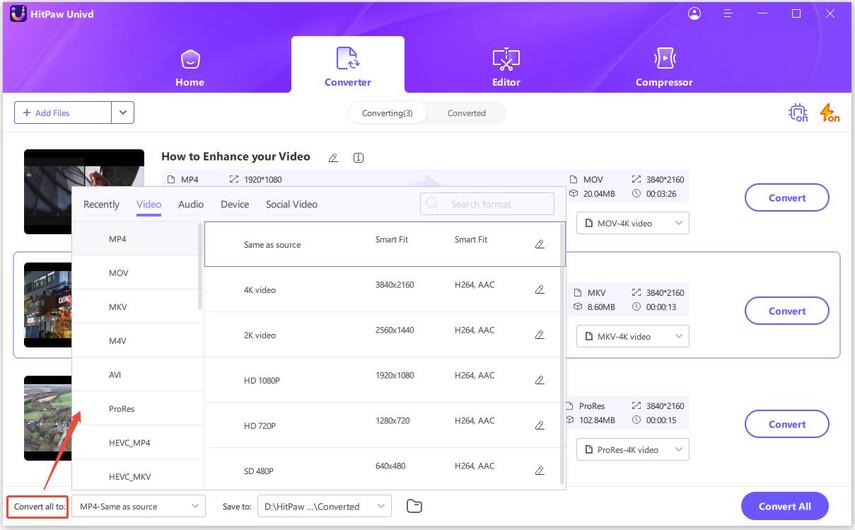
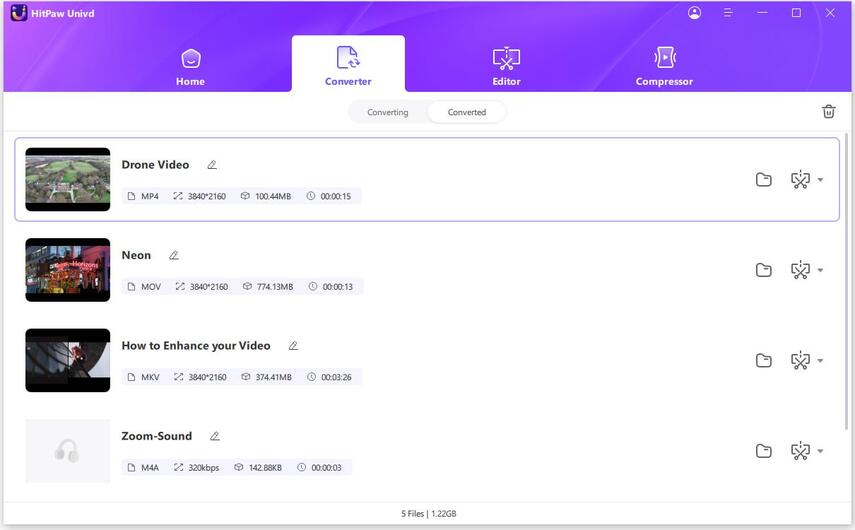
Step 3. Adjust settings to how you like them. Click on the "Convert" button and let the conversion process begin. Look for the converted file in the designated folder once the conversion is done.
Steps to Convert Audio
Step 1. Open the HitPaw Univd. Add video files you want to convert by clicking on the "Add Files" button.
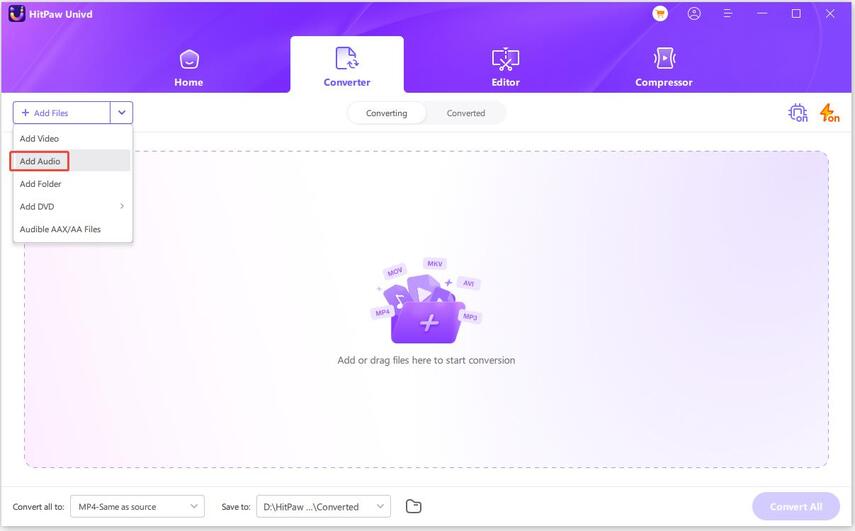
Step 2. Select the output format you desire from the dropdown menu.
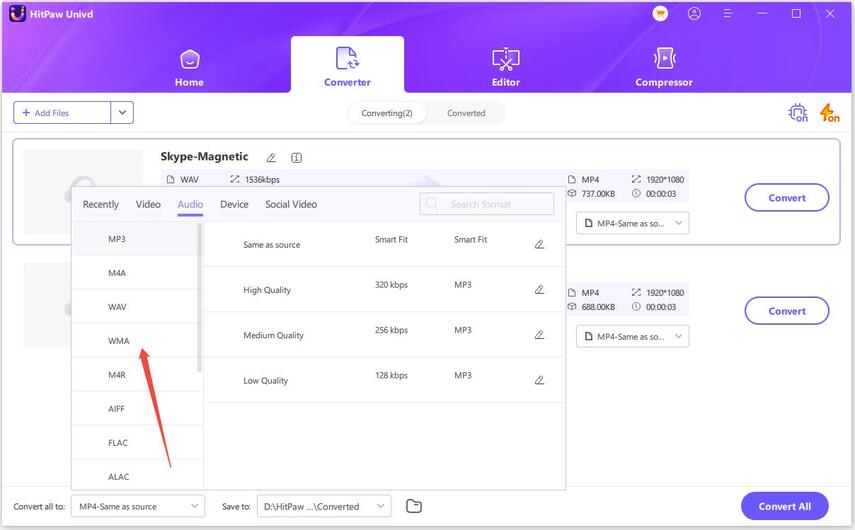
Step 3. Adjust settings to how you like them.
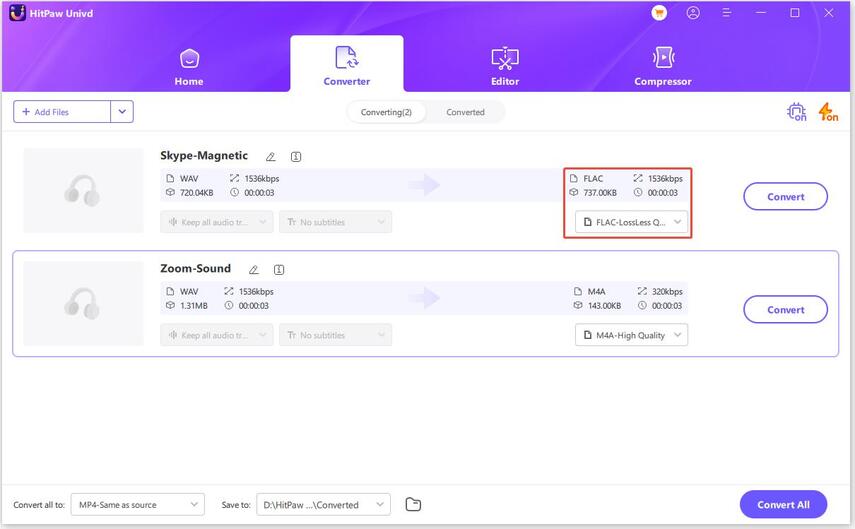
Step 4. Click on the "Convert" button and let the conversion process begin. Look for the converted file in the designated folder once the conversion is done.
Steps to Convert Video to Audio
Step 1. Open the HitPaw Univd. Import the Video files you want to convert by clicking on the "Add Files" button.

Step 2. Select the output format as MP3 from the dropdown menu.

Step 3. Adjust settings like bitrate, sample rate, and audio codec to how you like them. Click on the "Convert" button and let the conversion process begin. Look for the converted file in the designated folder once the conversion is done.

Part 5. FAQs of How to Save Illustrator File As JPEG
Q1. Can I save an Illustrator file as a JPEG without a white background?
A1. Yes, you can remove the white background in Illustrator before saving the file as a JPEG by setting a transparent background or using the "Save for Web" feature.
Q2. Can I save an SVG as a JPEG in Illustrator?
A2. No, Illustrator does not natively support saving SVG files as JPEG. You need to first export or save the SVG file as another compatible format, such as PNG or TIFF, and then convert it to JPEG using a different software or online converter tool.
Conclusion
Converting Illustrator files to JPEG is essential for compatibility and sharing purposes. HitPaw Univd offers a convenient solution for converting Illustrator files to JPEG format with ease. With its user-friendly interface and efficient conversion process, HitPaw Univd ensures that your artwork is ready for sharing across various platforms and devices without any hassle.


 HitPaw Photo Object Remover
 HitPaw Video Object Remover
 HitPaw VikPea (Video Enhancer)
Share this article:
Select the product rating:
Daniel Walker
Editor-in-Chief
My passion lies in bridging the gap between cutting-edge technology and everyday creativity. With years of hands-on experience, I create content that not only informs but inspires our audience to embrace digital tools confidently.
View all ArticlesLeave a Comment
Create your review for HitPaw articles