[Step-to-Step Guide] How to Restore a Single Photo from Time Machine
Losing precious photos feel like a sharp pain cutting through the heart. However, there is no need to worry more as the Mac time machine relieves your tension. You can restore your deleted photos and save them again.
This time machine extends its help in situations when you lost a single photo or even worse the whole photo library. This article will explain in detail how to restore a single photo from time machine so let’s get started.
1. [3 Minutes to Learn] How to Restore a Single Photo from Time Machine
Mac’s photos app stores all the photos and takes up a lot of storage space. It’s not the app but the database also which consumes the space to store images. To free up space you need to delete an image from the photos app. However, if you just deleted it and want it back then this section will help you in this regard.
Here is how to restore photos from time machine.
If the needed photo is not in the Photos APP
If the photo is not in the Photos app, here is how to restore it.
- Connect the disk of the time machine backup to your Mac
- Now open Finder and look for where the deleted image was stored
- Next open Time Machine and choose the photo to restore. After that, you will see it in its original place

If the needed photo is in the Photos APP
Now if the deleted photo is present in the photos app then restoring it requires different steps to be followed. Firstly, you need to restore the whole library to a different location then later you can import those only you want to be back in the working photo library. Here is how to restore photo library from time machine.
- Close the photos app in case you opened it.
- Go to Pictures folder > Photos library file.
- Connect the time machine disk to your mac > launch time machine clicking its icon.
You can use the up and down arrow or the timeline on the right to locate the date with desired photos.

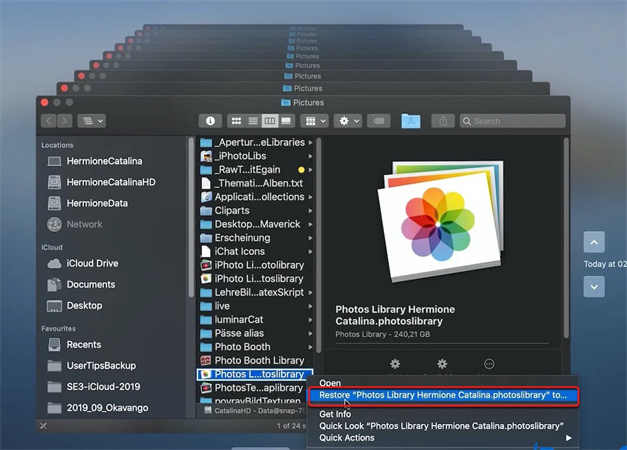
- Hold down Control and press the photos library.
Now click restore “Photos Library.photoslibrary” to store it on an external drive or any folder with enough storage space and click restore.

- Navigate to restore photos library and open it with the photos app.
- Choose the photo > press file > and click on the Export option at the upper left corner.
- Restore the needed photo to your current library. You can delete the photos library if you want to save the space.
2. How to Restore the Old Photo and Make Them Colorful and Vivid
Photos have an important existence in our lives since they carry the most precious memories. We can relive the past just by looking at those moments. However, having dim and boring photos don’t guarantee the pleasant feeling as a good quality photo can.
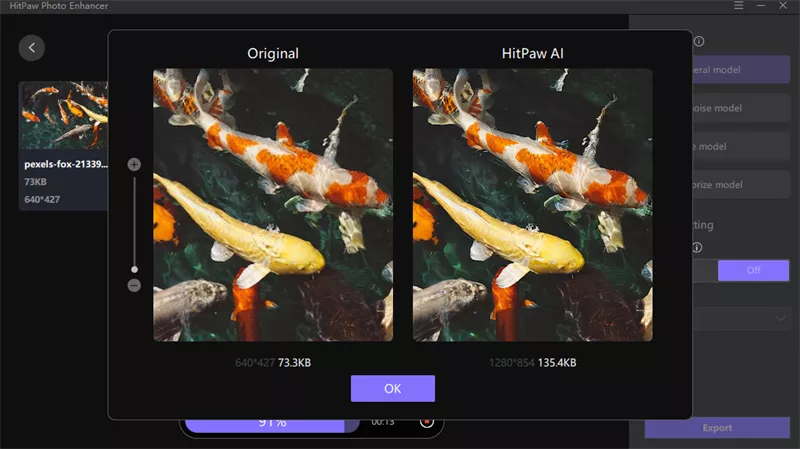
You probably should look for a genuine solution to bring your photos back to life. HitPaw FotorPea is a professional photo enhancer that uplifts your old photos in every way possible. Using deep learning technology this AI-based photo enhancer analyzes the details of your photos and refines the areas which need enhancement. You don’t need to make any manual edits since the process is automatic.

Apart from that it respects your time and processes your image in a matter of seconds. Doesn’t it feel so good to have good-looking photos with no hassle using an automatic photo enhancer?
- AI one-click enhance
- 4 AI models
- Support batch enhancing
- Fast processing
Here is how to restore the old photo using HitPaw FotorPea in just one click.
-
Step 1.Download & install this software by clicking the button below.
-
Step 2.Import your photos by clicking “Choose files”. You can also use drag and drop method to import the desired photos to the main interface.

-
Step 3.Next you will see 4 AI models including the general model, the denoise model, the face model, and colorize model. Select the one you consider best fits your imported picture.

-
Step 4.Process your image and before downloading it you can see the final look by pressing “Preview the effect”.
-
Step 5.Save your photo by clicking “Export”.
3. FAQ of Mac Time Machine
We hope now restoring a photo from the Mac Time machine is clear to you. However, if you still have some queries then read the next section to have answers to the basic questions you wonder.
Q1. How long does the Mac Time Machine keep the photos?
A1. Snapshots are created hourly on Time Machine and stored on the same disk as the original files. These snapshots are saved for 24 hours or until the space is full for new snapshots. Moreover, local snapshots are stored using the Apple File System (APFS). So, if you delete or change any file accidentally then you can use the Time machine to recover it.
Q2. Can I delete photos after Time Machine backup?
A2. Yes, you can delete photos from the time machine backup. If you delete any file from your mac, it ultimately affects the Time Machine snapshots. So, it’s important to have a backup whether to cloud backed provider or to local storage. So, if you delete a file you can restore it later.
Conclusion
Losing precious photos is such stress. To make yourself safe from such kind of situation it’s better to have a backup of your photos/library then it becomes easier how to restore a single photo from time machine. In case you want to uplift your old photos, don’t forget to take help from HitPaw FotorPea. It’s the best photo enhancement tool in town.


 HitPaw Univd (Video Converter)
  HitPaw VikPea (Video Enhancer)


Share this article:
Select the product rating:
Daniel Walker
Editor-in-Chief
My passion lies in bridging the gap between cutting-edge technology and everyday creativity. With years of hands-on experience, I create content that not only informs but inspires our audience to embrace digital tools confidently.
View all ArticlesLeave a Comment
Create your review for HitPaw articles