[100% Working] How to Remove Background in Procreate in 2 Ways
Procreate is one of the most popular drawing and photo editing apps for iPad and iPhone. With its powerful editing tools, you can easily remove backgrounds from photos and illustrations to make stunning graphics and designs.
Removing backgrounds allows you to isolate subjects, change backgrounds, and make composites. While Procreate doesn't have a dedicated "remove background" tool, there are a couple of easy ways to do it.
In this guide, we'll walk through two effective techniques for how to remove background in procreate. Whether you're a beginner or a pro user, you'll learn helpful tips to cleanly lift out backgrounds with precision. Let's dive in and master background removal on Procreate.
Part 1. 2 Ways for How to Remove Background in Procreate
Way 1. Try Eraser Tool to Remove the Background Manually
Removing backgrounds in Procreate is super easy when you've got a nice solid color behind your main subject. Let me walk you through how to remove a background in procreate.
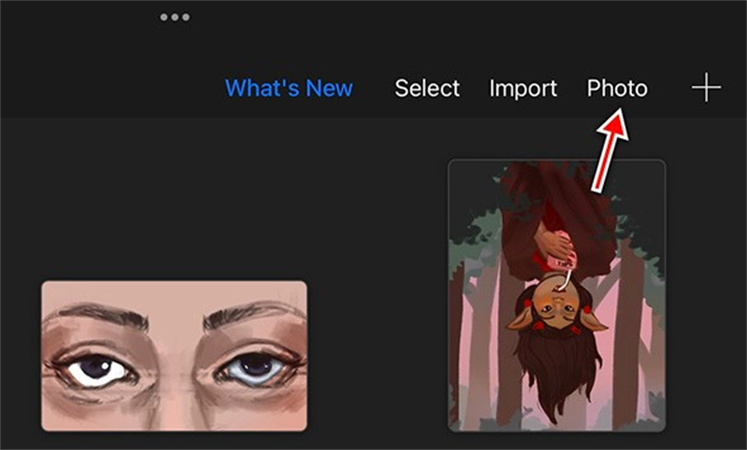
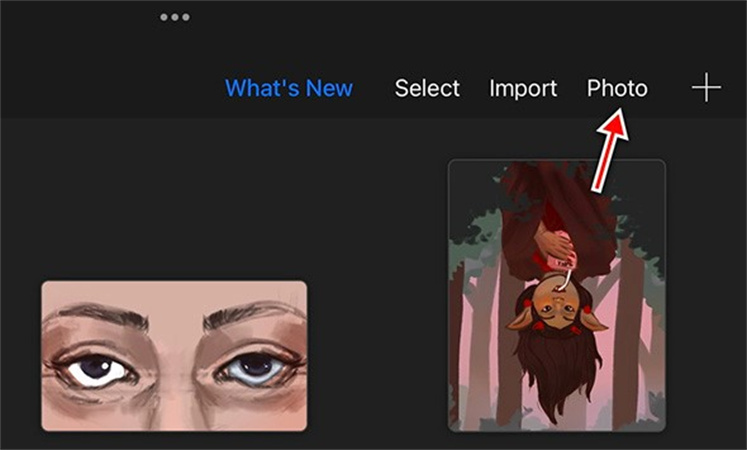
1.First, open up your image in Procreate. Go to the wrench icon, select Add, and choose Insert Photo to grab your image from your camera roll. Resize it how you like.

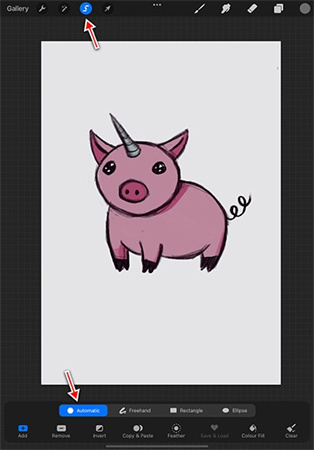
2.Next, tap on the lasso tool at the top - it looks like a curled-up S. Select Automatic from the menu at the bottom. This will automatically try to select your background.

3.Slide your finger left and right to adjust the selection until the whole background is inverted. That means Procreate has selected it.

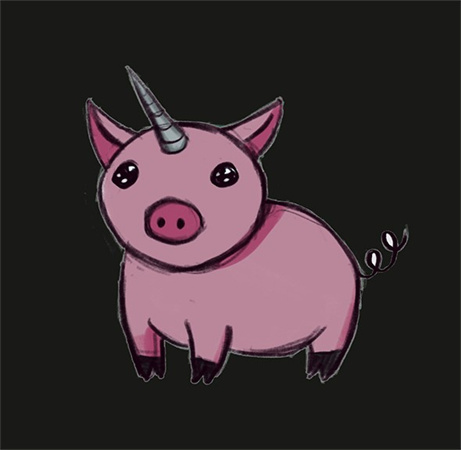
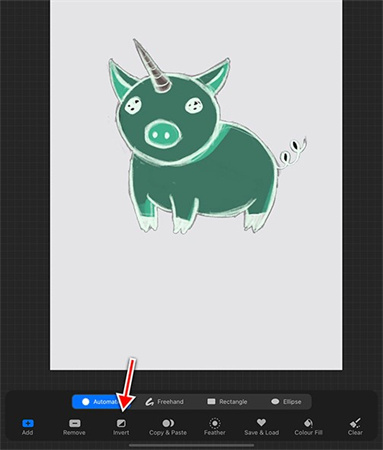
4.Tap Invert to switch the selection to your subject instead of the background. Then, hit Copy and Paste to put your subject on a new layer without the background.

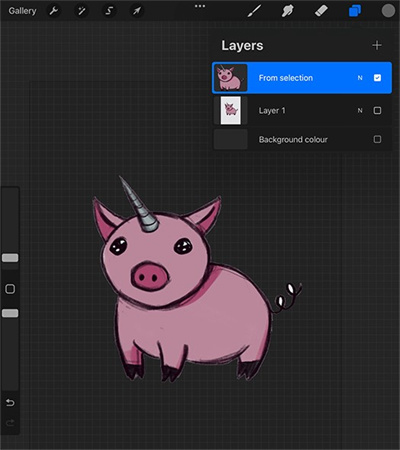
5.You can hide the original layer, and voila. Your subject now has a transparent background, as you can see by the gray grid.

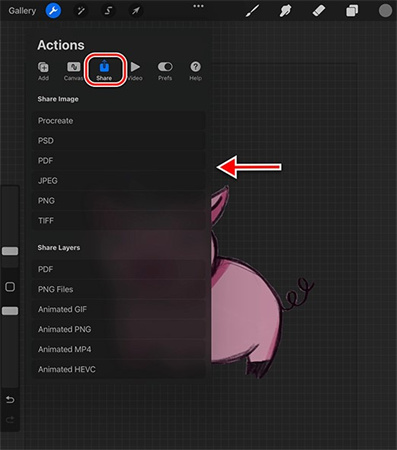
6.When you're done, you can save or export your image with the background removed from the wrench icon under Share. Choose file types like Procreate, PSD, JPG, PNG, TIFF, or whatever you need. So, it was how to remove background color in procreate automatically.

Way 2. Try the Freehand Selection tool to Remove the Background
Sometimes, the Automatic selection tool in Procreate can't quite get the entire background. This happens when the background is too complicated or blends into your main subject.
In cases like these, the erase tool is your best friend for removing finicky background elements. Here's how to remove background from picture in procreate:
1.As before, open your image in Procreate and size it how you want. Make sure Background Layers are unchecked in the Layers menu.

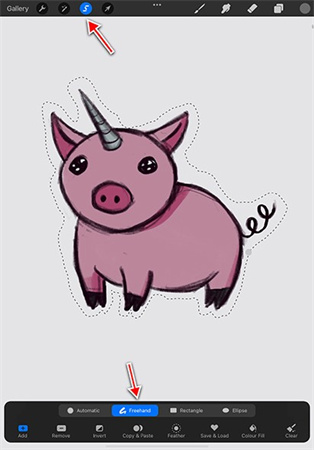
2.Tap on the lasso tool, but this time, choose the freehand option at the bottom. Roughly trace around your main subject. When you finish, tap Invert so the background is selected.

- 3.Do a three-finger swipe down to bring up the Copy/Cut/Paste menu. Choose Cut to delete the background.
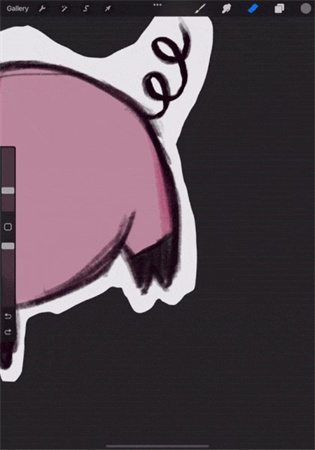
4.Now switch to the erase tool - it looks like a pointy brush. Erase any leftover background bits around your subject with a hard round brush.

- 5.You can also use the Selection tool again if needed to remove background sections more precisely.
- 6.Keep working until the entire background is gone. Then, you can export a transparent PNG to use your isolated subject elsewhere. So, it was how to remove a background from a picture in procreate using freehand tool.
Part 2. The Best Alternative to Remove Image Background with HitPaw Photo Object Remover
Looking for a smarter way to erase backgrounds and remove objects from photos? Or maybe it is difficult for you to learn how to remove image background in procreate.
HitPaw utilizes advanced neural networks and inpainting algorithms to detect and remove elements automatically. It can identify people, textures, shadows - you name it. The AI removes objects cleanly while filling in the background naturally.
FeaturesSome standout features include:
- Instantly changing photo backgrounds with color fills or transparent layers
- Eliminating facial blemishes and wrinkles for perfect portraits
- Erasing strangers, watermarks, text, and clutter from any image
- Restoring old photos by removing stains, creases, and grain
HitPaw delivers professional results in seconds without complicated editing. It's fast, easy, and beginner-friendly. For anyone looking to touch up their photos, this tool is a must-have.
Removing backgrounds with HitPaw Photo Object Remover is quick and easy. Just follow these steps:
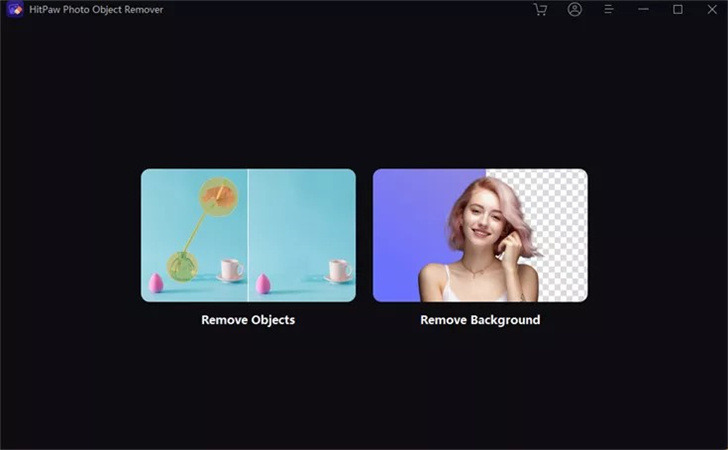
Step 1:Open the photo you want to edit in HitPaw. Select the "Remove Background" mode from the main menu. HitPaw will automatically detect and erase the existing background using advanced AI technology.

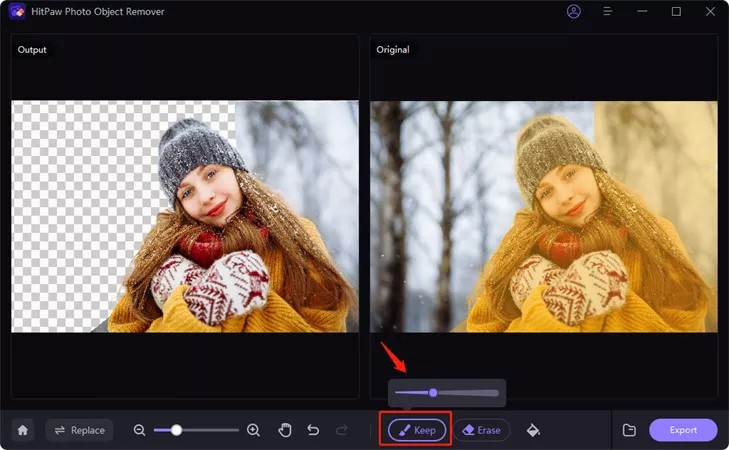
Step 2:Use the Keep tool to paint over any important foreground elements you want to preserve, like a person or product. This tells the AI not to remove those parts.

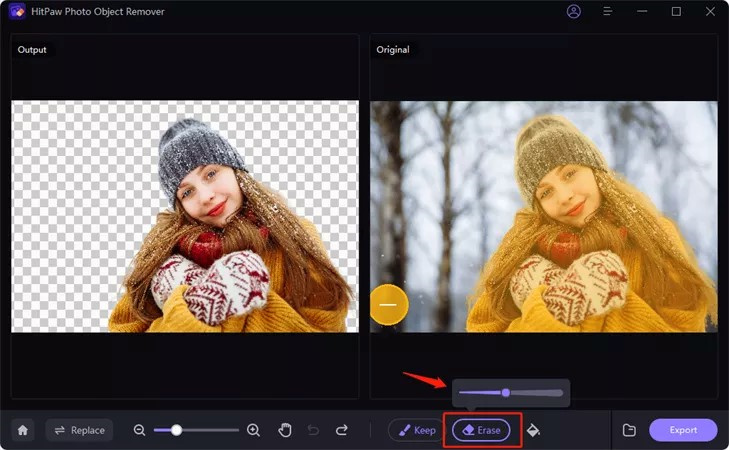
Step 3:If any leftover background areas remain, use the Erase tool to paint over them and remove any remnants.

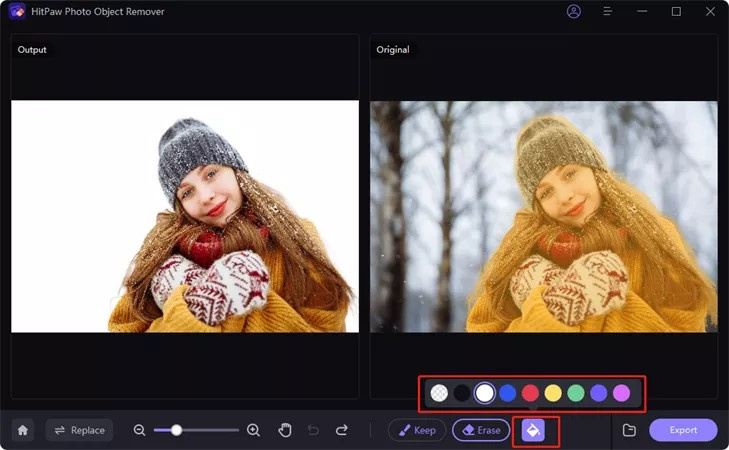
Step 4:Once the background is completely removed, select a new background color or image. Click the color picker to choose a solid color, or import a background photo from your files.

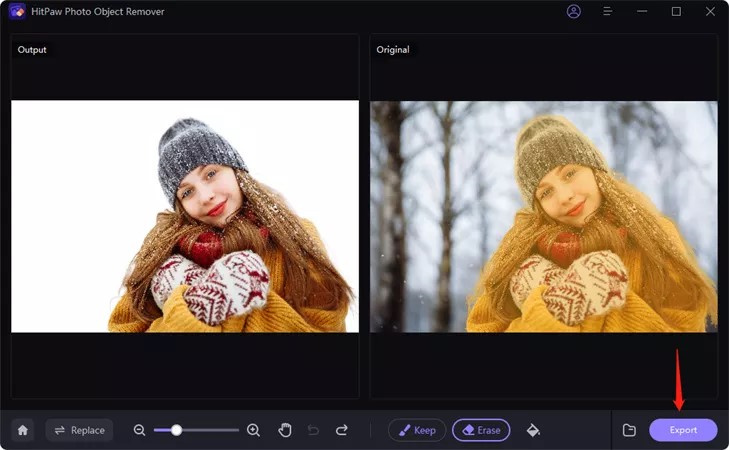
Step 5:Preview how the photo looks with the new background. When satisfied, export the edited photo to apply the changes.

Part 3. FAQs of How to Remove Background in Procreate
Q1. How do I make a background layer transparent in procreate?
A1. Here is how to remove background layer in procreate, first ensure the layer you want transparent is isolated and selected. Then tap the arrow icon at the top of the Layers menu and choose "Clear". This will automatically remove the background and make that layer transparent. You can also use a selection tool to manually select the background, tap Invert to switch the selection, then hit Cut or Clear to delete the background. Just be sure no other elements on that layer are selected or they'll be removed too.
Q2. Can I change the background of a photo on procreate?
A2. Yes, you can easily change the background of a photo in Procreate. Import your image and make sure it's on its own layer. Use the selection tools to isolate your foreground subject. Then create a new layer below it, fill it with your desired background color or pattern, and lower the opacity to blend.
Final Words
Removing backgrounds and objects from images is a handy skill for any designer or photo editor. In this article, we explored two effective ways how to remove the background in procreate. For more complex images, HitPaw Photo Object Remover provides an even easier AI-powered solution.
HitPaw utilizes advanced neural networks to instantly detect and erase backgrounds with just a click. It also excels at deleting unwanted objects like people, text, and blemishes. The AI fills in removed areas smoothly for natural results. Compared to Procreate's manual selection process, HitPaw saves tons of time while delivering professional edits.



 HitPaw VikPea
 HitPaw Edimakor


Share this article:
Select the product rating:
Daniel Walker
Editor-in-Chief
My passion lies in bridging the gap between cutting-edge technology and everyday creativity. With years of hands-on experience, I create content that not only informs but inspires our audience to embrace digital tools confidently.
View all ArticlesLeave a Comment
Create your review for HitPaw articles