How to Make a Photo Blurry with the Easiest Steps
Are you wondering why people need blur photos or why they add blur effects to a picture? Well, don't wonder anymore. They opt for a blur or bokeh effect to focus on the main subject or add a sense of movement to the picture.
Simply put, they want to boost a photo's artistic value and blur an image. It's easy to create the high-focus look of a shallow depth field through a blurry background. You surely want to try this effect. Don't you? If yes, continue reading and learn how to make a photo blurry.
Part 1. Types of Photo Blurring Services
When you want to blur the background of a picture or want to blur a person out of the picture, there are tons of ways. Since we can't explain them all in this post, we would focus on the top 3 ways that explain how to make blurred photos.
But first of all, you should have an idea about different types of Blurring services. Let's dive into this info.
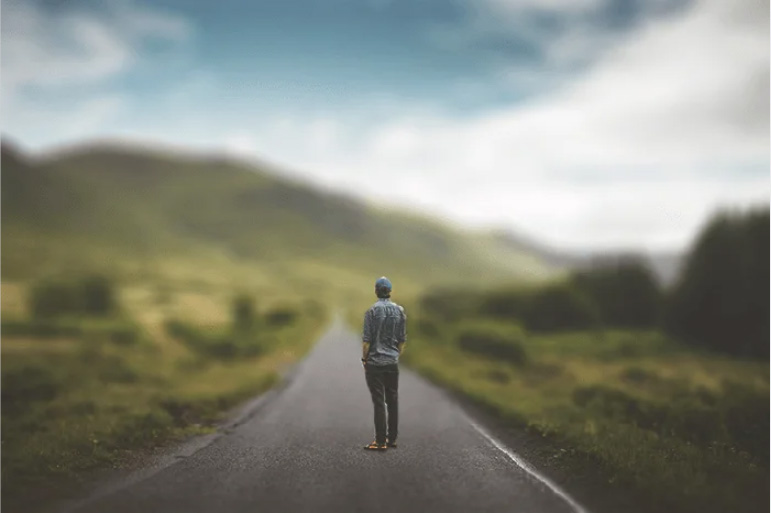
1. Add texture
Want to know how to make an image blurry by enhancing its value? You can be playful with its texture. A simple blur presents a natural texture, but you must do more. Aren't you? So, it would help if you tried other textures like sharpening an image, softening, or going with powerful amplification.
2. Emphasize focal points
You can draw the eye of the audience where you exactly want to by emphasizing more on the main subject while blurring the background, center, or other people. Nothing will work better than showering all the focus on the subject while blurring everything around it.
3. Add an artsy aesthetic
Are you ready to add a bit of drama to your photos? You can infuse it quickly into your picture through an artsy aesthetic. The idea is to try all your personas and give your picture to life by blurring the right spots artistically. You can learn online how to make blurry aesthetic pictures.
4. Isolate pics into parts
In the past, people believed that blurring a picture meant scratching out personal info of an image or covering the eyeballs of a person like the one you see in crime documentaries. Although it was common practice for people to blur a photo, it's not practical anymore. Today, you can do much more than that.
You can learn how to blur someone out of the picture or completely blur the background from the foreground. With proper application, you can blur the left side of a photo from the right or the upper side of a picture from the bottom.
Part 2. How to Make a Picture Blurry on Windows and Mac?
There are many benefits of adding blur effects to your picture. People opt for it because they can give photos a professional look by enhancing focus on the subject. It's easy to make an image impactful while reducing distractions from a busy or messy background.
When it comes to the useful ways to make a photo blurry on Windows and Mac, you can try the world-famous method known as Adobe Photoshop. You can learn how to blur someone out of a picture or other objects you don’t want with this professional tool.
Here is how to make pics blurry on Windows and Mac:
-
1
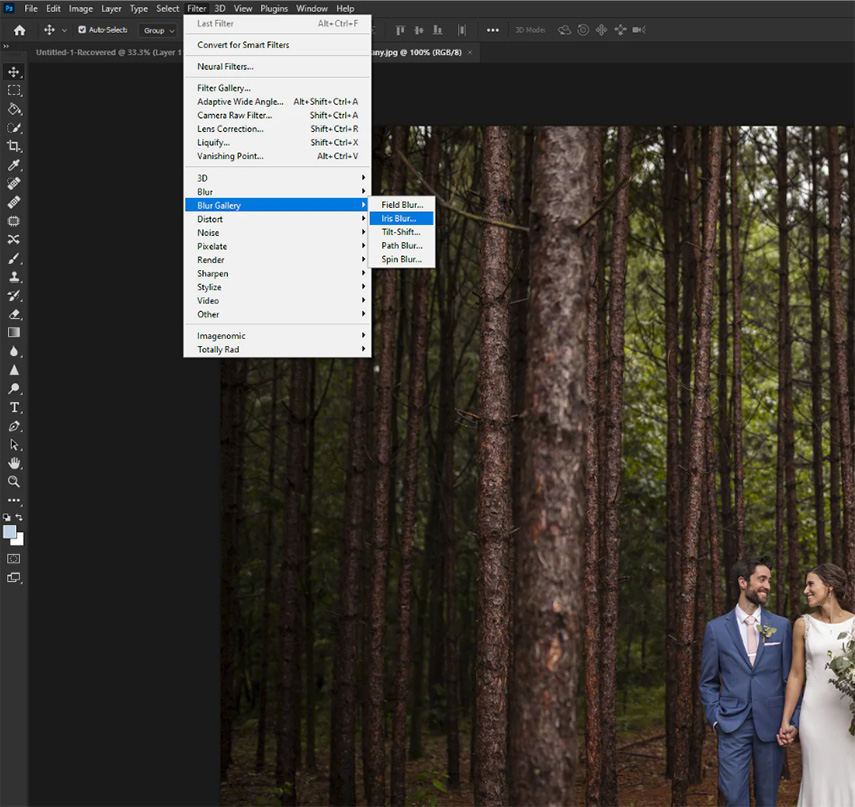
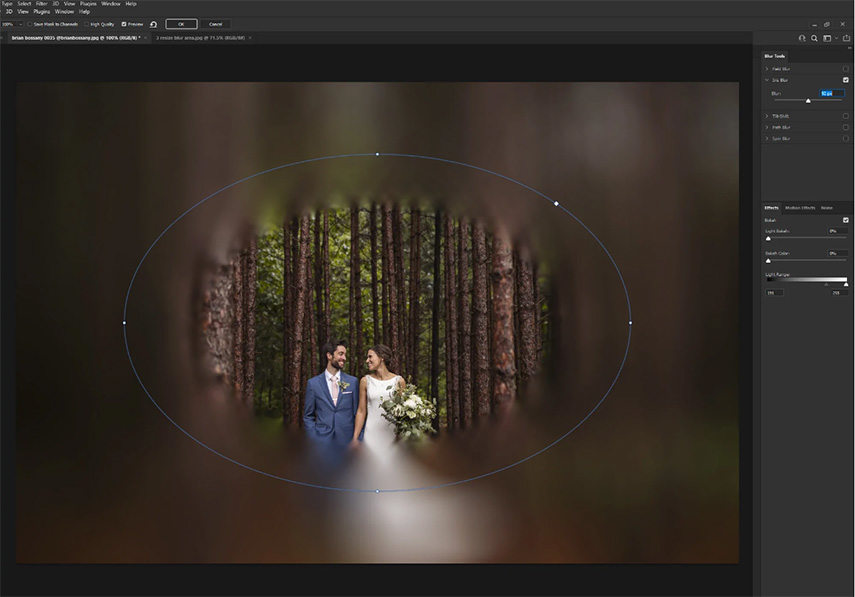
Upload your image to the photoshop application. Once your image appears, Go to Filter in the photoshop app. From the filter option, select Blur Gallery and then choose Iris Blur.
-

-
2
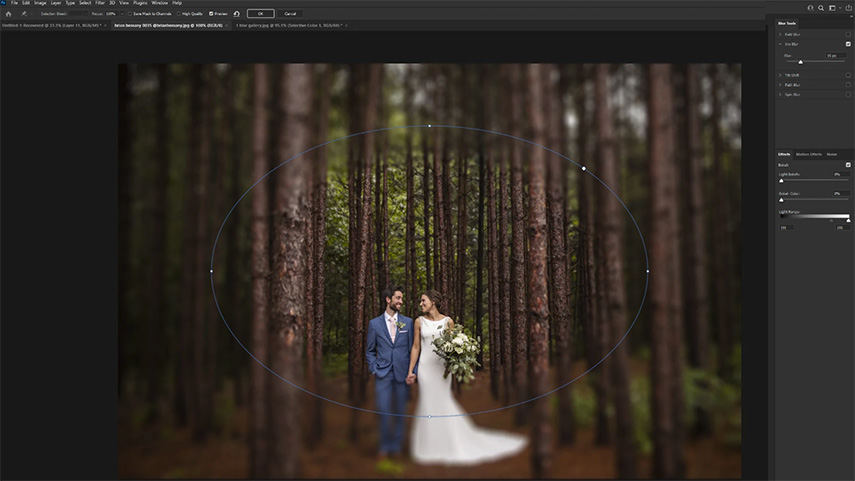
On your picture, you will click the Pin at the center or any other place you want to make a focal point of your image.
-

-
3
You will click and drag single points to increase the blurred space. Drag the outer line if you want to reside in the blur area.
-
4
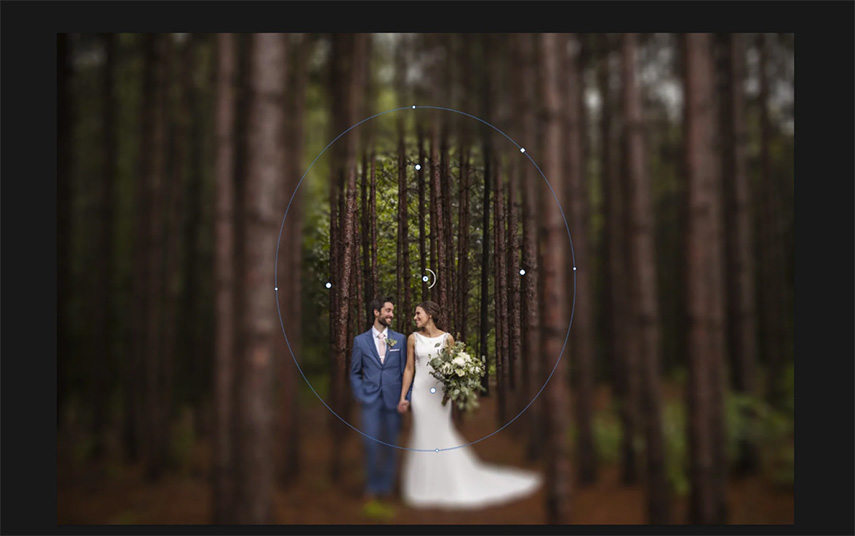
You can easily adjust the blur transition area size by clicking the dragging the dot inside the blur preview ring.
-

-
5
Next, control the amount of blur filter on your picture by adjusting the round blur dial.
-

-
6
When you finish blurring an image, click OK or tap on Enter at the top of the Blur Gallery Window. Hurrah! You have learned how to make your photos blurry.
Part 3. How to Make a Photo Blurry Online for Free?
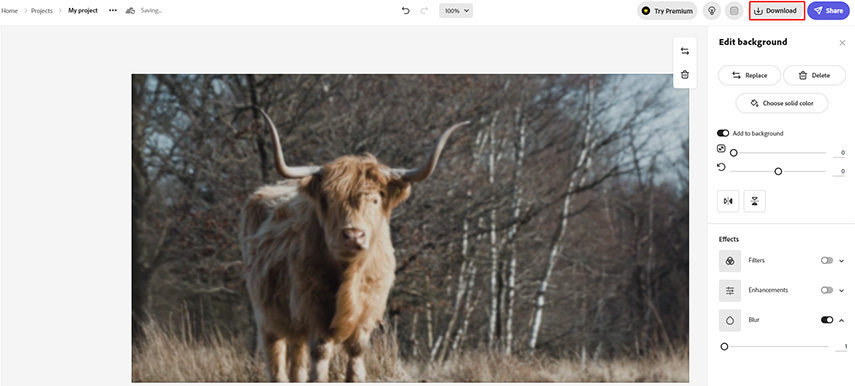
An online photo blurry application lets you quickly blur an image. You can use digital blur effects to blur a shot from anywhere, anytime. You can try many different software and tools, but when it comes to the famous method to blur an image, you should go with Adobe Express. This online software helps you customize your picture by making the most of blur tools and templates.
For the online tool, it's easy to use and accessible on any device. What’s more, no edits on the picture are permanent, and you can always revert to the original image. It will keep your image saved and lets you edit it whenever you like.
Here is how to make your pictures blurry by following four simple steps:
-
1
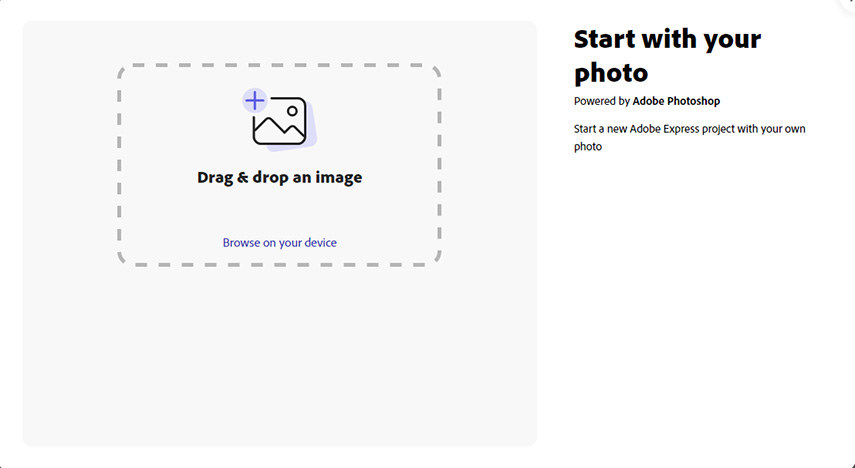
You need to upload an image or images you want to add a blur effect.
-

-
2
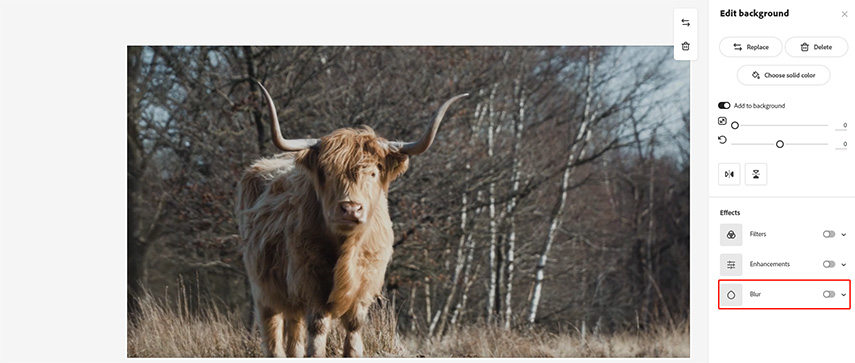
Select an image after uploading, and choose the blur option from the adjustment menu. Using the sliding scale, you can control the desired amount of blurring on an image.
-

-
3
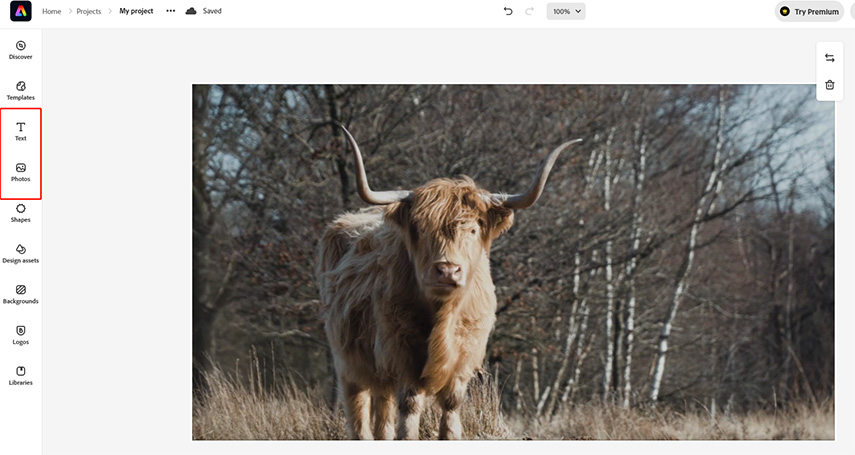
Blurring an image isn't the only way to make your image professional. Make the most of additional edit options like adding some text styles or icons to the overall design.
-

-
4
Once you are done blurring a photo, save it and download it on your device. You can print out your design or share it across social media; the choice is yours.
-

Part 4. How to Take Blurry Pictures on the Phone?
Different people use the blur feature for various purposes. Some want to blur the background to make their picture's subject stand out, while others simply want to hide some faces or messy backgrounds. If you are an iPhone user, you can easily do this.
Here are two common ways to blur a picture background effortlessly.
1. Use iPhone Portrait mode
iPhone Portrait mode is undoubtedly the simplest way to blur a picture background. You can blur the background while taking a picture. Here is how to make a blur photo.

-
1
Open the Camera app and tap on Portrait mode
-
2
Natural light is the default setting; scroll through different options and pick a suitable one before framing your shot.
-
3
To blur the background of an image, your subject should be two and eight feet from the camera lens.
-
4
Look at your screen to ensure that subject is sharp, and the background is blurred.
-
5
Now press the shutter button.
2. Blur the background using mobile apps
If you don't have portrait mode on your iPhone, no worries, you can still blur a photo through the mobile application. I would like to recommend the best one, which is Snapseed. It is a very cool application that lets you edit your image by using different effects.
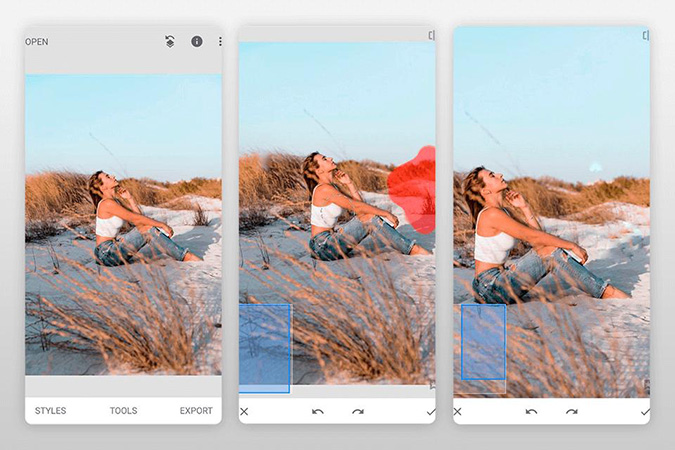
How to blur the background on an iPhone using Snapseed? Follow some simple steps:
-
1
Download the application and give the app permission.
-
2
Open the application, and add your photo to the application.
-
3
Tap on tools and then scroll down to tap on Lens blur.
-
4
A circle will appear. Drag this circle to a place you want to blur. You can pinch or widen your fingers to reside in the blur area.
-
5
Once you are done blurring, tap the check mark option in the lower corner.
-
6
Choose an Export option and save your photo to your library.
Part 5. Ultra-tips: How to Make Blurry Photos Clear with High Quality?
Do you want to unblur a photo? You might have a blurred picture that you want to make clear. If that's what you need, relying on HitPaw FotorPea is good. It is undoubtedly an effective tool that you can use to make the blur photo clear. It fixes blurry photos automatically. Thanks to its 3 AI models, one can enhance the photo quality to a great extent.
Features of HitPaw FotorPea
- Bring life into your old photo by coloring back and white image background.
- Employs powerful AI Noise reduction technology to remove noise from low-lighting images.
- You can clear image details pretty fast.
- Either enhance one image or a batch of images.
- The best AI sharpener to upscale image quality
How to Unblur an Image via HitPaw FotorPea?
Step 02 Open this software. Upload an image you want to make clear or unblur.
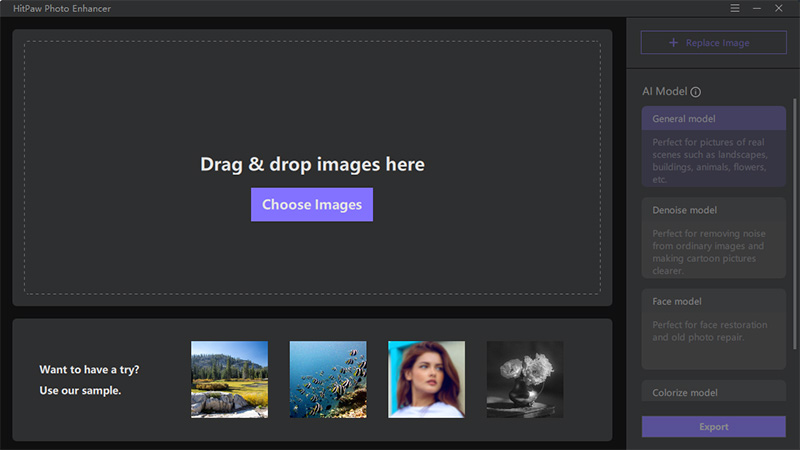
Step 03 Choose an AI model from three options on the right sidebar.
- The general model works for landscape, nature images, animals, etc
- Denoise model helps you the upscale quality of a low-quality image
- A face model is ideal for portrait images or old photos.
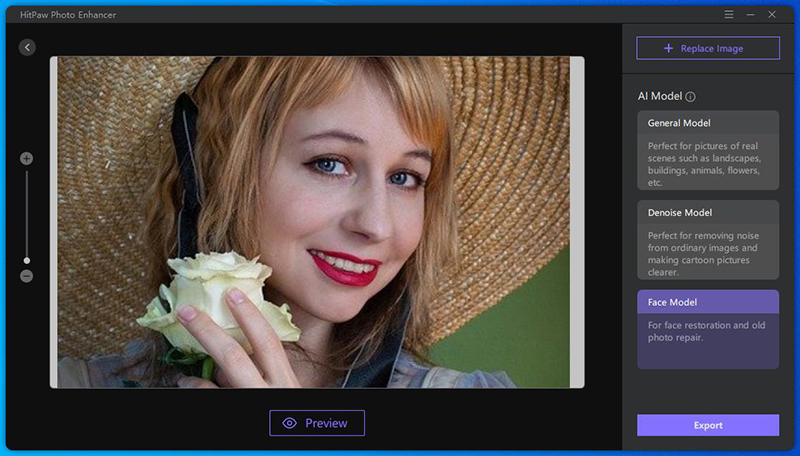
Step 04 Once you choose a mode, click on the preview to let this software do its job. It may take a few minutes.
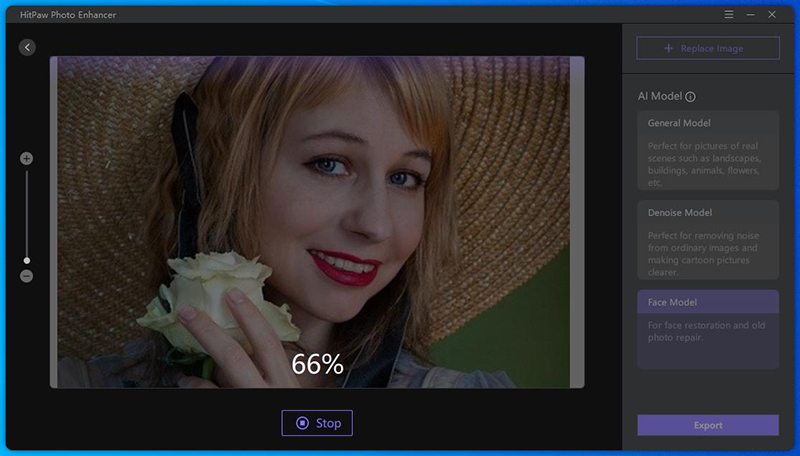
Step 05 Satisfied with your image editing? Click on export.
If you want to learn more about enhancing photo with HitPaw FotorPea, just click the following video:
Part 6. Conclusion
Finally, you have a clear idea of making a photo blurry. Now the next step is to try this amazing image editing option. Adobe Express or your iPhone apps might do the magic when adding a professional blur effect to your picture. However, when it comes to unblurring a picture, certainly nothing works better than HitPaw FotorPea. There is no need to keep an old blurry photo then. You certainly can boost its quality after downloading fantastic software. What do you think?



 HitPaw VikPea (Video Enhancer)
 HitPaw Univd (Video Converter)

Share this article:
Select the product rating:
Daniel Walker
Editor-in-Chief
My passion lies in bridging the gap between cutting-edge technology and everyday creativity. With years of hands-on experience, I create content that not only informs but inspires our audience to embrace digital tools confidently.
View all ArticlesLeave a Comment
Create your review for HitPaw articles