[Steps-by-steps] How to Fix Low Resolution Photos in 3 Ways
Do you wonder how to fix a picture with too low resolution? Low resolution photos are the bane of any digital photographer's existence. Whether it's from using an outdated camera phone, zooming in too much, or just generally poor image quality, we've all dealt with blurry, pixelated pictures that make us cringe.
In this guide, we'll explore 3 methods on how to fix photo resolution too low and turn them into something worth keeping. With a bit of effort and know-how, you can breathe new life into lackluster photos and get more mileage out of your photo library. Let's take a look at how to fix a picture resolution.
Part 1. 3 Ways to Fix Low Quality Pictures
You might be wondering if is there a way to fix low resolution photos right? There are several ways, but in this article, we will be talking about the 3 best ones so far.
1. The Best Tool to Fix Low Quality Photo with HitPaw FotorPea
HitPaw FotorPea is an innovative AI-powered photo enhancement tool that can dramatically improve the quality of your bad quality images with just one click.
Using advanced deep learning technology, HitPaw enhances resolution, reduces noise and artifacts, restores lost details, and breathes new life into lackluster photos.
Key Features of HitPaw FotorPea:- Automatic enhancement using AI models - no complicated adjustments needed
- Sharpen and upscale bad quality photos to 4K or 8K resolution
- Reduce blurriness and unwanted noise in photos
- Batch process multiple images at once
- Restore old, damaged, or restore low quality photos
- Dedicated AI models for faces, colors, and noise reduction
- User-friendly interface for Windows and Mac
- Free trial is available to test it out
But can you fix low resolution photos with HitPaw? Of course, you can. Here is how to fix low resolution photos using HitPaw FotorPea:
- Step 1:Download and install HitPaw FotorPea from their official website, or use the download button on the page.
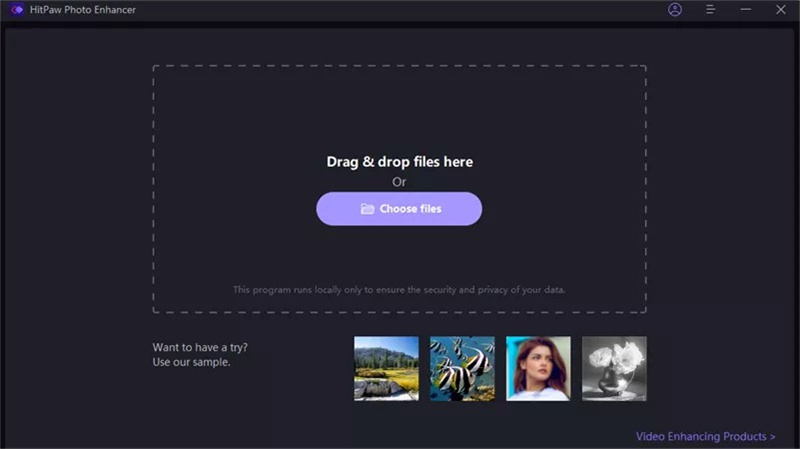
Step 2:Upload the original low-quality photo you want to enhance. You can click Choose File or drag and drop the photo into the software. HitPaw supports PNG, JPEG, JPG, WEBP, and TIFF formats.

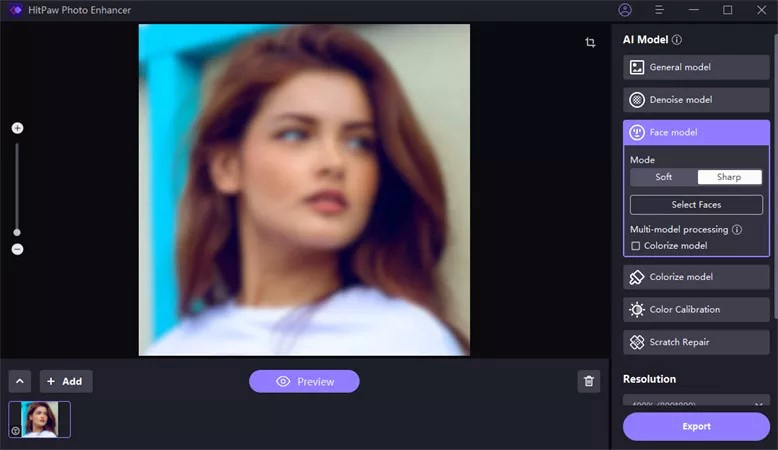
Step 3:Select one of the 6 AI enhancement models based on your photo type - General, Denoise, Face, Colorize, Color Calibration. The General model works for most real-life photos like landscapes or animals.

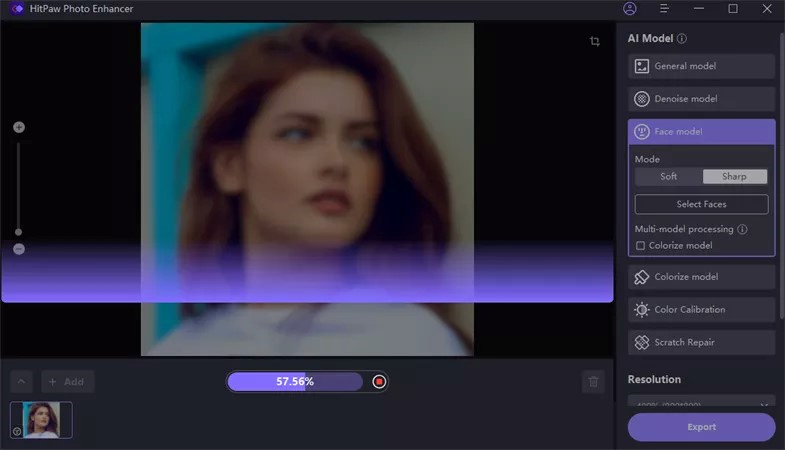
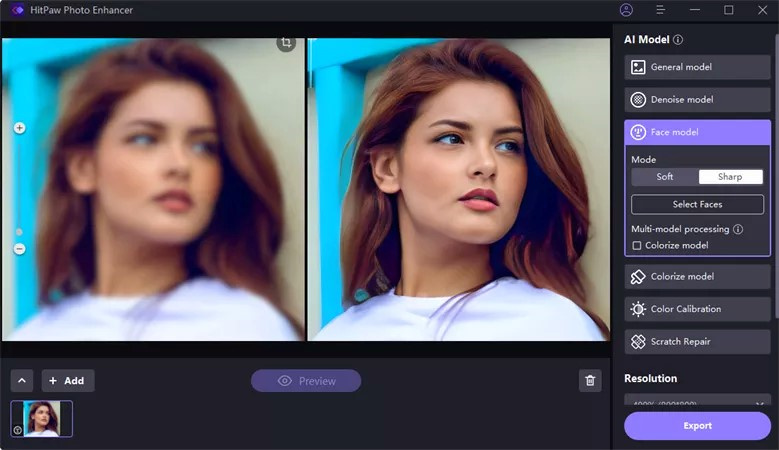
Step 4:Click the Preview button to see the enhanced version of your photo. Wait a few seconds for the AI to process the image.

Step 5:When you're happy with the preview, click the Export button to save the final enhanced photo.

2. How to Fix Low Resolution Photos with Photoshop
Still wondering how do i fix a low resolution photo? Adobe Photoshop is one of the most powerful and versatile image editing programs available today. Used by professionals and amateurs alike, Photoshop provides a robust toolkit for modifying and enhancing digital photographs.
When it comes to resizing images, Photoshop includes specialized tools that allow you to scale images both up and down in size while maintaining image quality.
The Image Size dialog box gives users precise control over pixel dimensions, resolution, and other critical factors for image resizing. Photoshop also provides a selection of interpolation methods like Bicubic that optimize resized images for sharpness, smoothness, and more.
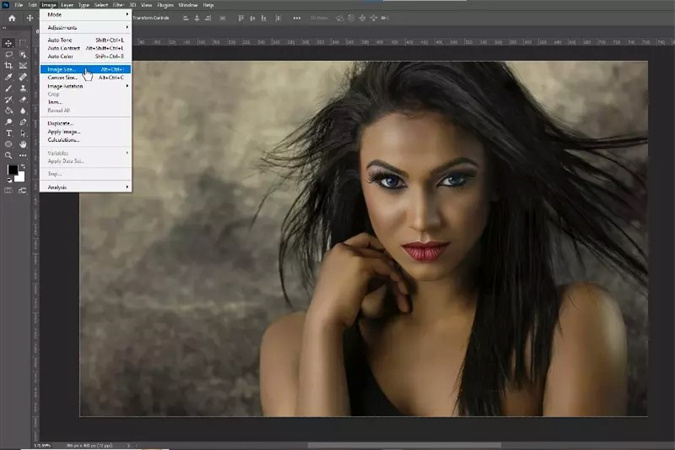
Here is how to fix a low resolution photo in Photoshop:1.Open the image file in Photoshop that you want to enlarge. Go to Image > Image Size to open the resize dialog box.

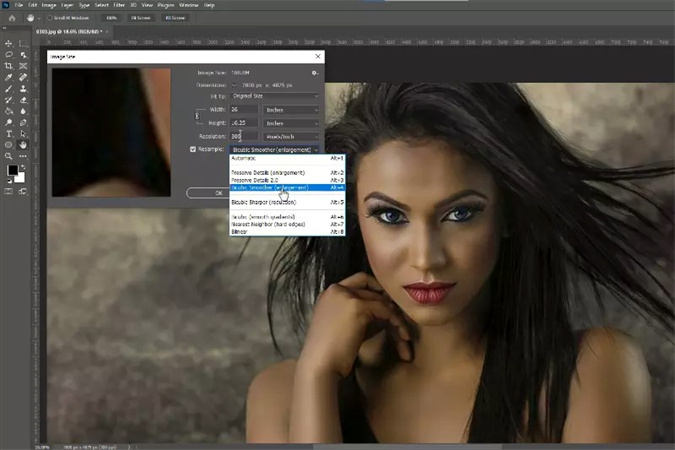
2.Check the Resample Image option to allow resizing. Choose Bicubic Sharper or Bicubic Smoother as the interpolation method.

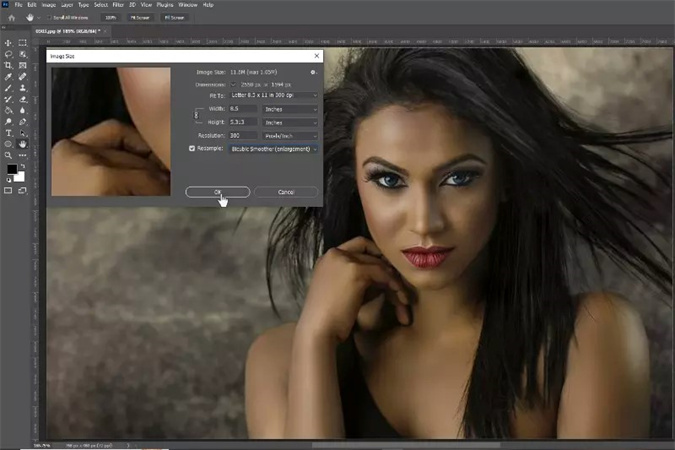
3.Input larger values for width and height to scale up the image. Click OK to accept the changes and upscale the image to the new larger size.

4.Save the resized upscaled image as a new file. This is how to clear up low resolution images.
3. How to Fix a Low Resolution Photo with Lightroom
Dealing with low resolution, pixelated images can be incredibly frustrating. While you may be tempted to delete these subpar shots, there are ways to salvage and improve them with the right editing tools.
This is where Adobe Lightroom comes in. As a powerful photo editor designed for RAW processing, Lightroom offers advanced features to enhance image quality in just a few clicks.
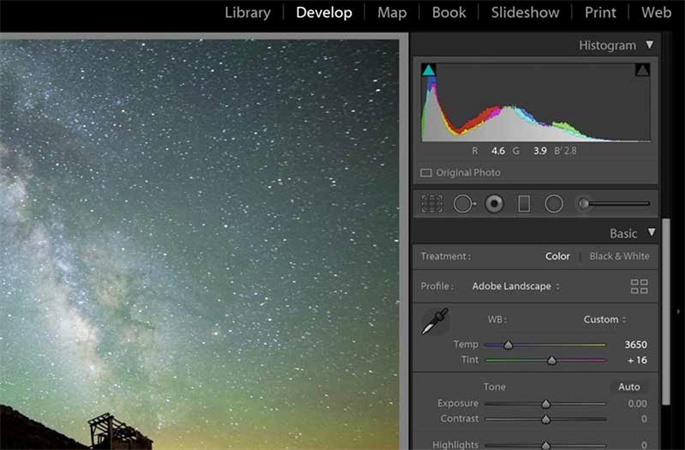
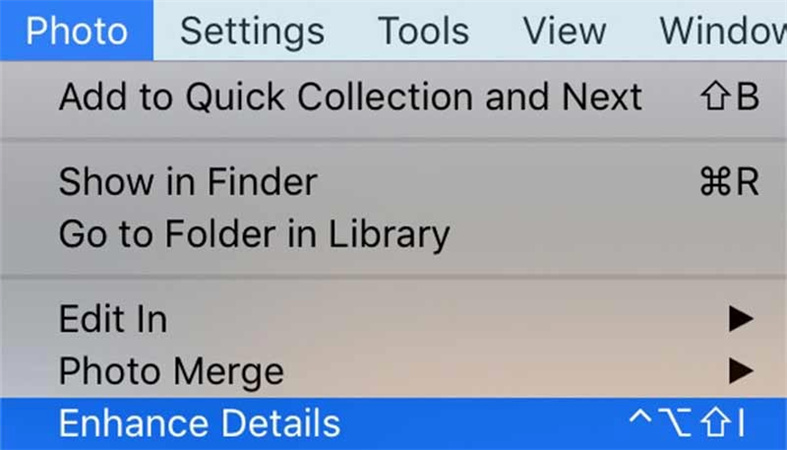
Here is how to fix low resolution pictures using Lightroom:1.Import the low quality photo into Lightroom.
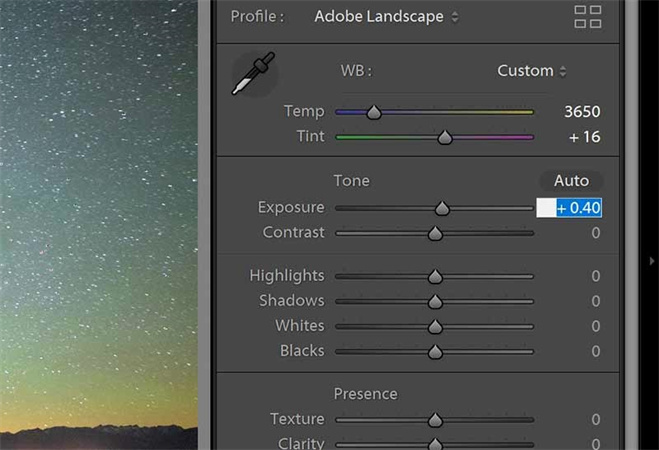
2.Go to the Develop tab and open the Basic panel. In the Tone section, adjust the Exposure slider to lighten or darken the image.

3.Use the Recovery slider to bring back blown out highlights and details.

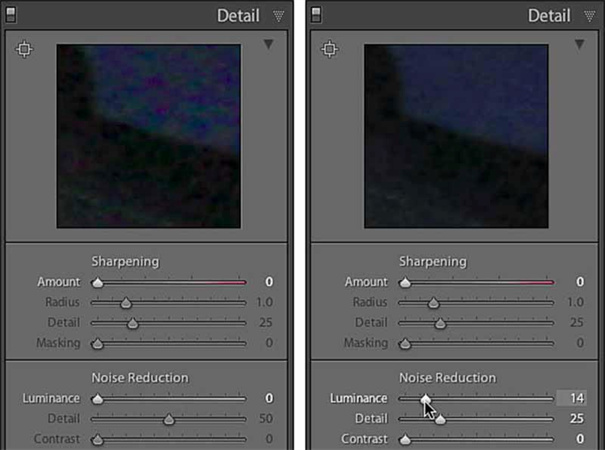
4.Open the Detail panel and go to Noise Reduction.

5.Adjust Luminance to reduce noise and graininess. In Sharpening, increase Clarity and Sharpness to sharpen a blurry photo.

6.Also modify Contrast and Texture for more definition. Refine the settings until the photo looks clear and enhanced. This is how to restore low resolution photos.
7.Export the improved image to save changes.
Conclusion
In this guide, we explored three effective methods on how to fix pictures and enhance low resolution photos. Using AI-powered tools like HitPaw FotorPea provides automatic adjustments for blurry, pixelated images with just one click. For more manual control, the resize and sharpening capabilities in Photoshop and Lightroom can significantly improve image quality and recover details.
Of all the options, HitPaw FotorPea's AI technology delivers the best and easiest way to upscale resolution, reduce noise, fix blurriness, and generate great-looking images. It is the best low resolution image fix.



 HitPaw VikPea
 HitPaw Edimakor

Share this article:
Select the product rating:
Daniel Walker
Editor-in-Chief
My passion lies in bridging the gap between cutting-edge technology and everyday creativity. With years of hands-on experience, I create content that not only informs but inspires our audience to embrace digital tools confidently.
View all ArticlesLeave a Comment
Create your review for HitPaw articles