[100% Useful] How to Brighten Face in Photo with 2 Methods
Correcting the brightness of the images is vital to make the photos look relevant and pleasing to the eyes. The dark photos won't serve your purpose, and whoever will see those images won't like them.
Hence, if you're struggling with dark photos and want to brighten face in photo, dive into this post to learn how to brighten face in photo.
Part 1. How to Brighten Face in Photo with 2 Methods
1. How to Brighten Certain Parts of a Photo in Photoshop
Adobe Photoshop is an excellent photo editor offering sublime techniques to make the images look exciting. It comes up with professional photo editing tools that can assist you to brighten face in photo.
There are various aspects to ponder about this face brightening photo editor. Still, this tool allows you to learn how to brighten a photo without compromising the quality of the images is one of the best aspects. Unfortunately, you might struggle with the hectic user interface of Adobe Photoshop, especially if you're a newbie.
After acquiring the prior knowledge of Adobe Photoshop, you can initiate brightening the images.
Here's the detailed guide below to learn how to brighten certain parts of a photo in Photoshop.
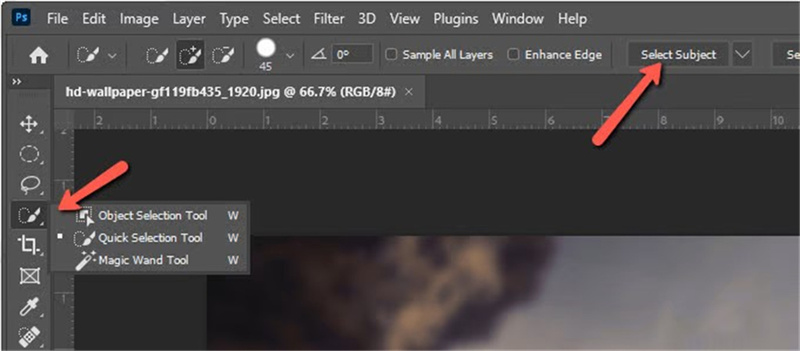
1.You can use the Selection tool to brighten face in photo. You'll need to start Adobe Photoshop on your PC and choose the ''Select Subject'' button after visiting the ''Options'' bar.


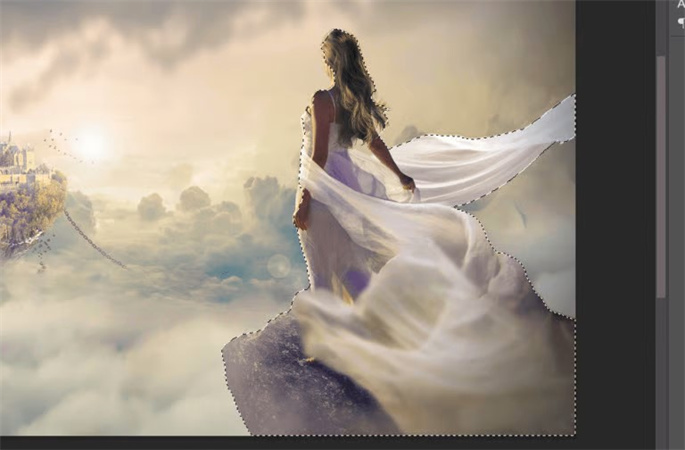
2.You can look at the selection which Adobe Photoshop has made for you.

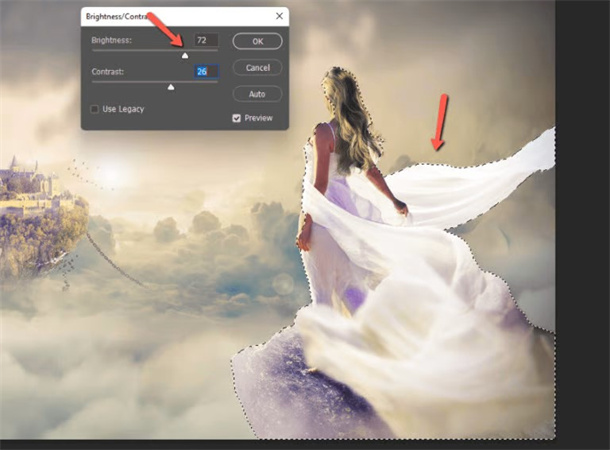
3.Refining the selection through the ''Quick Selection tool'' is quite possible, and that won't be needed for this tutorial. Navigate to the Image button and select the Adjust button. Select the Brightness/ Contrast; moving the sliders can make the selected parts of the images brighten.

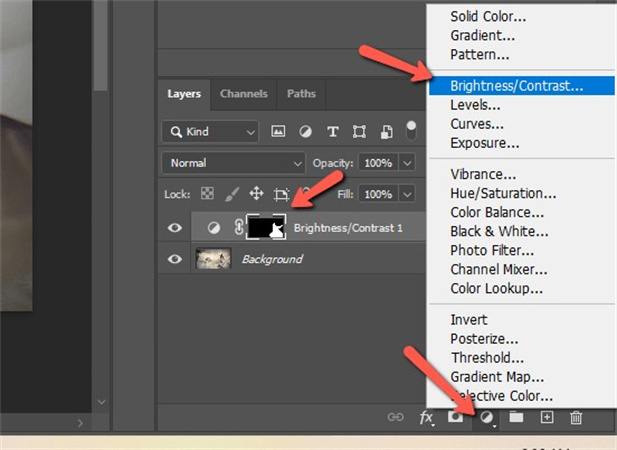
4.You can also look at the adjustment to lighten the selection. This method is non destructive and relies upon the mask, providing immense flexibility while lightening the images. Rather than navigating to the Menu bar, you'll need to choose the ''Adjustment Layer'' button and select the Brightness/ Contrast button. Doing so allows you to brighten the parts of the images.

2. Face Brightening Photo Editor with Luminar Neo
Increasing the image's brightness without thinking about doing it appropriately could make the portrait photo look weird. You need to ensure that the other parts of the image don't get brightened while brightening the face of the photo.
For that matter, you can look at the Luminar Neo, a mind-blowing face brightening photo editor that automatically identifies the face in the image before putting the brightness on it. It comes up with the 4 types of AI powered photo editing techniques that allow you to enjoy complete control over editing the images.
Follow the step by step guide to learn how to brighten face in Photo.
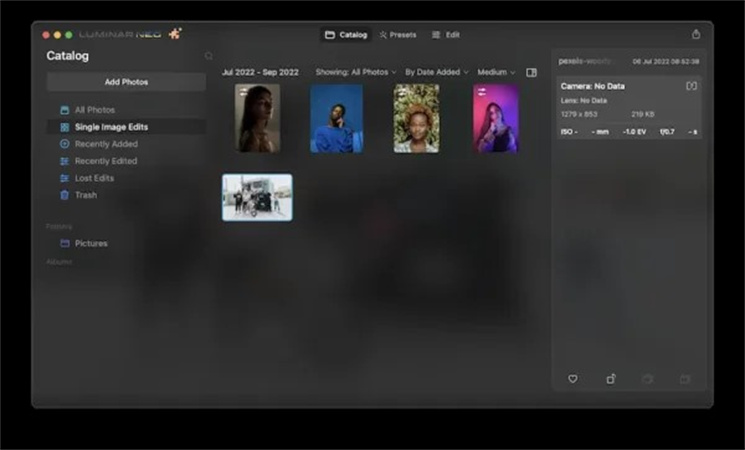
1.Visit the official webpage of the Luminar Neo before installing the desktop app on the Mac or Windows PC. Click the ''+'' button to import the photo you want to brighten.

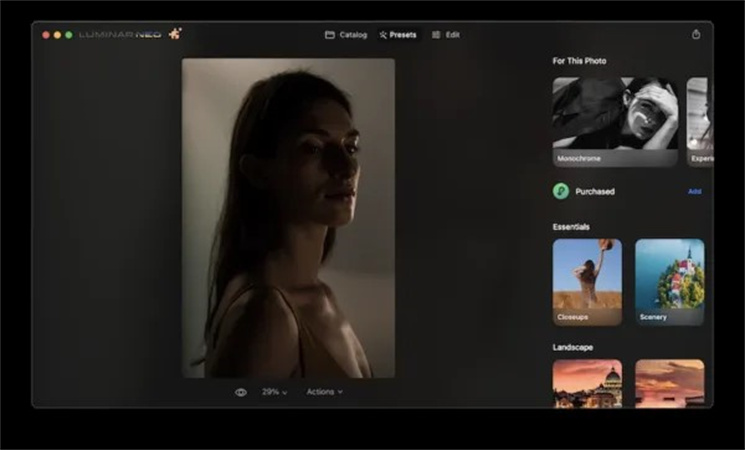
2.Navigate to the Presets tab and select the preferred Style for the photo enhancement.

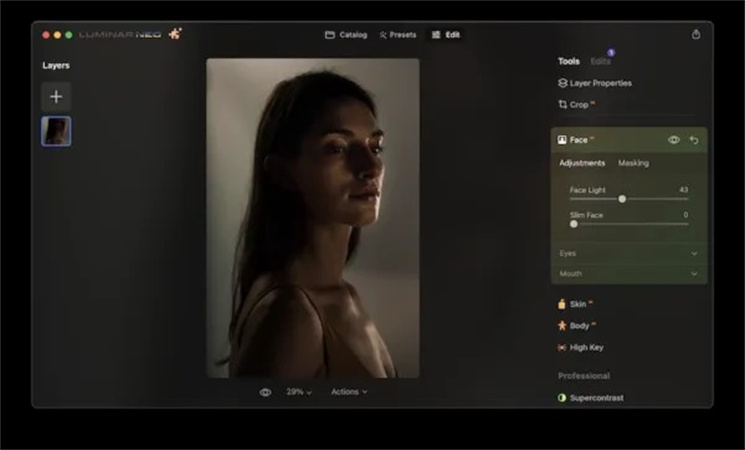
3.Navigate to the Face Light button after clicking the Edit, Portrait, and Face icons. You can drag the slider to customize the lightning before checking the after/before result.

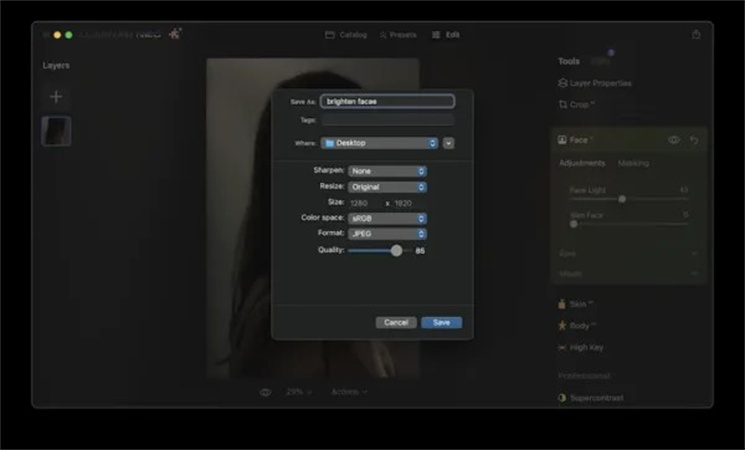
4.Navigate to the Export button and save the edited image on the computer. You can also select the desired output format and tinker with all the other settings.

Part 2. The Best PC Tool to Brighten Whole Images with HitPaw FotorPea
HitPaw FotorPea prompts the 6 eye-catching and highly rated AI Models, which allows you to improve the quality of the images from any aspect. On top of that, the HitPaw FotorPea doesn't tinker with the resolution of the images, and importing multiple images to the timeline of the HitPaw FotorPea simultaneously is also possible.
Hence, if you're looking for software to lighten the images without affecting the overall quality and shape of the images, opting for the HitPaw FotorPea must be your priority.
Features- Allows you to brighten the images automatically
- Doesn't compromise the quality of the images
- Allows you to remove the noise from the images
- Helps you to make the portraits look less blurry.
- Stunning AI image enhancer for Mac and Windows
- Helps you to upscale and enlarge images without compromising the quality of the images
- Comes up with an effortless user interface
- Colorize the black and white images.
- Resize the shape of the images without causing image quality loss.
Here's the step by step guide to brighten an image through HitPaw FotorPea.
Step 1:After getting straight into the main web page of the HitPaw FotorPea, you'll need to install the software on your computer.
Next, you'll start the program and press the Choose File button to upload the photo you want to brighten.
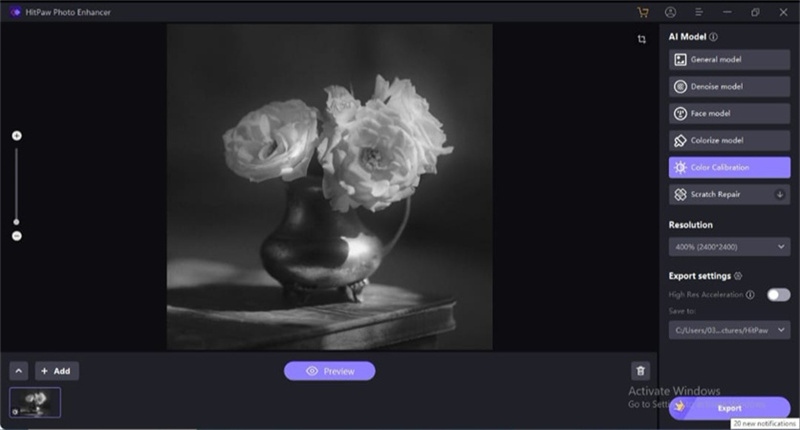
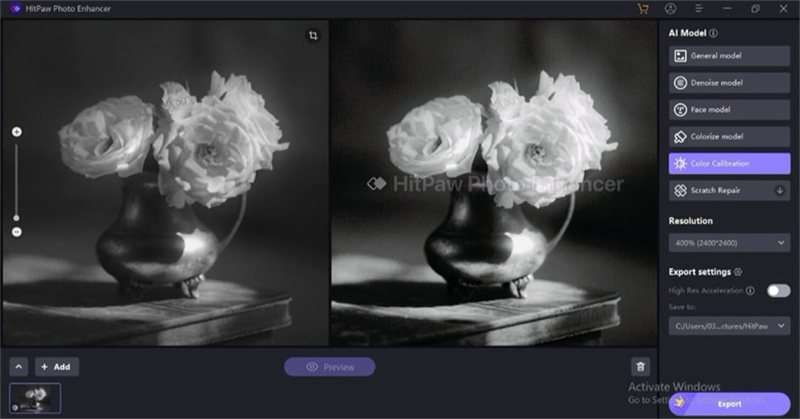
Step 2:HitPaw FotorPea blesses you with the 6 eye-catching AI models to select from, and by using these AI models, you can make the images look sublime and watchable. You can select the Color Calibration method to lighten an image.

Step 3:Click on the Preview icon to preview the brightness of the images, and upon satisfying the outcome, you'll need to press the Export button to get the image downloaded to the preferred folder on the computer.

Part 3. FAQs of How to Brighten Face in Photo
Q1. How do I lighten a photo on my iPhone?
A1. To lighten a photo on the iPhone, you must visit the Photo app and select the photo you want to brighten. Click on the Edit button and select the effects you'd like to apply, as you'll find the effects, including the Shadows, Highlights, brilliance, and Exposure. You can choose the Exposure effect to brighten the images.
Q2. How do you fix a picture that is too dark?
A2. If you're struggling with dark images and would love to brighten them, HitPaw FotorPea is there to assist you. You can upload the photo into the main interface of the HitPaw FotorPea before selecting the Color Calibration method to lighten the image.
Summary
Learning how to brighten the face in photo wasn't as easy as this post has made it look. We have listed Adobe Photoshop and Luminar Neo to brighten face in photo without affecting the quality of the images.
However, if you aren't satisfied with the lighting of the images through Adobe Photoshop and Luminar Neo, you can easily go for the HitPaw FotorPea. Besides offering a simple user interface, HitPaw FotorPea brings the best AI color calibration model to lighten the images automatically.




 HitPaw Watermark Remover
  HitPaw VikPea (Video Enhancer)


Share this article:
Select the product rating:
Daniel Walker
Editor-in-Chief
My passion lies in bridging the gap between cutting-edge technology and everyday creativity. With years of hands-on experience, I create content that not only informs but inspires our audience to embrace digital tools confidently.
View all ArticlesLeave a Comment
Create your review for HitPaw articles