[Step-to-step Guide] How to GIMP Sharpen Images with 2 Easy Solutions
Are you looking for a way to GIMP sharpen images? Sharpening may be the difference between a decent and a fantastic photo. Therefore, it's an important stage in any photo editing process. GIMP sharpen image only includes a few sharpening settings, but applying them correctly is critical to creating tack-sharp photos that don't seem overprocessed.
Here's a detailed guide to tell you how to do it.
1. 2 Methods to Solve Your Question on How to Sharpen An Image in GIMP
GIMP sharpen images using two easy solutions from your photos may seem complicated, but it is no longer. Learn about GIMP and how to sharpen an image in GIMP to make your photos seem excellent and more appealing to anybody.
Continue reading and you’ll know how to sharpen an image in GIMP step-by-step so everyone can do it.
How to Sharpen An Image in GIMP Directly
- Insert your picture into GIMP to modify. File Open or Ctrl—O to sharpen an image in GIMP.
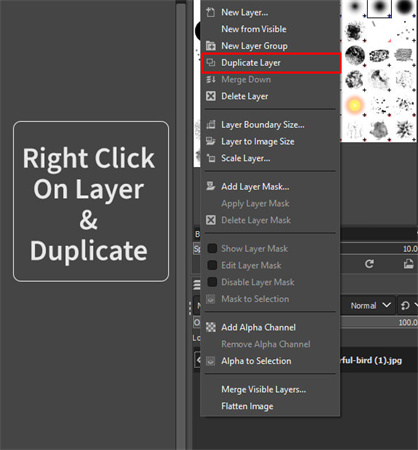
To make a duplicate layer in GIMP, go to Layer Duplicate Layer or use the Shift+Ctrl+D shortcut, and your duplicate layer will be generated. If you like, you may rename it.

- To get a razor-sharp focus, we'll need to zoom in by clicking View, followed by Zoom, and then selecting Zoom>1:1 (100%).
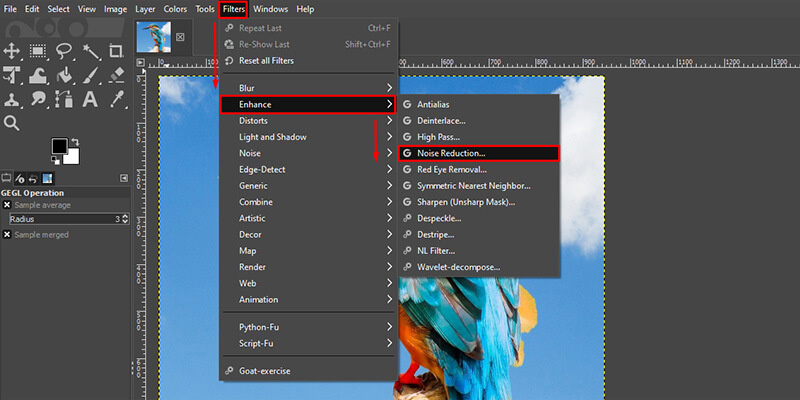
When we zoom closer, we will see noise in our picture, which we must eliminate before sharpening. Go to Filter Enhance Noise Reduction to reduce noise from the image.

- Now, utilize the high pass option to improve the sharpened image in GIMP. Select High Pass from the Filters Enhance menu. It will smooth out the picture to bring out the fine detail.
- Following that, we will utilize the vivid light option to add additional light and point to our picture. Locate the vote in the mode section and change the Normal setting to Vivid Light.
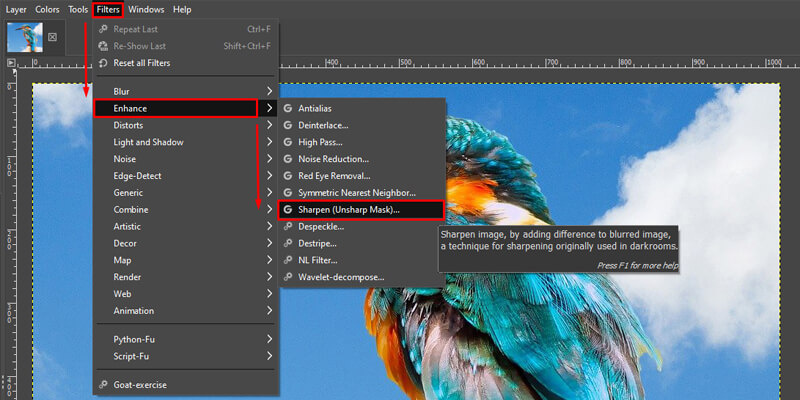
We've finished the preparation with the zooming, and now it's time to sharpen our image. We'll start by selecting the duplicate layer we made, then click on Filters > Enhance > Sharpen (Unsharp Mask).

Sharpen Image GIMP with a GIMP Sharpen Tool
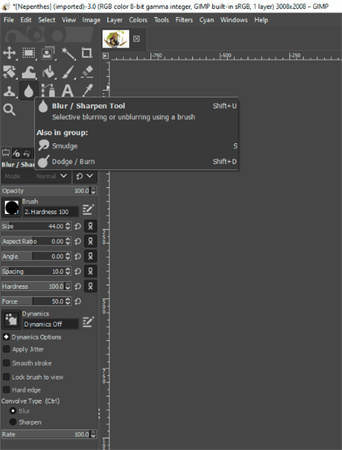
You're not alone if you need help locating the proper tool to apply to the whole image. The right tool may be found by accessing the toolbox, choosing the Blur / Sharpen tool, and then clicking Sharpen image in GIMP.
If you can’t find the Blur/Sharpen tool to sharpen an image in GIMP, you can use the shortcut Shift + U to directly open it. To use it, just like other brush tool, you can apply it directly to the image.

2. [Better Alternative]Your AI Sharpener to One-click Sharpen Pictures on Your Desktop and Mobile Devices
There are several Al sharpeners to click to sharpen pictures on your desktop and mobile. Al sharpens images in GIMP enlarger to GIMP sharpen blurry images and enlarge them without losing quality.
HitPaw FotorPea (Desktop)
Taking into account all of the user's needs, the HitPaw FotorPea is the ideal tool for sharpening your images effortlessly and rapidly. HitPaw's Photo Enhancer optimises texture details, improves photo quality, boosts resolution, and fixes better than GIMP to sharpen blurry images.
You can sharpen images with HitPaw FotorPea makes your face faultless and colourizes black-and-white pics with one click. Use the denoise model to eliminate noise from high-ISO and low-lighting automatically GIMP sharpen images with the HitPaw FotorPea AI noise reduction technology and make cartoon images seem crisper.
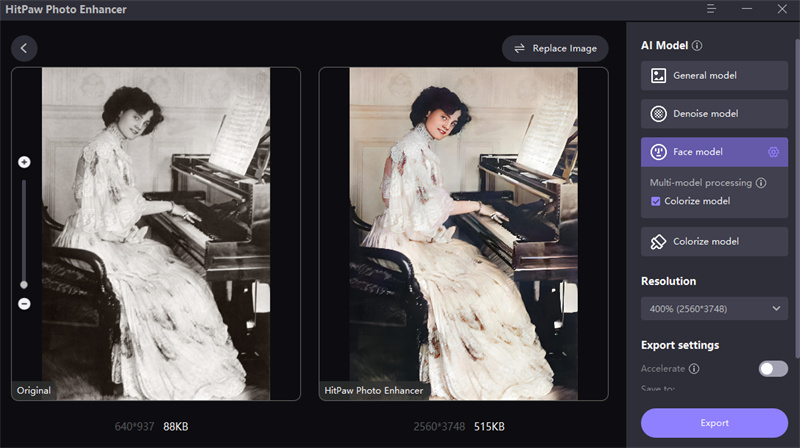
HitPaw FotorPea best AI sharpener may also enhance the quality of the photograph, making animals and flowers more visible.
- Your photographs are kept secure since the data is saved on your device.
- The boosting procedures occur locally on your device, making it quicker and smoother.
- Your desktop's HitPaw FotorPea guarantees that no progress is lost due to a network outage.
- It supports batch processing, making your job much simpler, smoother, and more efficient.
HitPaw FotorPea is one of the most excellent options for enhancing a GIMP sharpen blurry image. Let's look at how to upscale a picture.
-
Step 1.Download & install the software by clicking the button below.
-
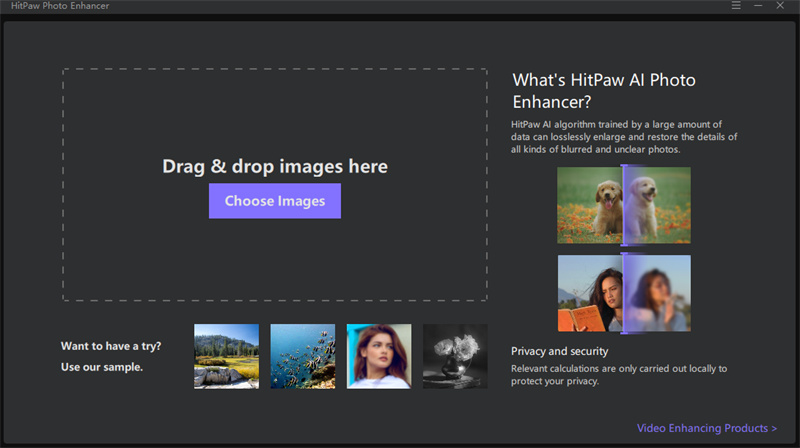
Step 2.Upscale the photo by dragging and dropping the original picture. HitPaw FotorPea supports PNG, JPEG, JPG, and WEBP.

-
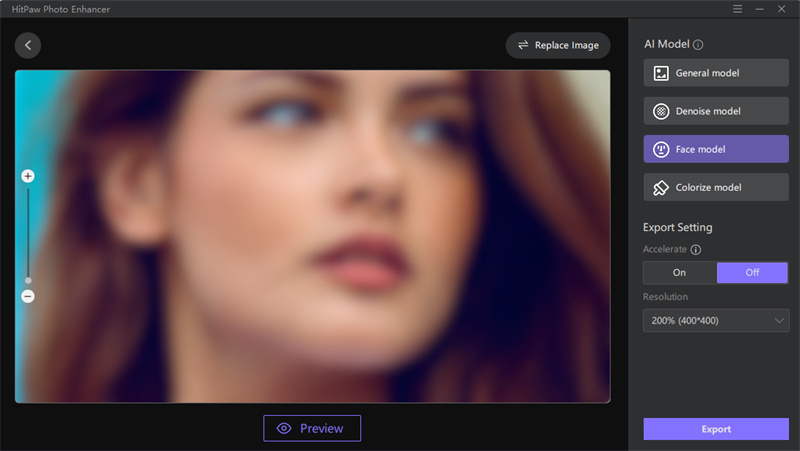
Step 3.Choose a suitable AI model to sharp you images. The AI model chosen depends on your photo type.

-
Step 4.Preview the effect and export it if you’re satisified.
HitPaw FotorPea App
Enhance pixelated, blurred, damaged photographs to higher quality. The HitPaw FotorPea mobile app optimizes image texture details, improves photo quality, boosts image resolution, and corrects sharpen blurry images.
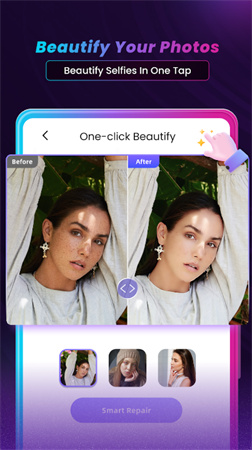
- The most advanced artificial intelligence Photo Enhancer mobile app
- With only the press of a button, the image quality and resolution will be improved automatically
- Images may have their noise and blurriness quickly cleaned up and repaired with this tool
- Scaling and up-sampling the image may be done without losing quality
Conclusion
We hope this Several GIMP sharpen images ways can help you rapidly sharpen an image in GIMP from your photographs and make them appear appealing. Addtionally, The HitPaw FotorPea is an excellent tool to sharpen your images and auto-beautifying your pictures.




 HitPaw Univd (Video Converter)
  HitPaw Edimakor
 HitPaw VikPea (Video Enhancer)

Share this article:
Select the product rating:
Daniel Walker
Editor-in-Chief
My passion lies in bridging the gap between cutting-edge technology and everyday creativity. With years of hands-on experience, I create content that not only informs but inspires our audience to embrace digital tools confidently.
View all ArticlesLeave a Comment
Create your review for HitPaw articles