Photoshop Fading Edges & Alternative: A Comprehensive Guide
Welcome to the world of visual enchantment, where ordinary images transform into captivating masterpieces. In this article, we're about to embark on a creative journey that revolves around the intriguing concept of "fade edges."
Picture this: a stunning sunset photograph that draws you into its radiant colors while softly diffusing the surroundings. That's the magic of fading edges, an artistic technique that can elevate your visual storytelling to new heights. In the following words, we'll explore what fading edges mean, how to master it using popular tools like Photoshop and iPhone, and even delve into the realm of AI enhancement to take your images beyond imagination. So, get ready to unravel the secrets of image transformation and discover how to make your visuals truly unforgettable.
Part 1. What is Fade Edges?

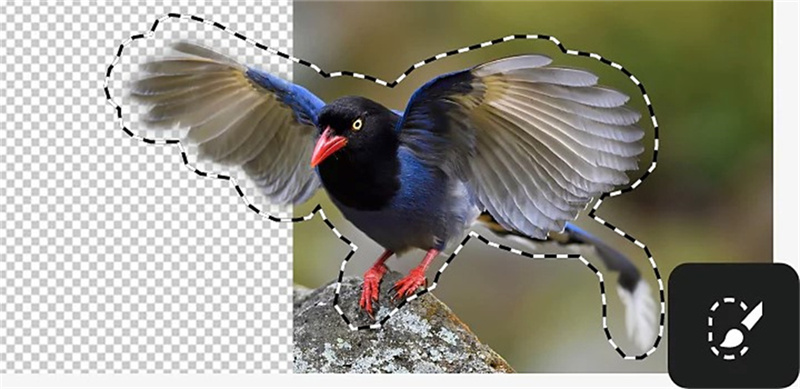
Fading edges is akin to adding a touch of magic to your visual storytelling. It's the art of gracefully merging the outer fringes of an image into the background, guiding the viewer's gaze with subtlety. Imagine an enchanting forest scene: by gently fading the edges, the focus shifts to the majestic tree in the center, its vibrant foliage undisturbed by distractions. This technique transcends mere photo editing; it's a creative expression that can evoke emotions and captivate the beholder.
Part 2. How To Fade Edges in Photoshop?
Photoshop, the industry standard for digital artists, provides a wealth of choices for edge blending and blurring. If you want to replicate this result, follow these simple instructions:
Step 1: Open Your Image
Begin by launching Photoshop and opening the image you want to work on.
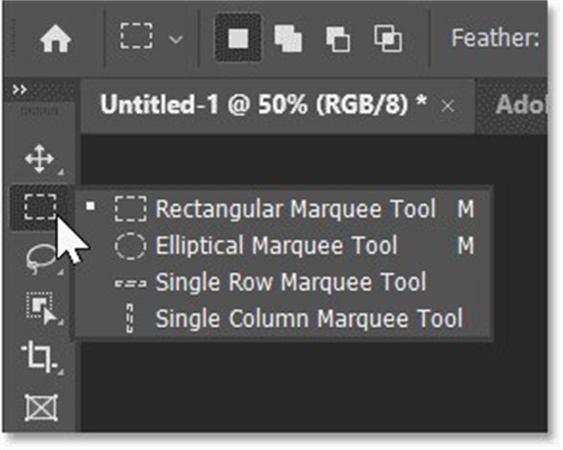
Step 2: Select the Elliptical Marquee Tool

In the Tools panel, select the Elliptical Marquee Tool. This tool allows you to create a circular or oval selection that you can use to control the fading effect.
Step 3: Create the Fade Edge Selection

Click and drag on your image to create an elliptical selection that encompasses the central subject. Adjust the size and position as needed.
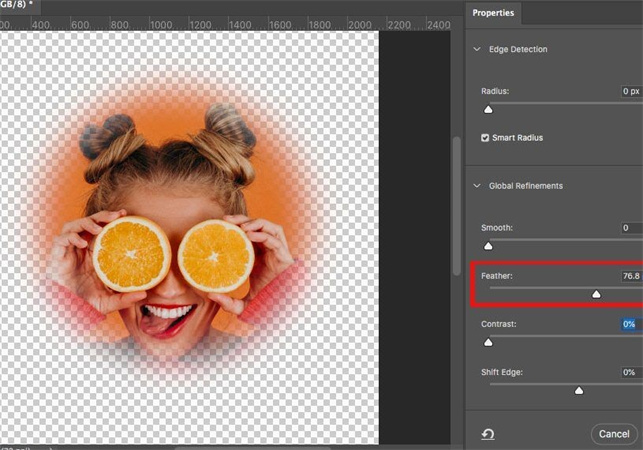
Step 4: Feather the Selection
To achieve a smooth transition, go to Select > Modify > Feather. A small dialog box will appear; enter a value between 20 to 50 pixels, depending on your image's resolution and the desired fade intensity.
Step 5: Invert the Selection
Now, invert the selection by going to Select > Inverse. This will select the outer edges instead of the central subject.
Step 6: Apply a Layer Mask
With the inverted selection active, click the Layer Mask icon at the bottom of the Layers panel. This action masks the outer edges, creating the fade effect.
Step 7: Refine and Adjust
Fine-tune your fade effect by adjusting the layer mask, opacity, and feathering as needed. You can also experiment with different blending modes for artistic variations.
Step 8: Save Your Work

Once you're satisfied with the result, save your edited image. Voila! You've successfully faded the edges using Photoshop.
Part 3. How Do You Fade Edges of a Picture on iPhone?
Fading edges on your iPhone is a straightforward process, perfect for quick edits on the go. Here's how to do it:
Step 1: Open Your Photo
Start by opening the photo you want to edit in your iPhone's Photos app.
Step 2: Access Edit Mode

Tap the Edit button located at the top-right corner of the screen.
Step 3: Choose the Vignette Effect

Scroll through the editing options at the bottom and select the Vignette effect. This effect essentially creates a fade around the edges of your photo.
Step 4: Adjust the Intensity

Use your finger to drag the slider left or right to adjust the intensity of the fade effect. Preview the changes in real-time until you're satisfied with the result.
Step 5: Save Your Edited Photo
Once you've achieved the desired fade effect, tap Done to save your edited photo. Your faded edges are now ready to impress!
Part 4. FAQs of Fade Edges
Q1. Can you soften edges in Canva?
A1. Yes, you can soften edges in Canva. Canva, a popular online graphic design tool, offers a user-friendly way to apply a fade effect to your images. Simply upload your image, select it, click on the "Effects" tab, and then choose the "Vignette" effect. Adjust the slider to control the intensity of the fade, and you're done!
Q2. How do I fade a picture in Windows 10?
A2. Utilise the Paint 3D application to initiate the process of opening your chosen image. Proceed to employ the "Magic Select" tool, which shall effectively segregate the subject matter from the surrounding elements. Subsequently, direct your attention towards the "Effects" button, wherein a plethora of artistic modifications can be accessed. Subsequently, opt for the "Vignette" effect and proceed to manipulate the sliders in order to attain the intended fade effect.
Q3. How do I fade the edges of a picture in PowerPoint?
A3. Fading the edges of a picture in PowerPoint can add a professional touch to your presentations. Here's how to do it: Insert your image into a PowerPoint slide, select the image, go to the "Format" tab, and click on the "Picture Border" dropdown. Choose "Picture Effects" and then "Soft Edges." Adjust the intensity as needed to create a subtle fade effect around the image.
Part 5. Pro-tips: AI Enhancer to Upscale Images After Fade Edges
In the world of image editing, innovation is the key to making your visual creations truly exceptional. After you've mastered the art of fading edges, take your images to the next level with the HitPaw FotorPea, a highly recommended AI-powered tool that can enhance and upscale your images effortlessly.
Here's why HitPaw FotorPea stands out from the crowd:Multiple AI Models for Enhanced Results
HitPaw FotorPea boasts a powerful lineup of AI models designed to enhance different aspects of your images. Whether you want to sharpen details, improve color balance, or reduce noise, HitPaw has you covered. These AI models work in harmony to deliver stunning results that breathe new life into your faded edge images.
Upscale Pictures to 4K ResolutionOne of the standout features of HitPaw FotorPea is its ability to upscale images to 4K resolution. This means that even if you've applied a fade effect that reduced the overall size of your image, HitPaw can bring back the sharpness and detail you desire, making your pictures suitable for high-quality printing or large displays.
Mature AI TechnologyHitPaw's AI technology is mature and constantly evolving, ensuring that you get the best results every time you use it. The algorithms are finely tuned to understand the nuances of your images, allowing for intelligent enhancements that preserve the integrity of your creative vision.
Simple and Clean InterfaceOne of the most significant advantages of HitPaw FotorPea is its user-friendly interface. You don't need to be a tech-savvy expert to use it. The software is designed to be intuitive and straightforward, making it accessible to everyone, from beginners to seasoned professionals.
Step 1.Download and Install:Visit HitPaw FotorPea and download the software. Install it on your computer following the on-screen instructions. Open HitPaw FotorPea after installation.
Step 2.Import Your Image:Click on the "Choose Files" button to select the image you want to enhance and upscale.

Step 3.Choose AI Model:Select the appropriate AI model based on the enhancements you want to make. HitPaw offers a variety of options to suit your needs. To fade the edge, you need to select feather edges AI model.

Step 4.Enhance Your Image:Once you've chosen the AI model, hit the "Start to Process" button, and let HitPaw work its magic. You'll witness a noticeable improvement in the quality of your image.

Step 5.Save Your Enhanced Image:After processing is complete, click on the "Save" button to save your enhanced image to your preferred location.

Bottom Line
In the world of creative image editing, mastering the art of fading edges is just the beginning of your journey. To truly elevate your visual creations and bring out the best in your photos, consider using HitPaw FotorPea. Its cutting-edge AI technology, user-friendly interface, and the ability to upscale images to 4K resolution make it a must-have tool for both enthusiasts and professionals.


 HitPaw VikPea
 HitPaw Edimakor


Share this article:
Select the product rating:
Daniel Walker
Editor-in-Chief
My passion lies in bridging the gap between cutting-edge technology and everyday creativity. With years of hands-on experience, I create content that not only informs but inspires our audience to embrace digital tools confidently.
View all ArticlesLeave a Comment
Create your review for HitPaw articles